Table of Contents
Advertisement
Advertisement
Table of Contents

Related Manuals for DANA SPICER AXLE 212


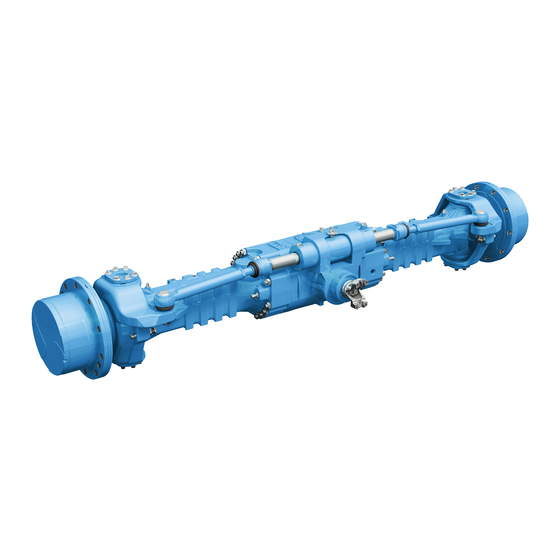
Summary of Contents for DANA SPICER AXLE 212
- Page 1 Service Manual Axle 212 ASM-0025E October 2013...
-
Page 3: Table Of Contents
STEERING CYLINDER ........................47 EXPLODED VIEW ............................47 OPTICAL SENSOR AND MAGNETIC SENSOR .................... 48 DISASSEMBLY ............................. 49 ASSEMBLY ..............................52 SPECIAL TOOLS ............................58 T1 ................................58 T2 ................................59 ASM-0025E - 212 Axle Service Manual Dana Holding Corporation... - Page 4 4" INCOMING BRAKE (2 AND 3 FUNCTION VERSIONS) ............... 111 EXPLODED VIEW ............................111 DISASSEMBLY ............................. 112 ASSEMBLY ..............................116 SPECIAL TOOLS ............................122 T1 ................................122 T2 ................................122 T3 ................................123 Dana Holding Corporation ASM-0025E - 212 Axle Service Manual...
- Page 5 EXPLODED VIEW ............................161 DISASSEMBLY ............................. 162 ASSEMBLY ..............................166 SPECIAL TOOLS ............................169 T1 ................................169 T2 ................................170 T3 ................................171 T4 ................................172 T5 ................................173 T6 ................................174 ASM-0025E - 212 Axle Service Manual Dana Holding Corporation...
- Page 6 Dana Holding Corporation ASM-0025E - 212 Axle Service Manual...
-
Page 7: Introduction
SPECIFIC EQUIPMENT AND SPARE PARTS: The drawings of all specific tools required for maintenance and repair work can be found at the end of this manual ; spare parts may be ordered either from the vehicle manufacturer or directly from the Service Centers or Authorized Distributors of SPICER. ASM-0025E - 212 Axle Service Manual Dana Holding Corporation... - Page 8 Dana Holding Corporation ASM-0025E - 212 Axle Service Manual...
-
Page 9: Specifications
SPECIFICATIONS DEFINITION OF VIEWPOINTS DATA PLATE MFG. BY CLARK-HURTH COMPONENTS S.P.A. 38062 Arco (Trento) MADE IN ITALY Model number Serial number Lubricant ASM-0025E - 212 Axle Service Manual Dana Holding Corporation... -
Page 10: Conversion Tables
2,205 UNITS OF TORQUE N·m daN·m kN·m kg·m lb·in 1N·m 0,001 0,102 8,854 1daN·m 0,01 1,02 88,54 1kN·m 1000 8854 1kg·m 9,81 0,981 0,00981 86,8 1 lb·in 0,1129 0,01129 0,0001129 0,01152 Dana Holding Corporation ASM-0025E - 212 Axle Service Manual... -
Page 11: Torque Specifications
2000 – 2210 N·m M30 x 2 mm 1511 – 1670 N·m 1648 – 1822 N·m 2138 – 2363 N·m 2332 – 2577 N·m 2565 – 2835 N·m 2788 – 3082 N·m ASM-0025E - 212 Axle Service Manual Dana Holding Corporation... -
Page 12: Wheel Nut Tightening Torques
M22X1,5 mm 450 N·m 650 N·m **RIM'S MATERIAL ST 52 IS RECOMMENDED BY DANA ON AXLE APPLICATION. IT IS THE OPTIMUM MA- TERIAL FOR TIGHTENING THE RIM TO THE HUB. NOTE: The wheel nut tightening torque is related only on nut thread and stud thread dry. (Without oil or any lubricant). -
Page 13: Maintenance
MAINTENANCE MAINTENANCE MAINTENANCE POINTS Oil fill plug Oil drain plug Check level plug ASM-0025E - 212 Axle Service Manual Dana Holding Corporation... -
Page 14: Maintenance Intervals
* Initially after 100 working hours ** Initially after 10 working hours *** When it starts sounding noisy **** According to DIN 51825 level KP2K-30 (NLGI #2) or KP3K-20 (NLGI #3); ASTM D4950 NLGI #2 GC-LB Dana Holding Corporation ASM-0025E - 212 Axle Service Manual... -
Page 15: Lubricant & Sealant Specifications
Lubricating compound containing molybdenum disulphide, used to lubricate articulation pins and to prevent sticking and oxi- dation of parts that are not lubricated on a regular basis. (LITHIUM-BASED) GREASE Applied to bearings, sliding parts and used to lubricate seals or parts during assembly. ASM-0025E - 212 Axle Service Manual Dana Holding Corporation... - Page 16 MAINTENANCE Dana Holding Corporation ASM-0025E - 212 Axle Service Manual...
-
Page 17: Safety Precautions
Indicates a potentially hazardous situation which, if not CAUTION avoided, may result in moderate or minor injury. NOTICE Indicates a situation which, if not avoided, may result in if not avoided, may result in damage to components. ASM-0025E - 212 Axle Service Manual Dana Holding Corporation... - Page 18 MAINTENANCE Dana Holding Corporation ASM-0025E - 212 Axle Service Manual...
-
Page 19: Checking Wear And Replacing The Braking Discs
CHECKING WEAR AND REPLACING THE BRAKING DISCS EXPLODED VIEW MAXIMUM 10° ASM-0025E - 212 Axle Service Manual Dana Holding Corporation... -
Page 20: Disassembly
Replace the braking disks and the intermediate disks on both sides if necessary. FIGURE 5: Loosen and remove the screws (4) and the wa- shers (5) that fix the arm (3) to the central body (6). Dana Holding Corporation ASM-0025E - 212 Axle Service Manual... - Page 21 Hold on to the piston as it may be suddenly ejected and da- maged. FIGURE 8: Remove the reversal springs (8) from the piston (9). NOTE: If the springs (8) are weak or deformed they must be re- placed. ASM-0025E - 212 Axle Service Manual Dana Holding Corporation...
-
Page 22: Assembly
FIGURE 14: Assist the insertion of the piston (9) by lightly hammering around the edge with a plastic hammer. FIGURE 12: Insert the stroke automatic regulation springs (15); place them in line with the piston (9). Dana Holding Corporation ASM-0025E - 212 Axle Service Manual... - Page 23 FIGURE 17: Slightly lubricate the braking disks (7) and fit them in the arm following the correct sequence; orient them so that the oil circulation holes and the marks "B" are perfectly lined up. ASM-0025E - 212 Axle Service Manual Dana Holding Corporation...
-
Page 24: Special Tools
SPECIAL TOOLS SPECIAL TOOLS P/N: 2313 2305 P/N: Dana Holding Corporation ASM-0025E - 212 Axle Service Manual... -
Page 25: Complete Steering Case
COMPLETE STEERING CASE EXPLODED VIEW ASM-0025E - 212 Axle Service Manual Dana Holding Corporation... -
Page 26: Disassembly
(4) complete with front seal (9) and shims (3). CAUTION Pay attention not to damage the surfaces. FIGURE 3: Remove the bottom articulation (19) pin complete with front sealing ring (10). Dana Holding Corporation ASM-0025E - 212 Axle Service Manual... -
Page 27: Assembly
FIGURE 7: Fit a new seal (3) onto the top articulation pin (4). Lu- bricate and install the unit in the steering case. Position the screws (8) and tighten with torque wrench 140N·m. Check the correct assembly side of the seal (3). ASM-0025E - 212 Axle Service Manual Dana Holding Corporation... - Page 28 FIGURE 12: Check the torque of the pins, which has to be between 30 and 60 N·m. If the preliminary measured value is too high, the shims have to be increased. Dana Holding Corporation ASM-0025E - 212 Axle Service Manual...
-
Page 29: Double U-Joint
DOUBLE U-JOINT EXPLODED VIEW ASM-0025E - 212 Axle Service Manual Dana Holding Corporation... -
Page 30: Disassembly
Write the assembly side of the ring (12). If necessary, for the extraction of the double U-joint use a plastic mallet or a lever. FIGURE 3: Remove the snap ring (9) from the bushing unit (13). Dana Holding Corporation ASM-0025E - 212 Axle Service Manual... -
Page 31: Assembly
FIGURE 11: Apply Loctite 242 to the jutting parts of the studs FIGURE 8: Heat the bearing in oil at an approximate tempe- (2). rature of 100°C and fit the entire bushing (13) on the u-joint (4). ASM-0025E - 212 Axle Service Manual Dana Holding Corporation... - Page 32 ASSEMBLY FIGURE 12: Install the nuts (3) on the studs (2) and tighten them using a torque wrench. Torque wrench setting: 122 N·m Dana Holding Corporation ASM-0025E - 212 Axle Service Manual...
-
Page 33: Special Tools
SPECIAL TOOLS SPECIAL TOOLS P/N: 3342 -- 0.1 Ø54,5 Ø30 + 0.1 Ø54 Ø79 -- 0.15 Ø90 P/N: 2301 x45 ° Proteggere da cementazione x45 ° ASM-0025E - 212 Axle Service Manual Dana Holding Corporation... - Page 34 SPECIAL TOOLS Dana Holding Corporation ASM-0025E - 212 Axle Service Manual...
-
Page 35: Planetary Reduction Gear
PLANETARY REDUCTION GEAR EXPLODED VIEW ASM-0025E - 212 Axle Service Manual Dana Holding Corporation... -
Page 36: Disassembly
(3) by alternatively forcing a screwdriver into the appropriate slots. FIGURE 6: Loosen and remove the tightening nuts (4) from the crown flange (5). FIGURE 3: Remove the complete planetary carrier cover (2). Dana Holding Corporation ASM-0025E - 212 Axle Service Manual... - Page 37 (5) by acting on the stud bolts. mer. NOTE: Alternately hammer on several equidistant points. FIGURE 9: Remove the snap ring (12) from the crown (13). FIGURE 12: Remove the external bearing (8). ASM-0025E - 212 Axle Service Manual Dana Holding Corporation...
- Page 38 (17) and the bearing (18) from the steering case (3). NOTE: Write down the orientation of both centering ring (16) and sealing ring (17). FIGURE 15: Remove the internal bearing (15). Dana Holding Corporation ASM-0025E - 212 Axle Service Manual...
- Page 39 DISASSEMBLY FIGURE 18: Remove the pins and remove the steering case (3). For details, see COMPLETE STEERING CASE p. 25. ASM-0025E - 212 Axle Service Manual Dana Holding Corporation...
-
Page 40: Assembly
FIGURE 24: Position the upper part of tool T3B (See drawing For pin assembly details, see COMPLETE STEERING CASE T3 p. 45) and press the thrust blocks into the hub (7) all the p. 25. way down. Dana Holding Corporation ASM-0025E - 212 Axle Service Manual... - Page 41 T1 0 FIGURE 30: Insert the flange (5) in the crown (13). FIGURE 27: Position tool T4 (See drawing T4 p. 46) and press the sealing ring (14) into its seat. ASM-0025E - 212 Axle Service Manual Dana Holding Corporation...
- Page 42 FIGURE 35: Tighten the nuts (4) using criss-cross method in two stages. Initial torque wrench setting: 120 N·m Final torque wrench setting: 255 - 285 N·m Dana Holding Corporation ASM-0025E - 212 Axle Service Manual...
- Page 43 For details, see COMPLETE STEERING CASE p. 25. FIGURE 38: Fit the planetary carrier cover (2) onto the hub (3). CAUTION Check that the o-ring (20) is in good condition and in posi- tion. ASM-0025E - 212 Axle Service Manual Dana Holding Corporation...
-
Page 44: Special Tools
SPECIAL TOOLS SPECIAL TOOLS P/N: 2303 Proteggere da cementazione x45 ° x15 ° x15 ° -- 0.2 3363 P/N: Proteggere da cementazione x45° x15° -- 0.2 Dana Holding Corporation ASM-0025E - 212 Axle Service Manual... - Page 45 SPECIAL TOOLS P/N: 3354 Ø158.5 Ø158.5 20° Ø50 H7 Ø35 Ø30 20° Ø40 Ø140 -- 0.08 Ø50 -- 0.12 Ø150 ±0.03 Ø200 Ø95 ASM-0025E - 212 Axle Service Manual Dana Holding Corporation...
- Page 46 SPECIAL TOOLS 3502 P/N: Ø40 Ø139.5 -- 0.1 Ø153 Ø168 Ø180 2304 P/N: x15° x45° 10 15 Dana Holding Corporation ASM-0025E - 212 Axle Service Manual...
-
Page 47: Steering Cylinder
STEERING CYLINDER EXPLODED VIEW ASM-0025E - 212 Axle Service Manual Dana Holding Corporation... -
Page 48: Optical Sensor And Magnetic Sensor
OPTICAL SENSOR AND MAGNETIC SENSOR OPTICAL SENSOR AND MAGNETIC SENSOR Optical sensor Magnetic sensor Dana Holding Corporation ASM-0025E - 212 Axle Service Manual... -
Page 49: Disassembly
Dispose of used cotter pins. FIGURE 6: Disconnect left and right steering bars (5) from the piston (2). FIGURE 3: NEW VERSION Remove the nuts (6) that lock the articulation pins (4). ASM-0025E - 212 Axle Service Manual Dana Holding Corporation... - Page 50 FIGURE 9: Remove the snap ring (1) from the cylinder head FIGURE 12: Hammer the piston (5) on the rear of the head (2) (2). using a plastic hammer. Continue hammering until the head (2) is ejected from the cylinder (3). Dana Holding Corporation ASM-0025E - 212 Axle Service Manual...
- Page 51 1 - All seals must be replaced every time the unit is disas- sembled. 2 - Particular attention must be paid not to damage the seats of both seals and piston slide. ASM-0025E - 212 Axle Service Manual Dana Holding Corporation...
-
Page 52: Assembly
2 - If a centering sensor is not fitted, then the magnetic ring (11) should be replaced by another guide ring (10). Thoroughly check that positioning of the anti-extrusion (7) ring is correct. Dana Holding Corporation ASM-0025E - 212 Axle Service Manual... - Page 53 (5). FIGURE 24: Apply pressure to the head using two screwdri- vers or levers until the head is fastened onto the stop ring (4). ASM-0025E - 212 Axle Service Manual Dana Holding Corporation...
- Page 54 (6) further. CAUTION Check that rubber guards (A) are intact. FIGURE 27: Lock the cylinder by criss-cross method the screws (8). Torque wrench setting: 116 - 128 N·m Dana Holding Corporation ASM-0025E - 212 Axle Service Manual...
- Page 55 FIGURE 32: Install the centering sensor (1) for checking pi- ston centering - if applicable - and tighten the screws (10). FIGURE 35: Sensor connection card, STANDARD version. Torque wrench setting: 5 - 6 N·m ASM-0025E - 212 Axle Service Manual Dana Holding Corporation...
- Page 56 NOTE: If cylinders come without a sensor, the centering of the piston must be carried out on the basis of the maximum stroke. Dana Holding Corporation ASM-0025E - 212 Axle Service Manual...
- Page 57 Check that articulations move easily and lock the collars (12). Torque wrench setting for nuts: 42 - 52 N·m FIGURE 43: CONVERGENCY ADJUSTMENT ON ALTERNA- TIVE VERSIONS Loosen the nuts (11) and screw them onto the ball-and-so- cket joints (15). ASM-0025E - 212 Axle Service Manual Dana Holding Corporation...
-
Page 58: Special Tools
SPECIAL TOOLS SPECIAL TOOLS P/N: 2724 -- 0.05 -- 0.10 Ø45 x1.25 Ø6.5 -- 0.05 Ø20.4 + 0.05 Ø43.6 Dana Holding Corporation ASM-0025E - 212 Axle Service Manual... - Page 59 SPECIAL TOOLS P/N: 1867 ±0.1 ASM-0025E - 212 Axle Service Manual Dana Holding Corporation...
- Page 60 SPECIAL TOOLS Dana Holding Corporation ASM-0025E - 212 Axle Service Manual...
-
Page 61: Differential Unit
DIFFERENTIAL UNIT EXPLODED VIEW ASM-0025E - 212 Axle Service Manual Dana Holding Corporation... -
Page 62: Disassembly
FIGURE 6: Insert a screwdriver in the opposing slots then for- ture of 80° C. ce and remove the middle cover (5) and the complete diffe- rential unit. NOTE: Support the pieces using a rod. Dana Holding Corporation ASM-0025E - 212 Axle Service Manual... - Page 63 (7) and (8) from middle cover and central body. NOTE: Accurately check the o-ring (6). FIGURE 8: Remove the top plug (7). NOTE: The cap must be replaced each time the unit is disassem- bled. ASM-0025E - 212 Axle Service Manual Dana Holding Corporation...
-
Page 64: Assembly
140 - 210 N·cm. CAUTION If bearings are not new, check the static torque; if bearings are new, check the continuous torque. Dana Holding Corporation ASM-0025E - 212 Axle Service Manual... - Page 65 For details, see CHECKING WEAR AND REPLACING THE crown by loosening one of the ring nuts (1) and tightening the BRAKING DISCS p. 19. opposite to compensate. Normal backlash: see table. ASM-0025E - 212 Axle Service Manual Dana Holding Corporation...
-
Page 66: Special Tools
SPECIAL TOOLS SPECIAL TOOLS P/N: 3333 x15 ° x15 ° 3317/4 P/N: 5x15 Dana Holding Corporation ASM-0025E - 212 Axle Service Manual... -
Page 67: Bevel Pinion
BEVEL PINION EXPLODED VIEW ASM-0025E - 212 Axle Service Manual Dana Holding Corporation... -
Page 68: Disassembly
FIGURE 2: If disassembly is awkward, heat the check nut (1) of the flange (2) at 80°C. NOTE: Heating is meant to loosen the setting of Loctite on the nut (1). FIGURE 5: Remove the swinging support (5). Dana Holding Corporation ASM-0025E - 212 Axle Service Manual... - Page 69 (8) complete with the in- ternal bearing (9), the spacer (10) and shims (11). NOTE: The thrust blocks of the bearings remain in the central body (12). ASM-0025E - 212 Axle Service Manual Dana Holding Corporation...
- Page 70 DISASSEMBLY FIGURE 12: Insert a drift in the appropriate holes and remove the thrust block of the internal bearing (9) as well as the shim washers (14). Dana Holding Corporation ASM-0025E - 212 Axle Service Manual...
-
Page 71: Assembly
(13) into its seat. Disconnect the press and remove the tension rod. NOTE: Before starting the next stage, make sure that the thrust block has been completely inserted into its seat. ASM-0025E - 212 Axle Service Manual Dana Holding Corporation... - Page 72 T7C (See drawing T7 p. 81) and take the measurement placed under the thrust block of the internal bearing (9). "A" at about 57 mm corresponding to the maximum diameter of arms centering. Dana Holding Corporation ASM-0025E - 212 Axle Service Manual...
- Page 73 Re-install all and insert the spacer (10) between bearings (9) and (13); manually tighten the whole pack. NOTE: Before going on to the next stage, make sure that the thrust block has been completely inserted. ASM-0025E - 212 Axle Service Manual Dana Holding Corporation...
- Page 74 T8 p. 82) and T8B (See drawing T8 p. 82); connect under a press; force the bearing onto the pinion. the tie rod T8C (See drawing T8 p. 82) (see special tools) to the press and block. Dana Holding Corporation ASM-0025E - 212 Axle Service Manual...
- Page 75 900 N·m. Apply onto the pinion (8) the bar-hold and with the help of a tor- que wrench, check the torque of the pinion (8). Torque: 120 - 200 N·cm ASM-0025E - 212 Axle Service Manual Dana Holding Corporation...
- Page 76 FIGURE 45: Remove blocks T4 (See drawing T4 p. 79) (used for extracting the pinion) and re-install the arms. For details, see CHECKING WEAR AND REPLACING THE BRAKING DISCS p. 19. Dana Holding Corporation ASM-0025E - 212 Axle Service Manual...
-
Page 77: Special Tools
SPECIAL TOOLS SPECIAL TOOLS P/N: 2308 ± 0.2 Ø185 ± 0.2 Ø105 -- 0 Ø34.5 + 0.2 Ø50 ±0.5 Ø32 Ø45 ASM-0025E - 212 Axle Service Manual Dana Holding Corporation... - Page 78 SPECIAL TOOLS 3317/3 P/N: 3317/A P/N: Ø85 Ø66 Ø55H7 15° Dana Holding Corporation ASM-0025E - 212 Axle Service Manual...
- Page 79 SPECIAL TOOLS P/N: 2309 99.5 2310 P/N: ± 0.001 Ø30.2 5X45° ASM-0025E - 212 Axle Service Manual Dana Holding Corporation...
- Page 80 P/N: Ø83 Ø35 -- 0.08 Ø19.5 -- 0.12 Ø19.55H7 Ø40 Ø88 + 0.1 Ø20 -- 0 Ø55 Ø83 -- 0.08 Ø89 -- 0.12 -- 0.1 Ø16.5 -- 0.2 M18x1.5 M18x1.5 Ø40 Dana Holding Corporation ASM-0025E - 212 Axle Service Manual...
- Page 81 SPECIAL TOOLS P/N: 2312 Ø110 Ø20 Ø65 Ø41.2 Ø20 -- 0.03 Ø9 Ø6.5 ASM-0025E - 212 Axle Service Manual Dana Holding Corporation...
- Page 82 SPECIAL TOOLS 3354 P/N: 5x15 3327 P/N: Ø50 + 0.08 + 0.12 Ø37.75 -- 0.2 -- 0.3 Ø55 Ø89 Ø99 Dana Holding Corporation ASM-0025E - 212 Axle Service Manual...
-
Page 83: Manual Emergency Relase
MANUAL EMERGENCY RELASE EXPLODED VIEW ASM-0025E - 212 Axle Service Manual Dana Holding Corporation... -
Page 84: Release
8 mm. FIGURE 2: Tighten screws (31) so as to fasten them onto the pressure plate (23). Dana Holding Corporation ASM-0025E - 212 Axle Service Manual... -
Page 85: Adjust
FIGURE 6: Lock into position with nuts (30). CAUTION Hold screws (31) into position while locking the nuts (30); af- ter locking, check the distance of screws (31) once more. ASM-0025E - 212 Axle Service Manual Dana Holding Corporation... - Page 86 ADJUST Dana Holding Corporation ASM-0025E - 212 Axle Service Manual...
-
Page 87: Mechanical Parking Brake
MECHANICAL PARKING BRAKE EXPLODED VIEW ASM-0025E - 212 Axle Service Manual Dana Holding Corporation... -
Page 88: Disassembly
FIGURE 5: Connect the whole arm (8) to the hoist and put the rod under light tension. Remove the whole arm; for details, see CHECKING WEAR AND REPLACING THE BRAKING DISCS p. 19. Dana Holding Corporation ASM-0025E - 212 Axle Service Manual... - Page 89 12 13 FIGURE 8: If thrust levers (12) and (13) need replacing, remo- ve the U-joint (14) before removing the arms (8). For details, see DOUBLE U-JOINT p. 29. ASM-0025E - 212 Axle Service Manual Dana Holding Corporation...
-
Page 90: Assembly
FIGURE 11: Re-install the piston (10) and the braking disks ting of 23.8 - 26.2 N·m. (9). For details, see CHECKING WEAR AND REPLACING THE CAUTION BRAKING DISCS p. 19. Refer and keep to the positions marked during disassembly. Dana Holding Corporation ASM-0025E - 212 Axle Service Manual... - Page 91 While the force is being applied, tighten stud (16) until it is caused to rest onto bushing (6). FIGURE 17: Lock stud (16) in this position with nut (15). Torque wrench setting: 20 - 25 N·m. ASM-0025E - 212 Axle Service Manual Dana Holding Corporation...
- Page 92 ASSEMBLY Dana Holding Corporation ASM-0025E - 212 Axle Service Manual...
-
Page 93: External Hydraulic Negative Brake
EXTERNAL HYDRAULIC NEGATIVE BRAKE EXPLODED VIEW ASM-0025E - 212 Axle Service Manual Dana Holding Corporation... -
Page 94: Disassembly
(5), internal nut (6) and support (8). FIGURE 2: Loosen and remove the external nut (7). FIGURE 5: Remove the snap ring (1) that checks the support (8) and remove the spacer (2). Dana Holding Corporation ASM-0025E - 212 Axle Service Manual... -
Page 95: Assembly
(18), move nuts (6) and (7) so that they are made to rest against support (8); lock the nuts with a torque wrench setting of 50 - 60 N·m. CAUTION Clearances should be set to zero without causing any pre- loading. ASM-0025E - 212 Axle Service Manual Dana Holding Corporation... - Page 96 "A" is left between cylinder (4) and lever (19). Also check that when pressure is released, piston (13) projects out by 4 - 5 mm. Dana Holding Corporation ASM-0025E - 212 Axle Service Manual...
-
Page 97: External Hydraulic Negative Brake With Quick Release
EXTERNAL HYDRAULIC NEGATIVE BRAKE WITH QUICK RELEASE EXPLODED VIEW ASM-0025E - 212 Axle Service Manual Dana Holding Corporation... -
Page 98: Disassembly
FIGURE 4: Remove the complete cylinder set (4). FIGURE 2: Remove snap ring (1) and extract spacer (2). FIGURE 5: Remove snap ring (5) from stem (6) and extract the check unit (7). Dana Holding Corporation ASM-0025E - 212 Axle Service Manual... - Page 99 (7) and screw a nut "B" until the spring seat (11) cylinder (18). is moved to the end of stroke. NOTE: Use a hex bolt. FIGURE 8: Rotate snap ring (12) until ring ends match slot "C". Remove snap ring (12). ASM-0025E - 212 Axle Service Manual Dana Holding Corporation...
-
Page 100: Assembly
(26) to a torque wrench setting of 20 - 25 N·m. CAUTION The idle stroke should be eliminated without causing any preloading. FIGURE 13: Using a plastic hammer, install the check unit (7) onto the stem (6). Dana Holding Corporation ASM-0025E - 212 Axle Service Manual... - Page 101 (18). cylinder head (4) by 4 - 5 mm. If necessary, remove the lever, turn it by one tooth in relation to the spline and repeat idle stroke elimination procedure. ASM-0025E - 212 Axle Service Manual Dana Holding Corporation...
- Page 102 FIGURE 22: Release the check unit (7) by giving a hammer blow to the external ring. Introduce pressure again and check that at the end of piston stroke, the check unit (7) is actually engaged onto the rod (6). Dana Holding Corporation ASM-0025E - 212 Axle Service Manual...
-
Page 103: Incoming Drum Brake
INCOMING DRUM BRAKE EXPLODED VIEW ASM-0025E - 212 Axle Service Manual Dana Holding Corporation... -
Page 104: Disassembly
FIGURE 2: Hold the upper shoe into position (2) and release the spring (3). FIGURE 5: Fit tool T1A (See drawing T1 p. 108) (or T1B), en- gage the stop rod and loosen the check nut (9) of the flange (10). Dana Holding Corporation ASM-0025E - 212 Axle Service Manual... - Page 105 If operations are to be carried out the bevel pinion, see Write down assembly direction. the specific axle section. FIGURE 8: Remove the securing screws (13) from brake sup- port (14). ASM-0025E - 212 Axle Service Manual Dana Holding Corporation...
-
Page 106: Assembly
Torque wrench setting: 34.2 - 37.8 N·m FIGURE 16: Fit tools T1A (See drawing T1 p. 108) (or T1B), engage the stop rod and tighten the nut (9). Torque wrench setting: 280 - 310 N·m Dana Holding Corporation ASM-0025E - 212 Axle Service Manual... - Page 107 (5). Fit the shoes assembly (4). FIGURE 19: Make sure that the shoes (4) center the slot of the fulcrum pin and rest on the surface of the lever (6). ASM-0025E - 212 Axle Service Manual Dana Holding Corporation...
-
Page 108: Special Tools
SPECIAL TOOLS SPECIAL TOOLS P/N: 2308 ± 0.2 Ø185 ± 0.2 Ø105 -- 0 Ø34.5 + 0.2 Ø50 ± 0.5 Ø32 Ø45 Dana Holding Corporation ASM-0025E - 212 Axle Service Manual... - Page 109 SPECIAL TOOLS P/N: 3327 Ø50 + 0.08 + 0.12 Ø37.75 -- 0.2 -- 0.3 Ø55 Ø89 Ø99 ASM-0025E - 212 Axle Service Manual Dana Holding Corporation...
- Page 110 SPECIAL TOOLS Dana Holding Corporation ASM-0025E - 212 Axle Service Manual...
-
Page 111: 4" Incoming Brake (2 And 3 Function Versions)
4" INCOMING BRAKE (2 AND 3 FUNCTION VERSIONS) EXPLODED VIEW FUNCTION VERSION 20 21 RKZA 0040 3-FUNCTION VERSION ONLY ASM-0025E - 212 Axle Service Manual Dana Holding Corporation... -
Page 112: Disassembly
(11). FIGURE 6: Slowly introduce compressed air through the nega- FIGURE 3: Remove nut (3), o-ring (4) and flange (5). tive brake connection point in order to extract the piston (12). Dana Holding Corporation ASM-0025E - 212 Axle Service Manual... - Page 113 Loosen studs (29) in an alternate manner until the piston comes to end of backstroke. FIGURE 9: With the help of a lever, pry off the cover (23) com- plete with o-ring (24). ASM-0025E - 212 Axle Service Manual Dana Holding Corporation...
- Page 114 (33). 15 16 FIGURE 17: Remove sealing rings (13) and (15) and anti-ex- trusion rings (14) and (16) from the piston (12). Dana Holding Corporation ASM-0025E - 212 Axle Service Manual...
- Page 115 (2). NOTE: During the assembly stage, union pieces (41) and (42) must be coated with Loctite 577 and tightened to a torque wrench setting of 35 - 50 N·m. ASM-0025E - 212 Axle Service Manual Dana Holding Corporation...
-
Page 116: Assembly
Carefully check the assembly position of the anti-extru- sion rings. FIGURE 27: 3-FUNCTION VERSION ONLY Fit the separating ring (10) of Belleville washers onto the cover (8), measure size "B1" and note it down. Dana Holding Corporation ASM-0025E - 212 Axle Service Manual... - Page 117 FIGURE 32: 3-FUNCTION VERSION ONLY Lock screws (31) in a criss-cross method by using a torque wrench set to a maximum torque of 10 N·m. CAUTION Do not exceed the specified torque setting. ASM-0025E - 212 Axle Service Manual Dana Holding Corporation...
- Page 118 Using a plastic hammer, push the piston (12) to the end of stroke. FIGURE 35: Apply Loctite 510 on the face of the cover (23). Fit the discs-hub-cover assembly prepared in the previous stages onto the pinion and engage it. Dana Holding Corporation ASM-0025E - 212 Axle Service Manual...
- Page 119 116 - 128 N·m. NOTE: Tighten in an alternate and criss-cross method. FIGURE 41: Check the state of the o-ring (40). Lubricate sealing ring (38) and fit flange (5) into the cover (8). ASM-0025E - 212 Axle Service Manual Dana Holding Corporation...
- Page 120 16 - 35 bar and by manually rotating the flange (5). Release pressure. FIGURE 47: 3-FUNCTION VERSION ONLY Connect the service and negative brakes to an external pump; introduce pressure up to a value of 20 - 25 N·m. Dana Holding Corporation ASM-0025E - 212 Axle Service Manual...
- Page 121 (lack of pressure due to vehicle breakdown), loosen nuts (22) and screw studs (21) in an alternate and gradual manner until you notice some preloading; continue by giving another 1.5 turns. ASM-0025E - 212 Axle Service Manual Dana Holding Corporation...
-
Page 122: Special Tools
SPECIAL TOOLS SPECIAL TOOLS P/N: 3739 Ø50 + 0.2 Ø64 Ø84.5 Ø94.5 Ø110 3317/3 P/N: Dana Holding Corporation ASM-0025E - 212 Axle Service Manual... - Page 123 SPECIAL TOOLS P/N: 3317/A Ø85 Ø66 Ø55H7 15° ASM-0025E - 212 Axle Service Manual Dana Holding Corporation...
- Page 124 SPECIAL TOOLS Dana Holding Corporation ASM-0025E - 212 Axle Service Manual...
-
Page 125: Normal Differential Unit
NORMAL DIFFERENTIAL UNIT EXPLODED VIEW ASM-0025E - 212 Axle Service Manual Dana Holding Corporation... -
Page 126: Disassembly
(3) and remove the crown (2). T1 4 FIGURE 6: Insert tool T1 (See drawing T1 p. 131) between the planetary gears (7). FIGURE 3: Remove the shim washer (5) and the planetary gear (6). Dana Holding Corporation ASM-0025E - 212 Axle Service Manual... - Page 127 T2 (See drawing T2 p. 131). gear (6) and the relative shim washer (5) from the differential carrier. NOTE: In this condition the tool T1 (See drawing T1 p. 131) con- tains pin (9). ASM-0025E - 212 Axle Service Manual Dana Holding Corporation...
-
Page 128: Assembly
FIGURE 18: Fit the snap rings (11) onto the pins (9). FIGURE 15: With the help of press tool T3A (See drawing T3 p. 132), position the second planetary gear (7) and the relative shim washer (8). Dana Holding Corporation ASM-0025E - 212 Axle Service Manual... - Page 129 FIGURE 21: Press T3B (See drawing T3 p. 132) pin all the way down. FIGURE 24: Position the shim washer (5) on the crown (2). NOTE: In order to hold the shim washer (5) in position, apply gre- ase to it. ASM-0025E - 212 Axle Service Manual Dana Holding Corporation...
- Page 130 Torque wrench setting for screws: 128 - 142 N·m NOTE: Secure the screws using the criss-cross method. T1 7 T1 7 FIGURE 26: Install the bearings (3) and (4) using tool T4 (See drawing T4 p. 132). Dana Holding Corporation ASM-0025E - 212 Axle Service Manual...
-
Page 131: Special Tools
SPECIAL TOOLS SPECIAL TOOLS P/N: 3708 x45 ° Ø5.5 x45 ° 10.5 22.5 Ø5.5 P/N: 3424 0.0.1 24.5 15 ° ASM-0025E - 212 Axle Service Manual Dana Holding Corporation... - Page 132 SPECIAL TOOLS 2306 P/N: x30° 2x30° ± 0.1 46.45 ± 0.5 19.6 56.6 29.6 x45° x30° P/N: 3332 x45° Dana Holding Corporation ASM-0025E - 212 Axle Service Manual...
-
Page 133: Limited Slip Differential Unit (25% And 45%)
LIMITED SLIP DIFFERENTIAL UNIT (25% AND 45%) EXPLODED VIEW ASM-0025E - 212 Axle Service Manual Dana Holding Corporation... -
Page 134: Disassembly
FIGURE 6: Remove the snap rings (10) from the pins (11) of the planetary gears (12). FIGURE 3: If bearing (5) needs replacing, remove it; remove crown (4). Dana Holding Corporation ASM-0025E - 212 Axle Service Manual... - Page 135 T2 (See drawing T2 p. 140) and insert (11). press tool T3A (See drawing T3 p. 141). Press press tool T3A Repeat the same operations on the remaining pins. (See drawing T3 p. 141) to end of stroke. ASM-0025E - 212 Axle Service Manual Dana Holding Corporation...
- Page 136 FIGURE 13: Remove tool T1 (See drawing T1 p. 140) and ex- tract from the differential unit (9) the two final planetary gears (12), the 2nd differential side gear (6) and the whole friction assembly concerned (7). Dana Holding Corporation ASM-0025E - 212 Axle Service Manual...
-
Page 137: Assembly
As to rings (13) and (16), the side without notches must face outwards. T16A T16 C FIGURE 18: Using press tool T3A (See drawing T3 p. 141), position the second planetary gear (12) and relative shim wa- sher (18). ASM-0025E - 212 Axle Service Manual Dana Holding Corporation... - Page 138 141). T16A FIGURE 24: Press press tool T3B (See drawing T3 p. 141) as far down as it will go. FIGURE 21: Fit snap rings (19) onto the pins (11). Dana Holding Corporation ASM-0025E - 212 Axle Service Manual...
- Page 139 Position the second differential side gear (6) and the second friction disc assembly (7) into the differential unit (9). FIGURE 29: Install the whole differential assembly (2) into the central body (1). For details, see DIFFERENTIAL UNIT p. 61. ASM-0025E - 212 Axle Service Manual Dana Holding Corporation...
-
Page 140: Special Tools
SPECIAL TOOLS SPECIAL TOOLS P/N: 3708 x45 ° Ø5.5 x45 ° 10.5 22.5 Ø5.5 3424 P/N: 0.0.1 24.5 15 ° Dana Holding Corporation ASM-0025E - 212 Axle Service Manual... - Page 141 SPECIAL TOOLS P/N: 2306 x30° 2x30° ± 0.1 46.45 ± 0.5 19.6 56.6 29.6 x45° x30° P/N: 3332 x45° ASM-0025E - 212 Axle Service Manual Dana Holding Corporation...
- Page 142 SPECIAL TOOLS Dana Holding Corporation ASM-0025E - 212 Axle Service Manual...
-
Page 143: Hydraulic Differential Lock
HYDRAULIC DIFFERENTIAL LOCK EXPLODED VIEW ASM-0025E - 212 Axle Service Manual Dana Holding Corporation... -
Page 144: Disassembly
The cap must be replaced each time the unit is disassembled. FIGURE 6: Using two wrenches, lock piston (6) and remove nut (4). FIGURE 3: Remove the security switch (2). NOTE: Check the state of the o-ring (3). Dana Holding Corporation ASM-0025E - 212 Axle Service Manual... - Page 145 (15). FIGURE 12: Remove snap ring (9) and take piston unit (6) FIGURE 9: Extract selector fork (5). apart. Remove all component parts. ASM-0025E - 212 Axle Service Manual Dana Holding Corporation...
- Page 146 Write down the direction of assembly of the stop ring (18). FIGURE 14: ONLY IF NECESSARY Remove the key (21) and disassemble the differential unit (15). For details, see DIFFERENTIAL UNIT p. 61. Dana Holding Corporation ASM-0025E - 212 Axle Service Manual...
-
Page 147: Assembly
T2 (See drawing T2 p. 149). FIGURE 17: Install bearing (16) onto the differential carrier (17). NOTE: Make sure that the bearing is well set in the differential carrier. ASM-0025E - 212 Axle Service Manual Dana Holding Corporation... - Page 148 If necessary, adjust differential unit clearances. (see DIFFE- RENTIAL UNIT p. 61). Install the top cap (1) and the arms. (For details, see CHE- CKING WEAR AND REPLACING THE BRAKING DISCS p. 19). Dana Holding Corporation ASM-0025E - 212 Axle Service Manual...
-
Page 149: Special Tools
SPECIAL TOOLS SPECIAL TOOLS P/N: 3543 -- 0.08 Ø28 -- 0.12 -- 0.08 Ø24 -- 0.12 5° Ø26 Ø33 P/N: 2316 M12x1.25 Ø16.2 -- 0.1 + 0.2 Ø17 + 0.1 ASM-0025E - 212 Axle Service Manual Dana Holding Corporation... - Page 150 SPECIAL TOOLS Dana Holding Corporation ASM-0025E - 212 Axle Service Manual...
-
Page 151: Hydraulic Negative Brake
HYDRAULIC NEGATIVE BRAKE EXPLODED VIEW ASM-0025E - 212 Axle Service Manual Dana Holding Corporation... -
Page 152: Disassembly
Loosen and remove screws (17) . FIGURE 5: Remove the pin screws (18) guiding the cover (11). CAUTION If the screws are to be replaced, write down the different co- lors for the different brake gaps. Dana Holding Corporation ASM-0025E - 212 Axle Service Manual... - Page 153 FIGURE 8: Loosen the studs and remove two of them. through the connection member for the service brake, in or- der to extract the piston (10). CAUTION Hold the piston (10) back, as it may be suddenly ejected and damaged. ASM-0025E - 212 Axle Service Manual Dana Holding Corporation...
- Page 154 (3). NOTE: If disks are not to be replaced, avoid changing their posi- CAUTION tion. Hold the piston (3) back, as it may be suddenly ejected and damaged. Dana Holding Corporation ASM-0025E - 212 Axle Service Manual...
-
Page 155: Assembly
Check the sense of direction of washers (7) and relative FIGURE 18: Fit o-rings (9) and (8) onto the piston (10). centering. Lubricate the piston and the o-rings and install the unit into the cylinder (7). ASM-0025E - 212 Axle Service Manual Dana Holding Corporation... - Page 156 FIGURE 26: Fill with ATF oil. For details see ADJUSTMENT AND CHECKS p. 14 FIGURE 23: Position the Belleville washers (2) and engage the cylinder (7). NOTE: Check the sense of direction of washers (2) and relative centering. Dana Holding Corporation ASM-0025E - 212 Axle Service Manual...
- Page 157 Tighten with torque wrench setting of 10 - 15 N·m (19); place them in line with the piston (11). Y 18 FIGURE 32: Y=brake gap FIGURE 29: Insert the intermediate disk (11). 0,75mm 1,00mm 1,25mm 1,50mm Depending on axle configuration. ASM-0025E - 212 Axle Service Manual Dana Holding Corporation...
- Page 158 EXAMPLE: 25.4 mm FIGURE 35: Put the brake disc pack including the shim under a press, load with 1000 kg and take the measure “V”. EXAMPLE: V = 40 mm Dana Holding Corporation ASM-0025E - 212 Axle Service Manual...
- Page 159 Tighten using the criss-cross method. FIGURE 39: Check integrity and position of the arm's o-ring; install the complete arm. NOTE: To assist axle shaft centering, slightly move the wheel hub. ASM-0025E - 212 Axle Service Manual Dana Holding Corporation...
- Page 160 ASSEMBLY Dana Holding Corporation ASM-0025E - 212 Axle Service Manual...
-
Page 161: Incorporated Reduction Gear And Pinion 602
INCORPORATED REDUCTION GEAR AND PINION 602 EXPLODED VIEW ASM-0025E - 212 Axle Service Manual Dana Holding Corporation... -
Page 162: Disassembly
FIGURE 5: Remove the snap ring (6) and discard it. FIGURE 2: Loosen the check nuts on upper (1) and lower (2) flange. FIGURE 6: Remove the lower flange (2). FIGURE 3: Draw out nuts (3) and o-rings (4). Dana Holding Corporation ASM-0025E - 212 Axle Service Manual... - Page 163 (11). FIGURE 12: Remove lower gear (13). FIGURE 9: Insert two levers in the provided slots and move the cover (9) away from the body of the reduction gear (11). ASM-0025E - 212 Axle Service Manual Dana Holding Corporation...
- Page 164 Write down direction of installation. FIGURE 18: Remove the intermediate cover (17) and the whole differential unit (18). FIGURE 15: Remove inner bearing (14) from gear assembly For details, see DIFFERENTIAL UNIT p. 61. (12). Dana Holding Corporation ASM-0025E - 212 Axle Service Manual...
- Page 165 Carefully check and note direction of installation of spa- cer. FIGURE 21: Remove ring nut (19). FIGURE 24: Using a punch and a hammer, extract the snap ring (25). NOTE: Note direction of installation of snap ring (24). ASM-0025E - 212 Axle Service Manual Dana Holding Corporation...
-
Page 166: Assembly
(22) is correctly oriented. 220Ncm. NOTE: Apply grease to the outer surface of the spacer (22). FIGURE 29: Re-install the differential unit (18) and the inter- mediate cover (17). Dana Holding Corporation ASM-0025E - 212 Axle Service Manual... - Page 167 The di stance piece (16) must be positioned between the outer bearing and the gear. FIGURE 34: Insert the upper gear unit (12) into the body of the reduction gear (11). ASM-0025E - 212 Axle Service Manual Dana Holding Corporation...
- Page 168 Torque wrench setting: 82 - 91 N·m. FIGURE 37: Fit the upper (1) and lower (2) flanges. Apply Loctite 242 to the threaded portion of pinion (20) and upper gear (12). Fit o-rings (4) and nuts (3). Dana Holding Corporation ASM-0025E - 212 Axle Service Manual...
-
Page 169: Special Tools
SPECIAL TOOLS SPECIAL TOOLS Ø75 – 0.08 Ø55 – 0.12 32,25 3/4" Ø15H7-n6 ASM-0025E - 212 Axle Service Manual Dana Holding Corporation... - Page 170 SPECIAL TOOLS Ø85 Ø66 Ø55H7 15° Dana Holding Corporation ASM-0025E - 212 Axle Service Manual...
- Page 171 SPECIAL TOOLS Ø64 Ø25 Ø35 -- 0.1 -- 0.2 Ø50 ASM-0025E - 212 Axle Service Manual Dana Holding Corporation...
- Page 172 SPECIAL TOOLS 3x15° 5x15° 17min. Dana Holding Corporation ASM-0025E - 212 Axle Service Manual...
- Page 173 SPECIAL TOOLS Ø30 -- 0.2 -- 0.3 Ø55 Ø60 -- 0.2 -- 0.3 Ø72 ASM-0025E - 212 Axle Service Manual Dana Holding Corporation...
- Page 174 SPECIAL TOOLS ± 0.2 Ø185 ± 0.2 Ø105 -- 0 Ø34.5 + 0.2 Ø50 ±0.5 Ø32 Ø45 Dana Holding Corporation ASM-0025E - 212 Axle Service Manual...
- Page 176 Copyright 2013 Dana Holding Corporation For product inquiries or support, All content is subject to copyright by Dana and may not visit www.dana.com or call 419-887-6445 be reproduced in whole or in part by any means, For other service publications, electronic or otherwise, without prior written approval.
Need help?
Do you have a question about the SPICER AXLE 212 and is the answer not in the manual?
Questions and answers