Table of Contents
Advertisement
Advertisement
Table of Contents

Related Manuals for Ford FPWG3400H


Summary of Contents for Ford FPWG3400H
- Page 1 Model: FPWG3400H Gasoline Pressure Washer OPERATOR’S MANUAL www.fordpower.cc...
-
Page 2: Table Of Contents
TABLE OF CONTENTS Introduction ....................................3 Safety Rules .....................................4 Safety Symbols ................................4 Safety Instructions ...............................4 Pressure Washer Features ..............................7 Pressure Washer Parts Assembly............................7 Pressure Washer Parts List ..............................7 Assembly ....................................10 Packing List ................................10 Unpacking ...................................10 Attaching Foot Assembly............................11 Install Handle................................11 Attaching Upper and Lower Gun Hooks ........................11 Attaching Accessory Hook ............................11 Attaching Spray Gun..............................12 Adding Engine Oil and Fuel ............................13... -
Page 3: Introduction
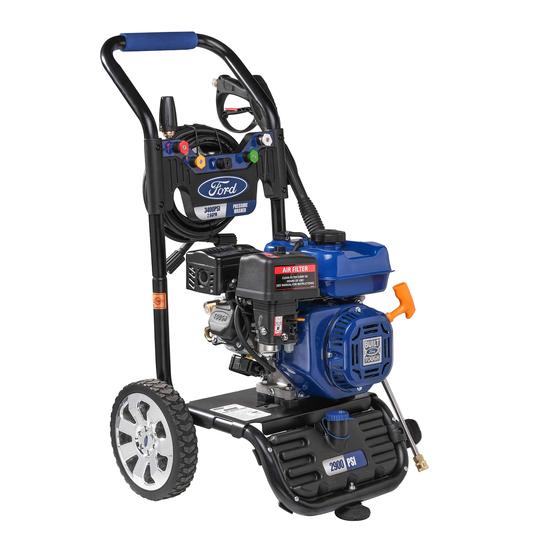
INTRODUCTION Thankyou for purchasing this superior quality pressure washer from Ford Power Equipment. When operating and maintaining this product as instructed in this manual, your pressure washer will give you many years of reliable service. Product Specifications: This pressure washer operates at 3400PSI with a flow rate of 2.6 gallons per minute. This high end residential use system features a 212cc Ducar engine, no flat foam filled tires, 30’... -
Page 4: Safety Rules
SAFETY RULES Safety Symbols Indicates a potentially hazardous WARNING! situation which could result in serious injury or death if not avoided. Indicates a potentially hazardous CAUTION! situation which could result in damage to equipment or property. Slippery surface Risk of explosion Risk of electric shock Hot surface Eye protection... - Page 5 SAFETY RULES To reduce the risk of injection, injury or possible amputation, never direct water pressure WARNING! towards people or pets. • The high pressure stream of water produced can cut through skin and underlying tissue. Never squeeze the trigger or point the spray gun at other people, animals, plants, or fragile objects such as glass, even if the engine is stopped.
- Page 6 SAFETY RULES WARNING! Stay alert and use common sense. Do not operate this unit if you are under the influence of alcohol, drugs, medication or you feel tired. Pull cord recoils rapidly and pulls arm towards engine faster than you can let go which WARNING! could result in injury.
-
Page 7: Pressure Washer Features
PRESSURE WASHER FEATURES A - 30’ High Pressure Hose H - Locking Trigger B - Fuel Tank and cap I - Pull Cord C - Choke J - Engine On/Off Switch D - Fuel Valve Lever K - Oil Fill and Dipstick E - Soap Tank L - No Flat Foam Filled Tires F - Handle... - Page 8 PRESSURE WASHER PARTS ASSEMBLY...
- Page 9 PRESSURE WASHER PARTS LIST Code Part name 120021210069VN ENGINE DH212 812030 WHEEL 92027 SCREW M6*45 815124-052 THE CHASSIS BASE 90039 NUT M8 813008 FOOT, FRAME ISOLATING 814016 UNDER THE GUN 94220 FLAT MAT PHI Φ6 90024 SELF-LOCKING NUT M6 812031 WHEEL 10.1 812013...
-
Page 10: Assembly
ASSEMBLY Packing List • Pressure washer • Quick start guide • Operator’s manual and product registration card • Spray gun Extension wand with quick-connect fitting High pressure hose • Spray nozzles: 0°, 15°, 25°, 40°, and soap nozzle • • Spray gun hook (upper) •... -
Page 11: Attaching Foot Assembly
ASSEMBLY Attaching Foot Assembly (See fig 1) • Align the foot support to the mounting hole and tighten it with self-locking nut • Buckle the wheel cover into the corresponding hole position of the wheel, and lock it with tapping screw. Install Handle (See fig 2) •... -
Page 12: Attaching Spray Gun
ASSEMBLY Attaching the Spray Gun (See fig 4 & 5) • Screw the spray wand and the trigger handle together until they are secure. • nut on by turning clockwise until it is hand tight. FIG 4 FIG 5... -
Page 13: Adding Engine Oil And Fuel
ASSEMBLY Adding / Checking Engine Oil (See fig 6) • Place pressure washer on a level surface. • • Carefully add between 520 ml (17.6 oz) of 4-Cycle engine oil (SAE10W30) to empty reservoir until oil reaches • Be sure to replace both dipsticks before attempting to start the engine. •... - Page 14 ASSEMBLY Connecting Garden Hose to Pressure Washer (See fig 8) • • Inspect inlet screen and remove any debris. • Connect hose to water inlet and tighten by hand. There must be a minimum of 10 feet of unrestricted hose between pressure washer and faucet or shut off valve.
-
Page 15: Operation
OPERATION Pre-Operation Check List • Read and understand this operator manual in its entirety before operating pressure washer. • Check oil level and add oil to the proper level if low. • Check fuel level and add fuel if needed. •... -
Page 16: How To Turn Off Pressure Washer
OPERATION Pull cord recoils rapidly and pulls arm towards engine faster than you can let go which WARNING! could result in injury. • Always relieve pressure from spray gun before pulling starter cord, including every failed attempt to start engine. •... -
Page 17: Using Spray Nozzle
OPERATION Using Spray Nozzle (See fig 15) • To connect or disconnect spray tip, pull back on the quick-connect collar. Insert or remove spray tip then release collar. • When spray tip is connected, pull on the spray tip to make sure it is secured. •... -
Page 18: Maintenance
MAINTENANCE Regular maintenance will extend the life of this pressure washer and improve its performance. The warranty does not cover items that result from operator negligence, misuse, or abuse. To receive full value from the warranty, operator must maintain the pressure washer as instructed in this manual, including proper storage. Before inspecting or servicing this machine, make sure the engine is off and no parts are WARNING! moving. -
Page 19: Changing Oil
MAINTENANCE Changing Engine Oil Engine oil will drain better if the engine is still warm, but not hot. • Shut off engine. • Clean the area around the oil fill cap/dipstick to keep out debris then remove oil fill cap/dipstick. •... -
Page 20: How To Store
MAINTENANCE Checking Spark Plug • Disconnect the spark plug wire from the spark plug. • Before removing the spark plug, clean the area around its base to prevent debris from entering the engine. • Clean carbon deposits off the electrode with a wire brush. •... -
Page 21: Troubleshooting
TROUBLESHOOTING PROBLEM CAUSE SOLUTION Engine does not start 1. Out of fuel 1. Fill fuel tank 2. Engine oil low 2. Add engine oil 3. Spark plug wire disconnected 3. Connect spark plug wire from spark plug 4. Replace spark plug 4.
Need help?
Do you have a question about the FPWG3400H and is the answer not in the manual?
Questions and answers