Table of Contents
Advertisement
Quick Links
Installation Instructions
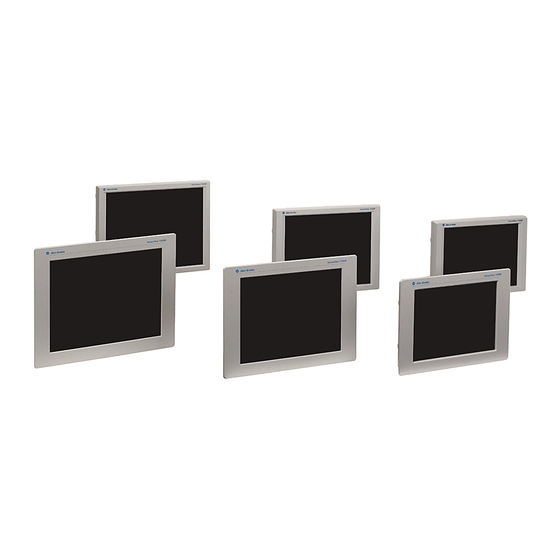
Industrial Standard Monitors
Catalog Numbers 6176M-15VN, 6176M-15VT, 6176M-15PN, 6176M-15PT, 6176M-17VN,
6176M-17VT, 6176M-17PN, 6176M-17PT, 6176M-19VN, 6176M-19VT, 6176M-19PN,
6176M-19PT
Topic
Monitor Dimensions
About This Publication
This document describes how to install your monitor and make connections. Monitors are
VESA-mount ready and can be installed in a panel or rack. This document does not provide
information on monitor configuration or setup.
Page
2
3
3
4
4
4
5
6
11
12
12
15
19
20
20
21
23
Advertisement
Table of Contents

Related Manuals for Rockwell Automation Allen-Bradley 6176M-15VN


Summary of Contents for Rockwell Automation Allen-Bradley 6176M-15VN
-
Page 1: Table Of Contents
Installation Instructions Industrial Standard Monitors Catalog Numbers 6176M-15VN, 6176M-15VT, 6176M-15PN, 6176M-15PT, 6176M-17VN, 6176M-17VT, 6176M-17PN, 6176M-17PT, 6176M-19VN, 6176M-19VT, 6176M-19PN, 6176M-19PT Topic Page Important User Information Environment and Enclosure Information European Union Directive Compliance Before You Begin Parts List Required Tools Installation Guidelines Install the Monitor Mounting a VESA Monitor to a Bench or Tabletop Monitor Dimensions... -
Page 2: Important User Information
In no event will Rockwell Automation, Inc. be responsible or liable for indirect or consequential damages resulting from the use or application of this equipment. -
Page 3: Environment And Enclosure Information
EMC Directive of the European Union. Obtain permission from the local power authority before connecting any computer configuration that draws more than 75 W of AC power directly from the public mains. Rockwell Automation Publication 6176M-IN001E-EN-P - August 2012... -
Page 4: Before You Begin
RS-232 touchscreen interface cable (for touch-enabled monitors) • USB touchscreen interface cable (for touch-enabled monitors) Required Tools These tools are required for installation. • Panel cutout tools (for panel mount applications) • #2 Phillips torque screwdriver Rockwell Automation Publication 6176M-IN001E-EN-P - August 2012... -
Page 5: Installation Guidelines
For VESA mounting, the installation must provide sufficient mechanical stability to minimize the effects from vibration and shock. The mounting means must be firmly attached to the supporting surface using the appropriate hardware. Rockwell Automation Publication 6176M-IN001E-EN-P - August 2012... -
Page 6: Install The Monitor
The panel mount monitors are installed directly into a panel with mounting clips. The number of clips varies by model. Cat. No. Monitor Model Mounting Clips 6176M-15PN, 6176M-15PT 1550M 6176M-17PN, 6176M-17PT 1750M 6176M-19PN, 6176M-19PT 1950M Cat. No. Description 6189V-MCLPS2 Replacement mounting clips (12) Rockwell Automation Publication 6176M-IN001E-EN-P - August 2012... - Page 7 The mounting hardware supplied accommodates panels up to 6.25 mm (0.25 in.) thick. ATTENTION: Failure to follow these guidelines may result in personal injury or damage to the panel components. Rockwell Automation Publication 6176M-IN001E-EN-P - August 2012...
- Page 8 5. Slide the mounting clips into the slots on the top, bottom, and sides of the monitor. Mounting Clips for 1550M and 1750M Mounting Clips for 1950M 6. Hand-tighten the clips in the specified sequence until the gasket is compressed uniformly against the panel. Rockwell Automation Publication 6176M-IN001E-EN-P - August 2012...
- Page 9 ATTENTION: Tighten the mounting clips to the specified torque to provide a proper seal and prevent damage to the monitor. Rockwell Automation assumes no responsibility for water or chemical damage to the monitor or other equipment within the enclosure because of improper installation.
- Page 10 The universal rails have a hole pattern that contains the wide pattern but provides an additional hole at the midpoint of the pattern. Universal rails are prevalent in the United States. Rockwell Automation Publication 6176M-IN001E-EN-P - August 2012...
-
Page 11: Mounting A Vesa Monitor To A Bench Or Tabletop
The illustration shows the mounting holes for VESA FPMPMI standard 100 mm (3.94 in.) interface pad. Installing Arm Installing Monitor to Arm Monitor Mounting Holes (4) 3. Tighten the screws to secure the VESA monitor to the arm. Rockwell Automation Publication 6176M-IN001E-EN-P - August 2012... -
Page 12: Monitor Dimensions
Monitor Dimensions Dimensions for the panel mount and VESA mount monitors are expressed in millimeters (inches). 1550M Panel Mount 309.0 (12.2) 410.0 (16.1) 50.0 (2.0) 1550M VESA Mount 282.6 (11.0) 383.6 (15.0) 50.0 (2.0) Rockwell Automation Publication 6176M-IN001E-EN-P - August 2012... - Page 13 Industrial Standard Monitors 13 1750M Panel Mount 356.0 (14.0) 452.0 (17.8) 53.0 (2.1) 1750M VESA Mount 326.5 (12.9) 53.0 (2.1) 421.0 (16.6) Rockwell Automation Publication 6176M-IN001E-EN-P - August 2012...
- Page 14 14 Industrial Standard Monitors 1950M Panel Mount 399.3 (15.7) 58.0 (2.3) 482.6 (19.0) 1950M VESA Mount 357.0 (14.1) 58.0 (2.3) 444.0 (17.5) Rockwell Automation Publication 6176M-IN001E-EN-P - August 2012...
-
Page 15: Monitor Connections
Connector Connector DVI-D video input DC power input (AC adapter) HD-15 video input USB Type A connection to peripheral devices (2) USB Type B connection to computer M5 ground screw RS-232 input (optional) Rockwell Automation Publication 6176M-IN001E-EN-P - August 2012... - Page 16 2. Connect the other cable end to the output of any digital DVI video source. For a DVI cable longer than 5 m (16.4 ft), use a DVI cable extension. However, DVI cables longer than 5 m (16.4 ft) exceed the DVI maximum cable length specification. Rockwell Automation Publication 6176M-IN001E-EN-P - August 2012...
- Page 17 USB touchscreen interface to the host computer. Cat. No. Description 6189V-TCHCBL2 Serial touch cable, RS-232 cable, 1.8 m (6 ft) 6189V-USBCBL2 USB/USB touch cable, Type A to Type B, 1.8 m (6 ft) Rockwell Automation Publication 6176M-IN001E-EN-P - August 2012...
- Page 18 You are now ready to install the touchscreen driver found on the Accessories CD or at http://www.ab.com/linked/industrialcomputers/drivers/monitors.html. Performing a Calibration After installing the driver, follow the calibration instructions in the touchscreen documentation. Following installation of the touchscreen driver and calibration, the touchscreen is ready to use. Rockwell Automation Publication 6176M-IN001E-EN-P - August 2012...
-
Page 19: Connect The Power
Using the functional ground screw is not required for safety and regulatory compliance. However, you can use the functional ground screw on the rear panel of the computer if a supplemental ground is desired. Rockwell Automation Publication 6176M-IN001E-EN-P - August 2012... -
Page 20: Backlight Assembly Disposal
Doing so may cause damage to the monitor. You must uninstall the monitor and place in its original packing material before shipping. Rockwell Automation is not responsible for damage incurred to a monitor that is shipped or transported while installed in a machine, panel, or rack. -
Page 21: Specifications
(14.1 x 17.5 x 2.3 in.) Weight Panel mount monitors 4.1 kg (9.02 lb) 5.7 kg (12.54 lb) 7.5 kg (16.50 lb) VESA mount monitors 3.1 kg (6.82 lb) 4.6 kg (10.12 lb) 6.0 kg (13.20 lb) Rockwell Automation Publication 6176M-IN001E-EN-P - August 2012... - Page 22 • • • C-Tick CE Marked for all applicable directives Turkey RoHS • • • China RoHS RoHS Compliant UL/c-UL Listed (1) See http://www.rockwellautomation.com/products/certification//index.html for declarations of conformity, certificates, and other certification details. Rockwell Automation Publication 6176M-IN001E-EN-P - August 2012...
-
Page 23: Additional Resources
Provides declarations of conformity, certificates, and other http://www.rockwellautomation.com/products/certification/ certification details. index.html You can view or download publications at http://www.rockwellautomation.com/literature/. To order paper copies of technical documentation, contact your local Allen-Bradley distributor or Rockwell Automation sales representative. Rockwell Automation Publication 6176M-IN001E-EN-P - August 2012... - Page 24 Rockwell Automation representative. New Product Satisfaction Return Rockwell Automation tests all of its products to ensure that they are fully operational when shipped from the manufacturing facility. However, if your product is not functioning and needs to be returned, follow these procedures.
Need help?
Do you have a question about the Allen-Bradley 6176M-15VN and is the answer not in the manual?
Questions and answers