Table of Contents
Advertisement
Quick Links
Advertisement
Table of Contents

Related Manuals for Rational iCombi Pro XS 6-2/3


Summary of Contents for Rational iCombi Pro XS 6-2/3
- Page 1 ® iCombi Operating instructions...
-
Page 3: Table Of Contents
Table of contents 1 Introduction........................................Help displayed on the unit ..................................Product warranty......................................Target group ........................................Intended use ........................................Working with this manual ..................................1.5.1 Explanation of symbols..................................1.5.2 Explanation of pictograms ................................1.5.3 Explanation of safety messages ..............................1.5.4 Images........................................ - Page 4 5.3.1 Calling up intelligent cooking process............................32 5.3.2 Starting intelligent cooking process ............................32 5.3.3 Pre-program start time..................................33 Adjusting cooking result to own requirements........................... 34 5.4.1 Cooking parameters ..................................34 5.4.2 Additional functions..................................36 5.4.3 Prompts........................................ 36 5.4.4 Information......................................37 5.4.5 Options.........................................
- Page 5 10.4.4 Time optimisation ..................................... 54 10.4.5 Energy optimisation ..................................55 10.5 Edit and delete tickets....................................56 10.6 Target time cooking ....................................56 10.7 Planning........................................... 57 10.7.1 Create planning ....................................57 10.7.2 Start planning...................................... 58 11 Programming mode ....................................59 11.1 Create manual programme..................................
- Page 6 13.6.7 Extra time in manual programs in the iProductionManager....................73 13.6.8 Climate retention time ..................................73 13.6.9 iProductionManager 3D .................................. 73 13.7 Cleaning........................................... 73 13.7.1 Forced cleaning ....................................73 13.7.2 Cleaning plan....................................... 74 13.8 Data management ......................................74 13.8.1 Export all data ..................................... 74 13.8.2 Cooking programs ....................................
- Page 7 15.6 Abort automatic clean....................................89 15.7 Forced cleaning......................................90 15.8 Cleaning plan ......................................... 90 16 Care..........................................92 16.1 General safety instructions..................................92 16.2 Care intervals......................................... 92 16.3 Care products ........................................ 92 16.4 Cleaning cooking cabinet door................................. 93 16.5 Descaling the moistening nozzle ................................94 16.6 Cleaning the air filter ....................................
-
Page 8: Introduction
This unit may not be used outdoors. This unit may not be used for continuous industrial mass production of food. All other uses are contrary to the intended purpose, and may be dangerous. RATIONAL AG assumes no liability for the consequences of using the unit contrary to the intended use. -
Page 9: Explanation Of Pictograms
1 | Introduction a. This symbol marks a list. 1.5.2 Explanation of pictograms The following pictograms are used in this document: Caution! Read the operating instructions before using the unit. General warning symbol Useful tips for simple use of your unit. 1.5.3 Explanation of safety messages If you see the following safety messages, you are being warned about hazardous situations and instructed to avoid... -
Page 10: The Icombi Pro
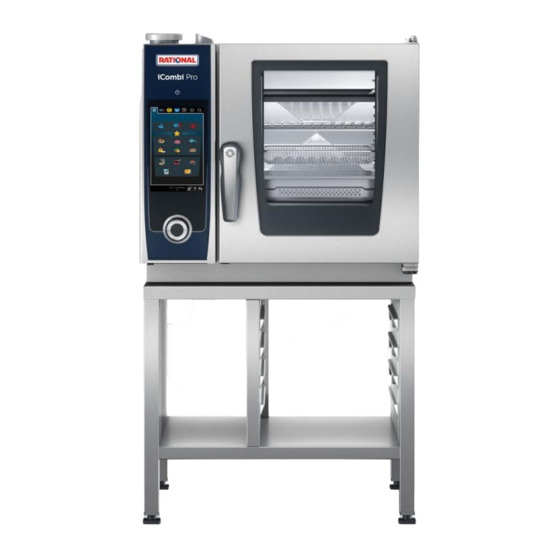
2 | The iCombi Pro The iCombi Pro Cooking cabinet Control panel Cooking cabinet door Display Door handle Central dial USB port Care drawer Hand shower Air filter 10 / 112 Operating instructions... -
Page 11: General Safety Instructions
Your cooking system should be serviced at least once a year by an authorised RATIONAL service partner to ensure that it is in perfect technical condition. Do not modify the unit or the unit installation undertaken by your RATIONAL Service Partner. -
Page 12: Safety Instructions For Units With A Gas Connection
– With grilling and roasting applications, use a fat collector under the food. To prevent material damage due to improper use of accessories: – Use only original RATIONAL accessories. – Use only the VarioSmoker to smoke food. Cold food is not to be added to the unit for rethermalization while hot food is being held. -
Page 13: Personal Protective Equipment
3 | General safety instructions – If your unit is connected to a chimney, contact your gas installer regularly to clean the ventilation pipe of the unit. Ensure that the provisions specific to the country are complied with. – Do not put objects on the exhaust pipes. This will prevent fatal accidents: –... -
Page 14: How To Work With The Unit
Initial start-up When starting up your unit for the first time, it has already been properly installed by a RATIONAL Service Partner. The self-test has already been performed and the unit is therefore ready for operation. You can find all the information on installation in the installation manual enclosed. -
Page 15: Start Screen
4 | How to work with the unit Start screen iProductionManager Programming mode iCookingSuite iCareSystem Home Manual cooking Favourites Intelligent cooking modes Cooking methods Back / Cancel Date, time, status Help Settings iProductionManager [} 49] Intelligent cooking - iCookingSuite [} 23] Home If you press this button, you will be navigated to the start screen. -
Page 16: Favourite
4 | How to work with the unit 4.3.1 Favourite You can save intelligent cooking paths and programs you use often as favourites and call them up from the home screen. This can give you fast access to the dishes on a seasonal menu, for example. 1. -
Page 17: Help Displayed On The Unit
In addition, the help function contains detailed information on individual cooking paths and provides you with a wealth of practical application examples tried and tested by RATIONAL with valuable tips. Interacting with the unit... -
Page 18: Opening And Closing The Cooking Cabinet Door
4 | How to work with the unit Model Max. load size [kg] Max. load per level XS 6-2/3 20 kg 10 kg Opening and closing the cooking cabinet door Opening cooking cabinet door 1. Turn the cooking cabinet door handle to the right. 2. -
Page 19: Inserting Core Temperature Probe
4 | How to work with the unit Rack level over 1.60 m If your unit has been installed so that the top rack is 1.60 m above the floor, you must apply the warning symbol supplied at that position. Inserting core temperature probe The following sections describe how to work both with the core probe and with the optional externally attachable USB core probes. - Page 20 4 | How to work with the unit If the core probe is warmer than the set core temperature, cool down the core probe using the hand shower. Meat, e.g. steak 1. Insert the core probe up to the handle into the food at an angle so that the core probe is as far into the food as possible.
-
Page 21: Using The Hand Shower
4 | How to work with the unit 1. Insert the core probe up to the handle into the food at an angle so that the core probe is as far into the food as possible. Whole fish 1. Insert the core probe up to the handle into the thickest point of the food. Make sure that the tip of the core probe does not protrude into the abdominal cavity of the fish. -
Page 22: Removing Hinging Rack
4 | How to work with the unit CAUTION Germ formation in the water pipe If you do not use the hand shower daily, germs may form in the water line. 1. Rinse the hand shower through with water in the morning and in the evening for 10 seconds. NOTICE Improper handling of the hand shower If you pull the hand shower out beyond the maximum hose length or rip the hose, the automatic retraction... -
Page 23: Intelligent Cooking - Icookingsuite
5 | Intelligent cooking - iCookingSuite Intelligent cooking - iCookingSuite The iCookingSuite is the cooking intelligence in the iCombi Pro. You select which food is to be cooked with which cooking method. With this selection, a wide range of cooking processes will be offered so you can achieve the ideal cooking result. -
Page 24: Intelligent Cooking Processes
5 | Intelligent cooking - iCookingSuite Boiling Frying Baking Grill A specific set of intelligent cooking paths is assigned to each operating mode. These cooking paths reflect cultural cooking habits that you can set in the primary national cuisine [} 71] and the secondary national cuisine [} 72]. Intelligent cooking processes 5.2.1 Poultry... -
Page 25: Meat
5 | Intelligent cooking - iCookingSuite Peking duck Select this cooking path if you would like to prepare traditional Peking duck. Turkey Select this cooking path if you would like to prepare whole turkeys or parts of the turkey. Also select this cooking path if you would like to prepare stuffed turkeys. - Page 26 5 | Intelligent cooking - iCookingSuite Semi-preserves Select this cooking path if you are using meat, for example if you would like to make boiled and cooked sausages, ragout or goulash semi-preserves. To make semi-preserves safely, you need a reference container with a lid. 1.
-
Page 27: Fish
5 | Intelligent cooking - iCookingSuite 5.2.3 Fish Choose this cooking process if you want to roast fish fillets or whole fish with or without skin, marinated or on a bed of vegetables. Steam Select this cooking process if you want to steam fish, fish fillets or terrines. Chinese-style steamed dishes Select this cooking process if you want to steam fish Chinese style. -
Page 28: Vegetables And Side Dishes
5 | Intelligent cooking - iCookingSuite Steam dessert Select this cooking path if you would like to prepare steamed desserts, like steamed dumplings or yeast dumplings. Frying eggs Select this cooking path if you would like to prepare fried eggs, scrambled eggs or omelettes. Steam/boiled eggs Select this cooking path if you would like to prepare soft, soft-boiled or hard-boiled eggs or if you would like to poach eggs. - Page 29 5 | Intelligent cooking - iCookingSuite Dim sum Select this cooking path if you would like to prepare Chinese Dim Sum. Double-boiled soup Select this cooking process if you would like to prepare Chinese double-boiled soup. Stew Select this cooking process if you want to stew vegetables and side dishes, such as ratatouille, red cabbage or onions.
-
Page 30: Baked Goods
5 | Intelligent cooking - iCookingSuite Steam rice Select this cooking path if you would like to steam rice or grains, like for example steaming pearl barley or couscous. Sushi rice Select this cooking process if you want to make sushi rice. Select this cooking process if you want to dehydrate vegetables, mushrooms or fruit. -
Page 31: Finishing
5 | Intelligent cooking - iCookingSuite Biscuits Select this cooking path if you are making shortbread biscuits, e.g. if you want to prepare biscuits, cookies or shortcrust pastry. Cakes Select this cooking path if you would like to prepare cakes and biscuit bases. Soft pretzels Select this cooking process if you want to make soft pretzels. -
Page 32: Cooking Food Intelligently
5 | Intelligent cooking - iCookingSuite Crisp Select this cooking path if you would like to heat up cooked dishes, like pork knuckle or crispy roasts, to the serving temperature. Cooking food intelligently 5.3.1 Calling up intelligent cooking process You can call up an intelligent cooking path in 2 ways: Via iCookingSuite Via the programming mode [} 59] iCookingSuite... -
Page 33: Pre-Program Start Time
5 | Intelligent cooking - iCookingSuite 4. Set the desired cooking result using the cooking parameters [} 34] Examples of cooking parameters can be core temperature, browning level or time. > After a short time, the display in the Cockpit [} 39] will switch. >... -
Page 34: Adjusting Cooking Result To Own Requirements
5 | Intelligent cooking - iCookingSuite > The cooking parameters of the cooking path are displayed. You can customise the cooking result as you wish. After a short time, it will show that the pre-programmed start time has been activated. 7. - Page 35 5 | Intelligent cooking - iCookingSuite Level Suitable for Stage 3 Select this level if you want to cook different foods at the same time. Level 4 – humid Select this level if you want to cook food that requires a lot of additional humidity, e.g.
-
Page 36: Additional Functions
5 | Intelligent cooking - iCookingSuite 5.4.2 Additional functions Cooking cabinet humidity With this additional function, you can set the humidity in the cooking cabinet. There are 2 available levels. The higher the selected level, the more humidity will be in the cooking cabinet, and the humidity level is higher throughout the entire cooking process. -
Page 37: Information
5 | Intelligent cooking - iCookingSuite Core probe in food You will be prompted to insert the core probe into the food. Pierce You will be prompted to pierce the food, e.g. crispy pork. Fill up You will be prompted to fill up the container with liquid, e.g. for braised dishes. You will be prompted to mix the food. - Page 38 5 | Intelligent cooking - iCookingSuite 4. Close the cooking cabinet door. 5. Press the button > A window appears in which you can set the core temperature. 6. Select the desired core temperature. >> Your setting will be applied automatically after just a few seconds. Repeat this step until all the food has reached the desired core temperature.
-
Page 39: Monitor The Intelligent Cooking Path
5 | Intelligent cooking - iCookingSuite Monitor the intelligent cooking path If you have started an intelligent cooking path, the display changes to the cockpit after a short time. All cooking steps that the intelligent cooking path processes are displayed here one after the other. The active cooking step is highlighted. -
Page 40: Manual Cooking
6 | Manual cooking Manual cooking With the manual modes, the iCombi Pro supports you in your personal craft. By selecting this mode, you set the climate and select whether you want to cook the food in steam, with convection heat or with a combination of steam and convection. Then you set the cooking cabinet temperature, the air speed and cooking time and make all the necessary decisions yourself. -
Page 41: Additional Functions
6 | Manual cooking 1. If you want to operate your unit in continuous operation, press either on or slide the cooking time regulator fully to the right until the following message is displayed: Continuous operation Core temperature With this cooking parameter, you can set how high the core temperature of the food should be. If you have set the core temperature, the cooking time cooking parameter will not be available. -
Page 42: Prompts And Information
6 | Manual cooking 6.1.3 Prompts and information During the cooking process, you may see the same prompts and information [} 37] as in intelligent cooking processes. Steam 6.2.1 Cooking climate and temperature range Cooking cabinet climate Cooking methods Cooking cabinet humidity Cabinet temperature moist Steam... -
Page 43: Combination Of Steam And Convection Heat
6 | Manual cooking >> The cooking process will continue. If the cooking time has elapsed or the core temperature has been reached, an acoustic signal will ask you to check whether the food has reached the desired result. Combination of steam and convection heat 6.3.1 Cooking climate and temperature range Cooking cabinet climate... -
Page 44: Convection
6 | Manual cooking Convection 6.4.1 Cooking climate and temperature range Cooking cabinet climate Cooking methods Cooking cabinet humidity Cabinet temperature Bake 0 - 100 % 30 – 300 °C Grill Deep-fry Gratinate Glaze If the cabinet temperature is above 260 °C for 30 minutes, the temperature will be automatically reduced to 260 °C if you do not work with the unit within this period. -
Page 45: Abort Manual Cooking
6 | Manual cooking Abort manual cooking 1. Press and hold the button: > The cooking process is cancelled. The start screen will appear. Operating instructions 45 / 112... -
Page 46: Sous-Vide Cooking
7 | Sous-vide cooking Sous-vide cooking In sous-vide cooking, food is prepared, seasoned, marinated or seared, vacuum-packed in a sous-vide bag and then cooked. This intensifies the food's own flavour, preserves the natural colours, precious vitamins and minerals are retained and cooking losses are reduced thanks to the gentle cooking. After cooking, the food must be cooled. Before the food is served, it is reheated still in the plastic bag, then removed from the bag and then finished according to the final dish. -
Page 47: Low Temperature Cooking
8 | Low temperature cooking Low temperature cooking Cooking large meat and poultry products requires a great deal of monitoring and many years of cooking experience. Your units are also blocked for hours. With your cooking system, you can face these challenges with ease: You can slowly roast, boil or braise food at low temperatures during low-production periods, such as in the afternoon or in non-service periods. -
Page 48: Finishing
9 | Finishing Finishing Using Finishing, you can separate your food production from service and thus give yourself some freedom for the important things in cooking: planning, menu design or creative plating. Quality losses from keeping food warm are minimised and perfect food quality is assured. Only finish the foods that you actually need, adjust the required food to your guest numbers. -
Page 49: Iproductionmanager
10 | iProductionManager iProductionManager The iProductionManager organises the entire production process intelligently and flexibly. This includes which products can be cooked together, the optimal preparation sequence of the dishes and the monitoring of the cooking path. The iProductionManager will remind you when a product needs to be loaded or taken out. You can decide whether the food is cooked energy-optimised, time-optimised or with a specific target time. -
Page 50: Ticket Board
10 | iProductionManager 1. Press the button in the menu bar: 2. Press the button 3. Press the button 4. Select the cooking mode steam [} 42] , combination of steam and convection [} 43] or convection [} 44] 5. Adjust the cooking parameters as required. You can also set the speed of the fan wheel. To do this, press this button: 6. -
Page 51: Ticket Board Editor
10 | iProductionManager 3. Press the button > The program is sent to the iProductionManager and displayed on the ticket board. 4. To send a shopping cart to the iProductionManager, press the desired shopping cart. > The shopping cart is sent to the iProduction Manager. All programs are displayed in the ticket board. 10.2.3 Ticket board editor 1. -
Page 52: Place Ticket
10 | iProductionManager 1. To place the timer at the current time, first press the timer on the ticket board and then on the desired rack level. > The timer is placed at the current time. 2. To place the timer in the future, drag the timer to the desired rack level and desired start time. 3. -
Page 53: Combination Check
10 | iProductionManager When the desired temperature is reached, you will be asked to load the unit. The symbol appears next to the rack level. After you have loaded the unit, the rack level shows how long the food stays in the cooking chamber. When the cooking process of the ticket is finished, you will be asked to unload the unit. -
Page 54: Time Optimisation
10 | iProductionManager You have created and placed tickets. 1. Press the button > You will be asked if you really want to close the planning gaps. NOTICE! The action cannot be reversed. 2. Confirm the question with: OK >> The time gaps between the tickets are closed. The positioning of the tickets with regard to one another are maintained. -
Page 55: Energy Optimisation
10 | iProductionManager You have created and placed tickets. 1. Press the button > You will be asked whether time gaps should really be closed. NOTICE! The action cannot be reversed. 2. Confirm the question with: OK >> Depending on the combination check [} 53], the tickets are newly placed. 10.4.5 Energy optimisation You can have tickets that you have already placed in iProductionManager automatically optimised by your iCombi... -
Page 56: Edit And Delete Tickets
10 | iProductionManager 10.5 Edit and delete tickets Manual tickets If you have placed a manual ticket, subsequently you can extend the core temperature or the cooking time. You cannot edit the set climate. 1. Press the ticket. > The ticket settings are displayed. 2. -
Page 57: Planning
10 | iProductionManager 10.7 Planning With the planning function of the iProductionManager you only have to place tickets once, so that you can retrieve them at any time. It is not possible to save tickets that have already been processed as planning. The additional inject steam function is not available when planning. -
Page 58: Start Planning
10 | iProductionManager 3. Assign a name. 4. To confirm the action, press the button: >> The planning is displayed in the planning list. 10.7.2 Start planning You have created a planning [} 57]. The iProductionManager is not currently processing any tickets. When tickets are processed, a message appears, informing you that all tickets must be cancelled before planning starts. -
Page 59: Programming Mode
11 | Programming mode Programming mode In the programming mode, you can create, save and manage your own manual programs [} 59], pan allocation [} 59], pan division [} 59], intelligent cooking paths [} 61] and shopping baskets [} 63]. All the manual cooking modes [} 40], intelligent cooking paths [} 23] and preset shopping baskets are available for this. Create new programme Planning Manual operating modes... - Page 60 11 | Programming mode > An overview of the available prompts is displayed. These configurable action cards help you to plan intermediate steps during the cooking process. You can either use the preset action cards or create your own. 6. Choose the required prompts and drag them into the lower area. 7.
-
Page 61: Create An Intelligent Program
11 | Programming mode 5. To confirm the action, press the button: 6. To assign an image to the profile, press the button: 7. Press the button Select program image 8. Select an image. 9. To confirm the action, press the button: Save program 1. - Page 62 11 | Programming mode 2. Press the button > Depending on the selected cooking process, the adjustable cooking parameters and additional functions will be displayed. The standard settings of the cooking path are marked with the following symbol: 3. Adjust the cooking parameters as required. 4.
-
Page 63: Programme The Shopping Cart
11 | Programming mode 11.3 Programme the shopping cart 1. Press the button in the menu bar: 2. Press the button+ New item 3. Press the button 4. To add intelligent cooking paths to the shopping basket, press the button: >... -
Page 64: Edit And Delete Programmes
11 | Programming mode 2. To delete an item from the shopping basket, press the button: Save shopping basket 1. To give the shopping basket a name, press the button: 2. Assign a name. 3. To save the shopping basket, press the button: >>... -
Page 65: Switch Between Operating Modes
12 | Switch between operating modes Switch between operating modes With the iCombi Pro you can easily switch between the cooking modes manual cooking, iCookingSuite and iProductionManager at any time. This means that you have the optimal mix of automatic, labour-saving cooking intelligence and individually desired control options. -
Page 66: Settings
13 | Settings Settings You can permanently change the factory settings on your unit to suit your requirements. 1. Press the button > The overview of all possible settings is shown: Favourites [} 66] Display [} 66] Light [} 67] Sound [} 68] Cooking system [} 70] Cooking [} 71] Cleaning [} 73] Data management [} 74]... -
Page 67: Temperature Format
13 | Settings 2. Select the desired date. >> The date is automatically adopted. Time 1. Press the button Time > The time is displayed. 2. Press the time. 3. Set the desired time. >> The time is automatically adopted. Toggle 24h/12h 1. -
Page 68: Display Brightness
13 | Settings 13.3.1 Display brightness Here you can adjust the display brightness on a scale from 0 - 100%. 1. Press the button Display brightness 2. Select the desired value on the scale or set it using the dial. >>... -
Page 69: Program Step End
13 | Settings 7. If you would like the tone to only continue for a certain time, press the button: Continuous playback OFF > The tone length section will be active. 8. Set the duration on a 0 - 180 second scale. 9. -
Page 70: Cooking System
The control solenoid can be activated permanently if undesired condensation is to be avoided in the kitchen. The control solenoid can be deactivated if the performance of your ventilation system is sufficient, which allows you to save water. Before you activate or deactivate the function, contact your RATIONAL Service Partner. 1. Press the button Control solenoid... -
Page 71: Warning Loading Door Opening
13 | Settings 2. To activate the function, press the button: ON 3. To deactivate the function, press the button: OFF 13.5.5 Warning loading door opening Here you can set the warning to sound if the cooking cabinet door has been open for too long during loading. 1. -
Page 72: Secondary Country Cuisine
13 | Settings >> The country cuisine is immediately adopted. In the iCookingSuite, the intelligent cooking paths that correspond to the national cuisine are displayed. The cooking parameters, cooking times and core temperatures of the intelligent cooking paths are adapted to the cultural eating habits. 13.6.2 Secondary country cuisine You can add an additional country cuisine to the primary country cuisine. -
Page 73: Extra Time In Manual Programs In The Iproductionmanager
13 | Settings >> The setting is immediately adopted. 13.6.7 Extra time in manual programs in the iProductionManager Here you can set whether the cooking time should be extended in manual programs in the iProductionManager of the cooking cabinet door is opened during the cooking time and the measured energy loss is so high that the cooking result cannot be achieved with the selected setting. -
Page 74: Cleaning Plan
13 | Settings 13.7.2 Cleaning plan Here you can set on which days of the week you want the unit to perform a forced cleaning process. This means that you can ensure that cleaning and hygiene regulations are observed when the unit is in shift operation. Click here for more information: Cleaning plan [} 90] 13.8 Data management... -
Page 75: User Profile
13 | Settings 13.8.3 User profile Export profiles You have created a profiles. You have connected a USB flash drive to the unit. 1. Press the button Export profiles >> The saved programs are saved on the USB flash drive. Import profiles 1. -
Page 76: User Data: Delete All
13 | Settings 13.8.5 User data: Delete all 1. Press the button User data: Delete all. > You will be asked if you really want to delete the data. 2. Press the button > A message confirms that all your user data – cooking programs, user profiles, images, and user settings – have been deleted 13.8.6 Basic unit settings... -
Page 77: Network Settings
13 | Settings 1. Press the button Service report: Export all >> The service reports are now downloaded to a USB flash drive. Export error statistics log You have connected a USB flash drive to the unit. 1. Press the button Copy the error statistics log to a USB flash drive >>... -
Page 78: 13.10.2 Edit Profile
13 | Settings >> When you open the start screen, the activated profile is displayed. If several profiles are displayed, you can scroll through the list. To create a new profile, press the button: + 13.10.2 Edit profile You have created a profile. 1. -
Page 79: 13.10.3 Add Profiles
13 | Settings Programming mode can be shown or hidden. iCareSystem can be shown or hidden. Create and edit screen 1. Press the button ON or OFF, the option : Create and edit screen to enable or disable the option Create new screen [} 80]. -
Page 80: 13.10.4 Edit Screen
13 | Settings 2. Press the button from a profile template to create a new profile from a profile template. 13.10.4 Edit screen You have created a new screen. 1. Press the button Edit screen > The functions and intelligent assistants of the menu bar are displayed. 2. -
Page 81: 13.11.1 Software Update Info
Serial number information Hotline - Chef [} 97] Hotline - Service [} 97] Service levels This function is only available to RATIONAL Service Partners. Software update info [} 81] Installed software version [} 81] Service messages of the last 14 days Open source licences 13.11.1 Software update info... - Page 82 13 | Settings Automatically transfer HACCP data 1. Press the button ON or OFF >> Your cooking system will not automatically transfer HACCP data to ConnectedCooking when you press OFF. As soon as you press the ON button, the cooking system automatically transfers the HACCP data to ConnectedCooking.
-
Page 83: Kitchen Management
When you network your units, you have the following options: Operate both units of a Combi-Duo installation on just one unit. Connecting units with ConnectedCooking. If you want to network the units of a Combi-Duo installation, please contact your RATIONAL service partner. Operating instructions 83 / 112... -
Page 84: Establishing A Wifi Connection
14 | Kitchen management 14.2.1 Establishing a WiFi connection If you want to connect the unit to a WiFi network where you have to log in via a website, the WiFi connection cannot be established. 1. Press the button 2. Press the button Network 3. -
Page 85: Establish Network Connection
RATIONAL units, ConnectedCooking offers you completely new and convenient application options. The only thing you need to do is connect your RATIONAL unit to a network and register at connectedcooking.com. In ConnectedCooking you can see the online status, cleaning details, the operating statistics and if the HACCP requirements are being complied with at a glance. -
Page 86: Perform Software Update
14 | Kitchen management Registration without smartphone 1. Write down the PIN. 2. Log on towww.connectedcooking.com. 3. Click on the symbol: Unit management 4. Select: Unit overview 5. Click on the symbol: Red cross with + 6. In the Name field, enter a unit name. 7. -
Page 87: Automatic Cleaning - Icaresystem
15 | Automatic cleaning - iCareSystem Automatic cleaning - iCareSystem The iCareSystem is the intelligent cleaning and descaling system in the iCombi Pro. It recognises how dirty the unit is and proposes the ideal cleaning program and the optimal quantity of care products. Eco mode Normal mode Cleaning programs... -
Page 88: Cleaning Modes
15 | Automatic cleaning - iCareSystem If a care product gets into your eyes, rinse your eyes with running water for 15 minutes. Remove any contact lenses. If you swallow a care product, rinse out your mouth with water and immediately drink half a litre of water. -
Page 89: Start Automatic Clean
If foam forms in the cooking cabinet during the automatic clean although you used the recommended number of Active Green cleaner tablets, reduce the number of tabs in the next automatic clean. If foam still forms, contact your RATIONAL Service Partner. 15.6 Abort automatic clean You can abort all automatic cleaning programs at any time. -
Page 90: Forced Cleaning
15 | Automatic cleaning - iCareSystem > You will be asked if you really want to cancel the clean. It will be displayed how long the process will be aborted. 2. Press the button > Remove the Active Green cleaner tabs. 3. - Page 91 15 | Automatic cleaning - iCareSystem 8. Press on in the icon bar to return to the overview of the cleaning time schedule. 9. Select the day on which a clean is to be performed. 10. Press the button: ON 11. Set the time when the clean is to be performed. 12.
-
Page 92: Care
16 | Care Care WARNING Fat or food residues in the cooking cabinet If you do not clean the cooking cabinet sufficiently, there is a risk of fire from fat and food residues. 1. Clean the unit daily. 2. In the event of fire, leave the cooking cabinet door closed. This will remove the oxygen from the fire. Turn off the unit. -
Page 93: Cleaning Cooking Cabinet Door
16 | Care Clean accessories with lukewarm water, a mild hand dishwashing detergent and a soft cloth. Unsuitable care products Do not clean the unit, its functional parts and accessories with the following unsuitable care products: Scouring cleaning agents or abrasive cloths Substances containing hydrochloric acid, caustic solution, sulphur or other oxygen-requiring substances Undiluted alcohol, methanol or solvents such as acetone, benzene, toluene or xylene Oven cleaner or grill cleaner... -
Page 94: Descaling The Moistening Nozzle
16 | Care The cooking cabinet door is open. 1. Clean the cooking cabinet door gasket with lukewarm water, a mild hand dishwashing detergent and a soft cloth. 2. Let the cooking cabinet door gasket dry completely. 16.5 Descaling the moistening nozzle Required tool Hexagon key Turn off the unit. -
Page 95: Cleaning The Hand Shower
16 | Care 1. Insert the screwdriver in the slot of the air filter cover and press the air filter backwards. 2. Pull out the air filter. 3. Clean the air filter in the dishwasher and then leave it to dry completely. >... - Page 96 16 | Care 3. In case of stubborn dirt, soak the accessories in lukewarm water and then remove the dirt with a soft cloth. 96 / 112 Operating instructions...
-
Page 97: Inspiration And Help
. You can find the number for ® ChefLine on the sticker on the cooking cabinet door, or in the settings under Service and at rational-online.com. RATIONAL Service Partners Our units are reliable and have a long service life. Should customers ever encounter technical issues; our RATIONAL Service Partners will provide fast, efficient assistance. -
Page 98: Error Messages Heating Steam Generator
17 | Inspiration and help For all error messages, please contact your RATIONAL Service Partner. Always keep the serial number of your unit and the version number of the installed software to hand. Both can be found in the error message. -
Page 99: Error Messages Heating Hot Air
17 | Inspiration and help Error report Cause Cooking possible Service 32.3 The gas burner is faulty. Close the shut-off valve on the gas line. Service 33.1 The gas burner is faulty. Close the shut-off valve on the gas line. Service 33.2 The gas burner is faulty. -
Page 100: Icaresystem Error Messages - Cleaning
17 | Inspiration and help 17.4.5 iCareSystem error messages - Cleaning Error report Cause Cooking possible Service 25 The water quantity required by the – iCareSystem is too low. Service 26 The ball valve cannot find the open position. Service 27 The ball valve cannot find the closed position. - Page 101 17 | Inspiration and help Error report Cause Cooking possible Service 52.2 The cooking cabinet lighting is not working correctly. Service 72 The activation temperature of a temperature probe has been exceeded. Operating instructions 101 / 112...
-
Page 102: Maintenance
18 | Maintenance Maintenance You can perform the following maintenance work yourself: Replacing air filter [} 102] Replacing the cooking cabinet door gasket [} 102] 18.1 Replacing air filter NOTICE Do not use sharp objects Do not use sharp objects such as knives to open the air filter cover as this may damage the filter holder. NOTICE Spraying water may damage the unit if the air filter is not correctly mounted Protection from water jets from all directions is only assured with a correctly mounted air filter. - Page 103 18 | Maintenance Open the cabinet door. 2. Pull the cooking cabinet door gasket out from the groove and dispose of it. 3. Moisten the retaining lips of the new gasket with soapy water. 4. First press the corners of the gasket into the corners of the groove. 5.
-
Page 104: Transport
19 | Transport Transport 19.1 Transport unit WARNING The castors can be damaged if the unit or the Combi-Duo is moved with the parking brakes applied If the castors are damaged, the unit or the Combi-Duo could tip over and seriously injure you. 1. - Page 105 19 | Transport 3. If you would like to pull the unit forwards slightly when cleaning the kitchen, release the parking brakes of the mobile stand or the castors. 4. Carefully pull the unit forwards. 5. Once you are finished with cleaning the kitchen, carefully slide the unit back into place and apply the parking brakes.
-
Page 106: Decommissioning And Disposal
20 | Decommissioning and disposal Decommissioning and disposal 20.1 Decommissioning Contact your RATIONAL Service Partner if you would like to decommission the unit. 20.2 Disposal Old units contain recyclable materials. Dispose of old units in an environmentally sound way using the appropriate disposal systems. -
Page 107: Technical Data
21 | Technical data Technical data Please also note the technical data on the model plate. The model plate is on the left next to the control panel. 21.1 Units with an electrical connection Value Weight (without packaging) Model XS 6-2/3 64 kg Protection class IPX5... -
Page 108: Regulatory Information
22 | Regulatory Information Regulatory Information This device complies with part 15 of the FCC Rules. Operation is subject to the following two conditions: (1) This device may not cause harmful interference, and (2) this device must accept any interference received, including interference that may cause undesired operation. This equipment has been tested and found to comply with the limits for a Class A digital device, pursuant to part 15 of the FCC Rules. -
Page 109: Index
Index Cooking level 35 Cooking time 35 Abort 39, 45 Cool-down function 41 Abort cooking process 36, 39, 45 Core probes Air filter Baked goods 21 Cleaning 95 Error report 21 Air speed 36, 41 Fish fillets 20 Automatic cleaning Inserting into the food 19 Cleaning programs... - Page 110 Replace gasket 103 Replacing air filter 102 Manual cooking Combination of steam and convection heat 43 Convection 44 Steam 42 37 Move core probe 37 Moves 17 New batch 38 Online help 97 Operating the unit Central dial 17 Moves 17 Performing maintenance yourself 102...
- Page 112 RATIONAL UK Limited Siegfried-Meister-Straße 1 86899 Landsberg am Lech Tel. +49 (0)8191 3270 Fax +49 (0)8191 21735 info@rational-online.com rational-online.com...
Need help?
Do you have a question about the iCombi Pro XS 6-2/3 and is the answer not in the manual?
Questions and answers