Advertisement
Quick Links
REQUEST A QUOTE AT WWW.AUTHORIZEDPARTS.COM
MAR/DCR Series Groups 3, 9, 12, 16, 25 &40
Installation Manual
Safety First
In the maintenance and operation of mechanical equipment,
the basic factor which must be considered at all times. Through the
use of the proper clothes, tools and methods of handling, serious
accidents causing injury to you or your fellow worker can be prevented.
Throughout this manual are listed a number of safety precautions.
Study them carefully and follow them; also insist upon those working
for you do the same. Remember, an accident is usually caused by
someone's carelessness, neglect or oversight.
To prevent ignition of hazardous atmospheres, do not
remove actuator cover while curcuits are live.
Installation
1.
Operate valve manually before installing actuator and place into
open position.
2.
If valve is equipped with mechanical position stops they should
be removed, but care should be taken not to damage or remove
necessary parts from the valve.
3.
When actuator is supplied separately from valve, actuator will
be shipped in valve open position and care should be taken to
maintain proper alignment between the actuator and valve
shafts. If actuator and valve shafts are not in correct alignment
repeat operation number one (1) with correction as required.
Direction of rotation is defined as the direction the actuator
output shaft rotates (CW or CCW) as viewed from above the top
of the actuator.
4.
Mount the actuator to the valve. The actuator is usually mounted
parallel to the run of the pipe. Tighten all bolts and nuts evenly,
taking care to center the actuator on the valve stem. It is often a
good idea to manually cycle the actuator while the mounting
bolts are somewhat loose. This will allow the unit to center
itself.
5.
Loosen socket set screw and remove the manual declutching
knob (Models MAR/DCR10, 50 & 90 only).
6.
Remove the hex bolts located around the enclosure of the
actuator.
7.
Wire per diagram, or if actuator is of special design, wiring
diagram is included with unit. Wiring diagram is drawn with the
actuator in the open position. Use #18AWG stranded wire or
better, for field hook-up.
SAFETY
CAUTION
8.
Manually operate the actuator from one extreme to the other
several times.
is
To Manually Operate:
Models MA8, MAR8:
•
Manual operation is accomplished by use of an open-end
wrench on the hex stock-coupling adapter.
•
Direction of rotation and or position can be checked by
indicator located on output shaft.
•
Avoid turning beyond normal open/close travel.
Models MAR10, 50 & 90:
•
Pull the black declutching knob (A) all the way up and hold.
Gently rock shaft back and forth with wrench to disengage, and
rotate to desired position as indicated by the arrows.
•
Actuator will automatically re-engage when "knob" is released
and electrical power is applied.
•
Avoid turning beyond normal open/close travel.
Models MAR100, 120, 160, 250, 800, 1600 & 4000:
•
Depress and rotate handwheel slowly until detent is felt to
engage.
•
Turn handwheel in desired direction (note markings on wheel
and check position by indicator located on output shaft).
•
Avoid turning beyond normal open/close travel.
•
When handwheel is returned to raised position, electrical
operation is restored (see manual cut-off switch).
Manual cut-off switch:
When handwheel is depressed for manual operation, an integral
cut-off switch prevents injury due to unexpected restoration of
electrical power and is automatically reset when handwheel is
returned to raised position. (Models MAR100, 160, 250, 800,
1600 & 4000 only)
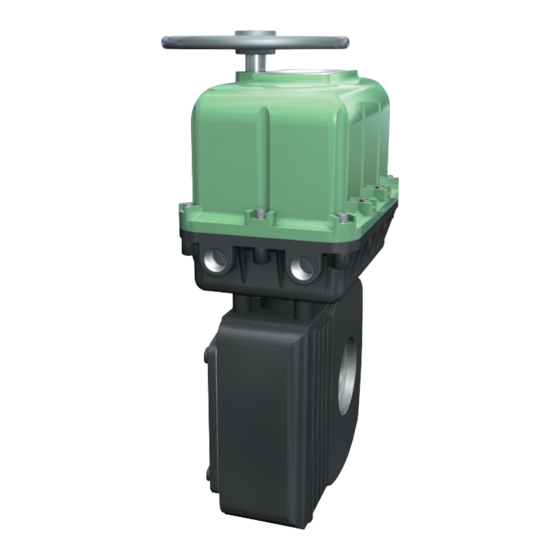
Manual Declutching Knob
MAR10, 50 & 90 Only
1
RCS Actuators
Advertisement

Subscribe to Our Youtube Channel
Related Manuals for Dresser MAR Series


Summary of Contents for Dresser MAR Series
- Page 1 REQUEST A QUOTE AT WWW.AUTHORIZEDPARTS.COM RCS Actuators MAR/DCR Series Groups 3, 9, 12, 16, 25 &40 Installation Manual Safety First Manually operate the actuator from one extreme to the other several times. In the maintenance and operation of mechanical equipment, SAFETY To Manually Operate: the basic factor which must be considered at all times.
- Page 2 REQUEST A QUOTE AT WWW.AUTHORIZEDPARTS.COM CAUTION To prevent ignition of hazardous atmospheres, do not remove actuator cover while curcuits are live. CAM 1 CAM 2 CAM 3 Cam Adjustment–Square Group 3: CAM 4 MAR8 Models Cam adjustments (if required), as follows: Open (counter-clockwise) direction of travel: Loosen setscrew on Cam 1 (and Cam 3 for auxiliary switches) to give the cam(s) a finger tight grip on the...
- Page 3 REQUEST A QUOTE AT WWW.AUTHORIZEDPARTS.COM If travel is not correct, repeat steps (a) through (e). Tighten the setscrew on Cam 2. Replace cover by screwing in a clockwise direction. Ensure the If auxiliary switches were provided, rotate Cam 4 about 2 cover is tight.
- Page 4 REQUEST A QUOTE AT WWW.AUTHORIZEDPARTS.COM Cam Adjustment–Group 9: MAR/DCR10, 50, 90–Part Turn Models (new style) CAM 4 Switch 4 CAM 3 Switch 3 Cam adjustments (if required), as follows: CAM 2 Switch 2 Open (counter-clockwise) direction of travel: CAM 1 Switch 1 Loosen setscrew on Cam 2 (and Cam 4 for auxiliary switches) to give the cam(s) a finger tight grip on the shaft.
- Page 5 REQUEST A QUOTE AT WWW.AUTHORIZEDPARTS.COM If auxiliary switches were provided, continue to rotate Cam If travel is not correct, repeat steps (a) through (e). 4 about 2 degrees in the same direction. Then tighten the Close (clockwise) direction of travel: setscrew.
- Page 6 REQUEST A QUOTE AT WWW.AUTHORIZEDPARTS.COM Manually move the actuator to the full “open” position. To set the close (clockwise) direction of travel by adjusting the switch plate: Rotate Cam 7 (and Cams 9 & 11) counter-clockwise until it engages the switch roller and the switch just “breaks”. Loosen Pivot and Micro-adjustment screws on the close You should hear a light click.
- Page 7 REQUEST A QUOTE AT WWW.AUTHORIZEDPARTS.COM Rotate Cam 1 (and Cam 3) clockwise until it engages the Note: In the event that the above procedure does not give the necessary travel control, the micro-adjustment cam must switch roller and the switch just “breaks”. You should hear a light click.
- Page 8 REQUEST A QUOTE AT WWW.AUTHORIZEDPARTS.COM Cam Adjustment–Group 12 Multi- Turn Models: MAR120 & 250–5, 8, 13 & 50 Cam 10 Switch 10 Turn Models Switch 3 Cam 3 Switch 8 Cam 8 Cam adjustments (if required), as follows: Cam 1 Switch 1 Open (counter-clockwise) direction of travel: Loosen setscrew on Cam 8 (and Cam 10 for auxiliary...
- Page 9 REQUEST A QUOTE AT WWW.AUTHORIZEDPARTS.COM Cam Adjustment–Group 12 Multi- Turn To set the open (counter-clockwise) direction of travel by adjusting the switch plate: Models: MAR120 & 250–18 & 26 Turn Loosen Pivot and Micro-adjustment screws on the open Models switch stack (switches 1 and 3). Cam adjustments (if required), as follows: If the actuator has not reached the full open position, rotate the micro-adjustment cam to swing the switch...
-
Page 10: Technical Data
REQUEST A QUOTE AT WWW.AUTHORIZEDPARTS.COM MA8 & MAR8 Parts List & Technical Data 4.38 Sq. 1/2 N.P.T. 1.37 4 Switch Option 1.25 2.19 1.50 Sq. 10-24 UNC-2B x .44 DP. .279 4 Places as shown Parts List .281 Across OSS Flats Loc. - Page 11 REQUEST A QUOTE AT WWW.AUTHORIZEDPARTS.COM MAR8RH Parts List & Technical Data 4.88 For Cover Removal 7.47 3/4” 14 N.P.T. 2 Places .375 6.12 Dia. Of Actuator .375 3.12 #10-24.50 Deep 4 Places .750. 1.500 Sq. 6.25 .436/.432 Across Flats .562/.561 (Output Shaft) Technical Data Parts List...
- Page 12 REQUEST A QUOTE AT WWW.AUTHORIZEDPARTS.COM MAR10, 50 & 90 Parts List & Technical Data 8.00 Clearance for Cover Removal 9.81 Manual Position 9.41 (MAR10, Auto 13, 25, Position 50 & 90) (MAR10, 15, 13, 25, 50 & 90) 7.41 3/4” N.P.T (MAR9, 12, 24, 49 &...
- Page 13 REQUEST A QUOTE AT WWW.AUTHORIZEDPARTS.COM MAR100, 160, 250 & 800 Parts List & Technical Data 9.00 Dia. 10.00 Clearance for Cover Removal 2.14 13.50 Auto Position 13.00 Manual Position 10.44 2.69 3/4” NPT 2 Places 2.06 1.03 for MAR100, 1.124/1.125 Dia. 120, 160 4.18 3.30...
- Page 14 REQUEST A QUOTE AT WWW.AUTHORIZEDPARTS.COM MAR1600 & 4000 Parts List & Technical Data 2.38 10.00 21.00 Max Manual Clearance Position for Cover Mounting 3.00 Auto Removal 1.96 5.62 Max Surface Position 8.36 4.56 Max 1.94 3.250 Dia. x 3.75 DP. 2.500 1/2 x 1/4 Key Slot (2-Places) 5.000 Sq.
-
Page 15: Maintenance
REQUEST A QUOTE AT WWW.AUTHORIZEDPARTS.COM Maintenance the common and both legs or no power at all, would indicate cam and or wiring adjustment(s) are required. The actuator is constructed with an adequately lubricated gear case section, this lubricant need never be changed. However, through 1e. - Page 16 REQUEST A QUOTE AT WWW.AUTHORIZEDPARTS.COM Industrial Products Group Dresser, Inc. 16240 Port Northwest Drive Houston, Texas 77041-2645 USA Ph: 832.590.2306 Fax: 713.849.2879 Toll Free Phone: 800.945.9898 Email: rcs@dresser.com www.dresser.com ©2008 Dresser, Inc. mar/dcr_im RCS and DRESSER are registered trademarks of Dresser, Inc. 1.09...
Need help?
Do you have a question about the MAR Series and is the answer not in the manual?
Questions and answers
how do i wire up the unit?
how do i set the position feedback on a mar100-30 actuator