Table of Contents
Advertisement
Available languages
Available languages
Quick Links
Advertisement
Chapters
Table of Contents

Related Manuals for OHAUS Pioneer PXP Series


Summary of Contents for OHAUS Pioneer PXP Series
- Page 1 P P ioneer PXP Series Balances Instruction Manual Pioneer Balanzas Serie PXP Manual de Instrucciones Pionnier Balance de Séries PXP Manuel d’instruction Pioneer PXP-Serie Waagen Bedienungsanleitung Bilance Pioneer Serie PXP Manuale di Istruzioni...
-
Page 3: Table Of Contents
PXP Series Balance EN-1 Table of Contents 1. INTRODUCTION ......................EN-3 Description ............................. EN-3 Features ..............................EN-3 Definition of Signal Warnings and Symbols ................... EN-3 Safety Precautions ..........................EN-3 2. INSTALLATION ....................... EN-4 Unpacking .............................. EN-4 Select the Location ..........................EN-4 Leveling .............................. - Page 4 EN-2 PXP Series Balance 5.6.4 Print To ............................. EN-24 5.6.5 Auto Print ............................EN-24 5.6.6 Header ............................. EN-24 5.6.7 Date and Time..........................EN-24 5.6.8 Balance ID ............................EN-25 5.6.9 Balance Name..........................EN-25 5.6.10 User Name ............................EN-25 5.6.11 Project Name ........................... EN-25 5.6.12 Application Name ..........................
-
Page 5: Introduction
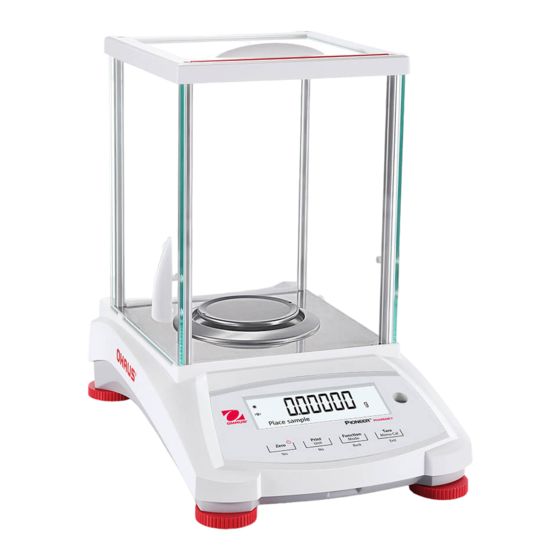
PXP Series Balance EN-3 1. INTRODUCTION 1.1 Description The PXP balance is a precision weighing instrument that will provide you with years of service if properly cared for. PXP balances are available in capacities from 52 grams to 4200 grams. 1.2 Features Operation Controls: 2-line backlit display, with 3 weighing applications and many other features. -
Page 6: Installation
EN-4 PXP Series Balance 2. INSTALLATION 2.1 Unpacking Carefully remove your PXP balance and each of its components from the package. The included components vary depending on the balance model (see the list below). Save the packaging to ensure safe storage and transport. Please read the manual completely before installing and using the Adventurer balance to avoid incorrect operation. -
Page 7: Connecting Power And Acclimating The Balance
PXP Series Balance EN-5 2.4 Connecting Power and Acclimatising the Balance Connect the DC output connector to the power receptacle on the rear of the balance. Then connect the AC adapter plug to a suitable electrical outlet. Acclimatising It is suggested that the balance should not be used until it has been connected to power and acclimatised to the environment for a certain period of time. -
Page 8: Operation
EN-6 PXP Series Balance 3. OPERATION Overview of Display, Home Screen The PXP balance has a 2-line backlit display. CONTROLS CONTROL FUNCTIONS Button On / Zero Print Function Tare Primary Function If the Indicator is Sends the current Operation is Performs tare (Short Off, turns on the... -
Page 9: Principal Functions And Main Menu
PXP Series Balance EN-7 MAIN APPLICATION SCREEN Net (NET) Result Field: Stability (*) Information varies Negative (-) by application Centre of Zero (>0<) Pre-tare (PT) Unit Instructional Messages Principal Functions and Main Menu Weighing: First press Zero to set the display to zero. Place an object on the pan. The display indicates the gross weight. -
Page 10: Applications
EN-8 PXP Series Balance 4. APPLICATIONS The PXP balance can be operated in 4 application modes by long pressing the Function / Mode button. Weighing Note: Before using any application, be sure the balance has been leveled and calibrated. Use this application to determine the weight of objects in the selected unit of measure. Weighing 1. - Page 11 PXP Series Balance EN-9 3. After confirmation by pressing Yes, the message "Clear APW?" will appear on the screen. 4. If the APW of the last Parts Counting operation needs to be kept, press No when the message "Clear APW?" displays. 5.
-
Page 12: Percent Weighing
EN-10 PXP Series Balance APW Optimization: Improving counting accuracy by re-calculating the piece weight automatically as parts are added. APW Optimization occurs only when the number of pieces added to the pan is between one and three times the number already on the pan. -
Page 13: Formulation
PXP Series Balance EN-11 6. Remove the reference sample and place the test object on the pan. The ratio of the test object to the reference sample weight displayed percentage. 7. To view the reference sample weight or the test object weight, press the Function / Mode button. - Page 14 EN-12 PXP Series Balance 4. Then, the message "Place component 2" will display. 5. Remove the first ingredient, add the second ingredient to the pan, and press the Function / Mode button to store the second weight. 6. Continue adding components, press Function / Mode button to store the weights.
-
Page 15: Additional Features
PXP Series Balance EN-13 Additional Features Weigh Below Note: Ensure the balance has been leveled and calibrated. The PXP balance is equipped with a weigh below hook for weighing below the balance (as shown in the figure below). Before turning the balance over, remove the pan and draft shield elements (if present) to prevent damage. Do not place the balance on the pan support cone or load cell pins. -
Page 16: Menu Settings
EN-14 PXP Series Balance 5. MENU SETTINGS 5.1 Menu Navigation Table 5-1 User Menu Structure Factory Calibration Setup Units RS232 Print Lockout Reset Internal Cal Language Gram Baud Rate Stable Only Header 1 Reset All Calibration InCal Adjust Filter Level Kilogram Transmission Numeric Only... -
Page 17: Calibration
PXP Series Balance EN-15 5.2 Calibration PXP balances offer a choice of three calibration methods: Internal Calibration (for InCal models only), Span calibration and Linearity Calibration. Attention: Do not disturb the balance during any calibration. 5.2.1 Calibration Sub-menu (InCal models) Note: ExCal models only have Span Calibration and Linearity Calibration. - Page 18 EN-16 PXP Series Balance Steps for span calibration 1. Press and hold the Tare / Menu-Cal button, and the Calibration Menu will display. 2. Press Yes to enter the Calibration Menu. To change the calibration mode, press No until Span Cal (span calibration) is displayed.
-
Page 19: Linearity Calibration
PXP Series Balance EN-17 8. Once the span calibration is completed successfully, "Calibration done" will display. Press any button to return to the previous screen. 5.2.5 Linearity Calibration Linearity calibration uses three calibration points, one at zero load and the others at specified loads. For detailed calibration mass information, please see the specification tables in section 9.1. -
Page 20: Balance Setup
EN-18 PXP Series Balance 4. Calibration masses value will be shown in the screen. After the display shows "Place weights" and "50.0000 g", place weight(s) of 50 g on the pan for calibration. 5. Remove the weight(s) of 50 g from the pan. After a while, "100.0000 g"... -
Page 21: Language
PXP Series Balance EN-19 Factory Reset Menu: All settings are locked. Entering the password: The password should be a combination of 1, 2 and 3 with the maximum length of 6 digits. Button Instructional Numeric/Function 1 / Confirm 2 / Cancel message "Do you confirm?"... -
Page 22: Graduations
EN-20 PXP Series Balance 5.3.6 Graduations Set the displayed readability of the balance. 1 Division = standard readability. 10 Divisions = readability is increased by a factor of 10. For example, if the standard readability is 0.01 g, selecting 10 Divisions will result in a displayed reading of 0.1 g. 5.3.7 Date Format Set the current date format. -
Page 23: Approved Mode
PXP Series Balance EN-21 5.3.14 Approved Mode Use this menu to set the Legal for Trade status. Off = standard operation. On = operation complies with Legal Metrology regulations. Note: When Approved Mode is set to On, the menu settings are affected as follows: Calibration Menu: For InCal models, only Internal Calibration is available. - Page 24 EN-22 PXP Series Balance Changing Weighing Units 1. Press and hold the Print / Unit button until the Unit Menu is displayed. 2. The default unit is gram (g). To change the unit, press No to advance to the next unit. 3.
-
Page 25: Rs232 Interface Setup
PXP Series Balance EN-23 Custom Unit = Conversion Factor x Grams. The LSD is the value by which the displayed weight is incremented or decremented. Note: The conversion factor is used by the balance to convert grams to the custom weighing unit and is defined by entering a factor and an exponent. -
Page 26: Handshake
EN-24 PXP Series Balance 5.5.3 Handshake Set the flow control method. None = no handshaking Xon-Xoff = XON/XOFF handshaking Hardware = hardware handshaking 5.6 Print Settings Enter this sub-menu to customize data transfer settings. 5.6.1 Stable Only Off = values are printed immediately, regardless of stability. On = values are printed only when the stability criteria are met. -
Page 27: Balance Id
PXP Series Balance EN-25 5.6.8 Balance ID On = the balance ID is printed. Off = the balance ID is not printed. 5.6.9 Balance Name On = the balance name is printed. Off = the balance name is not printed. 5.6.10 User Name On = the user name is printed. -
Page 28: Glp
EN-26 PXP Series Balance 5.7 GLP Enter this menu to set the Good Laboratory Practices (GLP). 5.7.1 Header Enables the printing of GLP headings. There are up to 5 headings available. Alphanumeric settings up to 25 characters are available for each Header setting 5.7.2 Balance Name Set the balance name. -
Page 29: Legal For Trade Lft
PXP Series Balance EN-27 6. LEGAL FOR TRADE LFT When the balance is used in trade or a legally controlled application it must be set up, verified and sealed in accordance with local weights and measures regulations. It is the responsibility of the purchaser to ensure that all pertinent legal requirements are met. -
Page 30: Printing
Use RS232 Interface Commands (Section 9.6.1) to control the balance from a PC. SPDC Software The Serial Port Data Collection or SPDC software is provided by Ohaus and can be used on operating systems that do not have the HyperTerminal software mentioned above. SPDC software can preliminarily collect and transfer the data to Microsoft files (such as Excel, Word, etc.). -
Page 31: Output Format
PXP Series Balance EN-29 Output Format The Result Data, and G/N/T data, is output in the following format. Term. Field: Label Space Weight Space Unit Space Stability Space G/N Space Characters Length: Note: 1. The length of the label field is not fixed. 2. - Page 32 Tare: 0.00 Reference weight: 100.000 g Averaging Time: 10 s Signature: ____________ Signature: ____________ Verified By: ____________ Verified By: ____________ INTERNAL CALIBRATION SPAN CALIBRATION LINEARITY CALIBRATION -OHAUS- -OHAUS- -OHAUS- 03/19/2000 04:51:46 07/26/2017 05:16:53 01/01/2000 17:30:47 Balance ID: Balance ID: Balance ID:...
-
Page 33: Maintenance
PXP Series Balance EN-31 8. MAINTENANCE Calibration Periodically verify calibration by placing an accurate weight on the balance and viewing the result. If calibration is required, refer to section 5.2 for instructions. Cleaning WARNING: Disconnect the balance from the power supply before cleaning. Make sure that no liquid enters the interior of the balance. -
Page 34: Service Information
EN-32 PXP Series Balance Service Information If the troubleshooting section does not resolve your problem, contact an Authorized Ohaus Service Agent. Please visit our website www.ohaus.com to locate the Ohaus office nearest you. 9. TECHNICAL DATA Specifications Ambient conditions Indoor use only Altitude: Up to 2000 m Specified Temperature range: 10°C to 30°C... - Page 35 PXP Series Balance EN-33 TABLE 9-1. SPECIFICATIONS InCal Model PXP125D PXP85 PXP225D PXP124 PXP224 PXP223 PXP523 Capacity (g) 52/120 82/220 0.00001/ 0.00001/ Readability d (g) 0.00001 0.0001 0.0001 0.001 0.001 0.0001 0.0001 Repeatability (STDEV) 0.00002/ 0.00002/ 0.00002 0.0001 0.0001 0.001 0.001 0.0001 0.0001...
- Page 36 EN-34 PXP Series Balance TABLE 9-2. SPECIFICATIONS (continued) InCal Model PXP822 PXP1602 PXP2202 PXP4202 Capacity (g) 1600 2200 4200 Readability d (g) 0.01 0.01 0.01 0.01 Repeatability (STDEV) (g) 0.01 0.01 0.01 0.01 Linearity (g) 0.02 0.02 0.02 0.02 Stabilization Time Typical (s) Sensitivity Temperature Drift (PPM/K) ±6 ±6...
- Page 37 PXP Series Balance EN-35 TABLE 9-3. SPECIFICATIONS (continued) InCal Model PXP224M PXP323M PXP523M PXP2202M PXP4202M Capacity (g) 2200 4200 Readability d (g) 0.0001 0.001 0.001 0.01 0.01 Repeatability (STDEV) (g) 0.0001 0.001 0.001 0.01 0.01 Linearity (g) 0.0002 0.002 0.002 0.02 0.02 Stabilization Time Typical (s)
-
Page 38: Drawings And Dimensions
EN-36 PXP Series Balance Drawings and Dimensions Fully assembled dimensions Figure 9-1 0.001g / 0.0001g / 0.00001 g model Figure 9-2 0.01 g / 0.1 g model Accessories TABLE 9-4 ACCESSORIES DESCRIPTION PART NUMBER Auxiliary Display AD7-RS 30472064 Density Kit 80253384 USB Interface Cable 83021085... -
Page 39: Communication
PXP Series Balance EN-37 Communication 9.4.1 Interface Commands Commands listed in the following table will be acknowledged by the balance. Command Function Characters Immediate Print of displayed weight (stable or unstable). Print displayed weight (stable or unstable). Continuous Print. Print on Stability. Enter Print Header Lines Same as pressing Zero Key Same as pressing Tare Key. - Page 40 Not selectable USB Interface The Ohaus USB Interface is a unique solution to the problem of connecting a balance to a computer using a Universal Serial Bus (USB). USB devices are categorized into classes such as disk drives, digital cameras, printers, etc.
-
Page 41: Usb Connection
Once Auto-Print is activated in the menu, the balance will send data as required. If there is data in the print buffer the printer will finish printing this data. SOFTWARE UPDATES Ohaus is continuously improving its balance software. To obtain the latest release, please contact your Authorized Ohaus Dealer or Ohaus Corporation. -
Page 42: Compliance
This Class A digital apparatus complies with Canadian ICES-003. ISO 9001 Registration In 1994, OHAUS Corporation, USA, was awarded a certificate of registration to ISO 9001 by Bureau Veritas Quality International (BVQI), confirming that the OHAUS quality management system is compliant with the ISO 9001 standard’s requirements. - Page 43 Ohaus. In lieu of a properly returned warranty registration card, the warranty period shall begin on the date of shipment to the authorized dealer. No other express or implied warranty is given by Ohaus Corporation. Ohaus Corporation shall not be liable for any consequential damages.
- Page 45 Balanza Serie PXP ES-1 Índice 1. INTRODUCCIÓN ....................... ES-3 Descripción ............................ES-3 Funcionalidades ............................. ES-3 Definición de las señales y símbolos de advertencia ................ES-3 Precauciones de seguridad ........................ES-3 2. INSTALACIÓN ........................ES-4 Desembalaje ............................ES-4 Seleccionar la ubicación ........................ES-4 Nivelación...............................
- Page 46 ES-2 Balanza Serie PXP 5.6.5 Auto Print (impresión automática) ....................ES-25 5.6.6 Header (encabezado) ........................ES-25 5.6.7 Date and Time (fecha y hora) ......................ES-25 5.6.8 Balance ID (Id. de la balanza) ......................ES-25 5.6.9 Balance Name (nombre de la balanza) ................... ES-25 5.6.10 User Name (nombre de usuario) .....................
-
Page 47: Introducción
Balanza Serie PXP ES-3 1. INTRODUCCIÓN 1.1 Descripción La Balanza PXP es una balanza de precisión que le proporcionará años de servicio si se cuida correctamente. Las Balanzas PXP están disponibles en capacidades desde 52 gramos a 4200 gramos. 1.2 Funcionalidades Comandos de operación: pantalla retroiluminada de 2 líneas, con 3 aplicaciones y varias funciones de pesaje. -
Page 48: Instalación
ES-4 Balanza Serie PXP 2. INSTALACIÓN 2.1 Desembalaje Extraiga con cuidado la balanza PXP y cada uno de sus componentes del paquete. Los componentes incluidos varían dependiendo del modelo de balanza (consulte la lista a continuación). Conserve el embalaje para asegurar un almacenamiento y transporte seguro. Lea el manual antes de instalar y utilizar la balanza PX para evitar un manejo incorrecto. -
Page 49: Conexión De La Alimentación Y Aclimatación De La Balanza
Balanza Serie PXP ES-5 2.4 Conexión de la alimentación y aclimatación de la balanza Conecte el conector de salida de CC a la toma de corriente en la parte posterior de la balanza. A continuación, conecte el enchufe del adaptador de CA a una toma de corriente adecuada. Aclimatación Se recomienda no utilizar la balanza hasta que la unidad esté... -
Page 50: Funcionamiento
ES-6 Balanza Serie PXP 3. FUNCIONAMIENTO Descripción de la pantalla, pantalla de inicio La balanza PXP cuenta con una pantalla retroiluminada de 2 líneas. CONTROLES FUNCIONES DE CONTROL Botón On / Zero Print Function Tare Función Si el indicador está Envía el valor La operación Realiza la... -
Page 51: Funciones Principales Y Menú Principal
Balanza Serie PXP ES-7 PANTALLA DE LA APLICACIÓN PRINCIPAL Neto (NETO) Estabilidad (*) Campo de resultados: Negativo (-) la información varía según la Centro de cero (>0<) aplicación Pre-tara (PT) Unidad Mensajes de instrucción Funciones principales y menú principal Pulse el botón Zero para ajustar la pantalla a cero. Coloque un objeto en el plato. La Pesaje: pantalla indica el peso bruto. -
Page 52: Aplicaciones
ES-8 Balanza Serie PXP 4. APLICACIONES La balanza PXP puede funcionar en 4 modos de aplicación con una pulsación larga del botón Function / Mode. Pesaje Nota: antes de utilizar cualquier aplicación, asegúrese de que la balanza está nivelada y calibrada. Utilice esta aplicación para determinar el peso de los objetos en la unidad de medida seleccionada. - Page 53 Balanza Serie PXP ES-9 3. Después confirmarlo pulsando Yes, aparecerá en la pantalla el mensaje «Clear APW?» (¿borrar APW?). 4. Si es necesario mantener el APW de la última operación de recuento de piezas, pulse No cuando aparezca en la pantalla el mensaje «Clear APW?».
-
Page 54: Pesaje Porcentual
ES-10 Balanza Serie PXP Optimización del APW: Mejorar la exactitud del recuento recalculando el peso de la pieza de forma automática a medida que se añaden más piezas. La optimización del APW se produce solo cuando el número de piezas añadidas al plato es entre una y tres veces el número de las que ya están en él. -
Page 55: Formulación
Balanza Serie PXP ES-11 6. Retire la muestra de referencia, y coloque el objeto de prueba en el plato. La relación del objeto de prueba al peso de la muestra de referencia se muestra como un porcentaje. 7. Para ver el peso de la muestra de referencia o el peso del objeto de prueba, pulse el botón Function / Mode. - Page 56 ES-12 Balanza Serie PXP 4. Una vez hecho, aparecerá en la pantalla el mensaje "Place component 2". 5. Retire el primer ingrediente, añada el segundo ingrediente a platillo y presione el botón de Function / Mode para almacenar el segundo peso. 6.
-
Page 57: Características Adicionales
Balanza Serie PXP ES-13 Características adicionales Pesaje por debajo Nota: asegúrese de que la balanza está nivelada y calibrada. balanza PXP está equipada con un gancho inferior para permitir el pesaje por debajo (como se muestra en la figura a continuación). Antes de dar la vuelta a la balanza, quite el plato y los componentes de la cámara de pesaje (si procede) para evitar daños. -
Page 58: Configuración Del Menú
ES-14 Balanza Serie PXP 5. CONFIGURACIÓN DEL MENÚ 5.1 Menú de navegación TABLA 5-1. ESTRUCTURA DE MENÚS DE USUARIO Factory Calibration Setup Units RS232 Print Lockout Reset Internal Cal Language Gram Baud Rate Stable Only Header 1 Reset All Calibration InCal Numeric Filter Level... -
Page 59: Calibration (Calibración
Balanza Serie PXP ES-15 5.2 Calibration (Calibración) Las balanzas PXP ofrecen tres métodos de calibración: Calibración interna (solo en modelos InCal), calibración de span o alcance (Span Cal), y calibración de linealidad (Linearity Cal). Atención: no perturbe la balanza durante la calibración. 5.2.1 Submenú... - Page 60 ES-16 Balanza Serie PXP Pasos para la calibración de span 1. Mantenga pulsado el botón Tare / Menu-Cal para mostrar el menú de calibración. 2. Pulse Yes para entrar en el menú de calibración. Para cambiar modo calibración, pulse No hasta que aparezca «Spa Cal»...
-
Page 61: Linearity Calibration (Calibración De Linealidad
Balanza Serie PXP ES-17 8. Una vez que la calibración de span se ha completado con éxito, la pantalla mostrará «Calibration done». Pulse cualquier botón para volver a la pantalla anterior. 5.2.5 Linearity Calibration (Calibración de linealidad) La calibración de linealidad utiliza tres puntos de calibración, uno a carga cero y los otros a carga especificada. -
Page 62: Balance Setup (Configuración De La Balanza
ES-18 Balanza Serie PXP 4. El valor de los pesos de calibración aparecerá en la pantalla. Cuando la pantalla muestra «Place weights» y «50.0000 g», coloque en el plato el peso o pesos hasta llegar a 50 g para realizar la calibración. -
Page 63: Language (Idioma
Balanza Serie PXP ES-19 Menú de restablecimiento de fábrica: Todos los ajustes están bloqueados. Introduciendo la contraseña: La contraseña debe ser una recombinación de 1, 2 y 3 con una extensión máxima de 6 dígitos. Botón Mensaje 1 / Confirmar 2 / Cancelar Número/Función informativo... -
Page 64: Graduations (Divisiones
ES-20 Balanza Serie PXP 5.3.6 Graduations (Divisiones) Configura la legibilidad indicada de la balanza. 1 división = legibilidad estándar. 10 divisiones = la legibilidad se incrementa por 10. Por ejemplo, si la legibilidad estándar es de 0,01 g, seleccionar 10 divisiones resultará en una lectura de 0,1 g. -
Page 65: Approved Mode (Modo Aprobado
Balanza Serie PXP ES-21 5.3.14 Approved Mode (modo aprobado) Utilice este menú para configurar el estado legal para comercio. Off = funcionamiento estándar. ON = el funcionamiento cumple con las normas legales de metrología. Nota: cuando el modo aprobado está activado, los ajustes del menú se ven afectados de la siguiente manera: Menú... - Page 66 ES-22 Balanza Serie PXP Pantalla Unidad Pantalla Unidad Gramo Pennyweight Kilogramo Momme Tonelada Mesghal Miligramo tl H HK tael Microgramo tl S SG tael Quilate tl T TW tael Newton Tical Libra tola Tola Onza baht Baht Onza troy lboz lb:oz Grano Cambiar las unidades de pesaje...
- Page 67 Balanza Serie PXP ES-23 1. Determine cuántas unidades personalizadas hay en 1 gramo. 2. Convierta el valor a notación científica, es decir, m x 10n. 3. Introduzca el valor de m como factor. 4. Introduzca el valor de n como el exponente. 5.
-
Page 68: Rs232 Interface Setup (Configuración De La Interfaz Rs232
ES-24 Balanza Serie PXP 5.5 RS232 Interface Setup (configuración de la interfaz RS232) Acceda a este menú para personalizar la configuración estándar de RS232. Los datos pueden pasarse a una impresora o un ordenador. 5.5.1 Baud Rate (velocidad en Baudios) Configura la velocidad en baudios (bits por segundo). -
Page 69: Auto Print (Impresión Automática
Balanza Serie PXP ES-25 5.6.5 Auto Print (impresión automática) Off = desactivado En estabilidad = imprime solo cuando se cumplen los criterios de estabilidad. Intervalo de impresión = imprime en el intervalo de tiempo definido. Continua = imprime de manera continua. Cuando está... -
Page 70: Tare (Tara
ES-26 Balanza Serie PXP 5.6.16 Tare (tara) On = imprime el valor de tara. Off = no imprime el valor de tara. 5.6.17 Line Feed (avance de línea) 1 línea = mueve el papel una línea hacia arriba después de la impresión. 4 líneas = mueve el papel cuatro líneas hacia arriba después de la impresión. -
Page 71: Legal Para Comercio (Lft
Balanza Serie PXP ES-27 6. LEGAL PARA COMERCIO (LFT) Cuando la balanza se utiliza en actividades comerciales o una aplicación controlada legalmente, debe ser configurada, verificada y sellada según los reglamentos locales de pesos y medidas. Es la responsabilidad del comprador asegurarse de que se cumplen todos los requisitos legales pertinentes. 6.1 Ajustes Antes de la verificación y el sellado, realice los siguientes pasos: 1. -
Page 72: Impresión
Utilice los comandos de la interfaz RS232 (sección 9.6.1) para controlar la balanza desde un ordenador. Software SPDC Ohaus proporciona el software SPDC / Recopilación de datos de puerto serie, y puede utilizarse en sistemas operativos que no tienen el software HyperTerminal mencionado anteriormente. El software SPDC puede recopilar y transferir preliminarmente los datos a archivos de Microsoft (como Excel, Word, etc.). -
Page 73: Formato De Salida
Balanza Serie PXP ES-29 Formato de salida Los datos de los resultados, y los datos G/N/T, tienen el siguiente formato de salida. Caracteres Campo: Etiqueta Espacio Peso Espacio Unidad Espacio Estabilidad Espacio G/N Espacio de term. Longitud: Nota: 1. La longitud del campo de etiqueta no es fija. 2. - Page 74 0.00 Reference weight: 100.000 g Averaging Time: 10 s Signature: ____________ Signature: ____________ Verified By: ____________ Verified By: ____________ CALIBRACIÓN DE CALIBRACIÓN DE SPAN CALIBRACIÓN INTERNA LINEALIDAD -OHAUS- -OHAUS- -OHAUS- 07/26/2017 05:16:53 03/19/2000 04:51:46 01/01/2000 17:30:47 Balance ID: Balance ID:...
-
Page 75: Mantenimiento
Balanza Serie PXP ES-31 8. MANTENIMIENTO Calibración Compruebe periódicamente la calibración colocando un peso exacto en la balanza y observando el resultado. Si es necesario realizar una calibración, consulte las instrucciones en la sección 5.2. Limpieza ADVERTENCIA: desconecte el equipo de la fuente de alimentación antes de su limpieza. Asegúrese de que no entre líquido en el interior de la balanza. -
Page 76: Información De Servicio
Información de servicio Si la sección de solución de problemas no resuelve su problema, póngase en contacto con su agente de servicio autorizado de Ohaus. Visite nuestro sitio web www.ohaus.com para localizar la oficina de Ohaus más cercana a usted. - Page 77 Balanza Serie PXP ES-33 TABLA 9-1. ESPECIFICACIONES Modelo InCal PXP125D PXP85 PXP225D PXP124 PXP224 PXP223 PXP523 Capacidad (g) 52/120 82/220 0.00001/ 0.00001/ Legibilidad d (g) 0.00001 0.0001 0.0001 0.001 0.001 0.0001 0.0001 Repetibilidad 0.00002/ 0.00002/ 0.00002 0.0001 0.0001 0.001 0.001 (STDEV) (g) 0.0001 0.0001...
- Page 78 ES-34 Balanza Serie PXP TABLA 9-2. ESPECIFICACIONES (cont.) Modelo InCal PXP822 PXP1602 PXP2202 PXP4202 Capacidad (g) 1600 2200 4200 Legibilidad d (g) 0.01 0.01 0.01 0.01 Repetibilidad (STDEV) (g) 0.01 0.01 0.01 0.01 Linealidad (g) 0.02 0.02 0.02 0.02 Tiempo de estabilización típico (s) Deriva térmica de ±6...
- Page 79 Balanza Serie PXP ES-35 TABLA 9-3. ESPECIFICACIONES (cont.) Modelo InCal PXP224M PXP323M PXP523M PXP2202M PXP4202M Capacidad (g) 2200 4200 Legibilidad d (g) 0.0001 0.001 0.001 0.01 0.01 Repetibilidad (STDEV) (g) 0.0001 0.001 0.001 0.01 0.01 Linealidad (g) 0.0002 0.002 0.002 0.02 0.02 Tiempo de estabilización...
-
Page 80: Esquemas Y Dimensiones
ES-36 Balanza Serie PXP Esquemas y dimensiones Dimensiones completamente montado Figura 9-1. Modelo 0.001 g / 0.0001 g / 0.00001 g Figura 9-2. Modelo 0.01 g / 0.1 g Accesorios TABLA 9-4. ACCESSORIOS DESCRIPCIÓN NÚMERO DE PIEZA Pantalla auxiliar AD7-RS 30472064 Kit de densidad 80253384... -
Page 81: Comunicación
Balanza Serie PXP ES-37 Comunicación 9.4.1 Comandos de la interfaz La balanza reconoce los comandos que se enumeran en la tabla siguiente. Caracteres Función de comando Impresión inmediata del peso que se indica (estable o inestable). Impresión del peso que se indica (estable o inestable). Impresión continua. -
Page 82: Rs232 (Db9) Conexiones Pin
No seleccionable 9.4.3 Interfaz USB La interfaz USB de Ohaus es una solución única al problema de conectar una balanza a un ordenador mediante un Bus Serie Universal (USB). Los dispositivos USB se clasifican en clases como unidades de disco, impresoras, cámaras digitales, etcétera. Las balanzas no tienen una clase de uso común por lo que la interfaz Ohaus USB utiliza una interfaz genérica basada en el serial RS232 estándar. -
Page 83: Conexión Usb
Cuando se utiliza la interfaz USB con programas que limitan el número de designaciones de puertos COM (por ejemplo Ohaus MassTracker permite solo COM1, 2, 3 y 4), puede ser necesario asignar uno de Ejemplo del asistente de hardware de Windows XP estos números de puerto al nuevo puerto... -
Page 84: Actualizaciones De Software
ES-40 Balanza Serie PXP 10. ACTUALIZACIONES DE SOFTWARE Ohaus está continuamente mejorando el software de sus balanzas. Para obtener la última versión, póngase en contacto con su distribuidor autorizado de Ohaus o con Ohaus Corporation. 11. CONFORMIDAD El cumplimiento con los siguientes estándares se indica por la marca correspondiente en el producto. - Page 85 ISO 9001 el cual confirma que el sistema administrativo de calidad de OHAUS cumple con los requerimientos del estándar ISO 9001. El 21 de mayo de 2009, OHAUS Corporation, EE. UU., fue registrada nuevamente al estándar ISO 9001:2008.
- Page 86 Los productos Ohaus están garantizados contra defectos en los materiales y mano de obra desde la fecha de entrega y hasta que termine el período de garantía. Durante el período de garantía, Ohaus reparará, o si procede, reemplazará sin coste alguno cualquier componente o componentes que resulten ser defectuosos, siempre y cuando se devuelva el producto a Ohaus con los gastos de envío...
- Page 87 Balance de séries PXP FR-1 Table des matières 1. INTRODUCTION ....................... FR-3 Description ............................. FR-3 Caractéristiques ............................. FR-3 Définition des symboles et signes d’avertissement………………………………………………………. . FR-3 Précautions de sécurité ......................... FR-3 2. INSTALLATION......................... FR-4 Désemballage ............................FR-4 Sélectionner la position .......................... FR-4 Nivellement et acclimation de la balance ....................
- Page 88 FR-2 Balance de séries PXP Impression automatique 5.6.5 ....................... FR-24 En-tête 5.6.6 ............................FR-24 5.6.7 Date et heure ........................... FR-24 5.6.8 ID de Balance........................... FR-24 5.6.9 Nom de Balance..........................FR-24 5.6.10 Nom d'utilisateur ..........................FR-24 5.6.11 Nom du project ..........................FR-24 5.6.12 Nom d'application ..........................
-
Page 89: Introduction
Balance de séries PXP FR-3 1. INTRODUCTION 1.1 Description La balance PXP est un instrument de mesure de précision offrant des années de service en cas d’utilisation appropriée. Les balances PXP sont disponibles en capacités allant de 52 grammes à 4200 grammes. 1.2 Caractéristiques Contrôle d’opération Écran rétro-éclairé... -
Page 90: Installation
FR-4 Balance de séries PXP 2. INSTALLATION 2.1 Désemballage Retirer soigneusement votre balance PXP et chacun de ses composants de l’emballage. Les composants inclus varient en fonction du modèle de la balance (voir la liste ci-dessous). Conserver l’emballage pour assurer la sécurité du stockage et du transport. Veuillez lire entièrement le manuel avant de procéder à... -
Page 91: Branchement De L'alimentation
Balance de séries PXP FR-5 2.4 Branchement de l’alimentation et acclimatation de la balance Brancher le connecteur de sortie DC du réceptacle d’alimentation à l’arrière de la balance. Connecter ensuite la fiche de l’adaptateur AC à une prise électrique appropriée. Acclimatation Il est suggéré... -
Page 92: Operation
FR-6 Balance de séries PXP 3. OPERATION Aperçu de l’affichage, de l’écran d’accueil La balance PXP a un affichage rétro éclairé de 2 lignes. CONTROLES FONCTIONS DE CONTROLE Bouton Marche/Zéro Imprimer Fonction Tare Fonction primaire Si l’indicateur est Envoie la valeur de L’opération Effectue (Appuyer... -
Page 93: Fonctions Principales Et Menu Principal
Balance de séries PXP FR-7 ECRAN PRINCIPAL D’APPLICATION Champ de résultat: Net (NET) Les informations Stabilité (*) varient en fonction Négatif (-) de l’application. Centre de zéro (>0<) Pré-tare (PT) Unité Messages d’instruction Fonction principales et menu principal Pesage: Appuyer sur Zéro pour régler l’affichage à zéro. Placer un objet sur le plateau. L’affichage indique le poids brut. -
Page 94: Applications
FR-8 Balance de séries PXP 4. APPLICATIONS La balance PXP pourrait être opérée dans 4 modes d’application en appuyant longuement sur le bouton Fonction / Mode. Pesage Remarque: Avant d’utiliser toute application, s’assurer que la balance est nivelée et calibrée. Utiliser cette application pour déterminer le poids des objets dans l’unité... - Page 95 Balance de séries PXP FR-9 3. Après la confirmation en appuyant sur , le message "Clear APW?" s’affiche à l’écran. 4. Si APW de l’opération de pesage du dernier pourcentage doit être maintenu, appuyer sur No lorsque le message "Clear APW?" s’affiche. 5.
-
Page 96: Pesage En Pourcentage
FR-10 Balance de séries PXP APW Optimization: L’amélioration de la précision du décompte par le re calcul automatique du poids des pièces comme parties sont ajoutés. APW Optimization survient uniquement lorsque le nombre de pièces ajoutées au plateau est entre un et trois fois le nombre déjà... -
Page 97: Élaboration
Balance de séries PXP FR-11 6. Retirer l’échantillon de référence et placer l’objet de test sur le plateau. Le rapport de l’objet du test au poids de l’échantillon de référence s’affiche comme pourcentage. Pour voir le poids d’échantillon de référence ou le poids de l’objet de test, appuyer sur le bouton Function / Mode. - Page 98 FR-12 Balance de séries PXP 2. Confirmez en appuyant sur « Yes », et le message « Place component 1 » apparaîtra à l’écran. 3. Déposez le premier ingrédient sur le plateau (ou dans un récipient puis mettre la tare à zéro) et appuyez sur le bouton «...
-
Page 99: Fonctionnalité Supplémentaires
Balance de séries PXP FR-13 Fonctionnalités supplémentaires Peser en deça Remarque: S’assurer que la balance a été nivelée et calibrée. La balance PXP est équipée avec un poids en dessous du crochet pour le pesage en dessous de la balance (tel qu’indiqué ci-dessous). Avant de déposer la balance, retirer le plateau et les éléments du paravent (si présent) pour empêcher les dommages. -
Page 100: Reglages Du Menu
FR-14 Balance de séries PXP 5. REGLAGES DU MENU 5.1 Menu de navigation TABLEAU 5-1. STRUCTURE DU MENU D’UTILISATEUR Ré Calibrage Réglage Unités RS232 Imprimer initialisatio déconnecte n d’usine Taux de Stable Tout Cal interne Langue Gramme En-tête 1 Calibrage bauds uniquement réinitialiser... -
Page 101: Sous Menu De Calibrage (Modèles Incal
Balance de séries PXP FR-15 5.2 Calibrage Les balances PXP offrent un choix de trois méthodes de calibrage: Le calibrage interne (pour les modèles InCal uniquement), le calibrage de portée et le calibrage de linéarité. Attention: Évitez de perturber la balance pendant le calibrage. 5.2.1 Sous menu de calibrage (modèles InCal) Remarque: Les modèles ExCal dont dotées uniquement du calibrage de portée et du calibrage de la linéarité. - Page 102 FR-16 Balance de séries PXP Étapes pour le calibrage de portée 1. Appuyer et maintenir la touche Tare / Menu-Cal, et le menu de calibrage s’affiche. 2. Appuyer sur Yes pour entrer dans le menu de calibrage. Pour changer le mode de calibrage, appuyer sur No jusqu’à...
-
Page 103: Calibrage De Linéarité
Balance de séries PXP FR-17 8. Une fois le calibrage de portée effectué avec succès, "Calibration done" s’affiche. Appuyer sur n’importe quelle touche pour retourner dans l’écran précédent. 5.2.5 Calibrage de linéarité Le calibrage de linéarité utilise trois points de calibrage, un à la charge zéro et les autres aux charges spécifiées. -
Page 104: Réglage De La Balance
FR-18 Balance de séries PXP 4. La valeur des masses de calibrage seront affichées sur l’écran. Une fois que l’affichage présente "Place weights" et 50,0000 g, placer les poids de 50 g sur le plateau pour le calibrage. 5. Retirer le poids de 50 g sur le plateau. Après un certain temps, 100,0000 g s’affiche à... -
Page 105: Langue
Balance de séries PXP FR-19 Menu Restauration des Paramètres d’Usine : Tous les paramètres sont bloqués. Renseigner le mot de passe : Le mot de passe doit être une combinaison des chiffres 1, 2 et 3 avec une longueur maximum de 6 chiffres. -
Page 106: Graduations
FR-20 Balance de séries PXP 5.3.6 Graduations Régler la lecture affichée sur la balance. 1 Division = lisibilité standard. 10 Divisions = la lisibilité est augmentée par le facteur 10. A titre d’exemple, si la lisibilité standard est 0,01g, la sélection de 10 divisions débouchera sur une lecture de 0,1 g. -
Page 107: Mode Approuvé
Balance de séries PXP FR-21 Lorsque la capacité est réglée sur Marche, une capacité de barre s’affiche en bas de l’écran. La capacité de barre affiche de manière approximative le poids comme pourcentage de la capacité de la balance. Lorsque l’affichage est à zéro, la capacité de barre ne s’affiche pas. 5.3.14 Mode approuvé... - Page 108 FR-22 Balance de séries PXP Affichage Unité Affichage Unité Gramme Pennyweight Kilogramme Momme Tonne Mesghal Milligramme tl H HK tael Microgramme tl S SG tael Carat tl T TW tael Newton Tical Pound tola Tola Once baht Baht Troy ounce lboz lb:oz Grain...
- Page 109 Balance de séries PXP FR-23 1. Déterminer le nombre d’unité ordinaire contenue dans 1 gramme. 2. Convertir la valeur en notation scientifique, exemple m x 10n. 3. Entrer la valeur de m comme réglage de facteur. 4. Entrer la valeur de n comme réglage d’exposant. 5.
-
Page 110: Régalge D'interface Rs232
FR-24 Balance de séries PXP Réglage d’interface RS232 Entrer dans le sous menu pour personnaliser les réglages standard RS232. Les données pourraient être lues sur une imprimante ou sur un PC. 5.5.1 Taux de bauds Régler le taux de bauds (bits par seconde). 1200 = 1200 bps 2400... -
Page 111: Impression Automatique
Balance de séries PXP FR-25 5.6.4 Imprimer à PC = Imprimer les données sur un PC Imprimante = Imprimer les données sur une imprimante 5.6.5 Impression automatique = désactivé Arrêt = impression uniquement lorsque les critères de stabilité sont respectés.. En cas de stabilité... -
Page 112: Net
FR-26 Balance de séries PXP 5.6.15 Net Marche = le poids net est imprimé. Marche = le poids net n’est pas imprimé. 5.6.16 Tare Marche = le poids tare est imprimé. Marche = le poids tare n’est pas imprimé. 5.6.17 Ligne d’alimentation 1 Ligne = déplacer le papier vers le haut à... -
Page 113: Certifie Pour Usage Commercial (Lft
Balance de séries PXP FR-27 6. CERTIFIE POUR USAGE COMMERCIAL (LFT) Lorsque l’indicateur est utilisé dans le commerce ou dans une application légalement contrôlée, elle doit être configurée, vérifiée et scellée conformément aux règlements de mesure et poids locaux. L’acheteur doit s’assurer que toutes les exigences légales pertinentes sont respectées. -
Page 114: Impression
Utiliser les commandes d’interface RS232 (Section 9.6.1) pour contrôler la balance à partir d’un PC. Logiciel SPDC Le port de série des données de collecte/logiciel SPDC est fourni par Ohaus et pourrait être utilisé sur les systèmes d’exploitation ne disposant pas le logiciel HyperTerminal susmentionné. Le logiciel SPDC pourrait tout d’abord collecter et transférer les données aux fichiers Microsoft (notamment Excel, Word,... -
Page 115: Format D'affichage
Balance de séries PXP FR-29 Format d’affichage Les données de résultat et les données G/N/T sont l’affichage sous le format suivant. Étiquette Terme Champ: Espace Poids Espace Unité Espace Stabilité Espace Espace Caractères Longueur: Remarque: 1. La longueur du champ d’étiquette n’est pas fixée. 2. - Page 116 0.00 Reference weight: 100.000 g Averaging Time: 10 s Signature: ____________ Signature: ____________ Verified By: ____________ Verified By: ____________ CALIBRAGE INTERNE CALIBRAGE DE PORTEE CALIBRAGE DE LINEARITE -OHAUS- -OHAUS- -OHAUS- 03/19/2000 04:51:46 07/26/2017 05:16:53 01/01/2000 17:30:47 Balance ID: Balance ID:...
-
Page 117: Entretien
Balance de séries PXP FR-31 8. ENTRETIEN Calibrage Vérifier périodiquement le calibrage en plaçant un poids précis sur la balance et en observant le résultat. Si le calibrage est nécessaire, se référer à la section 5.2 pour les instructions. Nettoyage AVERTISSEMENT: Déconnecter la balance de l’alimentation avant le nettoyage. -
Page 118: Renseignement Sur Le Service
Renseignement sur le service Si La section de dépannage ne résout pas votre problème; contacter votre agent de service autorisé Ohaus Veuillez visiter notre site web à l’adresse www.ohaus.com afin de localiser le bureau Ohaus le plus proche. 9. DONNÉES TECHNIQUES Spécifications... - Page 119 Balance de séries PXP FR-33 TABLEAU 9-1. SPECIFICATIONS Modèle InCal PXP125D PXP85 PXP225D PXP124 PXP224 PXP223 PXP523 Capacité (g) 52/120 82/220 0.00001/ 0.00001/ Lisibilité d (g) 0.00001 0.0001 0.0001 0.001 0.001 0.0001 0.0001 Lisibilité 0.00002/ 0.00002/ 0.00002 0.0001 0.0001 0.001 0.001 (STDEV) (g) 0.0001...
- Page 120 FR-34 Balance de séries PXP TABLEAU 9-2. SPECIFICATIONS (Suite) Modèle InCal PXP822 PXP1602 PXP2202 PXP4202 Capacité (g) 1600 2200 4200 Lisibilité d (g) 0.01 0.01 0.01 0.01 Lisibilité (STDEV) (g) 0.01 0.01 0.01 0.01 Linéarité (g) 0.02 0.02 0.02 0.02 Temps de stabilisation typique Dérive de sensibilité...
- Page 121 Balance de séries PXP FR-35 TABLEAU 9-3. SPECIFICATIONS (Suite) Modèle InCal PXP224M PXP323M PXP523M PXP2202M PXP4202M Capacité (g) 2200 4200 Lisibilité d (g) 0.0001 0.001 0.001 0.01 0.01 Lisibilité (STDEV) (g) 0.0001 0.001 0.001 0.01 0.01 Linéarité (g) 0.0002 0.002 0.002 0.02 0.02...
-
Page 122: Schémas Et Dimensions
FR-36 Balance de séries PXP Schémas et dimensions Dimensions de l’assemblage entier Figure 9-1 0,001 g / 0,0001 g / 0,00001 g modèle Figure 9-2 0.01 g / 0.1 g model Accessoires TABLEAU 9-4. ACCESSORIES DESCRIPTION NUMÉRO DE PIÈCE Affichage auxiliaire AD7-RS 30472064 Kit de densité... -
Page 123: Communication
Balance de séries PXP FR-37 Communication 9.4.1 Commandes d’interface Les commandes listées dans le tableau suivant seront reconnues par la balance. Caractères de Fonction commande Impression immédiate du poids affiché (stable ou instable). Impression du poids affiché (stable ou instable). Impression continue Imprimer en cas de stabilité... -
Page 124: Rs232 (Db9) Connexions De Broches
Bus (USB). Les appareils USB sont catégorisés en classes notamment les lecteurs de disque, les caméras numériques, les imprimantes, etc. Les balances n’ont pas une classe commune, dont l’interface USB Ohaus utilise une interface générique basée sur le standard de série RS232. -
Page 125: Connexion Usb
S’il y’ a des données dans le tampon d’imprimante, l’imprimante terminal l’impression de ces données. 10. MISE À JOUR DU LOGICIEL Ohaus met régulièrement à jour le logiciel de sa balance. Pour obtenir la version la plus récente, veuillez contacter un vendeur Ohaus autorisé ou Ohaus Corporation. -
Page 126: Conformite
Marque Norme Ce produit est conforme avec les directives UE 2014/30/UE (EMC), 2014/35/UE (LVD) and 2014/31/UE (NAWI). La déclaration de conformité est disponible à l’adresse www.ohaus.com/ce EN 61326-1, AS/NZS 61010-1 CAN/CSA-C22.2 No. 61010-1 UL Std. No. 61010-1 Remarque importante pour les instruments de pesage vérifiés dans l’UE Lorsque l’indicateur est utilisé... - Page 127 Veritas Quality International (BVQI), confirmant que le système de gestion de la qualité d’Ohaus est conforme avec les exigences de la norme ISO 9001. Le jeudi 21 juin 2012, Ohaus Corporation USA a renouvelé son enregistrement à la norme ISO 9001:2008.
- Page 128 Balance de séries PXP GARANTIE LIMITÉE Les produits Ohaus sont garantis contre les défaillances dans les matériels et la fabrication à partir de la date de livraison jusqu’à la couverture entière de la période de garantie. Pendant la période de garantie, Ohaus réparera gratuitement, selon son appréciation ou remplacera tous les composants défectueux, à...
- Page 129 Waage PXP Serie DE-1 Inhaltsverzeichnis 1. EINLEITUNG ........................DE-3 Beschreibung ............................DE-3 Eigenschaften ............................DE-3 Definition von Signalwarnungen und Symbolen ..................DE-3 Sicherheitsmaßnahmen ......................... DE-3 2. INSTALLATION......................... DE-4 Auspacken ............................. DE-4 Standortauswahl ............................ DE-4 Nivellierung ............................DE-4 Stromanschluss und Akklimatisierung der Waage ................DE-5 Schnittstellenanschluss ..........................
- Page 130 DE-2 Waage PXP Serie 5.6.5 Auto Druck ............................DE-25 5.6.6 Kopfzeile ............................DE-25 5.6.7 Datum und Uhrzeit ........................... DE-25 5.6.8 Waage-ID ............................DE-25 5.6.9 Waage-Name ........................... DE-25 5.6.10 Name des Benutzers ........................DE-25 5.6.11 Name des Projekts ........................... DE-25 5.6.12 Name der Anwendung ........................DE-25 5.6.13 Ergebnis ............................
-
Page 131: Einleitung
Waage PXP Serie DE-3 1. EINLEITUNG 1.1 Beschreibung Die PXP-Waage ist eine Präzisionswaage, die Ihnen bei richtiger Pflege jahrelang Dienste erweisen wird. PXP-Waagen sind in Kapazitäten von 52 Gramm bis 4200 Gramm erhältlich. 1.2 Eigenschaften Bedienelemente: 2-zeiliges hintergrundbeleuchtetes Display mit 3 Wägeanwendungen und vielen anderen Funktionen. -
Page 132: Installation
DE-4 Waage PXP Serie 2. INSTALLATION 2.1 Auspacken Entfernen Sie vorsichtig Ihre PXP-Waage und alle Komponenten aus der Verpackung. Die enthaltenen Komponenten variieren je nach Waagemodell (siehe folgende Liste). Bewahren Sie die Verpackung auf, um eine sichere Lagerung und einen sicheren Transport zu gewährleisten. Bitte lesen Sie das Handbuch vollständig durch, bevor Sie die PXP-Waage installieren und verwenden, um einen fehlerhaften Betrieb zu vermeiden. -
Page 133: Stromanschluss Und Akklimatisierung Der Waage
Waage PXP Serie DE-5 2.4 Stromanschluss und Akklimatisierung der Waage Verbinden Sie den Gleichstromausgangsstecker mit der Buchse auf der Rückseite der Waage. Schließen Sie dann den Wechselstromadapterstecker an eine geeignete Steckdose an. Akklimatisierung Es wird empfohlen, die Waage nicht zu benutzen, bevor sie an die Stromversorgung angeschlossen und für eine gewisse Zeit an die Umgebung akklimatisiert wurde. -
Page 134: Betrieb
DE-6 Waage PXP Serie 3. BETRIEB Übersicht über Display, Startbildschirm Die PXP-Waage verfügt über ein hintergrundbeleuchtetes 2-Zeilen-Display. STEUERUNGEN STEUERFUNKTIONEN Taste Ein / Null Druck Funktion Tara Wenn die Anzeige Sendet den Der Betrieb Führt den Primärfunktion ausgeschaltet ist, aktuell hängt vom Tarabetrieb aus. -
Page 135: Hauptfunktionen Und Hauptmenü
Waage PXP Serie DE-7 HAUPTANWENDUNGSBILDSCHIRM Ergebnisfeld: Netto (NET) Informationen Stabilität (*) variieren je nach Negativ (-) Anwendung Nullpunkt (>0<) Vor-Tara (PT) Einheit Anweisungsmitteilunge Hauptfunktionen und Hauptmenü Wiegen: Drücken Sie Null um das Display auf Null zu stellen. Legen Sie ein Objekt auf die Schale. -
Page 136: Anwendungen
DE-8 Waage PXP Serie 4. ANWENDUNGEN Die PXP Waage kann in 4 Anwendungsmodi durch langes Drücken der Funktion / Modus-Taste bedient werden. 4.1 Wiegung Hinweis: Bevor Sie eine Anwendung verwenden, vergewissern Sie sich, dass die Waage kalibriert wurde. Verwenden Sie diese Anwendung, um das Gewicht von Objekten in der ausgewählten Maßeinheit zu bestimmen. - Page 137 Waage PXP Serie DE-9 3. Nach der Bestätigung durch Drücken von Yes, erscheint die Nachricht "Clear APW?" auf dem Bildschirm. 4. Wenn das APW der letzten Stückzählung beibehalten werden soll, drücken Sie No wenn die Nachricht "Clear APW?" angezeigt wird. 5.
- Page 138 DE-10 Waage PXP Serie APW-Optimierung: Verbesserung der Zählgenauigkeit durch automatische Neuberechnung des Stückgewichts bei Hinzufügung von Teilen. Die APW-Optimierung wird nur ausgeführt, wenn die Anzahl der der Schale hinzugefügten Teile zwischen dem Einfachen und dem Dreifachen der Anzahl liegt, die sich bereits auf der Schale befindet.
-
Page 139: Formulierung
Waage PXP Serie DE-11 4. Legen Sie die Referenzprobe auf die Schale, um das Gewicht anzuzeigen. Wenn die Ablesung stabil ist, erscheint das *. 5. Drücken Sie die Function / Mode Taste, so dass das Gewicht Referenzprobe Speicher abgelegt wird. Das Display zeigt 100% 6. - Page 140 DE-12 Waage PXP Serie 2. Nach Bestätigung durch das Drücken auf „Yes“, erscheint die Nachricht "Place component 1" auf der Anzeige. 3. Legen Sie den ersten Bestandteil auf die Waagschale (oder in einen tarierten Behälter) und drücken Sie die “Function / Mode”-Taste, um das erste Gewicht zu speichern.
-
Page 141: Zusätzliche Eigenschaften
Waage PXP Serie DE-13 4.5 Zusätzliche Eigenschaften Unterflur wiegen Hinweis: Stellen Sie sicher, dass die Waage nivelliert und kalibriert wurde. Die PXP-Waage ist mit einem Haken zum Wiegen unter der Waage ausgestattet (wie in der Abbildung unten gezeigt). Bevor Sie die Waage umdrehen, entfernen Sie die Wägeschale und die Windschutzelemente (falls vorhanden), um Schäden zu vermeiden. -
Page 142: Menüeinstellungen
DE-14 Waage PXP Serie 5. MENÜEINSTELLUNGEN 5.1 Menünavigation TABELLE 5-1. STRUKTUR DES BENUTZERMENÜS Zurücksetzun Kalibrieru Konfiguratio g auf Einheiten RS232 Druck Sperrung Werkseinstell ungen Alles Interne Kal Sprache Gramm Baudrate Nur stabil Kopfzeile 1 Kalibrierung zurücksetzen InCal Übertragun Konfiguratio Filterebene Kilogramm Nur numerisch Kopfzeile 2... -
Page 143: Kalibrierung
Waage PXP Serie DE-15 5.2 Kalibrierung PXP-Waagen bieten eine Auswahl von drei Kalibrierungsmethoden: Interne Kalibrierung (nur für InCal- Modelle), Spannenkalibrierung und Linearitätskalibrierung. Achtung: Stören Sie die Waage während der Kalibrierung nicht. 5.2.1 Kalibrierungsuntermenü (InCal-Modelle) Hinweis: ExCal-Modelle verfügen nur über Messspannenkalibrierung und Linearitätskalibrierung. 5.2.2 Interne Kalibrierung (gilt nicht für ExCal-Modelle) Die Kalibrierung erfolgt mit der internen Kalibriermasse. -
Page 144: Spannenkalibrierung
DE-16 Waage PXP Serie 5.2.4 Spannenkalibrierung Die Spannenkalibrierung verwendet zwei Kalibrierungspunkte, einen bei Nulllast und den anderen bei festgelegter Volllast (Spanne). Für detaillierte Informationen Kalibrierung, siehe Spezifikationstabellen in Abschnitt 9.1. Die Spannenkalibrierung kann bei eingeschalteter Waage und ohne Last auf der Schale durchgeführt werden. -
Page 145: Linearitätskalibrierung
Waage PXP Serie DE-17 7. Entfernen Sie das Gewicht aus der Schale. 8. Sobald die Kalibrierung des Spanne erfolgreich abgeschlossen wurde, wird "Kalibrierung abgeschlossen" angezeigt. Drücken Sie eine beliebige Taste, um zum vorherigen Bildschirm zurückzukehren. 5.2.5 Linearitätskalibrierung Die Linearitätskalibrierung verwendet drei Kalibrierungspunkte, einen bei Nulllast und die anderen bei festgelegten Lasten. -
Page 146: Waageneinstellung
DE-18 Waage PXP Serie 3. Drücken Sie Ja um die Linearitätskalibrierung zu beginnen. 4. Der Wert Kalibriermasse wird Bildschirm angezeigt. Nachdem auf dem Display "Gewichte platzieren" und "50.0000 g" angezeigt werden, legen Sie zwecks Kalibrierung Gewichte von 50 g auf die Waagschale. 5. -
Page 147: Sprache
Waage PXP Serie DE-19 Units Menu (Einheiten-Menü): Alle Einstellungen sind gesperrt. Print Menu: (Drucker-Menü:) Alle Einstellungen sind gesperrt. GLP-Menü: (für Gute Laborpraxis) Alle Einstellungen sind gesperrt. Factory Reset Menü (Menü für das Zurücksetzen auf die Werkseinstellungen): Alle Einstellungen sind gesperrt. Eingabe des Passworts: Das Passwort sollte aus einer Kombination von 1, 2 und 3 mit der maximalen Länge von 6 Ziffern bestehen. -
Page 148: Azt (Automatische Nullpunktverfolgung
DE-20 Waage PXP Serie 5.3.4 AZT (Automatische Nullpunktverfolgung) Stellen Sie die automatische Nullpunktverfolgung ein. Aus = deaktiviert. 0,5 d = Display hält Null bis zu einer Abweichung von 0,5 Abstufungen pro Sekunde. 1 d = Display hält Null bis zu einer Verschiebung von 1 Abstufung pro Sekunde. 3 d = Anzeige hält Null bis zu einer Abweichung von 3 Abstufungen pro Sekunde. -
Page 149: Auto Dim
Waage PXP Serie DE-21 5.3.12 Auto Dim Stellen Sie ein, ob die Waage die Hintergrundbeleuchtung des Displays automatisch ausschaltet. Aus = deaktiviert 10 Minuten = wird dunkel, wenn 10 Minuten lang keine Bewegung erfolgt 20 Minuten = wird dunkel, wenn 20 Minuten lang keine Bewegung erfolgt 30 Minuten = wird dunkel, wenn 30 Minuten lang keine Bewegung erfolgt 5.3.13 Kapazitätsbalken Aus = deaktiviert... -
Page 150: Wiegeeinheiten
DE-22 Waage PXP Serie 5.4 Wiegeeinheiten Rufen Sie dieses Untermenü auf, um die gewünschten Maßeinheiten zu aktivieren. PXP-Waagen bieten eine Auswahl von 21 Einheiten, die standardmäßig auf Ein eingestellt sind. Hinweis: Aufgrund nationaler Gesetze kann die Waage einige der aufgeführten Maßeinheiten nicht enthalten. - Page 151 Waage PXP Serie DE-23 Definition der Benutzereinheit Stellen Sie Benutzerdefiniert im Einheit-Menü auf Ein, um die Benutzereinheit zu aktivieren und zu definieren. Die Benutzereinheit wird durch Eingabe der drei Parameter Faktor, Exponent und LSD (letzte signifikante Stelle) definiert. Definieren Sie die benutzerdefinierte Einheit wie folgt: 1.
-
Page 152: Rs232-Schnittstelleneinrichtung
DE-24 Waage PXP Serie Ergebnis Display zählt um 1 Display zählt um 5 Display zählt um 10 … … Wenn zum Beispiel der angezeigte Wert für eine Tasse einer Chemikalie 0,56 beträgt, sollte die LSD auf 100 eingestellt werden. 5.5 RS232-Schnittstelleneinrichtung Rufen Sie dieses Untermenü... -
Page 153: Druckeinstellungen
Waage PXP Serie DE-25 5.6 Druckeinstellungen Betreten Sie dieses Untermenü, um die Datenübertragungseinstellungen einzustellen. 5.6.1 Nur stabil Aus = Werte werden unabhängig von der Stabilität sofort gedruckt. Ein = Werte werden nur gedruckt, wenn die Stabilitätskriterien erfüllt werden. 5.6.2 Nur numerisch Aus = Alle ausgewählten Ergebnisse werden gedruckt. -
Page 154: Name Des Benutzers
DE-26 Waage PXP Serie 5.6.10 Name des Benutzers Ein = der Name des Benutzers wird gedruckt. Aus = der Name des Benutzers wird nicht gedruckt. 5.6.11 Name des Projekts Ein = der Projektname wird gedruckt. Aus = der Projektname wird nicht gedruckt. 5.6.12 Name der Anwendung Ein = der Name der Anwendung wird gedruckt. -
Page 155: Glp
Waage PXP Serie DE-27 5.7 GLP Rufen Sie dieses Menü auf, um die Gute Laborpraxis (GLP) festzulegen. 5.7.1 Kopfzeile Aktiviert das Drucken von GLP-Kopfzeilen. Es sind bis zu 5 Kopfzeilen verfügbar. Alphanumerische Einstellungen bis zu 25 Zeichen stehen für jede Kopfzeile zur Verfügung 5.7.2 Waage-Name Legen Sie den Namen der Waage fest. -
Page 156: Eichpflichtige Anwendung (Legal For Trade, Lft
DE-28 Waage PXP Serie 6. EICHPFLICHTIGE ANWENDUNG (LEGAL FOR TRADE, LFT) Wenn die Waage im Handel oder in einer gesetzlich kontrollierten Anwendung verwendet wird, muss sie entsprechend den örtlichen Eichvorschriften aufgestellt, geprüft und versiegelt werden. Es liegt in der Verantwortung des Käufers sicherzustellen, dass alle relevanten rechtlichen Anforderungen erfüllt werden. -
Page 157: Druck
SPDC-Software Die Serial Port Data Collection / SPDC wird von Ohaus bereitgestellt und kann auf Betriebssystemen verwendet werden, auf denen die oben genannte HyperTerminal-Software nicht installiert ist. Die SPDC- Software kann die Daten vorläufig sammeln und an Microsoft-Dateien (z. B. Excel, Word usw.) übertragen. -
Page 158: Ausgabeformat
DE-30 Waage PXP Serie Ausgabeformat Die Ergebnisdaten und B/N/T-Daten werden im folgenden Format ausgegeben. Leerzeich Leerzeic Leerzei Abschl. Feld: Etikett Gewicht Leerzeichen Einheit Leerzeichen Stabilität chen Zeichen Länge: Hinweis: 1. Die Länge des Etikettfeldes ist nicht festgelegt. 2. Jedem Feld folgt ein einzelnes begrenzendes Leerzeichen (ASCII 32). 3. - Page 159 Tare: 0.00 Reference weight: 100.000 g Averaging Time: 10 s Signature: ____________ Signature: ____________ Verified By: ____________ Verified By: ____________ INTERNE KALIBRIERUNG SPANNENKALIBRIERUNG LINEARITY CALIBRATION -OHAUS- -OHAUS- -OHAUS- 03/19/2000 04:51:46 07/26/2017 05:16:53 01/01/2000 17:30:47 Balance ID: Balance ID: Balance ID:...
-
Page 160: Wartung
DE-32 Waage PXP Serie 8. WARTUNG Kalibrierung Überprüfen Sie die Kalibrierung regelmäßig, indem Sie ein genaues Gewicht auf die Waage legen und das Ergebnis ablesen. Wenn eine Kalibrierung erforderlich ist, siehe Anweisungen in Abschnitt 5.2. Reinigung WARNUNG: Trennen Sie die Waage vor der Reinigung von der Stromversorgung. Stellen Sie sicher, dass keine Flüssigkeit in das Innere der Waage gelangt. -
Page 161: Service-Informationen
Waage PXP Serie DE-33 Service-Informationen Wenn der Fehlerbehebungsabschnitt Ihr Problem nicht löst, wenden Sie sich an einen autorisierten Ohaus Service Agenten. Bitte besuchen Sie unsere Webseite www.ohaus.com, um das für Sie nächstgelegene Ohaus Büro zu finden. 9. TECHNISCHE DATEN Spezifikationen... - Page 162 DE-34 Waage PXP Serie TABELLE 9-1. SPEZIFIKATIONEN InCal-Modell PXP125D PXP85 PXP225D PXP124 PXP224 PXP223 PXP523 Kapazität (g) 52/120 82/220 0.00001/ 0.00001/ Lesbarkeit d (g) 0.00001 0.0001 0.0001 0.001 0.001 0.0001 0.0001 Wiederholbarke 0.00002/ 0.00002/ 0.00002 0.0001 0.0001 0.001 0.001 it (STABW) (g) 0.0001 0.0001 0.00002/...
- Page 163 Waage PXP Serie DE-35 TABELLE 9-2. SPEZIFIKATIONEN (Fortsetzung) InCal-Modell PXP822 PXP1602 PXP2202 PXP4202 Kapazität (g) 1600 2200 4200 Lesbarkeit d (g) 0.01 0.01 0.01 0.01 Wiederholbarkeit 0.01 0.01 0.01 0.01 (STABW) (g) Linearität (g) 0.02 0.02 0.02 0.02 Stabilisierungszeit Typisch (s) Empfindlichkeit Temperaturverschieb ±6...
- Page 164 DE-36 Waage PXP Serie TABLE 9-3. SPEZIFIKATIONEN (Fortsetzung) InCal-Modell PXP224M PXP323M PXP523M PXP2202M PXP4202M Kapazität (g) 2200 4200 Lesbarkeit d (g) 0.0001 0.001 0.001 0.01 0.01 Wiederholbarkeit 0.0001 0.001 0.001 0.01 0.01 (STABW) (g) Linearität (g) 0.0002 0.002 0.002 0.02 0.02 Stabilisierungszeit Typisch (s)
-
Page 165: Zeichnungen Und Dimensionen
Waage PXP Serie DE-37 Zeichnungen und Dimensionen Dimensionen wenn komplett zusammengebaut Abbildung 9-1 0,001 g / 0,0001 g 0,00001 g Modell Abbildung 0.01 g / 0.1 g Modell 9.3 Zubehörteile TABLE 9-4. ZUBEHÖRTEILE BESCHREIBUNG TEILENUMMER Zusatzanzeige AD7-RS 30472064 Dichte-Kit 80253384 USB-Schnittstellenkabel 83021085 Sicherheitsgerät... -
Page 166: Kommunikation
DE-38 Waage PXP Serie 9.4 Kommunikation 9.4.1 Schnittstellenbefehle Befehle, die in der folgenden Tabelle aufgeführt sind, werden von der Waage erkannt. Befehlszeichen Funktion Direkter Ausdruck des angezeigten Gewichts (stabil oder instabil). Ausdrucken des angezeigten Gewichts (stabil oder instabil). Durchgehender Ausdruck. Bei Stabilität ausdrucken. -
Page 167: Rs232 (Db9) Steckverbindungen
Nicht auswählbar 9.4.3 USB-Schnittstelle Die Ohaus USB-Schnittstelle ist eine einzigartige Lösung für das Problem, eine Waage mit einem Computer über einen USB-Anschluss (Universal Serial Bus) zu verbinden. USB-Geräte werden in Klassen wie Festplatten, Digitalkameras, Drucker usw. kategorisiert. Waagen haben keine allgemein gebräuchliche Klasse, daher verwendet die Ohaus USB-Schnittstelle eine generische Schnittstelle, die... -
Page 168: Usb-Anschluss
Sobald der automatische Druck im Menü aktiviert ist, sendet die Waage Daten wie erforderlich. Wenn sich Daten im Druckpuffer befinden, druckt der Drucker diese Daten aus. 10. SOFTWARE UPDATES Ohaus verbessert kontinuierlich seine Waagensoftware. Um die neueste Version zu erhalten, wenden Sie sich bitte an Ihren autorisierten Ohaus-Händler oder an die Ohaus Corporation. -
Page 169: Einhaltung
Kennzeichen Standard Dieses Produkt entspricht den EU-Richtlinien 2014/30/EU (EMC), 2014/35/EU (LVD) und 2014/31/EU (NAWI). Die EU-Konformitätserklärung ist online unter www.ohaus.com/ce verfügbar. EN 61326-1, AS/NZS 61010-1 CAN / CSA-C22.2 Nr. 61010-1 UL Std. Nr. 61010-1 Wichtiger Hinweis für verifizierte Waagen in der EU Wenn das Gerät im Handel oder in einer gesetzlich geregelten Anwendung verwendet wird, muss es... - Page 170 Interferenzen. In diesem Fall muss der Benutzer die Störungen auf eigene Kosten korrigieren. Industry Canada-Hinweis Dieses digitale Gerät der Klasse A entspricht der kanadischen Norm ICES-003. ISO 9001 Registrierung Im Jahr 1994 erhielt die OHAUS Corporation, USA, von Bureau Veritas Quality International (BVQI) das Zertifikat für Registrierung laut 9001 bestätigte,...
- Page 171 Für Ohaus-Produkte gilt eine Garantie für Material- und Verarbeitungsfehler ab dem Zeitpunkt der Lieferung für die Dauer der Garantiezeit. Während der Garantiezeit repariert Ohaus alle Komponenten, die sich als defekt erweisen, oder ersetzt diese kostenlos, sofern das Produkt frachtfrei an Ohaus zurückgesandt wird.
- Page 173 Bilancia Serie PXP IT-1 Sommario 1. INTRODUZIONE ....................... IT-3 Descrizione .............................. IT-3 Caratteristiche ............................IT-3 Definizione dei Segnali di Avvertimento e dei Simboli ................IT-3 Precauzioni di Sicurezza.......................... IT-3 2. INSTALLAZIONE ......................IT-4 Disimballaggio ............................IT-4 Selezionare la Posizione.......................... IT-4 Livellamento .............................
- Page 174 IT-2 Bilancia Serie PXP 5.6.5 Auto-Stampa ............................IT-25 5.6.6 Intestazione ............................IT-25 5.6.7 Data e Orario............................IT-25 5.6.8 ID Bilancia ............................IT-25 5.6.9 Nome Bilancia ............................ IT-25 5.6.10 Nome Utente ............................IT-25 5.6.11 Nome del Progetto ..........................IT-25 5.6.12 Nome dell'Applicazione ........................IT-25 5.6.13 Risultato .............................
-
Page 175: Introduzione
Bilancia Serie PXP IT-3 1. INTRODUZIONE 1.1 Descrizione La Bilancia PXP è uno strumento per pesare di precisione che vi offrirà molti anni di servizio se tenuta con cura. Le Bilance PXP sono disponibili don capacità da 52 grammi fino a 4200 grammi 1.2 Caratteristiche Controlli Funzionamento:... -
Page 176: Installazione
IT-4 Bilancia Serie PXP INSTALLAZIONE 2.1 Disimballaggio Rimuovere con attenzione la vostra bilancia PXP e ogni suo componente dal pacchetto. I componenti inclusi variano a seconda del modello della bilancia (vedi l’elenco di seguito). Conservare l'imballaggio per garantire una sicuro immagazzinamento e trasporto. Si prega di leggere completamente il Manuale prima di installare e usare la bilancia “PX”... -
Page 177: Collegamento Dell'alimentazione Elettrica E Condizionamento Della Bilancia
Bilancia Serie PXP IT-5 2.4 Collegamento dell’Alimentazione Elettrica e Condizionamento della Bilancia Collegare il connettore di output CC alla presa di alimentazione sul retro della bilancia. Quindi, collegare la spina dell'adattatore CA a una presa elettrica adeguata. Condizionamento Si suggerisce di non usare la bilancia fino a quando non si è collegata all'alimentazione elettrica e al condizionamento per un certo periodo. -
Page 178: Funzionamento
IT-6 Bilancia Serie PXP 3. FUNZIONAMENTO 3.1 Visualizzazione del Display, Schermata Iniziale La Bilancia PXP ha un display in retroilluminazione a 2 linee CONTROLLI CONTROLLO FUNZIONI Pulsante Acceso/Zero Stampa Funzione Taratura Funzione Primaria Se l’Indicatore è Invia il valore della Funzionamento Esegue il (Premuta... -
Page 179: Funzioni Principali E Menu Principali
Bilancia Serie PXP IT-7 SCHERMO D’APPICAZIONE PRINCIPALE Risultato del Campo: Le Informazioni variano Netto (NETTO) dall’applicazione Stabilità (*) Negativo (-) Centro dello Zero (>0<) Unità Pre-taratura (PT) Messaggi d’Istruzione 3.2 Funzioni Principali e Menu Principali Premere Zero per impostare il display su zero. Porre un oggetto sulla piastra della bilancia. Il Pesata: display indica il peso lordo. -
Page 180: Applicazioni
IT-8 Bilancia Serie PXP 4. APPLICAZIONI La Bilancia PXP può funzionare in 4 modalità d’applicazione premendo a lungo il pulsante Funzione/Modalità. 4.1 Pesata Nota: Prima di usare qualsiasi applicazione, assicuratevi che la bilancia è a livello e tarata. Usare quest’applicazione per determinare il peso degli oggetti nella selezionata unità di misura Pesata 1. - Page 181 Bilancia Serie PXP IT-9 3. Dopo conferma premendo “Yes” (SI), messaggio “Clear APW?” (Cancellare APW (Peso Medio Pezzo)? apparirà sullo schermo. 4. Se l’APW dell’ultima operazione del Conteggio dei Pezzi dovesse essere mantenuta, premere “No” quando il messaggio “Clear APW?” appare. 5.
-
Page 182: Pesata Percento
IT-10 Bilancia Serie PXP Ottimizzazione dell’APW (Peso Medio del Pezzo): Migliorare precisione conteggio ricalcolando automaticamente il peso del pezzo man mano che i pezzi vengono aggiunti. L'ottimizzazione APW (Peso Medio del Pezzo) avviene solamente quando il numero dei pezzi aggiunti al piastra della bilancia è... -
Page 183: Formulazione
Bilancia Serie PXP IT-11 6. Rimuovere il campione di riferimento e porre l'oggetto del test sulla piastra della bilancia. Il rapporto tra l'oggetto del test e il peso campione di riferimento viene visualizzato in percentuale. 7. Per visualizzare il peso del campione di riferimento o il peso dell'oggetto del test, premere il pulsante Function / Mode. - Page 184 IT-12 Bilancia Serie PXP 4. Dopodiche, apparirà il messaggio “Place component 2” sullo schermo. 5. Rimuovere il primo ingrediente dal piatto, aggiungere il secondo ingrediente sul piatto, e premere il tasto Function / Mode per memorizzare il secondo peso. 6. Continuare ad aggiungere componenti, e premere il tasto Function / Mode per memorizzare i pesi.
-
Page 185: Funzioni Aggiuntive
Bilancia Serie PXP IT-13 4.5 Funzioni Aggiuntive Pesata di Sotto Nota: Assicurarsi che la bilancia sia stata livellata e tarata. La Bilancia PXP è dotata con un gancio per la pesata di sotto per pesare sotto la bilancia (come mostrato nella seguente Figura). Prima di rovesciare la bilancia, rimuovere la piastra della bilancia e gli elementi scudo del paravento (se presenti) per evitare danneggiamenti. -
Page 186: Impostazioni Menu
IT-14 Bilancia Serie PXP 5. IMPOSTAZIONI MENU 5.1 Menu Navigazione TABELLA 5-1. STRUTTURA MENU UTENTE GLP (Buone Azzeramento Taratura Impostazione Unità RS232 Stampa Pratiche di Bloccare Predefinito Laboratorio) Solamente Cal Interno Lingua Grammo Baud Rate Intestazione 1 Azzerare Tutti Taratura Stabile Regolazione Solamente... -
Page 187: Taratura
Bilancia Serie PXP IT-15 5.2 Taratura La Bilance PXP offre una scelta di tre metodi di taratura: Taratura Interna (solamente per i modelli InCal), Taratura Portata e Taratura Linearità. Attenzione: Non disturbare la bilancia durante la taratura. 5.2.1 Taratura dei Sottomenu (modelli InCal) Nota: Solamente i modelli ExCal hanno Taratura Portata e Taratura Linearità. - Page 188 IT-16 Bilancia Serie PXP Passi per taratura di portata. 1. Premere e tenere premuto il pulsante Tare/Menu-Cal, e verrà visualizzato il Menu Taratura.. 2. Premere “YES” (Sì) per accedere al Menu Taratura. Per variare la modalità di taratura, premere NO finché “Span Cal”...
-
Page 189: Taratura Di Linearità
Bilancia Serie PXP IT-17 Una volta che la taratura della portata sia stat completata con successo "Calibration done" (Taratura eseguita) sarà visualizzata. Premere qualsiasi pulsante per tornare alla schermata precedente. 5.2.5 Taratura di Linearità La taratura di linearità utilizza tre punti di taratura, uno a carico zero e gli altri a carichi specificati. Per informazioni dettagliate di taratura di massa si prega di consultare le tabelle delle specifiche nella Sezione 9.1 Senza carico sulla bilancia, la Taratura di Linearità... -
Page 190: Impostazione Della Bilancia
IT-18 Bilancia Serie PXP 4. Il valore delle masse di taratura verrà visualizzato sul display. Dopo che il display mostra “Place weights” (Porre pesi) e “50,0000 g”, porre un peso(i) di 50 g sulla piastra della bilancia per la taratura. Rimuovere il peso(i) di 50 g dalla piastra della bilancia. -
Page 191: Lingua
Bilancia Serie PXP IT-19 Menù di reset di fabbrica: Tutte le impostazioni sono bloccate. Immettere la password. La password deve essere una combinazione di 1, 2, e 3 con una lunghezza massima di 6 cifre. Tasto Messaggio Numerico/Funzio 1 / Conferma 2 / Cancella d’istruzioni “Do you confirm?”... -
Page 192: Graduazioni
IT-20 Bilancia Serie PXP Nota: “Place Container” (Porre Contenitore) sarà visualizzato quando “Automatic Tare” (Taratura Automatica) viene impostata su Acceso. 5.3.6 Graduazioni Impostare la leggibilità visualizzata della bilancia. 1 Divisione = leggibilità standard. 10 Divisioni = la leggibilità viene aumentata da un fattore di 10. Per esempio, se la leggibilità... -
Page 193: Modalità Approvata
Bilancia Serie PXP IT-21 Quando la capacità è Accesa, una barra di capacità sarà visualizzata in fondo dello schermo. La barra di capacità mostrerà approssimativamente l’attuale peso come una percentuale di capacità della bilancia. Quando il display è a zero, la barra di capacità non si visualizzerà. 5.3.14 Modalità... - Page 194 IT-22 Bilancia Serie PXP Display Unità Display Unità Grammo Unità di Pes Troy Kilogrammo Momme Tonnellata Mdesghal Milligrammo tl H HK tael Microgrammo tl S So taell Carato tl T TW tael Newton Tical Libbra total Tola Oncia baht Baht Oncia Troy lboz libbra:oncia...
- Page 195 Bilancia Serie PXP IT-23 3. Immettere il valore di m come impostazione Fattore. 4. Immettere il valore di n come impostazione Esponente. 5. Immettere la quantità che l'Unità Personalizzata esegue come impostazione LSD. Immettere il Fattore, l'Esponente e LSD (Cifra Meno Significativa). Fattore Esponente Fattore di...
-
Page 196: Impostazione Interfaccia Rs232
IT-24 Bilancia Serie PXP 5.5 Impostazione Interfaccia RS232 Immettere questo sottomenu per personalizzare le impostazioni standard RS232. I dati possono essere emessi sia a una Stampante o a un PC. 5.5.1 Baud Rate Impostare i baud rate (bits per secondo). 1.200 = 1.200 bps 2.400 = 2.400 bps 4.800 = 4.800 bps... -
Page 197: Auto-Stampa
Bilancia Serie PXP IT-25 5.6.5 Auto-Stampa Spento = disabilitato Accesa Stabilità = la stampa avviene ogni volta che vengono soddisfatti i criteri di stabilità. Intervallo di Stampa = la stampa avviene nell'intervallo definito. Continuo = la stampa avviene continuamente. Quando è selezionata la Stabilità Accesa, impostare le condizioni per la stampa. Carico = Stampa quando il carico visualizzato è... -
Page 198: Netto
IT-26 Bilancia Serie PXP 5.6.15 Netto Acceso = il peso netto viene stampato. Spento = il peso netto non viene stampato. 5.6.16 Taratura Acceso = il peso della taratura viene stampato Spento = il peso della taratura non viene stampato. 5.6.17 Alimentazione Linea 1 Linea = spostare il foglio verso l'alto di una riga dopo la stampa. -
Page 199: Lft) Legale Per Il Commercio
Bilancia Serie PXP IT-27 6. (LFT) LEGALE PER IL COMMERCIO Quando la bilancia viene utilizzata in commercio o in un’applicazione legalmente controllata, deve essere installata, verificata e sigillata in conformità con le normative locali per Pesi e Misurazioni. È responsabilità dell'acquirente assicurarsi che tutti i requisiti legali pertinenti siano soddisfatti. -
Page 200: Stampa
PC. Software SPDC Il Raccogli Dati Portale Seriale/Software SPDC è fornito da Ohaus e può essere utilizzato su sistemi operativi che non hanno il software HyperTerminal menzionato precedentemente. Il software SPDC può raccogliere e trasferire in modo preliminare i dati ai file Microsoft (come Excel, Word, ecc.). -
Page 201: Formato Di Output
Bilancia Serie PXP IT-29 Formato di Output I Dati Risultanti e i dati G/N/T vengono emessi nel seguente formato Term. Campo: Etichetta Spazio Peso Spazio Unità Stabilità Spazio Caratteri Lunghezza: Nota: 1. La lunghezza del campo dell’etichetta non è fissa. 2. - Page 202 13.205 Reference weight: 100.000 g Averaging Time: 10 s Signature: ____________ Signature: ____________ Verified By: ____________ Verified By: ____________ TARATURA INTERNA TARATURA DI PORTATA TARATURA DI LINEARITÀ -OHAUS- -OHAUS- -OHAUS- 03/19/2000 04:51:46 07/26/2017 05:16:53 01/01/2000 17:30:47 Balance ID: Balance ID:...
-
Page 203: Manutenzione
Bilancia Serie PXP IT-31 8. MANUTENZIONE Taratura Verificare periodicamente la taratura ponendo un preciso peso sulla bilancia e visualizzando il risultato Se la taratura dovesse essere richiesta, fare riferimento alla Sezione 5.2 per ulteriori istruzioni. Pulizia AVVERTIMENTO: Disconnettere la bilancia dall’alimentazione di corrente elettrica, prima di iniziare la pulizia. -
Page 204: Informazioni Di Servizio
Bilancia Serie PXP Informazioni di Servizio Se la sezione Risoluzione dei Problemi non risolve i vostri problemi, contattare un Agente di Servizio Ohaus Autorizzato. Si prega di visitare il nostro sito web www.ohaus.com per localizzare l‘ufficio Ohaus a voi più vicino. - Page 205 Bilancia Serie PXP IT-33 Tabella 9-1. SPECIFICHE Modello InCal PXP125D PXP85 PXP225D PXP124 PXP224 PXP223 PXP523 Capacità (g) 52/120 82/220 0.00001/ 0.00001/ Leggibilità d (g) 0.00001 0.0001 0.0001 0.001 0.001 0.0001 0.0001 Ripetibilità (STDEV) 0.00002/ 0.00002/ 0.00002 0.0001 0.0001 0.001 0.001 0.0001 0.0001...
- Page 206 IT-34 Bilancia Serie PXP TABLE 9-2. SPECIFICHE (ripreso) Modello InCal PXP822 PXP1602 PXP2202 PXP4202 Capacità (g) 1600 2200 4200 Leggibilità d (g) 0.01 0.01 0.01 0.01 Ripetibilità (STDEV) 0.01 0.01 0.01 0.01 Linearità (g) 0.02 0.02 0.02 0.02 Tipico Tempo di Stabilizzazione (s) Sensitività...
- Page 207 Bilancia Serie PXP IT-35 TABLE 9-3. SPECIFICHE (ripreso) Modello InCal PXP224M PXP323M PXP523M PXP2202M PXP4202M Capacità (g) 2200 4200 Leggibilità d (g) 0.0001 0.001 0.001 0.01 0.01 Ripetibilità (STDEV) 0.0001 0.001 0.001 0.01 0.01 Linearità (g) 0.0002 0.002 0.002 0.02 0.02 Tipico Tempo di Stabilizzazione (s)
-
Page 208: Disegni E Dimensioni
IT-36 Bilancia Serie PXP Disegni e Dimensioni Dimensioni di assemblaggio completo Figura 9-1. Modello da 0,001 g / 0,0001 g / 0,00001 g Figure 9-2. Modello da 0.01 g / 0.1 g 9.3 Accessori TABLE 9-4. ACCESSORI DESCRIZIONE NUMERO PEZZO DI RICAMBIO Display Ausiliario AD7-RS 30472064 Kit Densità... -
Page 209: Comunicazione
Bilancia Serie PXP IT-37 Comunicazione 9.4.1 Controlli Interfaccia I controlli elencati nella seguente tabella saranno riconosciuti dalla bilancia. Controllo Funzione Caratteri Stampa immediata del peso visualizzato (stabile o non stabile). Stampa del peso visualizzato (stabile o non stabile). Stampa continua. Stampa sulla Stabilità. -
Page 210: Collegamenti Perno Rs232 (Db9
9.4.3 Interfaccia USB L'interfaccia USB Ohaus è una soluzione unica al problema del collegamento di una bilancia a un computer tramite Universal Serial Bus (USB). I dispositivi USB sono classificati in classi come unità disco, fotocamere digitali, stampanti, ecc. Le bilance non hanno una classe comunemente usata, quindi l'interfaccia USB Ohaus utilizza un'interfaccia generica basata sullo standard seriale RS232. -
Page 211: Connessione Usb
Quando si utilizza l'interfaccia USB con programmi limitano numero designazioni del portale COM (ad esempio, Ohaus MassTracker consente solo COM1, 2, Esempio di Windows XP Hardware Wizard (Procedura 3 e 4), potrebbe essere necessario assegnare Guidata) uno di questi numeri dei portali al nuovo portale virtuale. -
Page 212: Aggiornamenti Dei Software
IT-40 Bilancia Serie PXP 10. AGGIORNAMENTI DEI SOFTWARE Ohaus migliora continuamente i suoi software della sua bilancia. Per ottenere l'ultima versione, si prega di contattare il vostro rivenditore autorizzato Ohaus oppure Ohaus Corporation. 11. CONFORMITÀ La conformità alle seguenti Norme è indicata dal marchio corrispondente sul prodotto. - Page 213 Nel 1994, a OHAUS Corporation, USA, è stato assegnato un certificato di registrazione ISO 9001 da Bureau Veritas Quality International (BVQI), confermando che il sistema di gestione della qualità OHAUS è conforme ai requisiti della Norma ISO 9001. Il 21 giugno 2012, OHAUS Corporation, USA, è stata registrata di nuovo alla Norma ISO 9001: 2008.
- Page 214 Nessun'altra garanzia espressa o implicita è fornita da Ohaus Corporation. Ohaus Corporation non sarà responsabile per eventuali danni conseguenti. Poiché la legislazione sulla garanzia varia da Stato a Stato e da Paese a Paese, contattare Ohaus o il proprio rivenditore Ohaus locale per ulteriori dettagli.
- Page 216 With offices worldwide / Con oficinas en todo el mundo / Avec des bureaux partout dans le monde / Mit Büros weltweit / Con uffici in tutto il mondo www.ohaus.com *30372571* P/N 30372571 D © 2018 Ohaus Corporation, all rights reserved / todos los derechos reservados / tous droits réservés / alle Rechte vorbehalten / tutti i diritti riservati...
Need help?
Do you have a question about the Pioneer PXP Series and is the answer not in the manual?
Questions and answers