Table of Contents
Advertisement
Quick Links
Advertisement
Table of Contents

Subscribe to Our Youtube Channel
Related Manuals for HIKVISION DS-2CD7A26G0/P-IZHSWG


Summary of Contents for HIKVISION DS-2CD7A26G0/P-IZHSWG
- Page 1 Wiegand Camera Operation Manual...
-
Page 2: Table Of Contents
Wiegand Camera ·Operation Manual Table of Contents 1 Introduction ....................1 2 Cameras ....................... 2 2.1 Available Models ........................2 2.2 Basic Parameters ........................2 2.3 Wiegand Interface Appearance ....................3 3 Transfer Access Control Card No. via Wiegand Protocol ....... 4 3.1 Transfer Access Control Card No. -
Page 3: Introduction
Wiegand Camera ·Operation Manual 1 Introduction This manual is about the Wiegand configuration and features of network cameras. The manual is created as a guide for the technical support engineer, sales engineer, etc. Currently overseas license plate cameras support 3 Wiegand protocols: Card ID 26-bit Wiegand protocol, Hik 34-bit Wiegand protocol, and SHA-1 26-bit Wiegand protocol (European access control manufacturers Paxton and Salto use the 26-bit Wiegand protocol). -
Page 4: Cameras
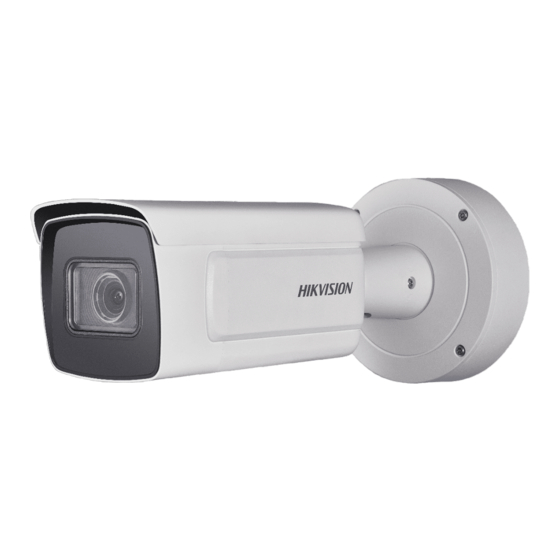
Wiegand Camera ·Operation Manual 2 Cameras 2.1 Available Models The available models of network cameras are: DS-2CD7A26G0/P-IZHSWG (2.8-12 mm) DS-2CD7A26G0/P-IZHSWG (8-32 mm) 2.2 Basic Parameters Image sensor 1/1.8"Progressive Scan CMOS Max. resolution 1920 × 1080 @60 fps Illumination 0.002 Lux @ (F1.2, AGC ON) , 0 Lux with IR... -
Page 5: Wiegand Interface Appearance
Wiegand Camera ·Operation Manual 2.3 Wiegand Interface Appearance Figure 2-1 Wiegand Interface Connection: Connect the block’s D0, D1 and GND to those of receiving terminal accordingly. -
Page 6: Transfer Access Control Card No. Via Wiegand Protocol
Wiegand Camera ·Operation Manual 3 Transfer Access Control Card No. via Wiegand Protocol 3.1 Transfer Access Control Card No. via 26-Bit Wiegand Protocol Map the license plate number with the access control card number. Find the related card number in black and white list, and transfer the card information (26 bit) via Wiegand interface. - Page 7 Wiegand Camera ·Operation Manual 8-bit 16-bit front rear (To express the site (To express the card parity parity (even parity (odd parity code ID, if the site ID, if the card ID is bit) bit) code ID is less than less than 8 digits, 0 8 digits, 0 will be will be added before...
-
Page 8: Configure Parameters
Wiegand Camera ·Operation Manual 3.1.5 Configure Parameters Set Wiegand Type as Card ID Steps Go to Configuration-> Road Traffic->Wiegand-> Wiegand Type. Figure 3-2 Wiegand Configuration Interface Enable Vehicle Detection Steps: Go to Configuration->Road Traffic->Detection Configuration. Check the checkbox of Enable to enable Vehicle Detection. Set the specific detection parameters, which are the same as those of conventional ANPR cameras. - Page 9 Wiegand Camera ·Operation Manual Figure 3-3 Detection Configuration Interface Configure Blocklist & Allowlist Steps: Go to Configuration->Road Traffic->Blocklist & Allowlist. Click Export to download Blocklist & Allowlist template. Fill in the template. Figure 3-4 Blocklist & Allowlist Excel Template You can set at most 10000 license plates in allowlist and blocklist in total. You should enter 8-digit Card ID in the ID row.
-
Page 10: Transfer Access Control Card No. Via Hik 34-Bit Wiegand Protocol
Determine whether the car has permission to pass according to the card number. The protocol for directly transferring the access control card No. through the Wiegand interface is a private protocol of Hikvision. 3.2.1 Advantage 1. Theoretically compatible with any standard access control system 2. - Page 11 Wiegand Camera ·Operation Manual Support up to 10-digit card number. If you enter a card number of more than 10 digits, only the first 10 digits are kept. Currently, the maximum supported card number is 2147483647 because of the limitation of the platform int length type. 32-bit The front parity The last parity...
-
Page 12: Configure Parameters
Wiegand Camera ·Operation Manual 3.2.4 Configure Parameters Set Wiegand Type as Card ID Steps Go to Configuration-> Road Traffic->Wiegand-> Wiegand Type. Figure 3-6 Wiegand Configuration Interface For the steps to enable Vehicle Detection and Blocklist and Allowlist Configuration, see 3.1.5 Configure Parameters. -
Page 13: Transfer Plate Number Via Wiegand Interface
Wiegand Camera ·Operation Manual 4 Transfer Plate Number via Wiegand Interface 4.1 Overview The Wiegand interface directly transmits the license plate number, and performs a hash operation on the license plate number. The last 24 bits are taken through the Wiegand standard interface, and an even parity bit and an odd parity bit are added before and after the 24 bits respectively according to the standard 26 bit protocol. -
Page 14: Configure Parameters
Wiegand Camera ·Operation Manual Add parity bit to 26 bit both before and after the number based on 26 bit protocol 4.5 Configure Parameters Set the Wiegand Type as Paxton. Steps: Go to Configuration->Road Traffic->Wiegand ->Wiegand Type. Figure 4-2 External Device Settings Interface... -
Page 15: Appendix
Wiegand Camera ·Operation Manual 5 Appendix 5.1 Paxton Configuration 5.1.1 Connect Net2 ACU Steps The connections for the ANPR Camera and Reader port using a Belden reader cable (as per Paxton specification) on the Net2 ACU are as follows: Blue wire: D1 at ANPR –... - Page 16 Wiegand Camera ·Operation Manual In the user record, select the ‘Tokens’ tab and select ‘New Token’ to open the ‘Add new token’ window: Select Vehicle number plate and enter the license plate number you wish to add for the user; e.g. BR07 UMM Click OK then Apply.
-
Page 17: View Anpr Captured Image In Net2
Net2 ACU. 5.1.2 View ANPR Captured Image in Net2 Hikvision has a second integration with Net2 that allows users to view DVR/NVR video from within the Net2 UI. This integration can be used in conjunction with the ANPR camera to show the capture of the licence plate as it is read by the camera. - Page 18 Wiegand Camera ·Operation Manual Click OK, then go to the ACU that is associated with the ANPR camera and select it as the camera that is monitoring the door. As the ANPR camera generates events in Net2, a camera icon will appear next to the event.
-
Page 19: Ftp Server Creation
Wiegand Camera ·Operation Manual 5.2 FTP Server Creation Steps Use FTP server tool to create the FTP server in your PC. Set the permission information like user name and password in the server. Set the path for the communication between the terminal and the server. Keep the software turned on. - Page 20 Wiegand Camera ·Operation Manual...
Need help?
Do you have a question about the DS-2CD7A26G0/P-IZHSWG and is the answer not in the manual?
Questions and answers