Table of Contents
Advertisement
Quick Links
Advertisement
Table of Contents

Related Manuals for Microtek MS4


Summary of Contents for Microtek MS4
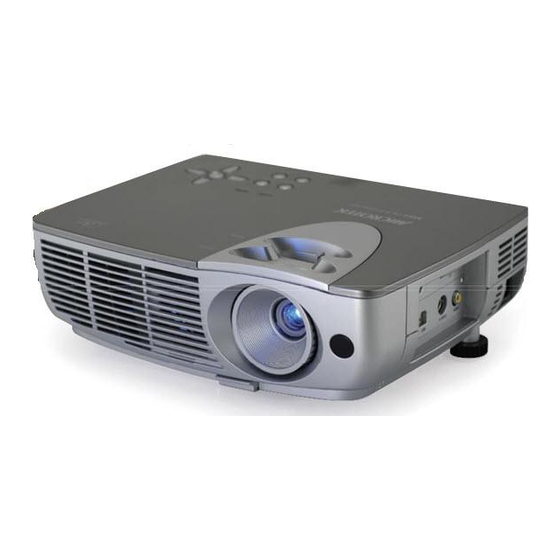
- Page 1 MS4 DLP Projector www.microtek.com Conference Projectors...
-
Page 2: Trademark Recognition
Copyright This publication, including all photographs, illustrations and software, is protected under international copy - right laws, with all rights reserved. Neither this manual, nor any of the material contained herein, may be reproduced without written consent of the author. ©... -
Page 3: Symbols Used
Symbols Used Warning symbols are used on the unit and in this manual to alert you of hazardous situations. The following boxes are used in this manual to alert you to important information. Note: Provides additional information on the topic at hand. Important: Provides additional information that should not be overlooked. - Page 4 Allow the lamp sufficient time to cool. About this manual This manual is intended for end users and describes how to install and operate the DLP projector. Wher- ever possible, relevant information —such as an illustration and its description — has been kept on one page.
-
Page 5: Table Of Contents
GETTING STARTED ... 1 ...1 ACKING HECKLIST ...2 IEWS OF ROJECTOR ARTS Front-right view... 2 Top view ...3 Top view — OSD buttons and LEDs... 4 Connectors view ... 5 Bottom view ...6 ... 7 EMOTE ONTROL ARTS ...9 EMOTE ONTROL PERATING ANGE... -
Page 6: Getting Started
Packing Checklist Carefully unpack the projector and check that the following items are i ncluded: PROJECTOR OWER CORD CABLE CD-ROM ( T ’ S MANUAL Contact your dealer immediately if any items are missing, appear damaged, or if the unit does not work. -
Page 7: View Of Projector Part
Adjusts level of projector Height adjuster Height adjuster button Push to release height adjuster Important: Grill openings on the projector allow for good air circulation, which keeps the projector lamp cool. Do not obstruct any of the grill openings. ESCRIPTION EE PAGE... -
Page 8: Top View
Top view ABEL Image-focus control Zoom Enlarge or shrink Power Turns the projector on or off System status LEDs (next page) OSD navigation buttons (next page) Source Detects the input device Menu Opens the On-Screen Display (OSD) Auto Optimizes image size, position, and resolution... -
Page 9: Top View -Osd Buttons And Leds
Operational error code (refer to “LED Error Messages” on page 30) Ready (LED) Orange Lamp ready —you can safely turn on or off the projector Flashing Lamp not ready —do not press the power button Keystone/ Corrects image-trapezoid (wider top) effect... -
Page 10: Connectors View
Connectors view ABEL Audio-in Connect the audio cable (supplied) from the input device RS-232 Reserved service port for firmware upgrades DVI-I Connect the DVI cable (supplied) from a computer Kensington Lock Secure to permanent object with a Kensington Lock system Connect the USB cable (supplied) from a computer S-video Connect the supplied S-video cable from a video device... -
Page 11: Bottom View
Height adjuster Adjust level of the projector Side foot Ceiling support Contact your dealer for information on mounting the projector on a ceiling. holes CAUTION: With ceiling installation, use approved mounting hardware & M4 screw. bolt ): 4mm. Distance from ceiling/ wall: 50/50 cm, 20/20 inch for proper ventilation. For permanent instal- lations, follow local codes. -
Page 12: Remote Control Parts
2. Be sure nothing obstructs the path between the remote control and the projector. If the path be- tween remote and projector is obstructed, you can bounce the remote signal off certain reflective surfaces such as projector screens. - Page 13 Left cursor Navigates and changes settings in the OSD PageDn key when OSD off Menu Opens the On-Screen Display (OSD) Freeze Freeze/unfreezes the on-screen picture Source Detects the input device Power Turns the projector on or off ESCRIPTION EE PAGE...
-
Page 14: Remote Control Operating Range
Provided you are not holding the remote perpendicular to the sides or the rear of the projector, the remote will function well within a radius of about (10) meters (33 feet) and 30 degrees above or below the projector level. If the projector does not respond to the remote control, move a little closer. -
Page 15: Setup And Operation
(+/ - ) as shown here. Replace the cover. Caution: 1. Only use AAA alkaline batteries. 2. Dispose of used batteries according to local ordinance regulations. 3. Remove the batteries when not using the projector for prolonged periods. ETUP AND PERATION... -
Page 16: Connecting Input Devices
Connecting Input Devices A PC or notebook computer as well as video devices can be connected to the projector at the same time. Video devices include DVD, VCD, and VHS players, as well as movie camcorders and digital still cameras. Check the user manual of the connecting device to confirm it has the appropriate output connector. -
Page 17: Starting And Shutting Down The Projector
Source button repeatedly to switch among devices. (DVD and HDTV are supported through the DVI-I connector.) To turn off the projector, press the Power button. The projector prepares for shutdown and a “Wait a moment please…” message appears. -
Page 18: Adjusting The Projector Level
Position the projector so that it is perpendicular to the screen. Be sure cables are not in the way or can cause the projector to be knocked over. To raise the level of the projector, lift the projector [A] and press the height-adjuster button [B]. -
Page 19: Adjust The Zoom, Focus And Keystone
Adjust the Zoom, Focus and Keystone Use the Image -focus con- trol (on the projector only) to sharpen the projected image Use the Image -zoom con- trol (on the projector only) to resize the projected i m - age and screen size... -
Page 20: Adjusting The Volume
Adjusting the Volume Press the Volume +/- but - tons on the projector or the remote control. The volume control ap- pears on the display. Use the Volume +/- but - tons to adjust the level. Press the Mute button (on the remote control only) to turn off the volume. -
Page 21: On -Screen Display Menu Settings
Navigating the OSD You can use the remote control or the buttons on the top of the projector to navigate and make changes to the OSD. The following illustration shows the corresponding buttons on the remote control and on the projector. -
Page 22: Setting The Osd Language
Setting the OSD Language You may want to reference the OSD on your projector while reading this section. Set the OSD lan- guage to your preference before continuing. (The default language is English.) 1. Press the Menu button. The Main menu appears. -
Page 23: Main Menu
Main Menu Press the Menu button to open the OSD menu. Press the cursor menu. Press the cursor button to move up and down in the Main menu. Brightness Press the cursor button to adjust the brightness. (Range: 0— 100) Contrast Press the cursor button to adjust the contrast. -
Page 24: Setup Menu
Setup Menu Press the Menu button to open the OSD menu. Press the cursor menu. Press the cursor button to move up and down in the Setup menu. Horizontal Press the cursor button to move the image left or right. (Range: 0— 100) Position Vertical P o- Press the cursor... -
Page 25: Config Menu
Config Menu Press the Menu button to open the Main menu. Press the cursor menu. Press the cursor button to move up and down in the Config menu. Blank Screen Press the cursor button to select a background color for blank screen (Range: Black –... -
Page 26: Utility Menu
Utility Menu Press the Menu button to open the Main menu. Press the cursor menu. Press the cursor button to move up and down in the Utility menu. Video Type Press the cursor (Range: Auto – NTSC – PAL – SECAM) Video AGC Press the cursor matic gain control for video source. -
Page 27: Language Menu
Language Menu Press the Menu button to open the Main menu. Press the cursor guage menu. Press the cursor button to move up and down in the Language menu. English French German Italian Press the cursor menu. Spanish Swedish Press the cursor guage. -
Page 28: Status Menu
Status Menu Press the Menu button to open the Main menu. Press the cursor menu. Press the cursor button to move up and down in the Status menu. Video Displays the resolution and refresh rate of the connected video device. Information Active Source Displays the active source. -
Page 29: Maintenance And Security
2. Avoid touching the glass surface of the new lamp: Doing so may shorten its operation life. Warning: Be sure to turn off and unplug the projector at least an hour before replacing the lamp. Failure to do so could result in a severe burn. - Page 30 Remove the two screws from the lamp module. Lift the module handle Pull firmly on the mod- ule handle to remove the lamp module. Reverse steps 1 to 5 to install the new lamp module.
-
Page 31: Resetting The Lamp
Resetting the Lamp After replacing the lamp, you should reset the lamp hour counter to zero. Refer to the following: Press the Menu button to open the Main menu. Press the cursor button to move to the Status menu. Press the cursor button to move down to Lamp Hour Reset. -
Page 32: Cleaning The Projector
Cleaning the projector to remove dust and grime will help ensure tro uble-free operation. Warning: 1. Be sure to turn off and unplug the projector at least an hour before cleaning. Failure to do so could result in a severe burn. -
Page 33: Cleaning The Case
To prevent discoloration or fading of the case, do not use abrasive alcohol-based cleaners. Using the Kensington Lock If you are concerned about security, attach the projector to a permanent object with the Kensi ngton slot and a security cable. -
Page 34: Troubleshooting
Common problems and solutions These guidelines provide tips to deal with problems you may encounter while using the projector. If the problem remains unsolved, contact your dealer for assistance. Often after time spent troubleshooting, the problem is traced to something as simple as a loose con- nection. -
Page 35: Led Error Messages
Adjust the F o c u s on the projector. Press the Auto button on the remote control or projector. Ensure the projector-t o-screen distance is within the 10-meter (33 -feet) speci fied range. Check that the projector lens is clean. -
Page 36: Lamp Problems
Having the Projector Serviced If you are unable to solve the problem, y ou should have the projector serviced. Pack the projector in the original carton. Include a description of the problem and a checklist of the steps you took when... - Page 37 The information may be useful to the service personnel. Return the projector to the place you purchased it.
-
Page 38: Specifications
Specifications Display type TI DMD 0.55-inch x 1, 12 degrees, DDR DLP Resolution SVGA 800 x 600 Native Color 16.7 Million (24-bits/Pixel) Bandwidth Up to XGA 1024x768 @60 Hz Weight 2.0 kg (4.5 lbs.) Projection distance 1.5 to 7 meter Projection screen size 37 inches to 202.8 inches Brightness uniform ity... -
Page 39: Input/Output Connectors
Input/output connectors DVI-I Video Composite video (RCAx1) S-Video (Mini-DIN) Audio Mini- jack Service/upgrades RS- 232 Security Kensington slot... -
Page 40: Projection Distance V.s. Projection Size
Projection Distance V.S. Projection Size Screen Width Projec- Max. Screen Size tion Distance Diagonal 1.5m 1.10m 4.92' 43.3" 2.0m 1.47m 6.56' 57.8" 2.4m 1.76m 7.87' 69.3" 2.8m 2.06m 9.18' 81.1" 3.2.m 2.35m 10.5' 92.5" 3.6m 2.65m 11.81' 104.3" 4.0m 2.94m 13.12' 115.7"... -
Page 41: Timing Charts
Timing Charts The projector can display several resolutions. The following table outlines the resolutions that can be displayed by the projector. Table 2: ANALOG Computer Timings (Resolution and Refresh Rate 【 fV 】 ) Resolution FH (kHz) 640 x 480 31.47... -
Page 42: Dimensions
Dimensions 28.0 cm (11.02 in.) -
Page 43: Regulatory Compliance
FCC Warning This equipment has been tested and found to comply with the limits for a Class B digital device pur- suant to Part 15 of the FC C Rules. These limits are designed to provide reasonable protection against harmful interference when the equipment is operated in a commercial environment. This equipment generates, uses, and can radiate radio frequency energy and, if not installed and used in accordance with the instruction manual, may cause harmful interference to radio communica- tions.
Need help?
Do you have a question about the MS4 and is the answer not in the manual?
Questions and answers