Advertisement
dynabook PORTEGE A30-E/TECRA A30-G,-J/
Rev.00
Rev.01
Mar. 2020
Rev.02
Dec. 2020
Rev.03
Oct. 2022
Personal Computer
dynabook S Series
Maintenance Manual
First issue
・Addition of information of TECRA A30-G model
・Addition of note for LCD removal and for SSD
installation (Chap.4)
・Addition of information of TECRA A30-J model
・Update information of 4.11 LTE MODULE
Dynabook Inc.
File Number (960-931)
[CONFIDENTIAL]
Advertisement
Chapters
Troubleshooting

Related Manuals for dynabook S Series


Summary of Contents for dynabook S Series
- Page 1 Personal Computer dynabook PORTEGE A30-E/TECRA A30-G,-J/ dynabook S Series Maintenance Manual Rev.00 First issue Rev.01 Mar. 2020 ・Addition of information of TECRA A30-G model ・Addition of note for LCD removal and for SSD installation (Chap.4) Rev.02 Dec. 2020 ・Addition of information of TECRA A30-J model Rev.03...
- Page 2 Copyright © 2020 Dynabook Inc. All rights reserved. Under the copyright laws, this manual cannot be reproduced in any form without our prior written permission. No patent liability is assumed with respect to the use of the information contained herein.
- Page 3 If you replace the battery pack, be sure to use only the same model battery or an equivalent battery recommended by us. Installation of the wrong battery can cause the battery to explode. dynabook PORTEGE A30-E/TECRA A30-G,-J/dynabook S Series Maintenance Manual (960-931) [CONFIDENTIAL]...
- Page 4 Handling the LCD module Board layout Pin assignments Keyboard Matrix Key layout Wiring diagrams BIOS rewrite procedures EC/KBC rewrite procedures Reliability [CONFIDENTIAL] dynabook PORTEGE A30-E/TECRA A30-G,-J/dynabook S Series Maintenance Manual (960-931)
- Page 5 Text that you are instructed to type in is shown in the boldface type below: DISKCOPY A: B: The display Text generated by the computer that appears on its display is presented in the type face below: Format complete System transferred dynabook PORTEGE A30-E/TECRA A30-G,-J/dynabook S Series Maintenance Manual (960-931) [CONFIDENTIAL]...
- Page 6 1.4 TFT Color Display......................1-18 1.5 Web camera ........................1-20 1.6 Power Supply ........................1-21 1.7 Batteries ........................1-22 1.8 AC Adapter ........................1-25 1.9 USB Type-C Adapter ....................1-28 [CONFIDENTIAL] dynabook PORTEGE A30-E/TECRA A30-G,-J/dynabook S Series Maintenance Manual (960-931)
-
Page 7: Table Of Contents
2.17 Fingerprint sensor Troubleshooting ................. 2-41 2.18 Web camera Troubleshooting ................... 2-44 2.19 HDMI port Troubleshooting .................... 2-45 2.20 USB Type-C adapter Troubleshooting ................2-47 dynabook PORTEGE A30-E/TECRA A30-G,-J/dynabook S Series Maintenance Manual (960-931) [CONFIDENTIAL]... - Page 8 3.13 LCD Gamma correction..................... 3-22 3.14 Wireless Module Test ....................... 3-26 3.15 Sound Test......................... 3-29 3.16 SETUP ..........................3-30 3.17 Battery Off mode setting tool.................... 3-49 viii [CONFIDENTIAL] dynabook PORTEGE A30-E/TECRA A30-G,-J/dynabook S Series Maintenance Manual (960-931)
- Page 9 4.19 LCD FAT ASSY/COVER ASSY ..................4-68 4.20 LCD ..........................4-73 4.21 HINGE ASSY ........................4-82 4.22 W-LAN ANTENNA/LTE ANTENNA ................4-85 4.23 MIC BOARD/CAMERA MODULE ................4-92 dynabook PORTEGE A30-E/TECRA A30-G,-J/dynabook S Series Maintenance Manual (960-931) [CONFIDENTIAL]...
- Page 10 Appendix E Key Layout ....................E-1 Appendix F Wiring Diagrams .................... F-1 Appendix G BIOS rewrite Procedures ................G-1 Appendix H EC/KBC rewrite Procedures ................. H-1 Appendix I Reliability ......................I-1 [CONFIDENTIAL] dynabook PORTEGE A30-E/TECRA A30-G,-J/dynabook S Series Maintenance Manual (960-931)
- Page 11 Chapter 1 Hardware Overview...
- Page 12 1 Hardware Overview 1-ii [CONFIDENTIAL] dynabook PORTEGE A30-E/TECRA A30-G,-J/dynabook S Series Maintenance Manual (960-931)
- Page 13 Web camera ......................1-20 Power Supply ......................1-21 Batteries ........................1-22 1.7.1 Main Battery ..................1-22 1.7.2 Battery Charging Control ..............1-23 AC Adapter ......................1-25 USB Type-C Adapter ....................1-28 dynabook PORTEGE A30-E/TECRA A30-G,-J/dynabook S Series Maintenance Manual (960-931) [CONFIDENTIAL] 1-iii...
- Page 14 Table 1-7 Time required for charges .................. 1-23 Table 1-8 Data preservation time ..................1-24 Table 1-9 AC adapter specifications................... 1-25 Table 1-10 USB Type-C adapter specifications ..............1-28 1-iv [CONFIDENTIAL] dynabook PORTEGE A30-E/TECRA A30-G,-J/dynabook S Series Maintenance Manual (960-931)
-
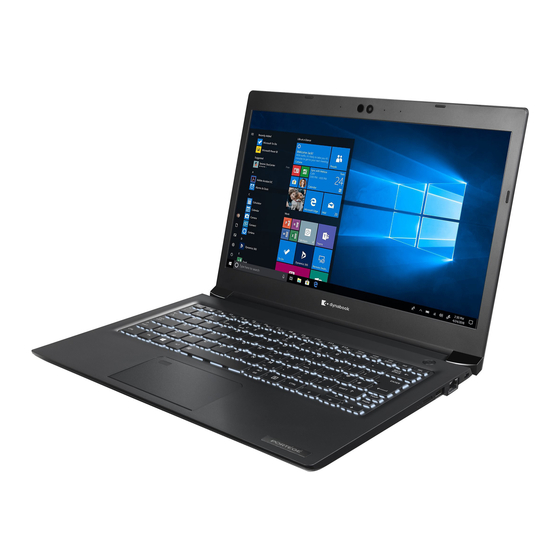
Page 15: Figure 1-1 Appearance And Each Unit Position
The following shows each unit position and system unit configuration of this model. Front view Figure 1-1 Appearance and each unit position (1) dynabook PORTEGE A30-E/TECRA A30-G,-J/dynabook S Series Maintenance Manual (960-931) [CONFIDENTIAL] 1-1... - Page 16 1 Hardware Overview Left side Right side Underside Figure 1-1 Appearance and each unit position (2) 1-2 [CONFIDENTIAL] dynabook PORTEGE A30-E/TECRA A30-G,-J/dynabook S Series Maintenance Manual (960-931)
-
Page 17: Figure 1-2 Board Connection Diagram
1 Hardware Overview Figure 1-2 Board connection diagram dynabook PORTEGE A30-E/TECRA A30-G,-J/dynabook S Series Maintenance Manual (960-931) [CONFIDENTIAL] 1-3... -
Page 18: Figure 1-3 System Block Diagram
1 Hardware Overview Figure 1-3 System block diagram 1-4 [CONFIDENTIAL] dynabook PORTEGE A30-E/TECRA A30-G,-J/dynabook S Series Maintenance Manual (960-931) - Page 19 Cometlake U Core i7-10710U 12MB 4.70GHz 6/12 (1.10GHz) 6+2 Cometlake U Core i7-10510U 4.90GHz (1.80GHz) 4+2 Cometlake U Core i5-10310U 4.40GHz (1.70GHz) vPro 4+2 Cometlake U Core i5-10210U 4.20GHz (1.60GHz) 4+2 dynabook PORTEGE A30-E/TECRA A30-G,-J/dynabook S Series Maintenance Manual (960-931) [CONFIDENTIAL] 1-5...
- Page 20 < PSZ1* and PSZ2* model > • 128GB, 256GB (for SATA I/F) • 128GB, 256GB, 512GB, 1TB (for PCIe I/F) < PSZ3* model > • 128GB, 256GB, 512GB (for PCIe I/F) 1-6 [CONFIDENTIAL] dynabook PORTEGE A30-E/TECRA A30-G,-J/dynabook S Series Maintenance Manual (960-931)
- Page 21 Sound system The sound system is equipped with the following features: • Stereo speakers : No-brand • Built-in microphone : Dual microphone is supported • Headphone/Microphone combo jack dynabook PORTEGE A30-E/TECRA A30-G,-J/dynabook S Series Maintenance Manual (960-931) [CONFIDENTIAL] 1-7...
- Page 22 Power-off and Charge function. Sensors and others • Finger print sensor: on SecurePad (BTO) • IR Camera (Face Recognition Sensor) (BTO) • GPS (for 3G/LTE models (BTO)) • EC/KBC: MEC1642 1-8 [CONFIDENTIAL] dynabook PORTEGE A30-E/TECRA A30-G,-J/dynabook S Series Maintenance Manual (960-931)
-
Page 23: Table 1-1 M.2 Sata Ssd Specifications
Height (mm) 2.38 (Max) Length (mm) 80.0±0.15 Weight (g) 8.0g (Max) Data transfer speed Maximum Data Read: 540MB/s Maximum Data Read: 540MB/s Maximum Data Write: 500MB/s Maximum Data Write: 520MB/s dynabook PORTEGE A30-E/TECRA A30-G,-J/dynabook S Series Maintenance Manual (960-931) [CONFIDENTIAL] 1-9... - Page 24 22.00±0.15 Height (mm) 2.38 (Max) Length (mm) 80.0±0.15 Weight (g) Data transfer speed Maximum Data Read: 550MB/s Maximum Data Read: 550MB/s Maximum Data Write: 450MB/s Maximum Data Write: 490MB/s 1-10 [CONFIDENTIAL] dynabook PORTEGE A30-E/TECRA A30-G,-J/dynabook S Series Maintenance Manual (960-931)
-
Page 25: Table 1-2 M.2 Pcie Ssd Specifications
512GB Outline Width (mm) 22.00±0.15 Height (mm) 2.23 (Max) Length (mm) 80.0±0.15 Weight (g) 5.30g (Typ) Maximum Data Read (MB/s) 1,900 2,200 2,200 Maximum Data Write (MB/s) 1,400 1,400 dynabook PORTEGE A30-E/TECRA A30-G,-J/dynabook S Series Maintenance Manual (960-931) [CONFIDENTIAL] 1-11... - Page 26 Part code G8BC000CJ120 G8BC000CJ250 G8BC000CJ510 Capacity 128GB 256GB 512GB Outline Width (mm) 22.00±0.15 Height (mm) 2.15 Length (mm) 80.0±0.15 Maximum Data Read (MB/s) 2,500 Maximum Data Write (MB/s) 2,100 1-12 [CONFIDENTIAL] dynabook PORTEGE A30-E/TECRA A30-G,-J/dynabook S Series Maintenance Manual (960-931)
- Page 27 512GB Outline Width (mm) 22.00±0.15 Height (mm) 2.25 (Max) Length (mm) 80.0±0.15 Weight (g) 8 (Max) Maximum Data Read (MB/s) 1,800 2,000 2,000 Maximum Data Write (MB/s) 1,200 1,600 dynabook PORTEGE A30-E/TECRA A30-G,-J/dynabook S Series Maintenance Manual (960-931) [CONFIDENTIAL] 1-13...
-
Page 28: Figure 1-4 Uk Keyboard Layout
Part code 278.0±0.2 (W) x 104.0±0.2 (L) x Outline 3.75+0.35/-0.20(H)(mm) Max. 92 (g) Weight 19.0 mm (major keys) Key Pitch 1.5±0.2 (mm) keystroke Number of keys Backlight AccuPoint Black Color 1-14 [CONFIDENTIAL] dynabook PORTEGE A30-E/TECRA A30-G,-J/dynabook S Series Maintenance Manual (960-931) - Page 29 Part code 278.0±0.2 (W) x 104.0±0.2 (L) x Outline 3.75+0.35/-0.20(H)(mm) Max. 89 (g) Weight 19.0 mm (major keys) Key Pitch 1.5±0.2 (mm) keystroke Number of keys Backlight AccuPoint Black Color dynabook PORTEGE A30-E/TECRA A30-G,-J/dynabook S Series Maintenance Manual (960-931) [CONFIDENTIAL] 1-15...
- Page 30 Part code 278.0±0.2 (W) x 104.0±0.2 (L) x Outline 3.75+0.35/-0.20(H)(mm) Max. 89 (g) Weight 19.0 mm (major keys) Key Pitch 1.5±0.2 (mm) keystroke Number of keys Backlight AccuPoint Black Color 1-16 [CONFIDENTIAL] dynabook PORTEGE A30-E/TECRA A30-G,-J/dynabook S Series Maintenance Manual (960-931)
- Page 31 Item Specifications Type Tile keyboard for JP Maker Chicony G83C000LV5JP G83C000KR5JP G83C000KQ5JP Part code (PSZ3* model) Outline Weight Key Pitch keystroke Number of keys Backlight AccuPoint Blue White Color dynabook PORTEGE A30-E/TECRA A30-G,-J/dynabook S Series Maintenance Manual (960-931) [CONFIDENTIAL] 1-17...
-
Page 32: Figure 1-5 Lcd Module
Active display area [mm] 293.76(H) × 165.24(V) 293.8266(H) × 165.1968(V) Dot pitch [mm] 0.153(H)×0.153(V) 0.2151(H)×0.2151(V) R.G.B. Vertical Stripe R.G.B. Vertical Stripe Pixel configuration 170 (max) 260 (max) Weight [g] 1-18 [CONFIDENTIAL] dynabook PORTEGE A30-E/TECRA A30-G,-J/dynabook S Series Maintenance Manual (960-931) - Page 33 0.5(H) ± 2.35max. w/PCB(D) Number of Dots (pixel) 1920(H) ×1080(V) ×RGB 293.76(W) ± 165.24(H) Active display area [mm] Dot pitch [mm] 0.153(H)×0.153(V) R.G.B. Vertical Stripe Pixel configuration 170 (max) Weight [g] dynabook PORTEGE A30-E/TECRA A30-G,-J/dynabook S Series Maintenance Manual (960-931) [CONFIDENTIAL] 1-19...
-
Page 34: Table 1-5 Web Camera Module Specifications
G9BC0006A210 (PSZ1* model) (PSZ2*/PSZ3* model) HD + IR Camera 82±0.2 × 6±0.2 × 2.75±0.2 Size [mm] (Max) Weight [g] 1,280 x 720 Output size (Max) Focus Distance 50 cm 1-20 [CONFIDENTIAL] dynabook PORTEGE A30-E/TECRA A30-G,-J/dynabook S Series Maintenance Manual (960-931) - Page 35 5. Turns the power supply on and off. 6. Provides more accurate detection of a low battery. 7. Calculates the remaining battery capacity. 8. Controls the transmission of the status signal of the main battery. dynabook PORTEGE A30-E/TECRA A30-G,-J/dynabook S Series Maintenance Manual (960-931) [CONFIDENTIAL] 1-21...
-
Page 36: Table 1-6 Battery Specifications
The main battery pack is the computer’s main power source when the AC adaptor is not attached. The main battery maintains the state of the computer when the computer enters in sleep mode. 1-22 [CONFIDENTIAL] dynabook PORTEGE A30-E/TECRA A30-G,-J/dynabook S Series Maintenance Manual (960-931) -
Page 37: Table 1-7 Time Required For Charges
1. The battery becomes fully charged. 2. The AC adaptor or battery is removed. 3. Output voltage from main battery or AC adapter is abnormal. 4. Charging current is abnormal. dynabook PORTEGE A30-E/TECRA A30-G,-J/dynabook S Series Maintenance Manual (960-931) [CONFIDENTIAL] 1-23... -
Page 38: Table 1-8 Data Preservation Time
About 35 days (PSZ2* model) About TBD days (PSZ3* model) About 40 days (PSZ1* model) Main battery (4Cell,42Wh) About 5 days About 35 days (PSZ2* model) About TBD days (PSZ3* model) 1-24 [CONFIDENTIAL] dynabook PORTEGE A30-E/TECRA A30-G,-J/dynabook S Series Maintenance Manual (960-931) -
Page 39: Table 1-9 Ac Adapter Specifications
Power Input voltage 100V/240V 50Hz to 60Hz Input frequency Output voltage 19V±5% Output current 2.37A (Peak 2.89A) Dimension (mm) 36(W) x 85(L) x 26.3(H) (Typ.) Cable length 1800(±50) (mm) dynabook PORTEGE A30-E/TECRA A30-G,-J/dynabook S Series Maintenance Manual (960-931) [CONFIDENTIAL] 1-25... - Page 40 100V/240V Input voltage 50Hz to 60Hz Input frequency Output voltage 19V±5% 2.37A (Peak 2.89A) Output current Dimension (mm) 36(W) x 85(L) x 26.3(H) (Typ.) Cable length 1800 ±50 (mm) 1-26 [CONFIDENTIAL] dynabook PORTEGE A30-E/TECRA A30-G,-J/dynabook S Series Maintenance Manual (960-931)
- Page 41 50Hz to 60Hz Output voltage 5~20 V (Normal) 3A (Peak 3.5A) Output current 3.25A (Peak 3.75A) (at 20V output) Dimension (mm) 63(W) x 63(L) x 28(H) (Typ.) Cable length 1800±50 (mm) dynabook PORTEGE A30-E/TECRA A30-G,-J/dynabook S Series Maintenance Manual (960-931) [CONFIDENTIAL] 1-27...
-
Page 42: Table 1-10 Usb Type-C Adapter Specifications
Table 1-10 USB Type-C adapter specifications Rev.02 Item Specifications Maker Goodway Appearance USB-C to VGA Adapter Specifications G83C000J6110 (PSZ1*/PSZ2* model) G83C000J6210 (PSZ1*/PSZ2* model) Parts code G83C000J6310 RGB/USB Type-C port (Power Delivery Charging) Functions 1-28 [CONFIDENTIAL] dynabook PORTEGE A30-E/TECRA A30-G,-J/dynabook S Series Maintenance Manual (960-931) -
Page 43: Troubleshooting Procedures
Chapter 2 Troubleshooting Procedures... - Page 44 2.8.2 Procedure 2 Connector Check ............2-24 2.8.3 Procedure 3 Replacement Check ............2-25 Display (LCD) Troubleshooting ................2-26 2.9.1 Procedure 1 Diagnostic Test Program Execution Check ....2-26 2-ii [CONFIDENTIAL] dynabook PORTEGE A30-E/TECRA A30-G,-J/dynabook S Series Maintenance Manual (960-931)
- Page 45 Procedure 2 Registration of Pin and fingerprint ......... 2-41 2.17.3 Procedure 3 Authentication of fingerprint .......... 2-42 2.17.4 Procedure 4 Connector Check and Replacement Check ....2-43 2.18 Web camera Troubleshooting ................2-44 2-iii dynabook PORTEGE A30-E/TECRA A30-G,-J/dynabook S Series Maintenance Manual(960-931) [CONFIDENTIAL]...
- Page 46 USB Type-C port (power delivery charging) ........2-48 Figures Figure 2-1 Troubleshooting flowchart .................. 2-4 Tables Table 2-1 Power indicator ....................2-9 Table 2-2 DC IN/Battery indicator ................. 2-9 Table 2-3 Error code ....................2-12 2-iv [CONFIDENTIAL] dynabook PORTEGE A30-E/TECRA A30-G,-J/dynabook S Series Maintenance Manual (960-931)
-
Page 47: Troubleshooting
15. Fingerprint sensor 16. Web camera 17. HDMI port 18. USB Type-C adapter The Test Program operations are described in Chapter 3. Detailed procedures for replacement are described in Chapter 4. dynabook PORTEGE A30-E/TECRA A30-G,-J/dynabook S Series Maintenance Manual(960-931) [CONFIDENTIAL]... - Page 48 There are following two types of connections in the figure of board and module connection in this chapter. (1) Cable connection is described with lines in the figure. (2) Pin connection is described with arrow in the figure. < Sample figure of connection > 2-2 [CONFIDENTIAL] dynabook PORTEGE A30-E/TECRA A30-G,-J/dynabook S Series Maintenance Manual (960-931)
-
Page 49: Troubleshooting Flowchart
Make sure that Toshiba Windows is installed on the hard disk. Non-Windows operating systems can cause the computer to malfunction. Make sure all the optional equipment is removed from the computer. dynabook PORTEGE A30-E/TECRA A30-G,-J/dynabook S Series Maintenance Manual(960-931) [CONFIDENTIAL]... - Page 50 2.9. If the “Password=” message appears, type the password. Perform the SSD Is Windows logo being Troubleshooting Procedures loaded? in section 2.6. Figure 2-1 Troubleshooting flowchart (1/2) 2-4 [CONFIDENTIAL] dynabook PORTEGE A30-E/TECRA A30-G,-J/dynabook S Series Maintenance Manual (960-931)
- Page 51 Confirm on which test the error Is an error detected during was detected and perform the the running test? appropriate procedures. System can work without problem. Figure 2-1 Troubleshooting flowchart (2/2) dynabook PORTEGE A30-E/TECRA A30-G,-J/dynabook S Series Maintenance Manual(960-931) [CONFIDENTIAL]...
- Page 52 13. If an error is detected on the Sound, perform the Sound Troubleshooting Procedures in Section 2.15. 14. If an error is detected on the Memory media (SD Card) Slot, perform the Memory media (SD Card) Slot Troubleshooting Procedures in Section 2.16. 2-6 [CONFIDENTIAL] dynabook PORTEGE A30-E/TECRA A30-G,-J/dynabook S Series Maintenance Manual (960-931)
- Page 53 17. If a malfunction is detected on the HDMI port, perform the HDMI port Troubleshooting Procedures in Section 2.19. 18. If a malfunction is detected on the USB Type-C adapter, perform the USB Type-C adapter Troubleshooting Procedures in Section 2.20. dynabook PORTEGE A30-E/TECRA A30-G,-J/dynabook S Series Maintenance Manual(960-931) [CONFIDENTIAL]...
-
Page 54: Power Supply Troubleshooting
Procedures as instructed. The procedures described in this section are: Procedure 1: Power Status Check Procedure 2: Error Code Check Procedure 3: Connection Check Procedure 4: Charging Check Procedure 5: Replacement Check 2-8 [CONFIDENTIAL] dynabook PORTEGE A30-E/TECRA A30-G,-J/dynabook S Series Maintenance Manual (960-931) - Page 55 The AC adaptor must be connected in order to recharge the battery. No light Indicates the AC adaptor is not connected In the case of other than the above, there might be a problem on the battery. dynabook PORTEGE A30-E/TECRA A30-G,-J/dynabook S Series Maintenance Manual(960-931) [CONFIDENTIAL]...
- Page 56 G71C000H0510 (3-pin), G71C000L1610 (2-pin, USB PD) or G71C000L2510 (3-pin, USB PD). When the DC IN/Battery indicator is still flashing, go to Procedure 2.When the DC IN/Battery indicator is turned off, go to Procedure 3. 2-10 [CONFIDENTIAL] dynabook PORTEGE A30-E/TECRA A30-G,-J/dynabook S Series Maintenance Manual (960-931)
- Page 57 On for half second Interval between data bits Off for half second The error code begins with the least significant digit. Example: Error code A2h (Error codes are given in hexadecimal format.) dynabook PORTEGE A30-E/TECRA A30-G,-J/dynabook S Series Maintenance Manual(960-931) [CONFIDENTIAL] 2-11...
- Page 58 Abnormal output (no output) PCNFBV signal de-asserted B system power supply Power off the steady state and Power Off steady state BVON signal when de-asserted, Abnormal output (with output) PCNFBV signal asserted 2-12 [CONFIDENTIAL] dynabook PORTEGE A30-E/TECRA A30-G,-J/dynabook S Series Maintenance Manual (960-931)
- Page 59 Power On steady state OPGODD signal de-assert Abnormal output Other P system power supply Power off the steady state and Power Off steady state OPGODD signal assert Abnormal output (with output) dynabook PORTEGE A30-E/TECRA A30-G,-J/dynabook S Series Maintenance Manual(960-931) [CONFIDENTIAL] 2-13...
- Page 60 To disassemble the computer, follow the steps described in Chapter 4, Replacement Procedures. Check 1 AC adapter may be faulty. Replace the AC adapter with a new one. If the problem still occurs, perform Check 2. 2-14 [CONFIDENTIAL] dynabook PORTEGE A30-E/TECRA A30-G,-J/dynabook S Series Maintenance Manual (960-931)
- Page 61 Battery pack may be faulty. Replace it with a new one. If the problem still occurs, perform Check 4. Check 4 System board may be faulty. Replace it with a new one. dynabook PORTEGE A30-E/TECRA A30-G,-J/dynabook S Series Maintenance Manual(960-931) [CONFIDENTIAL] 2-15...
-
Page 62: System Board Troubleshooting
Procedure 1 and continue with the other procedures as instructed. The procedures described in this section are: Procedure 1: Message Check Procedure 2: Diagnostic Test Program Execution Check Procedure 3: Replacement Check 2-16 [CONFIDENTIAL] dynabook PORTEGE A30-E/TECRA A30-G,-J/dynabook S Series Maintenance Manual (960-931) -
Page 63: Procedure 1 Message Check
F2 to display the BIOS setup screen. Set the correct boot device and repeat Procedure 1. If any error occurs or any device is not installed, go to Procedure 2. dynabook PORTEGE A30-E/TECRA A30-G,-J/dynabook S Series Maintenance Manual(960-931) [CONFIDENTIAL] 2-17... -
Page 64: Procedure 2 Diagnostic Test Program Execution Check
Menu of the test program. After the exchange, register the DMI information to the new system board according to Chapter 3. At that time, update the BIOS and EC/KBC to the latest ones. 2-18 [CONFIDENTIAL] dynabook PORTEGE A30-E/TECRA A30-G,-J/dynabook S Series Maintenance Manual (960-931) -
Page 65: Usb Troubleshooting
2.5.2 Procedure 2 Replacement Check of USB unit Check 1 USB unit may be faulty. Replace it with a new one. If the problem still occurs, go to Procedure 3. dynabook PORTEGE A30-E/TECRA A30-G,-J/dynabook S Series Maintenance Manual(960-931) [CONFIDENTIAL] 2-19... - Page 66 USB board/LTE board may be faulty. Replace it with a new one. If the problem still occurs, perform Check 4. Check 4 System board may be faulty. Replace it with a new one. 2-20 [CONFIDENTIAL] dynabook PORTEGE A30-E/TECRA A30-G,-J/dynabook S Series Maintenance Manual (960-931)
-
Page 67: Ssd Troubleshooting
Make sure the M.2 SSD is connected firmly to the connector on the system board. System board CN1910 If the connection is loose, reconnect it firmly and repeat Procedure 1. If there is still an error, go to Procedure 3. dynabook PORTEGE A30-E/TECRA A30-G,-J/dynabook S Series Maintenance Manual(960-931) [CONFIDENTIAL] 2-21... -
Page 68: Procedure 3 Replacement Check
Chapter 4, Replacement Procedures and check the operation. If the problem still exists, perform Check 2. Check 2 System board may be faulty. Replace it with a new one following the instructions in Chapter 4, Replacement Procedures. 2-22 [CONFIDENTIAL] dynabook PORTEGE A30-E/TECRA A30-G,-J/dynabook S Series Maintenance Manual (960-931) -
Page 69: Keyboard Troubleshooting
Chapter 4, Replacement Procedures. If the problem still occurs, perform Check 3. Check 3 System board may be faulty. Replace it with a new one following the instructions in Chapter 4, Replacement Procedures. dynabook PORTEGE A30-E/TECRA A30-G,-J/dynabook S Series Maintenance Manual(960-931) [CONFIDENTIAL] 2-23... -
Page 70: Touch Pad (Click Pad) Troubleshooting
CN9560 Click pad I/F Touch Pad System board CN9550 KB fingerprint sensor I/F FP FFC (Only for Secure pad) If the problem still occurs, go to Procedure 3. 2-24 [CONFIDENTIAL] dynabook PORTEGE A30-E/TECRA A30-G,-J/dynabook S Series Maintenance Manual (960-931) -
Page 71: Procedure 3 Replacement Check
Chapter 4, Replacement Procedures. If the problem still occurs, perform Check Check 2 Touch Pad or the cable(s) may be faulty. Replace them with new ones one by one following the steps in Chapter 4, Replacement Procedures. dynabook PORTEGE A30-E/TECRA A30-G,-J/dynabook S Series Maintenance Manual(960-931) [CONFIDENTIAL] 2-25... -
Page 72: Display (Lcd) Troubleshooting
Diagnostics, for more information on how to perform the test program. If any error occurs during the test program, go to Procedure 3. If not, both the LCD should work properly. 2-26 [CONFIDENTIAL] dynabook PORTEGE A30-E/TECRA A30-G,-J/dynabook S Series Maintenance Manual (960-931) -
Page 73: Procedure 3 Connector Check And Replacement Check
If the problem still exists, perform Check 4 Check 4 The display controller on the system board may be damaged. Replace the system board with a new one. dynabook PORTEGE A30-E/TECRA A30-G,-J/dynabook S Series Maintenance Manual(960-931) [CONFIDENTIAL] 2-27... -
Page 74: Optical Disk Drive Troubleshooting: Not Used
Chapter 4, Replacement Procedures. If the problem still exists, perform Check 3. Check 3 System board may be faulty. Replace it with new one following the instructions in Chapter 4, Replacement Procedure. 2-28 [CONFIDENTIAL] dynabook PORTEGE A30-E/TECRA A30-G,-J/dynabook S Series Maintenance Manual (960-931) -
Page 75: Lan Troubleshooting
Make sure the USB FPC is firmly connected to the boards following the instruction in Chapter 4, Replacement Procedure. If the connection is loose, connect it firmly. If the problem still occurs, go to Check 4 dynabook PORTEGE A30-E/TECRA A30-G,-J/dynabook S Series Maintenance Manual(960-931) [CONFIDENTIAL] 2-29... - Page 76 USB board/LTE board or USB FPC may be faulty. Replace it with a new one. If the problem still occurs, perform Check 7. Check 7 System board may be faulty. Replace it with a new one following the instruction in Chapter 4, Replacement Procedure. 2-30 [CONFIDENTIAL] dynabook PORTEGE A30-E/TECRA A30-G,-J/dynabook S Series Maintenance Manual (960-931)
-
Page 77: Wireless Lan +Bluetooth Troubleshooting
If the cables are not connected properly, connect them firmly to the correct position and perform Procedure 1. If the problem still occurs, go to the procedure 3. dynabook PORTEGE A30-E/TECRA A30-G,-J/dynabook S Series Maintenance Manual(960-931) [CONFIDENTIAL] 2-31... - Page 78 The antennas for wireless function may be faulty. Replace them with new ones. If the problem still occurs, perform Check 3. Check 3 System board may be faulty. Replace it with a new one. 2-32 [CONFIDENTIAL] dynabook PORTEGE A30-E/TECRA A30-G,-J/dynabook S Series Maintenance Manual (960-931)
-
Page 79: Lte Troubleshooting
This procedure checks if the 3G/LTE module can be found on the Windows application. Refer to Chapter 3 for more information about that. If any problem is found on that check, perform Procedure 2. dynabook PORTEGE A30-E/TECRA A30-G,-J/dynabook S Series Maintenance Manual(960-931) [CONFIDENTIAL] 2-33... - Page 80 Procedure 1 again. If the problem still exists, go to procedure 3. 2.13.3 Procedure 3 Replacement Check The SIM card or SIM tray may be defective or damaged. Replace it new one. 2-34 [CONFIDENTIAL] dynabook PORTEGE A30-E/TECRA A30-G,-J/dynabook S Series Maintenance Manual (960-931)
- Page 81 Antennas may be defective or damaged. Replace them with new ones and perform Procedure 1 again. If the problem still exists, perform Check 6. Check 6 System board may be defective or damaged. Replace it with a new one. dynabook PORTEGE A30-E/TECRA A30-G,-J/dynabook S Series Maintenance Manual(960-931) [CONFIDENTIAL] 2-35...
-
Page 82: Wigig Troubleshooting: Not Used
Make sure that WiGig module is firmly connected to the connector on the system board. If the connection is loose, connect it firmly and perform Procedure 1. If the problem still occurs, perform Check 2. 2-36 [CONFIDENTIAL] dynabook PORTEGE A30-E/TECRA A30-G,-J/dynabook S Series Maintenance Manual (960-931) - Page 83 WiGig antenna may be faulty. Replace it with a new one. If the problem still occurs, perform Check 3. Check 3 The system board may be faulty. Replace it with a new one. dynabook PORTEGE A30-E/TECRA A30-G,-J/dynabook S Series Maintenance Manual(960-931) [CONFIDENTIAL] 2-37...
-
Page 84: Sound Troubleshooting
If speaker (right or left) does not work properly, perform Check 2 of Procedure 3. If built-in microphone (Web camera) does not work properly, perform Check 3 of Procedure 3. 2-38 [CONFIDENTIAL] dynabook PORTEGE A30-E/TECRA A30-G,-J/dynabook S Series Maintenance Manual (960-931) -
Page 85: Procedure 3 Replacement Check
Replacement Procedures. If the problem still occurs, perform Check 4. Check 4 System board may be faulty. Replace it with a new one following the instructions in Chapter 4, Replacement Procedures. dynabook PORTEGE A30-E/TECRA A30-G,-J/dynabook S Series Maintenance Manual(960-931) [CONFIDENTIAL] 2-39... -
Page 86: Memory Media (Sd Card) Slot Troubleshooting
Memory media (micro SD Card) may be faulty. Replace it with a new one. If the problem continues, perform Check 3. Check 3 System board may be faulty. Replace it with a new one following the step in Chapter 4 Replacement Procedures. 2-40 [CONFIDENTIAL] dynabook PORTEGE A30-E/TECRA A30-G,-J/dynabook S Series Maintenance Manual (960-931) -
Page 87: Fingerprint Sensor Troubleshooting
To use the fingerprint functions, registration of your fingers on “Windows Hello” after setting the Windows sign-in password and PIN. 2.17.2 Procedure 2 Registration of Pin and fingerprint As for the registration of the fingerprint information, refer to the User’s manual. dynabook PORTEGE A30-E/TECRA A30-G,-J/dynabook S Series Maintenance Manual(960-931) [CONFIDENTIAL] 2-41... -
Page 88: Procedure 3 Authentication Of Fingerprint
If you fail this authentication continually five times, you can not use the fingerprint authentication. In that case, type the password to sign in to Windows. If you want to type the password on the finger print authentication screen, press BACKSPACE. 2-42 [CONFIDENTIAL] dynabook PORTEGE A30-E/TECRA A30-G,-J/dynabook S Series Maintenance Manual (960-931) - Page 89 Exchange the system board first as the Secure pad is stuck with double-sided tape and it is impossible to reuse. Check 4 The Secure pad may be faulty. Replace it with a new one. dynabook PORTEGE A30-E/TECRA A30-G,-J/dynabook S Series Maintenance Manual(960-931) [CONFIDENTIAL] 2-43...
-
Page 90: Web Camera Troubleshooting
Procedure 1 again. If the problem still occurs, perform Check 3 Check 3 System board may be faulty. Replace it with a new one. 2-44 [CONFIDENTIAL] dynabook PORTEGE A30-E/TECRA A30-G,-J/dynabook S Series Maintenance Manual (960-931) -
Page 91: Hdmi Port Troubleshooting
4. On [Replay] tab, select the item with TV icon and click [Set as default] button. 5. Click [OK] button. Switching the image output from computer’s screen to TV When you press F5, the screen for selecting the device to show image will appear. dynabook PORTEGE A30-E/TECRA A30-G,-J/dynabook S Series Maintenance Manual(960-931) [CONFIDENTIAL] 2-45... -
Page 92: Procedure 2 Connector Check And Replacement Check
Check 5. Check 5 The system board may be damaged. Disassemble the computer following the steps described in Chapter 4, Replacement Procedures, and replace it with a new one. 2-46 [CONFIDENTIAL] dynabook PORTEGE A30-E/TECRA A30-G,-J/dynabook S Series Maintenance Manual (960-931) -
Page 93: Usb Type-C Adapter Troubleshooting
When you press F5, the screen for selecting the device to show image will appear. Select [Second screen only]. Then check if the desktop image is shown on the TV. If any problem occurs on sound and image output, perform Procedure 2. dynabook PORTEGE A30-E/TECRA A30-G,-J/dynabook S Series Maintenance Manual(960-931) [CONFIDENTIAL] 2-47... -
Page 94: Usb Type-C Port (Power Delivery Charging)
If the DC IN/battery LED doesn’t glow, make sure that the power cord, USB Type-C adapter and PC are connected firmly each other. If connection is loose, reconnect it firmly and return to Procedure 1. If the problem still occurs, perform Procedure 2. 2-48 [CONFIDENTIAL] dynabook PORTEGE A30-E/TECRA A30-G,-J/dynabook S Series Maintenance Manual (960-931) - Page 95 Check 2. Check 2 USB Type-C adapter may be faulty. Replace it with a new one. If the problem still exists, check the PC condition. dynabook PORTEGE A30-E/TECRA A30-G,-J/dynabook S Series Maintenance Manual(960-931) [CONFIDENTIAL] 2-49...
- Page 96 2 Troubleshooting Procedures 2-50 [CONFIDENTIAL] dynabook PORTEGE A30-E/TECRA A30-G,-J/dynabook S Series Maintenance Manual (960-931)
-
Page 97: Chapter 3 Tests And Diagnostics
3 Tests and Diagnostics Chapter 3 Tests and Diagnostics dynabook PORTEGE A30-E/TECRA A30-G,-J/dynabook S Series Maintenance Manual (960-931) [CONFIDENTIAL]... - Page 98 3 Tests and Diagnostics 3-ii [CONFIDENTIAL] dynabook PORTEGE A30-E/TECRA A30-G,-J/dynabook S Series Maintenance Manual (960-931)
- Page 99 Sound Test ....................... 3-29 3.16 SETUP ........................3-30 3.16.1 Function Description ................3-30 3.16.2 Accessing the SETUP Program ............3-38 3.17 Battery Off mode setting tool .................. 3-49 3.17.1 Outline ....................3-49 dynabook PORTEGE A30-E/TECRA A30-G,-J/dynabook S Series Maintenance Manual (960-931) [CONFIDENTIAL] 3-iii...
- Page 100 3 Tests and Diagnostics 3.17.2 Preparation ..................3-49 3.17.3 Start and procedure ................3-50 3-iv [CONFIDENTIAL] dynabook PORTEGE A30-E/TECRA A30-G,-J/dynabook S Series Maintenance Manual (960-931)
-
Page 101: Test Program For Maintenance
3.1.5 Diagnostic test programs There are programs to write the HW information and to check the function of HW components in the diagnostic test. dynabook PORTEGE A30-E/TECRA A30-G,-J/dynabook S Series Maintenance Manual (960-931) [CONFIDENTIAL] 3-1... -
Page 102: Setting Of Battery Off Mode
AC adapter and execute it to set the “Battery Off mode” state. If the item is not shown, you will need the following equipment for it. The Battery Off mode setting tool for maintenance (USB Memory), [CONFIDENTIAL] dynabook PORTEGE A30-E/TECRA A30-G,-J/dynabook S Series Maintenance Manual (960-931) -
Page 103: How To Execute The Test Program
Then repeat from Step 2. Procedure 2: Check of hardware information The program checks and displays the hardware information such as HDD and SSD of the computer. dynabook PORTEGE A30-E/TECRA A30-G,-J/dynabook S Series Maintenance Manual (960-931) [CONFIDENTIAL] 3-3... - Page 104 (Selection=Y)? When the message above appears, pressing ENTER will start EC/KBC update. Then, since the computer reboots automatically, repeat from Step 2. If the update is not needed, press N. [CONFIDENTIAL] dynabook PORTEGE A30-E/TECRA A30-G,-J/dynabook S Series Maintenance Manual (960-931)
- Page 105 To start the Main Test Menu, press 3 and Enter. To start the LCD Gamma Correction Utility, press 7 and Enter. NOTE: Before starting the diagnostics, be sure to that all the cables are connected firmly. dynabook PORTEGE A30-E/TECRA A30-G,-J/dynabook S Series Maintenance Manual (960-931) [CONFIDENTIAL] 3-5...
-
Page 106: Entry Of The Dmi Information
The following message will appear. Press Y. **** Warning : Update DMI really? (y/n) *** The PC will restart. Press F12 and select the USB memory as the boot device. Then the following screen will appear. [CONFIDENTIAL] dynabook PORTEGE A30-E/TECRA A30-G,-J/dynabook S Series Maintenance Manual (960-931) - Page 107 When Cancel button is pressed, the PC will restart. Press F12 and select the USB memory as the boot device. Then this program will return to the test program screen. dynabook PORTEGE A30-E/TECRA A30-G,-J/dynabook S Series Maintenance Manual (960-931) [CONFIDENTIAL] 3-7...
-
Page 108: Heatrun Test
2. Sequential Read Test Refer to Subtest 1 of 3.7 Hard disk/SSD Test 3. V-RAM Memory test Refer to Subtest 2 of 3.6 Memory Test To terminate the program, press SHIFT + Q. [CONFIDENTIAL] dynabook PORTEGE A30-E/TECRA A30-G,-J/dynabook S Series Maintenance Manual (960-931) -
Page 109: Main Test Menu
The following table shows the subtests names of each test. Table 3-1 Subtest names (1/2) TEST No TEST NAME SUBTEST No SUBTEST NAME MEMORY Main Memory Test V-RAM Memory Test dynabook PORTEGE A30-E/TECRA A30-G,-J/dynabook S Series Maintenance Manual (960-931) [CONFIDENTIAL] 3-9... - Page 110 The setting of Yes/No can be changed by pressing ENTER. Error Stop Select Yes: if any error occurs during the test, the test is suspended and key input is required. 3-10 [CONFIDENTIAL] dynabook PORTEGE A30-E/TECRA A30-G,-J/dynabook S Series Maintenance Manual (960-931)
- Page 111 The subtest is started in the conditions selected above by entering ENTER. For more information about the tests in the Main Test Menu and other tests, refer to Section 3.6 or later. dynabook PORTEGE A30-E/TECRA A30-G,-J/dynabook S Series Maintenance Manual (960-931) [CONFIDENTIAL] 3-11...
-
Page 112: Memory Test
If the test data and read data is not the same, this test displays a message of the data comparing error and writes the information to the text file (errorlog.txt) as an error log. As for the details of the error log, refer to 3.12 Log utility. 3-12 [CONFIDENTIAL] dynabook PORTEGE A30-E/TECRA A30-G,-J/dynabook S Series Maintenance Manual (960-931) -
Page 113: Hard Disk/Ssd Test
3. LBA 86 (=22 + 64) (by 512-byte) 4. LBA 45 (=86 - 41) (by 512-byte) At Step 1, this test starts from the LBA 63 and writes the test data by 512-byte. dynabook PORTEGE A30-E/TECRA A30-G,-J/dynabook S Series Maintenance Manual (960-931) [CONFIDENTIAL] 3-13... - Page 114 ) If the test data and read data is not the same, this test displays a message of “Data Compare error” and writes the information to the text file (errorlog.txt) as an error log. (1 LBA (512-byte)) Number of Passes LBA No. 000000・・・・・・・・・・・・ (UINT32) (UINT32) 3-14 [CONFIDENTIAL] dynabook PORTEGE A30-E/TECRA A30-G,-J/dynabook S Series Maintenance Manual (960-931)
- Page 115 ” and Compare error writes the information to the text file (errorlog.txt) as an error log. As for the details of the error log, refer to 3.12 Log utility. dynabook PORTEGE A30-E/TECRA A30-G,-J/dynabook S Series Maintenance Manual (960-931) [CONFIDENTIAL] 3-15...
-
Page 116: Keyboard Test
B (right click button), and displays the information in real time. To back to the Keyboard test menu screen, press the button A and B. (Displayed information) [X: xxxx] [Y: xxxx] [Button A : x] [Button B : x] 3-16 [CONFIDENTIAL] dynabook PORTEGE A30-E/TECRA A30-G,-J/dynabook S Series Maintenance Manual (960-931) -
Page 117: Lcd Panel Test
This test displays the white screen for 5 sec. and then the black screen for 5 sec. After that, this test backs to the LCD Panel test menu screen automatically. dynabook PORTEGE A30-E/TECRA A30-G,-J/dynabook S Series Maintenance Manual (960-931) [CONFIDENTIAL] 3-17... - Page 118 This test displays the white screen and changes the LCD brightness to the maximum, middle and low setting in order with 5-sec intervals. After that this test backs to the LCD Panel test menu screen automatically. 3-18 [CONFIDENTIAL] dynabook PORTEGE A30-E/TECRA A30-G,-J/dynabook S Series Maintenance Manual (960-931)
-
Page 119: Battery Charge Test
The test starts by pressing ENTER. The test gets the charging status of the mounted battery pack and displays the message. To back to the main menu screen, press ENTER. dynabook PORTEGE A30-E/TECRA A30-G,-J/dynabook S Series Maintenance Manual (960-931) [CONFIDENTIAL] 3-19... -
Page 120: Fan Test
OK appears in the display if the test ends without an error. NG appears in the display if an error is found during the test. To back to the main menu screen, press ENTER. 3-20 [CONFIDENTIAL] dynabook PORTEGE A30-E/TECRA A30-G,-J/dynabook S Series Maintenance Manual (960-931) -
Page 121: Log Utility
・Write..Write value(Memory Test/HDD Test) ・Read..Read value(Memory Test/HDD Test/ Battery Charge Test) To clear the log information, press C. To back to the main menu screen, press ENTER. dynabook PORTEGE A30-E/TECRA A30-G,-J/dynabook S Series Maintenance Manual (960-931) [CONFIDENTIAL] 3-21... -
Page 122: Lcd Gamma Correction
The PC will restart. Press F12 and select the USB memory as the boot device. Then the following screen will appear and the correction is done automatically. If this program ends successfully, “PASS” is displayed. 3-22 [CONFIDENTIAL] dynabook PORTEGE A30-E/TECRA A30-G,-J/dynabook S Series Maintenance Manual (960-931) -
Page 123: Log
Then this program will return to the original test program screen. 3.13.1 < To check the log contents without save > Touch "Log Info." to display the “Log Information Display”. dynabook PORTEGE A30-E/TECRA A30-G,-J/dynabook S Series Maintenance Manual (960-931) [CONFIDENTIAL] 3-23... - Page 124 Output the log file. < To save the log contents in an external memory device > The log contents can’t be saved in the internal disk to keep the user files. 3-24 [CONFIDENTIAL] dynabook PORTEGE A30-E/TECRA A30-G,-J/dynabook S Series Maintenance Manual (960-931)
- Page 125 3. Select a folder to save the information file and touch “Save”. The log file named “wintndx.log” or “wintndx64.log” will be output to (saved in) the specified folder. dynabook PORTEGE A30-E/TECRA A30-G,-J/dynabook S Series Maintenance Manual (960-931) [CONFIDENTIAL] 3-25...
-
Page 126: Wireless Module Test
Bluetooth function is mounted. <How to display PC system information screen> 1. Click Start button. 2. Click [dynabook サービスステーション(dynabook service station)] -> [シ ステム情報(System information)]. Check the content of “ネットワーク(Netwrok)”. 3-26 [CONFIDENTIAL] dynabook PORTEGE A30-E/TECRA A30-G,-J/dynabook S Series Maintenance Manual (960-931) - Page 127 3 Tests and Diagnostics Rev.02 If any wireless module name (such as “Wireless**”) appears on the screen, it means the wireless module has been recognized. dynabook PORTEGE A30-E/TECRA A30-G,-J/dynabook S Series Maintenance Manual (960-931) [CONFIDENTIAL] 3-27...
-
Page 128: Check Of The Antenna Connection
In the case of no-antenna connection If AP should be ready but no AP point appears, any problem might occur on the wireless module or on the antenna connection. 3-28 [CONFIDENTIAL] dynabook PORTEGE A30-E/TECRA A30-G,-J/dynabook S Series Maintenance Manual (960-931) -
Page 129: Sound Test
3 Tests and Diagnostics 3.15 Sound Test Since there is no sound test in the test program for maintenance, check the functions related to sound on Windows with music data, etc. dynabook PORTEGE A30-E/TECRA A30-G,-J/dynabook S Series Maintenance Manual (960-931) [CONFIDENTIAL] 3-29... -
Page 130: Setup
Device Access Control/Device Boot Control (*1) *1 : This item is shown only when a supervisor password is set. *2 : This item is shown only on some models. 3-30 [CONFIDENTIAL] dynabook PORTEGE A30-E/TECRA A30-G,-J/dynabook S Series Maintenance Manual (960-931) - Page 131 - LAN Boot Selection - MAC Address Pass Through - Power On Display - Boot Up NumLock Status - Large aperture graphics adapters Diagnostic - HDD/SSD Test - Memory Test - Exit dynabook PORTEGE A30-E/TECRA A30-G,-J/dynabook S Series Maintenance Manual (960-931) [CONFIDENTIAL] 3-31...
- Page 132 *1 : This item is shown only when a supervisor password is set. *2 : This item is shown only on some models. *3 : This item is shown only when both the User and Master HDD Password. 3-32 [CONFIDENTIAL] dynabook PORTEGE A30-E/TECRA A30-G,-J/dynabook S Series Maintenance Manual (960-931)
- Page 133 - Large aperture graphics adapters - eco Charge Mode - Battery Disconnect - Absolute Persistence Configuration Diagnostic - Start HDD/SSD Test - HDD/SSD Test Mode - Start Memory Test dynabook PORTEGE A30-E/TECRA A30-G,-J/dynabook S Series Maintenance Manual (960-931) [CONFIDENTIAL] 3-33...
- Page 134 Boot Option #1 Boot Option #2 Boot Option #3 Boot Option #4 Priority for devices Exit menu Exit Saving Changes Exit Discarding Changes Load Setup Defaults Save Changes and Power Off 3-34 [CONFIDENTIAL] dynabook PORTEGE A30-E/TECRA A30-G,-J/dynabook S Series Maintenance Manual (960-931)
- Page 135 *1: This item is shown only when a supervisor password is set. *2: This item is shown only on some models. *3: This item is shown only when both the User and Master HDD Password. dynabook PORTEGE A30-E/TECRA A30-G,-J/dynabook S Series Maintenance Manual (960-931) [CONFIDENTIAL] 3-35...
- Page 136 - Large aperture graphics adapters - eco Charge Mode - Battery Disconnect - Absolute Persistence Configuration Diagnostic - Start HDD/SSD Test - HDD/SSD Test Mode - Start Memory Test 3-36 [CONFIDENTIAL] dynabook PORTEGE A30-E/TECRA A30-G,-J/dynabook S Series Maintenance Manual (960-931)
- Page 137 Boot Option #3 Boot Option #4 Priority for devices Add New Boot Option Exit menu Exit Saving Changes Exit Discarding Changes Load Setup Defaults Save Changes and Power Off dynabook PORTEGE A30-E/TECRA A30-G,-J/dynabook S Series Maintenance Manual (960-931) [CONFIDENTIAL] 3-37...
-
Page 138: Accessing The Setup Program
3 Tests and Diagnostics 3.16.2 Accessing the SETUP Program Turn on the power SW. then press F2 of the keyboard. The following display appears. < PSZ1* model > Main menu screen 3-38 [CONFIDENTIAL] dynabook PORTEGE A30-E/TECRA A30-G,-J/dynabook S Series Maintenance Manual (960-931) - Page 139 3 Tests and Diagnostics Security menu screen Power Management menu screen dynabook PORTEGE A30-E/TECRA A30-G,-J/dynabook S Series Maintenance Manual (960-931) [CONFIDENTIAL] 3-39...
- Page 140 3 Tests and Diagnostics Advanced menu screen Exit menu screen 3-40 [CONFIDENTIAL] dynabook PORTEGE A30-E/TECRA A30-G,-J/dynabook S Series Maintenance Manual (960-931)
- Page 141 3 Tests and Diagnostics < PSZ2* model > Main menu screen Security menu screen dynabook PORTEGE A30-E/TECRA A30-G,-J/dynabook S Series Maintenance Manual (960-931) [CONFIDENTIAL] 3-41...
- Page 142 3 Tests and Diagnostics Power Management menu screen Advanced menu screen 3-42 [CONFIDENTIAL] dynabook PORTEGE A30-E/TECRA A30-G,-J/dynabook S Series Maintenance Manual (960-931)
- Page 143 3 Tests and Diagnostics Boot menu screen Exit menu screen dynabook PORTEGE A30-E/TECRA A30-G,-J/dynabook S Series Maintenance Manual (960-931) [CONFIDENTIAL] 3-43...
- Page 144 3 Tests and Diagnostics Rev.02 < PSZ3* model > Main menu screen Security menu screen 3-44 [CONFIDENTIAL] dynabook PORTEGE A30-E/TECRA A30-G,-J/dynabook S Series Maintenance Manual (960-931)
- Page 145 3 Tests and Diagnostics Rev.02 Power Management menu screen Advanced menu screen dynabook PORTEGE A30-E/TECRA A30-G,-J/dynabook S Series Maintenance Manual (960-931) [CONFIDENTIAL] 3-45...
- Page 146 3 Tests and Diagnostics Rev.02 Boot menu screen Exit menu screen 3-46 [CONFIDENTIAL] dynabook PORTEGE A30-E/TECRA A30-G,-J/dynabook S Series Maintenance Manual (960-931)
- Page 147 The Factory Preset Configuration When you access SETUP, the current configuration is displayed. 1. To show the factory preset configuration, press F9. 2. To accept the default settings, press Y. dynabook PORTEGE A30-E/TECRA A30-G,-J/dynabook S Series Maintenance Manual (960-931) [CONFIDENTIAL] 3-47...
- Page 148 3 Tests and Diagnostics How to change setup Options Since a help is displayed on the right-hand side of each menu screen, refer it before change. 3-48 [CONFIDENTIAL] dynabook PORTEGE A30-E/TECRA A30-G,-J/dynabook S Series Maintenance Manual (960-931)
-
Page 149: Battery Off Mode Setting Tool
Step 5: Copy the “BOOTx64.efi” file to the “efi\boot\” folder on the USB memory. Step 6: Download and unzip the SetBatOffMode_R***.zip, registered as 360082949 to the system, and copy to the root folder on the USB memory. dynabook PORTEGE A30-E/TECRA A30-G,-J/dynabook S Series Maintenance Manual (960-931) [CONFIDENTIAL] 3-49... - Page 150 When any key is pressed, the program returns to Step 3. Retry to do this program several times. If NG continues, end the program in Step 3 by pressing 0 key and check the PC condition. 3-50 [CONFIDENTIAL] dynabook PORTEGE A30-E/TECRA A30-G,-J/dynabook S Series Maintenance Manual (960-931)
- Page 151 NOTE: When turning on the power just after setting this mode, it will take 13 to 14 sec until the logo display. Do not press the power button again before logo display. dynabook PORTEGE A30-E/TECRA A30-G,-J/dynabook S Series Maintenance Manual (960-931) [CONFIDENTIAL] 3-51...
- Page 152 3 Tests and Diagnostics 3-52 [CONFIDENTIAL] dynabook PORTEGE A30-E/TECRA A30-G,-J/dynabook S Series Maintenance Manual (960-931)
- Page 153 Chapter 4 Replacement Procedures...
- Page 154 4 Replacement Procedures 4-ii [CONFIDENTIAL] dynabook PORTEGE A30-E/TECRA A30-G,-J/dynabook S Series Maintenance Manual (960-931)
- Page 155 CLICK PAD ......................4-67 4.19 LCD FAT ASSY/COVER ASSY ................4-69 4.20 LCD .......................... 4-74 4.21 HINGE ASSY ......................4-83 4.22 W-LAN ANTENNA/LTE ANTENNA ..............4-86 4.23 MIC BOARD/CAMERA MODULE ..............4-93 dynabook PORTEGE A30-E/TECRA A30-G,-J/dynabook S Series Maintenance Manual (960-931) [CONFIDENTIAL] 4-iii...
- Page 156 Figure 4-27 Removing the LCD (3) .................. 4-77 Figure 4-28 Removing the HINGE ASSY (1) ..............4-83 Figure 4-29 Removing the HINGE ASSY (2) ..............4-84 Figure 4-30 Removing the W-LAN ANTENNA/LTE ANTENNA (1) ......4-86 4-iv [CONFIDENTIAL] dynabook PORTEGE A30-E/TECRA A30-G,-J/dynabook S Series Maintenance Manual (960-931)
- Page 157 Figure 4-31 Removing the W-LAN ANTENNA/LTE ANTENNA (2) ......4-87 Figure 4-32 Removing the MIC BOARD/CAMERA MODULE (1) ....... 4-94 Figure 4-33 Removing the MIC BOARD/CAMERA MODULE (2) ....... 4-95 dynabook PORTEGE A30-E/TECRA A30-G,-J/dynabook S Series Maintenance Manual (960-931) [CONFIDENTIAL] 4-v...
- Page 158 4 Replacement Procedures 4-vi [CONFIDENTIAL] dynabook PORTEGE A30-E/TECRA A30-G,-J/dynabook S Series Maintenance Manual (960-931)
-
Page 159: Overview
The chart shows the case for the following example: • Removing the FAN All FRUs down to the “4.2 Micro SD card” to “4.6 BATTERY PACK” above the 4.10 FAN must be removed. dynabook PORTEGE A30-E/TECRA A30-G,-J/dynabook S Series Maintenance Manual (960-931) [CONFIDENTIAL] 4-1... - Page 160 (in case of “PHISON” is SQUARE CUSHION (311) printed on SSD) Parts List ITEM PART NAME Quantity ITEM No 19, 19-A CLICK PAD CLICK PAD AL TAPE (181) D TAPE PAD 4-2 [CONFIDENTIAL] dynabook PORTEGE A30-E/TECRA A30-G,-J/dynabook S Series Maintenance Manual (960-931)
- Page 161 ITEM PART NAME Quantity ITEM No LCD (Incel model) AL TAPE (131) (LTE model) Parts List ITEM PART NAME Quantity ITEM No LCD HARNESS LCD HARNESS INSU BH L dynabook PORTEGE A30-E/TECRA A30-G,-J/dynabook S Series Maintenance Manual (960-931) [CONFIDENTIAL] 4-3...
- Page 162 AL TAPE (171) (Camera model) LCD COVER ASSY EMI GASKET (T10) (FHD model) (Camera model) SQUARE CUSHION (181) LCD PROTECT (611) SPACER FHD SQUARE CUSHION (251) LCD PROTECT (161) EMI GASKET (T10) 4-4 [CONFIDENTIAL] dynabook PORTEGE A30-E/TECRA A30-G,-J/dynabook S Series Maintenance Manual (960-931)
- Page 163 CUSHION (251), LCD PROTECT (161), SQUARE CUSHION (231), LCD PROTECT ICT, SQUARE CUSHION (261), SQUARE CUSHION (311), LCD PROTECT (171), D TAPE ICT, INSU ANT HOLD and RUBBER SQUARE. dynabook PORTEGE A30-E/TECRA A30-G,-J/dynabook S Series Maintenance Manual (960-931) [CONFIDENTIAL] 4-5...
- Page 164 M2.5×2.5C S-THIN HEAD SCREW M2.5X4 FLAT HEAD M2.5×4B FLAT HEAD SCREW M2.5X6 FLAT HEAD M2.5×6B FLAT HEAD SCREW M2X2.3 FLAT HEAD M2×2.3C S-THIN HEAD TSCREW M2X3 3CR M2×3B S-THIN HEAD 4-6 [CONFIDENTIAL] dynabook PORTEGE A30-E/TECRA A30-G,-J/dynabook S Series Maintenance Manual (960-931)
- Page 165 6) Some parts inside the computer, such as the CPU and cooling module, become very hot during operation. Conduct repair work after they have cooled. Be careful around the CPU and cooling module to avoid burns. dynabook PORTEGE A30-E/TECRA A30-G,-J/dynabook S Series Maintenance Manual (960-931) [CONFIDENTIAL] 4-7...
- Page 166 11. Be careful that not to break the computer casing and harnesses by the removed parts. 12. After replacing an FRU, check that the computer and replaced part operate correctly. 4-8 [CONFIDENTIAL] dynabook PORTEGE A30-E/TECRA A30-G,-J/dynabook S Series Maintenance Manual (960-931)
- Page 167 Normal pin connectors are used for all other cables. Simply pull out or push in these connectors to disconnect or reconnect. Pressure plate connector Spring connector Back flip connector dynabook PORTEGE A30-E/TECRA A30-G,-J/dynabook S Series Maintenance Manual (960-931) [CONFIDENTIAL] 4-9...
- Page 168 • When checking the computer moved correctly, do not put the excessive power on the hinges and computer itself. After installing FRUs, check that the computer operates correctly. 4-10 [CONFIDENTIAL] dynabook PORTEGE A30-E/TECRA A30-G,-J/dynabook S Series Maintenance Manual (960-931)
- Page 169 ESD mats (lay on work table or floor) • An ESD wrist strap and heel grounder • Anti-static carpet or flooring • Air-ionizers in highly static sensitive areas • Antenna coaxial cable disconnector dynabook PORTEGE A30-E/TECRA A30-G,-J/dynabook S Series Maintenance Manual (960-931) [CONFIDENTIAL] 4-11...
- Page 170 Press along the axis of the screwdriver while turning the screw. This is because the contact area between the screw and driver is less than for a pan head screw (standard pan-shaped screw head). 4-12 [CONFIDENTIAL] dynabook PORTEGE A30-E/TECRA A30-G,-J/dynabook S Series Maintenance Manual (960-931)
- Page 171 U: Other screws (Unique screws: pan head, stud, etc.) Example: B6 ... 6mm BIND screw Screw color/material B: Black/Nickel C: Silver/Non-Hexavalent Chromate U: Other screws (Unique screws: such as stud, etc.) dynabook PORTEGE A30-E/TECRA A30-G,-J/dynabook S Series Maintenance Manual (960-931) [CONFIDENTIAL] 4-13...
-
Page 172: Micro Sd Card
To install the Micro SD Card, follow the steps below and refer to Figure 4-1. 1. Insert the Micro SD card into the slot and push it carefully to ensure a firm connection. 4-14 [CONFIDENTIAL] dynabook PORTEGE A30-E/TECRA A30-G,-J/dynabook S Series Maintenance Manual (960-931) -
Page 173: Sim Card
SIM card tray. 2. Remove the SIM card from the SIM card tray. SIM card SIM card tray Slender object Figure 4-2 Removing the SIM card dynabook PORTEGE A30-E/TECRA A30-G,-J/dynabook S Series Maintenance Manual (960-931) [CONFIDENTIAL] 4-15... - Page 174 To install the SIM Card, follow the steps below and refer to Figure 4-2. 1. Set the SIM card on the SIM card tray. 2. Set the SIM card tray (with the SIM card) into the SIM card slot. 4-16 [CONFIDENTIAL] dynabook PORTEGE A30-E/TECRA A30-G,-J/dynabook S Series Maintenance Manual (960-931)
-
Page 175: Smart Card
CAUTION: Before you remove the Smart card, refer to the card’s documentation and to your operating system documentation for proper procedures and precautions. 1. Pull out the Smart card from the smart card slot. Smart card Figure 4-3 Removing the Smart card dynabook PORTEGE A30-E/TECRA A30-G,-J/dynabook S Series Maintenance Manual (960-931) [CONFIDENTIAL] 4-17... - Page 176 To install the Smart Card, follow the steps below and refer to Figure 4-3. 1. Insert the Smart card into the smart card slot and push it carefully to ensure a firm connection. 4-18 [CONFIDENTIAL] dynabook PORTEGE A30-E/TECRA A30-G,-J/dynabook S Series Maintenance Manual (960-931)
-
Page 177: Base Assy
×4 (Described as “4” in the Figure 4-4) FLAT HEAD screw • M2.5×6B ×7 (Described as “6” in the Figure 4-4) FLAT HEAD screw 5. Remove the BASE ASSY while releasing the latches. dynabook PORTEGE A30-E/TECRA A30-G,-J/dynabook S Series Maintenance Manual (960-931) [CONFIDENTIAL] 4-19... - Page 178 4 Replacement Procedures 4.5 BASE ASSY BASE ASSY Figure 4-4 Removing the BASE ASSY 4-20 [CONFIDENTIAL] dynabook PORTEGE A30-E/TECRA A30-G,-J/dynabook S Series Maintenance Manual (960-931)
- Page 179 EMI GASKET to the BASE ASSY in place. NOTE: When replacing the BASE ASSY (2cell Battery model) with a new one, stick a new SQUARE CUSION (291) to the BASE ASSY in place. dynabook PORTEGE A30-E/TECRA A30-G,-J/dynabook S Series Maintenance Manual (960-931) [CONFIDENTIAL] 4-21...
- Page 180 Prepare required parts in advance, when replacing the following items. Parts List ITEM PART NAME Quantity ITEM No BASE ASSY EMI GASKET (P10) BASE ASSY (Non LTE model) SQUARE CUSHION (291) (2cell Battery model) 4-22 [CONFIDENTIAL] dynabook PORTEGE A30-E/TECRA A30-G,-J/dynabook S Series Maintenance Manual (960-931)
-
Page 181: Battery Pack
3. Remove the following screws (4cell model) and the BATTERY PACK. • M2.5×4B ×2 FLAT HEAD screw CAUTION: The used battery must be disposed according to the laws and ordinances of your local authority. dynabook PORTEGE A30-E/TECRA A30-G,-J/dynabook S Series Maintenance Manual (960-931) [CONFIDENTIAL] 4-23... - Page 182 4 Replacement Procedures 4.6 BATTERY PACK M2.5x4B FLAT HEAD BATTERY PACK INSU SQUARE M2.5x4B FLAT HEAD BATTERY HARNESS CN8021 Figure 4-5 Removing the BATTERY PACK (4cell) 4-24 [CONFIDENTIAL] dynabook PORTEGE A30-E/TECRA A30-G,-J/dynabook S Series Maintenance Manual (960-931)
- Page 183 4.6 BATTERY PACK 4 Replacement Procedures INSU SQUARE BATTERY PACK BATTERY HARNESS CN8021 Figure 4-6 Removing the BATTERY PACK (2cell) dynabook PORTEGE A30-E/TECRA A30-G,-J/dynabook S Series Maintenance Manual (960-931) [CONFIDENTIAL] 4-25...
- Page 184 2. Set the BATTERY PACK to the COVER ASSY. (2cell model) 3. Connect the BATTERY HARNESS to the connector CN8021 on the SYSTEM BOARD. 4. Stick the INSU SQUARE in place. 4-26 [CONFIDENTIAL] dynabook PORTEGE A30-E/TECRA A30-G,-J/dynabook S Series Maintenance Manual (960-931)
-
Page 185: Memory Module
Never press hard or bend the MEMORY MODULE. 1. Open the left and right latches outside and remove the MEMORY MODULE. Latch MEMORY MODULE Latch Figure 4-7 Removing the MEMORY MODULE dynabook PORTEGE A30-E/TECRA A30-G,-J/dynabook S Series Maintenance Manual (960-931) [CONFIDENTIAL] 4-27... - Page 186 2. When the power of the computer is turned on, the computer checks automatically the memory size. Confirm that the new memory is detected correctly. 3. If the memory is not detected, check if it is connected correctly. 4-28 [CONFIDENTIAL] dynabook PORTEGE A30-E/TECRA A30-G,-J/dynabook S Series Maintenance Manual (960-931)
- Page 187 3. Disconnect the SC FFC from the connectors on the SMART CARD SLOT and CN2100 on the SYSTEM BOARD. 4. Remove the SMART CARD SLOT in the arrow pointing from the guides of the COVER ASSY. dynabook PORTEGE A30-E/TECRA A30-G,-J/dynabook S Series Maintenance Manual (960-931) [CONFIDENTIAL] 4-29...
-
Page 188: Smart Card Slot
4 Replacement Procedures 4.8 SMART CARD SLOT INSU CUSHION SC SMART CARD SLOT AL TAPE SC FFC Guide CN2100 Figure 4-8 Removing the smart card slot 4-30 [CONFIDENTIAL] dynabook PORTEGE A30-E/TECRA A30-G,-J/dynabook S Series Maintenance Manual (960-931) - Page 189 CUSHION SC and AL TAPE (171) on the SMART CARD SLOT in place. Prepare required parts in advance, when replacing the following items. Parts List ITEM PART NAME Quantity ITEM No SMART CARD SLOT SMART CARD SLOT AL TAPE (171) dynabook PORTEGE A30-E/TECRA A30-G,-J/dynabook S Series Maintenance Manual (960-931) [CONFIDENTIAL] 4-31...
-
Page 190: Speaker
2. Disconnect the FP FFC (finger print sensor model) and CPAD FFC from the connectors CN9550 and CN9560 on the SYSTEM BOARD. Mark CN9560 CPAD FFC CN9550 FP FFC Figure 4-9 Removing the SPEAKER (1) 4-32 [CONFIDENTIAL] dynabook PORTEGE A30-E/TECRA A30-G,-J/dynabook S Series Maintenance Manual (960-931) - Page 191 4. Open the INSU. 5. Remove the SPEAKER (left and right) from the slots of the COVER ASSY. SPEAKER SPEAKER SPEAKER HARNESS CN6290 INSU Figure 4-10 Removing the SPEAKER (2) dynabook PORTEGE A30-E/TECRA A30-G,-J/dynabook S Series Maintenance Manual (960-931) [CONFIDENTIAL] 4-33...
- Page 192 5. Connect the mark side of the FP FFC (finger print sensor model) and CPAD FFC to the connectors on the CLICK PAD. Prepare required parts in advance, when replacing the following items. 4-34 [CONFIDENTIAL] dynabook PORTEGE A30-E/TECRA A30-G,-J/dynabook S Series Maintenance Manual (960-931)
- Page 193 4.9 SPEAKER 4 Replacement Procedures Parts List ITEM PART NAME Quantity ITEM No SPEAKER SPEAKER D STICK TAPE (211) D STICK TAPE (221) dynabook PORTEGE A30-E/TECRA A30-G,-J/dynabook S Series Maintenance Manual (960-931) [CONFIDENTIAL] 4-35...
-
Page 194: Fan
2. Remove the following screws and the FAN. ×2 M2×3C S-THIN HEAD screw NOTE: Do not touch the center portion of the FAN. M2x3C S-THIN HEAD FAN HARNESS CN3380 Figure 4-11 Removing the FAN 4-36 [CONFIDENTIAL] dynabook PORTEGE A30-E/TECRA A30-G,-J/dynabook S Series Maintenance Manual (960-931) - Page 195 1. Set the FAN to the COVER ASSY and secure it with the following screws. • M2×3C ×2 S-THIN HEAD screw 2. Connect the FAN HARNESS to the connector CN3380 on the SYSTEM BOARD. dynabook PORTEGE A30-E/TECRA A30-G,-J/dynabook S Series Maintenance Manual (960-931) [CONFIDENTIAL] 4-37...
-
Page 196: Lte Module
2. Disconnect the ANTENNA CABLEs from the connectors on the LTE MODULE. 3. Remove the following screw and disconnect the LTE MODULE from the connector CN2610 on the LTE BOARD. • M2×2.3C ×1 S-THIN HEAD screw 4-38 [CONFIDENTIAL] dynabook PORTEGE A30-E/TECRA A30-G,-J/dynabook S Series Maintenance Manual (960-931) - Page 197 (Quectel) (Sierra) LTE AUX ANTENNA Cable (black) LTE MAIN ANTENNA Cable (red) M2x2.3C S-THIN HEAD screw INSU LTE HNS HOLD INSU SQUARE (GM9042990431) Figure 4-12 Removing the LTE MODULE dynabook PORTEGE A30-E/TECRA A30-G,-J/dynabook S Series Maintenance Manual (960-931) [CONFIDENTIAL] 4-39...
- Page 198 2. Connect the LTE ANTENNA CABLEs to the connectors on the LTE MODULE. 3. Stick the INSU LTE HNS HOLD in place. Stick the INSU SQUARE (GM9042990431). (Quectel only) 4-40 [CONFIDENTIAL] dynabook PORTEGE A30-E/TECRA A30-G,-J/dynabook S Series Maintenance Manual (960-931)
-
Page 199: Usb Board/Lte Board
1. Disconnect the USB FPC from the connector CN9600 on the SYSTEM BOARD and CN9640 on the USB BOARD/LTE BOARD. CN9640 USB FPC CN9600 Figure 4-13 Removing the USB BOARD/LTE BOARD (1) dynabook PORTEGE A30-E/TECRA A30-G,-J/dynabook S Series Maintenance Manual (960-931) [CONFIDENTIAL] 4-41... - Page 200 2. Remove the following screws and the USB BOARD/LTE BOARD. • ×3 M2×3C S-THIN HEAD screw M2x3C S-THIN HEAD HINGE USB BOARD Figure 4-14 Removing the USB BOARD/LTE BOARD (2) 4-42 [CONFIDENTIAL] dynabook PORTEGE A30-E/TECRA A30-G,-J/dynabook S Series Maintenance Manual (960-931)
- Page 201 4.12 USB BOARD/LTE BOARD 4 Replacement Procedures M2x3C S-THIN HEAD HINGE LTE BOARD Figure 4-15 Removing the USB BOARD/LTE BOARD (3) dynabook PORTEGE A30-E/TECRA A30-G,-J/dynabook S Series Maintenance Manual (960-931) [CONFIDENTIAL] 4-43...
- Page 202 BOARD under the HINGE) and secure it with the following screws. • M2×3C ×3 S-THIN HEAD screw 2. Connect the USB FPC to the connector CN9600 on the SYSTEM BOARD and CN9640 on the USB BOARD/LTE BOARD. 4-44 [CONFIDENTIAL] dynabook PORTEGE A30-E/TECRA A30-G,-J/dynabook S Series Maintenance Manual (960-931)
-
Page 203: W-Lan Module
CN2630 on the SYSTEM BOARD. • M2×2.3C ×1 S-THIN HEAD screw M2x2.3C S-THIN HEAD W-LAN MAIN ANTENNA CABLE INSU W-LAN AUX ANTENNA CABLE W-LAN MODULE CN2630 Figure 4-16 Removing the W-LAN MODULE dynabook PORTEGE A30-E/TECRA A30-G,-J/dynabook S Series Maintenance Manual (960-931) [CONFIDENTIAL] 4-45... - Page 204 2. Connect the W-LAN ANTENNA CABLEs to the connectors on the W-LAN MODULE. (MAIN cable (with the white tube) to “▲MAIN 2” and AUX cable to “△AUX 1”) 3. Close the INSU. 4-46 [CONFIDENTIAL] dynabook PORTEGE A30-E/TECRA A30-G,-J/dynabook S Series Maintenance Manual (960-931)
-
Page 205: Heat Sink
To remove the HEAT SINK, follow the steps below and refer to Figure 4-17. 1. Remove the following screws and the HEAT SINK. • M2×2.3C ×2 S-THIN HEAD screw M2x2.3C S-THIN HEAD HEAT SINK Figure 4-17 Removing the HEAT SINK dynabook PORTEGE A30-E/TECRA A30-G,-J/dynabook S Series Maintenance Manual (960-931) [CONFIDENTIAL] 4-47... - Page 206 NOTE: Apply new silicon grease as shown in the figure below. Silicon grease 3. Set the HEAT SINK in place and secure it with the following screws. • M2×2.3C ×2 S-THIN HEAD screw 4-48 [CONFIDENTIAL] dynabook PORTEGE A30-E/TECRA A30-G,-J/dynabook S Series Maintenance Manual (960-931)
-
Page 207: System Board
(MBR-DPK) must be written on the SYSTEM BOARD. 3. When removing/installing the SYSTEM BOARD, handle with both hands and do not handle with the handling prohibition area (refer to the figure below). Handling prohibition area dynabook PORTEGE A30-E/TECRA A30-G,-J/dynabook S Series Maintenance Manual (960-931) [CONFIDENTIAL] 4-49... - Page 208 3. Turn up the INSU PCB GASKET and disconnect the KB BL FPC from the connector CN3280 on the SYSTEM BOARD. (back light KB model) 4. Release the lock bar and disconnect the LCD HARNESS from the connector CN5390 on the SYSTEM BOARD. 4-50 [CONFIDENTIAL] dynabook PORTEGE A30-E/TECRA A30-G,-J/dynabook S Series Maintenance Manual (960-931)
- Page 209 (Connected to CN3280) KB MEMBRANE (Connected to CN3240) INSU PCB GASET Lock bar LCD HARNESS (Connected to CN5390) DC-IN HARNESS (Connected to CN8001) Figure 4-18 Removing the SYSTEM BOARD (1) dynabook PORTEGE A30-E/TECRA A30-G,-J/dynabook S Series Maintenance Manual (960-931) [CONFIDENTIAL] 4-51...
- Page 210 5. Remove the following screws and the SYSTEM BOARD. • M2×3C ×4 S-THIN HEAD screw M2x3C S-THIN HEAD M2x3C S-THIN HEAD SYSTEM BOARD Figure 4-19 Removing the SYSTEM BOARD (2) 4-52 [CONFIDENTIAL] dynabook PORTEGE A30-E/TECRA A30-G,-J/dynabook S Series Maintenance Manual (960-931)
- Page 211 GASKET (if stuck on the original board) , INSU PCB PIPE, SQUARE CUSHION (241) (un-reusable) and INSU SSD to the SYSTEM BOARD in place for PSZ1* model. INSU PCB GASKET INSU PCB PIPE SQUARE CUSHION (241) dynabook PORTEGE A30-E/TECRA A30-G,-J/dynabook S Series Maintenance Manual (960-931) [CONFIDENTIAL] 4-53...
- Page 212 INSU PCB BATT HNS INSU PCB GASKET INSU MEM INSU PCB PIPE 20 SQUARE CUSHION (241) INSU PCB BATT HNS INSU PCB PIPE 20 To the board outline. To the board outline. 4-54 [CONFIDENTIAL] dynabook PORTEGE A30-E/TECRA A30-G,-J/dynabook S Series Maintenance Manual (960-931)
- Page 213 1. Set the SYSTEM BOARD to the COVER ASSY in place and secure it with the following screws. • M2×3C ×4 S-THIN HEAD screw 2. Connect the DC-IN HARNESS to the connector CN8001 on the SYSTEM BOARD. dynabook PORTEGE A30-E/TECRA A30-G,-J/dynabook S Series Maintenance Manual (960-931) [CONFIDENTIAL] 4-55...
- Page 214 Prepare required parts in advance, when replacing the following items. Rev.02 Parts List ITEM PART NAME Quantity ITEM No MOTHER BOARD ASSY SQUARE CUSHION (241) SYSTEM BOARD RUBBER SQUARE (MOTHER BOARD ASSY) (t1.6x3x3(TAPE t0.1): black) (PSZ3* model) 4-56 [CONFIDENTIAL] dynabook PORTEGE A30-E/TECRA A30-G,-J/dynabook S Series Maintenance Manual (960-931)
-
Page 215: Ssd
1. Remove the following screw and disconnect the SSD from the connector CN1910 on the SYSTEM BOARD. • M2×2.5 ×1 FLAT HEAD DANTUKI screw M2x2.5 FLAT HEAD DANTUKI CN1910 Figure 4-20 Removing the SSD dynabook PORTEGE A30-E/TECRA A30-G,-J/dynabook S Series Maintenance Manual (960-931) [CONFIDENTIAL] 4-57... - Page 216 Prepare required parts in advance, when replacing the following items. < PSZ2* model only > Parts List ITEM PART NAME Quantity ITEM No (in case of “PHISON” is SQUARE CUSHION (311) printed on SSD) 4-58 [CONFIDENTIAL] dynabook PORTEGE A30-E/TECRA A30-G,-J/dynabook S Series Maintenance Manual (960-931)
-
Page 217: Keyboard
To remove the KEYBOARD, follow the steps below and refer to Figure 4-21 and 4-22. 1. Turn the LCD FAT ASSY in the direction on the figure below. LCD FAT ASSY Figure 4-21 Removing the KEYBOARD (1) dynabook PORTEGE A30-E/TECRA A30-G,-J/dynabook S Series Maintenance Manual (960-931) [CONFIDENTIAL] 4-59... - Page 218 3. Releasing the latches and turn over the computer to remove the KEYBOARD while peeling the D-STICK TAPE portion carefully. Latch M2x3C S-THIN HEAD D-STICK TAPE (front) KB BL FPC KB MEMBRANE KEYBOARD Figure 4-22 Removing the KEYBOARD (2) 4-60 [CONFIDENTIAL] dynabook PORTEGE A30-E/TECRA A30-G,-J/dynabook S Series Maintenance Manual (960-931)
- Page 219 4.17 KEYBOARD 4 Replacement Procedures NOTE: Remove the KEYBOARD as shown in the figure below. dynabook PORTEGE A30-E/TECRA A30-G,-J/dynabook S Series Maintenance Manual (960-931) [CONFIDENTIAL] 4-61...
- Page 220 4 Replacement Procedures 4.17 KEYBOARD 4-62 [CONFIDENTIAL] dynabook PORTEGE A30-E/TECRA A30-G,-J/dynabook S Series Maintenance Manual (960-931)
- Page 221 To install the KEYBOARD, follow the steps below and refer to Figure 4-21 and 4-22. NOTE: When replacing the COVER ASSY with a new one, stick a new INSU SQUARE (191) (KB non backlight model) on the COVER ASSY in place. dynabook PORTEGE A30-E/TECRA A30-G,-J/dynabook S Series Maintenance Manual (960-931) [CONFIDENTIAL] 4-63...
- Page 222 4 Replacement Procedures 4.17 KEYBOARD NOTE: Set the KEYBOARD as shown in the figure below. 4-64 [CONFIDENTIAL] dynabook PORTEGE A30-E/TECRA A30-G,-J/dynabook S Series Maintenance Manual (960-931)
- Page 223 4.17 KEYBOARD 4 Replacement Procedures D-STICK TAPE dynabook PORTEGE A30-E/TECRA A30-G,-J/dynabook S Series Maintenance Manual (960-931) [CONFIDENTIAL] 4-65...
- Page 224 3. Set the KEYBOARD to the COVER ASSY while securing the latches. 4. Turn over the computer. 5. Secure the KEYBOARD with the following screw. • M2×3C ×1 S-THIN HEAD screw 4-66 [CONFIDENTIAL] dynabook PORTEGE A30-E/TECRA A30-G,-J/dynabook S Series Maintenance Manual (960-931)
-
Page 225: Click Pad
2. Peel off the CLICK PAD from the COVER ASSY. NOTE: Do not reuse the removed AL TAPE and CLICK PAD. Be sure to use new ones. CLICK PAD AL TAPE Figure 4-23 Removing the CLICK PAD dynabook PORTEGE A30-E/TECRA A30-G,-J/dynabook S Series Maintenance Manual (960-931) [CONFIDENTIAL] 4-67... - Page 226 Prepare required parts in advance, when replacing the following items. Parts List ITEM PART NAME Quantity ITEM No 19, 19-A CLICK PAD CLICK PAD AL TAPE (181) D TAPE PAD 4-68 [CONFIDENTIAL] dynabook PORTEGE A30-E/TECRA A30-G,-J/dynabook S Series Maintenance Manual (960-931)
- Page 227 1. Turn up the INSU. 2. Release the ANTENNA CABLEs. 3. Remove the following screws and separate the LCD FAT ASSY and COVER ASSY. • M2.5×4B ×2 FLAT HEAD screw dynabook PORTEGE A30-E/TECRA A30-G,-J/dynabook S Series Maintenance Manual (960-931) [CONFIDENTIAL] 4-69...
-
Page 228: Lcd Fat Assy/Cover Assy
4 Replacement Procedures 4.19 LCD FAT ASSY/COVER ASSY M2.5x4B FLAT HEAD M2.5x4B FLAT HEAD INSU COVER ASSY LCD FAT ASSY ANTENNA CABLE Figure 4-24 Removing the LCD FAT ASSY/COVER ASSY 4-70 [CONFIDENTIAL] dynabook PORTEGE A30-E/TECRA A30-G,-J/dynabook S Series Maintenance Manual (960-931) - Page 229 NOTE: When replacing the COVER ASSY with a new one, stick new EMI GASKET (Z10) (if stuck on the original COVER ASSY) and PRODUCT BADGE on the COVER ASSY in place. dynabook PORTEGE A30-E/TECRA A30-G,-J/dynabook S Series Maintenance Manual (960-931) [CONFIDENTIAL] 4-71...
- Page 230 4.19 LCD FAT ASSY/COVER ASSY 1. Arrange the ANTENNA CABLEs in place and fix them with the INSU. NOTE: Arrange the ANTENNA CABLEs as shown in the figure below. 4-72 [CONFIDENTIAL] dynabook PORTEGE A30-E/TECRA A30-G,-J/dynabook S Series Maintenance Manual (960-931)
- Page 231 (Smart card model) AL TAPE (181) 19, 19-A CLICK PAD EMI GASKET (Z10) COVER ASSY (if stuck on the original COVER ASSY) INSU SQUARE (191) (KB Non Backlight model) PRODUCT BADGE dynabook PORTEGE A30-E/TECRA A30-G,-J/dynabook S Series Maintenance Manual (960-931) [CONFIDENTIAL] 4-73...
-
Page 232: Lcd
NOTE: When handling the HINGE CAP L/R ASSY, be careful not to damage or scratch them. HINGE CAP R ASSY HINGE CAP L ASSY Figure 4-25 Removing the LCD (1) 4-74 [CONFIDENTIAL] dynabook PORTEGE A30-E/TECRA A30-G,-J/dynabook S Series Maintenance Manual (960-931) - Page 233 4.20 LCD 4 Replacement Procedures 2. Release the latches and remove the LCD MASK ASSY from the LCD COVER ASSY. LCD MASK ASSY Figure 4-26 Removing the LCD (2) dynabook PORTEGE A30-E/TECRA A30-G,-J/dynabook S Series Maintenance Manual (960-931) [CONFIDENTIAL] 4-75...
- Page 234 (LCD panel). When turning up the LCD UNIT to separate it from the COVER ASSY, be careful not to break the LCD UNIT. < Incell model > < HD model > 4-76 [CONFIDENTIAL] dynabook PORTEGE A30-E/TECRA A30-G,-J/dynabook S Series Maintenance Manual (960-931)
- Page 235 4. Turn up the pull tape and release the lock bar to disconnect the LCD HARNESS from the connector on the LCD UNIT. LCD UNIT LCD HARNESS LCD COVER ASSY Connector Lock bar Pull tape Figure 4-27 Removing the LCD (3) dynabook PORTEGE A30-E/TECRA A30-G,-J/dynabook S Series Maintenance Manual (960-931) [CONFIDENTIAL] 4-77...
- Page 236 LCD when replacing, and prepare an appropriate LCD HARNESS. 2. Lay down the lock bar to engage and close the pull tape. 3. Place the LDC UNIT on the LCD COVER ASSY in place. 4-78 [CONFIDENTIAL] dynabook PORTEGE A30-E/TECRA A30-G,-J/dynabook S Series Maintenance Manual (960-931)
- Page 237 PANEL (camera model) and FA PANEL (non camera model) to the LCD MASK in place. When sticking new parts, do not scratch or get dirty the lens of the LCD MASK. dynabook PORTEGE A30-E/TECRA A30-G,-J/dynabook S Series Maintenance Manual (960-931) [CONFIDENTIAL] 4-79...
- Page 238 4 Replacement Procedures 4.20 LCD 4-80 [CONFIDENTIAL] dynabook PORTEGE A30-E/TECRA A30-G,-J/dynabook S Series Maintenance Manual (960-931)
- Page 239 PART NAME Quantity ITEM No LCD (HD model) AL TAPE (131) (LTE model) Parts List ITEM PART NAME Quantity ITEM No LCD (Incel model) AL TAPE (131) (LTE model) dynabook PORTEGE A30-E/TECRA A30-G,-J/dynabook S Series Maintenance Manual (960-931) [CONFIDENTIAL] 4-81...
- Page 240 4 Replacement Procedures 4.20 LCD Parts List ITEM PART NAME Quantity ITEM No LCD HARNESS LCD HARNESS INSU BH L 4-82 [CONFIDENTIAL] dynabook PORTEGE A30-E/TECRA A30-G,-J/dynabook S Series Maintenance Manual (960-931)
-
Page 241: Hinge Assy
3. Remove the following screws and the HINGE R ASSY from the LCD COVER ASSY. • M2.5×2.5C ×2 S-THIN HEAD screw INSU BH R HINGE R ASSY M2.5x2.5C S-THIN HEAD ANTENNA CABLE Figure 4-28 Removing the HINGE ASSY (1) dynabook PORTEGE A30-E/TECRA A30-G,-J/dynabook S Series Maintenance Manual (960-931) [CONFIDENTIAL] 4-83... - Page 242 6. Remove the following screws and the HINGE L ASSY from the LCD COVER ASSY. • M2.5×2.5C ×2 S-THIN HEAD screw HINGE L ASSY INSU BH L M2.5x2.5C S-THIN HEAD LCD HARNESS ANTENNA CABLE Figure 4-29 Removing the HINGE ASSY (2) 4-84 [CONFIDENTIAL] dynabook PORTEGE A30-E/TECRA A30-G,-J/dynabook S Series Maintenance Manual (960-931)
- Page 243 5. Wrap the ANTENNA CABLEs with a new INSU BH R. 6. Stick the INSU BH R to the HINGE L ASSY. NOTE: Stick the INSU BH R to the HINGE R ASSY as shown in the figure below. dynabook PORTEGE A30-E/TECRA A30-G,-J/dynabook S Series Maintenance Manual (960-931) [CONFIDENTIAL] 4-85...
-
Page 244: W-Lan Antenna/Lte Antenna
1. Open the INSU ANT HOLD (LTE model) and release the W-LAN/LTE ANTENNA CABLE. INSU ANT HOLD INSU ANT HOLD LTE AUX ANTENNA CABLE INSU ANT HOLD INSU ANT HOLD Figure 4-30 Removing the W-LAN ANTENNA/LTE ANTENNA (1) 4-86 [CONFIDENTIAL] dynabook PORTEGE A30-E/TECRA A30-G,-J/dynabook S Series Maintenance Manual (960-931) - Page 245 W-LAN ANTENNA MAIN LTE ANTENNA/W-LAN ANTENNA MAIN CABLE W-LAN ANTENNA AUX LTE ANTENNA MAIN LTE ANTENNA AUX LTE ANTENNA/W-LAN ANTENNA AUX CABLE Figure 4-31 Removing the W-LAN ANTENNA/LTE ANTENNA (2) dynabook PORTEGE A30-E/TECRA A30-G,-J/dynabook S Series Maintenance Manual (960-931) [CONFIDENTIAL] 4-87...
- Page 246 1. Stick a new W-LAN ANTENNA MAIN and LTE ANTENNA MAIN to the LCD COVER ASSY in place. NOTE: Stick the W-LAN ANTENNA MAIN and LTE ANTENNA MAIN to the LCD COVER ASSY as shown in the figure below. 4-88 [CONFIDENTIAL] dynabook PORTEGE A30-E/TECRA A30-G,-J/dynabook S Series Maintenance Manual (960-931)
- Page 247 2. Arrange the W-LAN ANTENNA/LTE ANTENNA MAIN CABLE to the guides of the LCD COVER ASSY. NOTE: Arrange the W-LAN ANTENNA MAIN CABLE to the LCD COVER ASSY as shown in the figure below. dynabook PORTEGE A30-E/TECRA A30-G,-J/dynabook S Series Maintenance Manual (960-931) [CONFIDENTIAL] 4-89...
- Page 248 3. Stick a new W-LAN ANTENNA AUX and LTE ANTENNA AUX to the LCD COVER ASSY in place. NOTE: Stick the W-LAN ANTENNA AUX and LTE ANTENNA AUX to the LCD COVER ASSY as shown in the figure below. 4-90 [CONFIDENTIAL] dynabook PORTEGE A30-E/TECRA A30-G,-J/dynabook S Series Maintenance Manual (960-931)
- Page 249 4. Arrange the W-LAN ANTENNA/LTE ANTENNA AUX CABLE to the guides of the LCD COVER ASSY. NOTE: Arrange the W-LAN ANTENNA/LTE ANTENNA AUX CABLE to the LCD COVER ASSY as shown in the figure below. dynabook PORTEGE A30-E/TECRA A30-G,-J/dynabook S Series Maintenance Manual (960-931) [CONFIDENTIAL] 4-91...
- Page 250 W-LAN/LTE MAIN W-LAN/LTE MAIN ANTENNA ANTENNA INSU BH R Parts List ITEM PART NAME Quantity ITEM No W-LAN/LTE AUX ANTENNA W-LAN/LTE AUX INSU BH L ANTENNA INSU BH R 4-92 [CONFIDENTIAL] dynabook PORTEGE A30-E/TECRA A30-G,-J/dynabook S Series Maintenance Manual (960-931)
-
Page 251: Mic Board/Camera Module
MIC BOARD and on the CAMERA MODULE. 3. Peel off the LCD HARNESS (FPC portion) from the LCD COVER ASSY. NOTE: Do not reuse the removed LCD HARNESS. Be sure to use a new one. dynabook PORTEGE A30-E/TECRA A30-G,-J/dynabook S Series Maintenance Manual (960-931) [CONFIDENTIAL] 4-93... - Page 252 4 Replacement Procedures 4.23 MIC BOARD/CAMERA MODULE INSU LCD COV FHD CN9710 Connector SPACER FHD LCD HARNESS D STICK TAPE Figure 4-32 Removing the MIC BOARD/CAMERA MODULE (1) 4-94 [CONFIDENTIAL] dynabook PORTEGE A30-E/TECRA A30-G,-J/dynabook S Series Maintenance Manual (960-931)
- Page 253 NOTE: Do not reuse the removed AL TAPE (171). Be sure to use a new one. AL TAPE CAMERA MODULE MIC BOARD Figure 4-33 Removing the MIC BOARD/CAMERA MODULE (2) dynabook PORTEGE A30-E/TECRA A30-G,-J/dynabook S Series Maintenance Manual (960-931) [CONFIDENTIAL] 4-95...
- Page 254 6. Stick the INSU LCD COV FHD to the LCD COVER ASSY in place. (FHD model) 7. Stick a new SPACER FHD to the LCD COVER ASSY in place. (FHD model) 4-96 [CONFIDENTIAL] dynabook PORTEGE A30-E/TECRA A30-G,-J/dynabook S Series Maintenance Manual (960-931)
- Page 255 NOTE: When replacing the LCD COVER ASSY (camera model) with a new one, stick new EMI GASKET (T10) and AL TAPE (171) to the LCD COVER ASSY in place. dynabook PORTEGE A30-E/TECRA A30-G,-J/dynabook S Series Maintenance Manual (960-931) [CONFIDENTIAL] 4-97...
- Page 256 NOTE: When replacing the LCD COVER ASSY (HD model) with a new one, stick new SQUARE CUSHION (211), SQUARE CUSHION (131), D TAPE HD, LCD PROTECT (611) and LCD PROTECT (181) to the LCD COVER ASSY in place. 4-98 [CONFIDENTIAL] dynabook PORTEGE A30-E/TECRA A30-G,-J/dynabook S Series Maintenance Manual (960-931)
- Page 257 4.23 MIC BOARD/CAMERA MODULE 4 Replacement Procedures dynabook PORTEGE A30-E/TECRA A30-G,-J/dynabook S Series Maintenance Manual (960-931) [CONFIDENTIAL] 4-99...
- Page 258 4 Replacement Procedures 4.23 MIC BOARD/CAMERA MODULE 4-100 [CONFIDENTIAL]dynabook PORTEGE A30-E/TECRA A30-G,-J/dynabook S Series Maintenance Manual (960-931)
- Page 259 SQUARE CUSHION (181), SQUARE CUSHION (251), LCD PROTECT (161), EMI GASKET (T10), LCD PROTECT (611), INSU LCD COV FHD (can be reused) and SPACER FHD to the LCD COVER ASSY in place. dynabook PORTEGE A30-E/TECRA A30-G,-J/dynabook S Series Maintenance Manual (960-931) [CONFIDENTIAL]4-101...
- Page 260 4 Replacement Procedures 4.23 MIC BOARD/CAMERA MODULE 4-102 [CONFIDENTIAL]dynabook PORTEGE A30-E/TECRA A30-G,-J/dynabook S Series Maintenance Manual (960-931)
- Page 261 4.23 MIC BOARD/CAMERA MODULE 4 Replacement Procedures dynabook PORTEGE A30-E/TECRA A30-G,-J/dynabook S Series Maintenance Manual (960-931) [CONFIDENTIAL]4-103...
- Page 262 NOTE: When replacing the LCD COVER ASSY (Incell model) with a new one, stick the SQUARE CUSHION (231), SQUARE CUSHION (261), LCD PROTECT (171), LCD PROTECT ICT, D TAPE ICT and INSU ANT HOLD (LTE model) to the LCD COVER ASSY in place. 4-104 [CONFIDENTIAL]dynabook PORTEGE A30-E/TECRA A30-G,-J/dynabook S Series Maintenance Manual (960-931)
- Page 263 4.23 MIC BOARD/CAMERA MODULE 4 Replacement Procedures dynabook PORTEGE A30-E/TECRA A30-G,-J/dynabook S Series Maintenance Manual (960-931) [CONFIDENTIAL]4-105...
- Page 264 4 Replacement Procedures 4.23 MIC BOARD/CAMERA MODULE 4-106 [CONFIDENTIAL]dynabook PORTEGE A30-E/TECRA A30-G,-J/dynabook S Series Maintenance Manual (960-931)
- Page 265 LCD COVER ASSY AL TAPE (171) (Camera model) (HD model) EMI GASKET (T10) (Camera model) SQUARE CUSHION (131) SQUARE CUSHION (211) LCD PROTECT (611) D TAPE HD LCD PROTECT (181) dynabook PORTEGE A30-E/TECRA A30-G,-J/dynabook S Series Maintenance Manual (960-931) [CONFIDENTIAL]4-107...
- Page 266 ITEM PART NAME Quantity ITEM No CAMERA MODULE CAMERA MODULE AL TAPE (171) Parts List ITEM PART NAME Quantity ITEM No MIC BOARD MIC BOARD AL TAPE (171) (Camera model) 4-108 [CONFIDENTIAL]dynabook PORTEGE A30-E/TECRA A30-G,-J/dynabook S Series Maintenance Manual (960-931)
- Page 267 Appendices [CONFIDENTIAL]...
- Page 268 Appendices App-ii [CONFIDENTIAL] dynabook PORTEGE A30-E/TECRA A30-G,-J/dynabook S Series Maintenance Manual (960-931)
- Page 269 Appendix E Key Layout ..................... E-1 Appendix F Wiring Diagrams ................... F-1 Appendix G BIOS rewrite Procedures ................G-1 Appendix H EC/KBC rewrite Procedures ..............H-1 Appendix I Reliability ......................I-1 dynabook PORTEGE A30-E/TECRA A30-G,-J/dynabook S Series Maintenance Manual (960-931) [CONFIDENTIAL]App-iii...
- Page 270 Appendices App-iv [CONFIDENTIAL] dynabook PORTEGE A30-E/TECRA A30-G,-J/dynabook S Series Maintenance Manual (960-931)
- Page 271 LCD cover before securing the module with screws. Do not force the module into place, because stress can affect its performance. Also, the panel’s polarized surface is easily scarred, so be careful when handling it. dynabook PORTEGE A30-E/TECRA A30-G,-J/dynabook S Series Maintenance Manual (960-931) [CONFIDENTIAL] A-1...
- Page 272 4. If water or other liquid is left on the panel’s surface for a long period, it can change the screen’s tint or stain it. Be sure to quickly wipe off any liquid. A-2 [CONFIDENTIAL] dynabook PORTEGE A30-E/TECRA A30-G,-J/dynabook S Series Maintenance Manual (960-931)
- Page 273 6. CMOS-LSI circuits are used in the module, so guard against damage from electrostatic discharge. Be sure to wear a wrist or ankle ground when handling the module. dynabook PORTEGE A30-E/TECRA A30-G,-J/dynabook S Series Maintenance Manual (960-931) [CONFIDENTIAL] A-3...
- Page 274 8. Do not store the module at temperatures below specifications. Cold can cause the liquid crystals to freeze, lose their elasticity or otherwise suffer damage. 9. Do not disassemble the LCD module. Disassembly can cause malfunctions. A-4 [CONFIDENTIAL] dynabook PORTEGE A30-E/TECRA A30-G,-J/dynabook S Series Maintenance Manual (960-931)
- Page 275 10. If you transport the module, do not use packing material that contains epoxy resin (amine) or silicon glue (alcohol or oxide). These materials can release gas that can damage the panel’s polarization. dynabook PORTEGE A30-E/TECRA A30-G,-J/dynabook S Series Maintenance Manual (960-931) [CONFIDENTIAL] A-5...
- Page 276 Appendices Appendix A Handling the LCD Module A-6 [CONFIDENTIAL] dynabook PORTEGE A30-E/TECRA A30-G,-J/dynabook S Series Maintenance Manual (960-931)
- Page 277 Table B-1 System board (FASZSY*) connectors and ICs (Front) ......... B-1 Table B-2 System board (FASZSY*) connectors and ICs (Back) ......... B-3 Table B-3 USB board (FASZCN*/FASZLT*) connectors and ICs ......... B-5 Table B-4 MIC board (FASZMC*) connectors ................ B-6 dynabook PORTEGE A30-E/TECRA A30-G,-J/dynabook S Series Maintenance Manual (960-931)[CONFIDENTIAL]...
- Page 278 Appendix B Board Layout Appendices B-ii [CONFIDENTIAL]dynabook PORTEGE A30-E/TECRA A30-G,-J/dynabook S Series Maintenance Manual (960-931)
- Page 279 Figure B-1 System board (FASZSY*) layout (Front) Table B-1 System board (FASZSY*) connectors and ICs (Front) Name CN1910 M.2 SSD I/F connector CN4800 USB Type-C I/F connector IS2142 Micro SD card I/F connector dynabook PORTEGE A30-E/TECRA A30-G,-J/dynabook S Series Maintenance Manual (960-931)[CONFIDENTIAL]...
- Page 280 Appendices B.2 System board (FASZSY*) Back View CN6290 CN2100 CN9600 CN9550 CN3240 CN9560 CN3280 CN8021 CN1410 J6320 CN5690 CN3380 IC1050 CN8001 IC1440~IC1410 CN5390 CN2630 Figure B-2 System board (FASZSY*) layout (Back) [CONFIDENTIAL]dynabook PORTEGE A30-E/TECRA A30-G,-J/dynabook S Series Maintenance Manual (960-931)
- Page 281 USB FPC I/F connector CN3380 FAN I/F connector IC1050 CN2630 M.2 W-LAN NGFF I/F connector CN5390 LCD, Camera, MIC I/F connector CN8001 DC-IN I/F connector J6320 Headphone/Microphone combo jack CN5690 HDMI I/F connector dynabook PORTEGE A30-E/TECRA A30-G,-J/dynabook S Series Maintenance Manual (960-931)[CONFIDENTIAL]...
- Page 282 Appendix B Board Layout Appendices B.3 USB board (FASZCN*/FASZLT*) View IS2621 S3270 IC3280 (Front) CN2610 CN9640 CN4830 CN4810 CN4810 CN4050 CN4050 (Back (FASZCN*)) (Back (FASZLT*)) Figure B-3 USB board (FASZCN*/FASZLT*) layout [CONFIDENTIAL]dynabook PORTEGE A30-E/TECRA A30-G,-J/dynabook S Series Maintenance Manual (960-931)
- Page 283 Lid sensor S3270 Power switch CN9640 USB FPC I/F connector CN2610 LTE I/F connector CN4830 USB 3.0 Type-A I/F connector CN4810 USB 3.0 Type-A (S&C) I/F connector CN4050 LAN I/F connector dynabook PORTEGE A30-E/TECRA A30-G,-J/dynabook S Series Maintenance Manual (960-931)[CONFIDENTIAL]...
- Page 284 Appendix B Board Layout Appendices B.4 MIC board (FASZMC*) View CN9710 (Front) (Back) Figure B-4 MIC board (FASZMC*) layout Table B-4 MIC board (FASZMC*) connectors Name CN9710 System board I/F connector [CONFIDENTIAL]dynabook PORTEGE A30-E/TECRA A30-G,-J/dynabook S Series Maintenance Manual (960-931)
- Page 285 CN9710 System board I/F connector (6-pin) ................C-23 USB FPC (FASZYN*) ............................C-24 C.27 CN9611 System board I/F connector (76-pin) ................C-24 C.28 CN9612 USB board I/F connector (76-pin) .................. C-26 dynabook PORTEGE A30-E/TECRA A30-G,-J/dynabook S Series Maintenance Manual (960-931) [CONFIDENTIAL] C-i...
- Page 286 Table C-25 USB FPC I/F connector (76-pin) ....................C-21 Table C-26 System board I/F connector (6-pin) .................... C-23 Table C-27 System board I/F connector (76-pin) ..................C-24 Table C-28 USB board I/F connector (76-pin) ....................C-26 C-ii [CONFIDENTIAL] dynabook PORTEGE A30-E/TECRA A30-G,-J/dynabook S Series Maintenance Manual (960-931)
- Page 287 Pin No. Signal name Pin No. Signal name ZERSS3-E1N ZERSS3-E1P ZETSS3-E1N ZETSS3-E1P ZERSS2-E1N ZERSS2-E1P ZETSS2-E1N ZETSS2-E1P ZERSS1-E1N ZERSS1-E1P ZETSS1-E1N ZETSS1-E1P DVSLP1-E3P ZERSS0-E1P ZERSS0-E1N ZETSS0-E1N ZETSS0-E1P PLTRS1-E3N SSDXRQ-P3N XSSDPCI-E0N XSSDPCI-E0P dynabook PORTEGE A30-E/TECRA A30-G,-J/dynabook S Series Maintenance Manual (960-931) [CONFIDENTIAL] C-1...
- Page 288 Appendix C Pin Assignments Appendices Table C-1 M.2 SSD I/F connector (75-pin)(2/2) Pin No. Signal name Pin No. Signal name SSDMDL-P3P C-2 [CONFIDENTIAL] dynabook PORTEGE A30-E/TECRA A30-G,-J/dynabook S Series Maintenance Manual (960-931)
- Page 289 Table C-2 M.2 W-LAN NGFF I/Fconnector (75-pin) (1/2) Pin No. Signal name Pin No. Signal name WLAN-E3V ZUSBBT-E3P WLAN-E3V ZUSBBT-E3N ZETWL-E1P ZETWL-E1N (CLRST1-E3N) (CLDAT1-E1P) ZERWL-E1P (XCLCK1-E1P) ZERWL-E1N XPEWL-E0P XPEWL-E0N XSUSCK-E3P PLTRS1-E3N WLXRQ-P3N BTRFON-S3P PEWAKE-E3N WLRFON-S3P dynabook PORTEGE A30-E/TECRA A30-G,-J/dynabook S Series Maintenance Manual (960-931) [CONFIDENTIAL] C-3...
- Page 290 Appendix C Pin Assignments Appendices Table C-2 M.2 W-LAN NGFF I/Fconnector (75-pin) (2/2) Pin No. Signal name Pin No. Signal name WLDET-P3N WLAN-E3V WLAN-E3V C-4 [CONFIDENTIAL] dynabook PORTEGE A30-E/TECRA A30-G,-J/dynabook S Series Maintenance Manual (960-931)
- Page 291 KBSC10-S3N KBSC01-S3N KBSC11-S3N KBSC07-S3N KBSC15-S3N KBSC12-S3N KBSC13-S3N KBSC14-S3N CN3380 FAN I/F connector (4-pin) Table C-4 FAN I/F connector (4-pin) Pin No. Signal name Pin No. Signal name FANG0-P3P IC3380-4 dynabook PORTEGE A30-E/TECRA A30-G,-J/dynabook S Series Maintenance Manual (960-931) [CONFIDENTIAL] C-5...
- Page 292 CN5690 HDMI I/F connector (19-pin) Table C-6 HDMI I/Fconnector (19-pin) Pin No. Signal name Pin No. Signal name ZMHDT2-P3P ZMHDT2-P3N ZMHDT1-P3P ZMHDT1-P3N ZMHDT0-P3P ZMHDT0-P3N XMHDCK-P3P XMHDCK-P3N MHDSCL-P5P MHDSDA-P5P IC5690-1 MHDHPD-S5P C-6 [CONFIDENTIAL] dynabook PORTEGE A30-E/TECRA A30-G,-J/dynabook S Series Maintenance Manual (960-931)
- Page 293 Signal name Pin No. Signal name IC5390-4 ZUSBIT-E3P TPNLDT-P3N ZUSBIT-E3N PVT-EFV PVT-EFV BKLPWM-P3P BLEN-E3P EDPHPD-P3P PNL-P3V PNL-P3V ZEDPAU-P1N ZEDPAU-P1P ZEDPA0-P1P ZEDPA0-P1N ZEDPA1-P1P ZEDPA1-P1N MICDET-P3N CAMDET-P3N ZUSBWC-E3P ZUSBWC-E3N XDMCLK-P3P DMICIN-P3P dynabook PORTEGE A30-E/TECRA A30-G,-J/dynabook S Series Maintenance Manual (960-931) [CONFIDENTIAL] C-7...
- Page 294 SMBDAT-P3P IPDDAT-P3P IPDCLK-P3P C.10 CN9550 Fingerprint sensor I/F connector (6-pin) Table C-10 Fingerprint sensor I/F connector (6-pin) Pin No. Signal name Pin No. Signal name ZUSBFS-E3N ZUSBFS-E3P FSDET-E3P FS-E3V C-8 [CONFIDENTIAL] dynabook PORTEGE A30-E/TECRA A30-G,-J/dynabook S Series Maintenance Manual (960-931)
-
Page 295: Cn6290 Speaker I/F Connector (6-Pin
Signal name SLEEVE-PXP RING2-PXP HEADL-PXP HEADR-PXP A-GND DETECT-P3N C.13 CN8001 DC-IN I/F connector (2-pin) Table C-13 DC-IN I/F connector (2-pin) Pin No. Signal name Pin No. Signal name PDVBUS dynabook PORTEGE A30-E/TECRA A30-G,-J/dynabook S Series Maintenance Manual (960-931) [CONFIDENTIAL] C-9... -
Page 296: Cn9600 Usb Fpc I/F Connector (76-Pin
PNLOFF-S3N PWRSW-S3N ZMDI0P-EYP ZMDI0N-EYN ZMDI1P-EYP ZMDI1N-EYN ZMDI2P-EYP ZMDI2N-EYN ZMDI3P-EYP ZMDI3N-EYN ZUSBE1-E3N ZUSBE1-E3P ZU3P1R-E1N ZU3P1R-E1P ZU3P1T-E1N ZU3P1T-E1P ZUSBP2-E3N ZUSBP2-E3P ZU3P2R-E1N ZU3P2R-E1P ZU3P2T-E1N ZU3P2T-E1P USCON0-S3N USBOC0-E3N USBON1-S3N USBOC1-E3N 3GRFON-S3P MODSEL1-P3P 3GON-E1P C-10 [CONFIDENTIAL] dynabook PORTEGE A30-E/TECRA A30-G,-J/dynabook S Series Maintenance Manual (960-931) -
Page 297: Is2142 Sd Card I/F Connector (12-Pin
SDCMD-P3P FMC-P3V SDCLK-P3P SDAT0-P3P SDAT1-P3P SDCD-P3N C.16 CN3280 KB backlight I/F connector (4-pin) Table C-16 KB backlight I/F connector (4-pin) Pin No. Signal name Pin No. Signal name IC3280-4 KBBLDT-P3N dynabook PORTEGE A30-E/TECRA A30-G,-J/dynabook S Series Maintenance Manual (960-931) [CONFIDENTIAL]C-11... -
Page 298: Cn2100 Smart Card I/F Connector (10-Pin
Appendix C Pin Assignments Appendices C.17 CN2100 Smart Card I/F connector (10-pin) Table C-17 Smart Card I/F connector (10-pin) Pin No. Signal name Pin No. Signal name SMCD-P5V ZUSBSC-E3N USBSC-E3P SCRMDL-P3N C-12 [CONFIDENTIAL] dynabook PORTEGE A30-E/TECRA A30-G,-J/dynabook S Series Maintenance Manual (960-931) -
Page 299: Cn1410 Memory Connector (260-Pin
Pin No. Signal Name BDQ58-B1P BDQ63-B1P BDQ59-B1P BDQ62-B1P BDQS7-B1N 1R2-B1V BDQS7-B1P BDQ56-B1P BDQ61-B1P BDQ57-B1P BDQ60-B1P BDQ33-B1P BDQ36-B1P BDQ35-B1P BDQ37-B1P BDQS4-B1N 1R2-B1V BDQS4-B1P BDQ32-B1P BDQ39-B1P BDQ34-B1P BDQ38-B1P BDQ09-B1P BDQ10-B1P BDQ08-B1P BDQ13-B1P dynabook PORTEGE A30-E/TECRA A30-G,-J/dynabook S Series Maintenance Manual (960-931) [CONFIDENTIAL]C-13... - Page 300 BDQ15-B1P BDQ12-B1P BDQ31-B1P BDQ25-B1P BDQ26-B1P BDQ24-B1P BDQS3-B1N 1R2-B1V BDQS3-B1P BDQ28-B1P BDQ27-B1P BDQ29-B1P BDQ30-B1P 1R2-B1V 1R2-B1V 1R2-B1V MSMRST-B1N BCKE0-B1P BCKE1-B1P 1R2-B1V 1R2-B1V BBG1-B1P BACT-B1N BBG0-B1P BALERT-B1N 1R2-B1V 1R2-B1V BMA12-B1P BMA11-B1P C-14 [CONFIDENTIAL] dynabook PORTEGE A30-E/TECRA A30-G,-J/dynabook S Series Maintenance Manual (960-931)
- Page 301 BMA10-B1P 1R2-B1V 1R2-B1V BCS0-B1N BBA0-B1P BMA14-B1P BMA16-B1P 1R2-B1V 1R2-B1V BODT0-B1P BMA15-B1P BCS1-B1N BMA13-B1P 1R2-B1V 1R2-B1V BODT1-B1P 1R2-B1V BVREFCA-B0V BDQ50-B1P BDQ55-B1P BDQ51-B1P BDQ54-B1P BDQS6-B1N 1R2-B1V BDQS6-B1P BDQ48-B1P BDQ52-B1P BDQ49-B1P BDQ53-B1P BDQ47-B1P dynabook PORTEGE A30-E/TECRA A30-G,-J/dynabook S Series Maintenance Manual (960-931) [CONFIDENTIAL]C-15...
- Page 302 BDQ45-B1P BDQ43-B1P BDQ01-B1P BDQ00-B1P BDQ02-B1P BDQ05-B1P BDQS0-B1N 1R2-B1V BDQS0-B1P BDQ04-B1P BDQ06-B1P BDQ07-B1P BDQ03-B1P BDQ23-B1P BDQ21-B1P BDQ22-B1P BDQ20-B1P BDQS2-B1N 1R2-B1V BDQS2-B1P BDQ16-B1P BDQ18-B1P BDQ17-B1P BDQ19-B1P SMBCLK-P3P SMBDAT-P3P 2R5-B2V 0R6-P0V 2R5-B2V C-16 [CONFIDENTIAL] dynabook PORTEGE A30-E/TECRA A30-G,-J/dynabook S Series Maintenance Manual (960-931)
-
Page 303: Usb Board/Lte Board (Faszcn*/Faszlt
CN4830 USB 3.0 Type-A I/F connector (9-pin) Table C-21 USB 3.0 Type-A I/F connector (9-pin) Pin No. Signal name Pin No. Signal name US3PS1-E5V ZUSBP2-E3N US3PS1-E5V ZUSBP2-E3P ZU3P2R-E1N ZU3P2R-E1P US3PS1-E5V ZU3P2T-E1N ZU3P2T-E1P dynabook PORTEGE A30-E/TECRA A30-G,-J/dynabook S Series Maintenance Manual (960-931) [CONFIDENTIAL]C-17... -
Page 304: S3270 Power Switch (4-Pin
PWRSW-S3N PWRSW-S3N C.23 IS2621 SIM card I/F connector (10-pin) Table C-23 SIM card I/F connector (10-pin) Pin No. Signal name Pin No. Signal name IMPWR-E3V UIMRST-E3P UIMCLK-E3P UIMDAT-E3P UIMDET-E3N C-18 [CONFIDENTIAL] dynabook PORTEGE A30-E/TECRA A30-G,-J/dynabook S Series Maintenance Manual (960-931) - Page 305 Table C-24 M.2 3G I/F connector (75-pin) (1/2) Pin No. Signal Name Pin No. Signal Name 3G-E3V 3G-E3V 3GON-E1P ZUSB3G-E3P 3GRFON-S3P ZUSB3G-E3N 3GSAR-E1N ZU33GR-E1N UIMRST-E3P ZU33GR-E1P UIMCLK-E3P UIMDAT-E3P ZU33GT-E1N UIMPWR-E3V ZU33GT-E1P 3GDET-P3N UIMDET-E3N 3G-E3V dynabook PORTEGE A30-E/TECRA A30-G,-J/dynabook S Series Maintenance Manual (960-931) [CONFIDENTIAL]C-19...
- Page 306 Appendix C Pin Assignments Appendices Table C-24 M.2 3G I/F connector (75-pin) (2/2) Pin No. Signal Name Pin No. Signal Name 3G-E3V 3G-E3V C-20 [CONFIDENTIAL] dynabook PORTEGE A30-E/TECRA A30-G,-J/dynabook S Series Maintenance Manual (960-931)
-
Page 307: Cn9640 Usb Fpc I/F Connector (76-Pin
NC(USBON1-S3N) USBOC0-E3N USCON0-S3N ZU33GT-E1P(ZU3P2T-E1P) ZU33GT-E1N(ZU3P2T-E1N) ZU33GR-E1P(ZU3P2R-E1P) ZU33GR-E1N(ZU3P2R-E1N) ZUSB3G-E3P(ZUSBP2-E3P) ZUSB3G-E3N(ZUSBP2-E3N) ZU3P1T-E1P ZU3P1T-E1N ZU3P1R-E1P ZU3P1R-E1N ZUSBE1-E3P ZUSBE1-E3N ZMDI3N-EYN ZMDI3P-EYP ZMDI2N-EYN ZMDI2P-EYP ZMDI1N-EYN ZMDI1P-EYP * ( ) shows the name on FASZCN* board. dynabook PORTEGE A30-E/TECRA A30-G,-J/dynabook S Series Maintenance Manual (960-931) [CONFIDENTIAL]C-21... - Page 308 Appendix C Pin Assignments Appendices Table C-25 USB FPC I/Fconnector (76-pin) (2/2) Pin No. Signal name Pin No. Signal name ZMDI0N-EYN ZMDI0P-EYP PWRSW-S3N PNLOFF-S3N PWLEOR-M5N PWLEWH-M5N(NC) 3GDET-P3N(NC) 3GSAR-E1N(NC) C-22 [CONFIDENTIAL] dynabook PORTEGE A30-E/TECRA A30-G,-J/dynabook S Series Maintenance Manual (960-931)
-
Page 309: Mic Board (Faszmc
Appendix C Pin Assignments Appendices MIC board (FASZMC*) C.26 CN9710 System board I/F connector (6-pin) Table C-26 System board I/F connector (6-pin) Pin No. Signal name Pin No. Signal name DMICIN-P3P XDMCLK-P3P dynabook PORTEGE A30-E/TECRA A30-G,-J/dynabook S Series Maintenance Manual (960-931) [CONFIDENTIAL]C-23... -
Page 310: Usb Fpc (Faszyn
PNLOFF-S3N PWRSW-S3N ZMDI0P-EYP ZMDI0N-EYN ZMDI1P-EYP ZMDI1N-EYN ZMDI2P-EYP ZMDI2N-EYN ZMDI3P-EYP ZMDI3N-EYN ZUSBE1-E3N ZUSBE1-E3P ZU3P1R-E1N ZU3P1R-E1P ZU3P1T-E1N ZU3P1T-E1P ZUSBP2-E3N ZUSBP2-E3P ZU3P2R-E1N ZU3P2R-E1P ZU3P2T-E1N ZU3P2T-E1P USCON0-S3N USBOC0-E3N USBON1-S3N USBOC1-E3N 3GRFON-S3P 3GON-E1P U3REN1-E3N C-24 [CONFIDENTIAL] dynabook PORTEGE A30-E/TECRA A30-G,-J/dynabook S Series Maintenance Manual (960-931) - Page 311 Appendix C Pin Assignments Appendices Table C-27 System board I/Fconnector (76-pin) (2/2) Pin No. Signal name Pin No. Signal name dynabook PORTEGE A30-E/TECRA A30-G,-J/dynabook S Series Maintenance Manual (960-931) [CONFIDENTIAL]C-25...
- Page 312 Pin No. Signal name U3REN1-E3N 3GON-E1P 3GRFON-S3P USBOC1-E3N USBON1-S3N USBOC0-E3N USCON0-S3N ZU3P2T-E1P ZU3P2T-E1N ZU3P2R-E1P ZU3P2R-E1N ZUSBP2-E3P ZUSBP2-E3N ZU3P1T-E1P ZU3P1T-E1N ZU3P1R-E1P ZU3P1R-E1N ZUSBE1-E3P ZUSBE1-E3N ZMDI3N-EYN ZMDI3P-EYP ZMDI2N-EYN ZMDI2P-EYP ZMDI1N-EYN ZMDI1P-EYP C-26 [CONFIDENTIAL] dynabook PORTEGE A30-E/TECRA A30-G,-J/dynabook S Series Maintenance Manual (960-931)
- Page 313 Appendix C Pin Assignments Appendices Table C-28 USB board I/F connector (76-pin) (2/2) Pin No. Signal name Pin No. Signal name ZMDI0N-EYN ZMDI0P-EYP PWRSW-S3N PNLOFF-S3N PWLEOR-M5N PWLEWH-M5N 3GMDL-P3N 3GDET-P3N 3GSAR-E1N dynabook PORTEGE A30-E/TECRA A30-G,-J/dynabook S Series Maintenance Manual (960-931) [CONFIDENTIAL]C-27...
- Page 314 Appendix C Pin Assignments Appendices C-28 [CONFIDENTIAL] dynabook PORTEGE A30-E/TECRA A30-G,-J/dynabook S Series Maintenance Manual (960-931)
- Page 315 Keyboard for UK ...................... D-1 Keyboard for US ....................... D-2 Keyboard for JP ......................D-3 Figure D-1 UK Keyboard ....................D-1 Figure D-2 US Keyboard ..................... D-2 Figure D-3 JP Keyboard ...................... D-3 dynabook PORTEGE A30-E/TECRA A30-G,-J/dynabook S Series Maintenance Manual (960-931) [CONFIDENTIAL] D-i...
- Page 316 Appendices Appendix D Keyboard Matrix D-ii [CONFIDENTIAL] dynabook PORTEGE A30-E/TECRA A30-G,-J/dynabook S Series Maintenance Manual(960-931)
- Page 317 Appendix D Keyboard Matrix Appendices Keyboard for UK Figure D-1 UK Keyboard dynabook PORTEGE A30-E/TECRA A30-G,-J/dynabook S Series Maintenance Manual (960-931) [CONFIDENTIAL] D-1...
- Page 318 Appendices Appendix D Keyboard Matrix Keyboard for US Figure D-2 US Keyboard D-2 [CONFIDENTIAL] dynabook PORTEGE A30-E/TECRA A30-G,-J/dynabook S Series Maintenance Manual(960-931)
- Page 319 Appendix D Keyboard Matrix Appendices Keyboard for JP Figure D-3 JP Keyboard dynabook PORTEGE A30-E/TECRA A30-G,-J/dynabook S Series Maintenance Manual (960-931) [CONFIDENTIAL] D-3...
- Page 320 Appendices Appendix D Keyboard Matrix D-4 [CONFIDENTIAL] dynabook PORTEGE A30-E/TECRA A30-G,-J/dynabook S Series Maintenance Manual(960-931)
- Page 321 Keyboard for UK ....................... E-1 Keyboard for US ......................E-1 Keyboard for JP ......................E-2 Figure E-1 UK Keyboard ...................... E-1 Figure E-2 US Keyboard ...................... E-1 Figure E-3 JP Keyboard ......................E-2 dynabook PORTEGE A30-E/TECRA A30-G,-J/dynabook S Series Maintenance Manual (960-931) [CONFIDENTIAL]...
- Page 322 Appendices Appendix E Key Layout E-ii [CONFIDENTIAL] dynabook PORTEGE A30-E/TECRA A30-G,-J/dynabook S Series Maintenance Manual (960-931)
- Page 323 Appendix E Key Layout Appendices Keyboard for UK Figure E-1 UK Keyboard Keyboard for US Figure E-2 US Keyboard dynabook PORTEGE A30-E/TECRA A30-G,-J/dynabook S Series Maintenance Manual (960-931) [CONFIDENTIAL] E-1...
- Page 324 Appendices Appendix E Key Layout Keyboard for JP Figure E-3 JP Keyboard E-2 [CONFIDENTIAL] dynabook PORTEGE A30-E/TECRA A30-G,-J/dynabook S Series Maintenance Manual (960-931)
- Page 325 Appendix F Wiring diagrams Appendices Appendix F Wiring diagrams (Not used) RGB Monitor Loopback Connector Figure F-1 RGB Monitor Loopback Connector LAN Loopback Connector Figure F-2 LAN Loopback Connector dynabook PORTEGE A30-E/TECRA A30-G,-J/dynabook S Series Maintenance Manual (960-931) [CONFIDENTIAL] F-1...
- Page 326 Appendices Appendix F Wiring diagrams F-2 [CONFIDENTIAL] dynabook PORTEGE A30-E/TECRA A30-G,-J/dynabook S Series Maintenance Manual (960-931)
- Page 327 3. If you fail to rewrite BIOS, then when you next turn on the power, the power icon may flash in orange or an error message may be displayed. In this case, repeat the rewriting procedure. dynabook PORTEGE A30-E/TECRA A30-G,-J/dynabook S Series Maintenance Manual (960-931) [CONFIDENTIAL] G-1...
- Page 328 Appendices Appendix G BIOS rewrite procedures G-2 [CONFIDENTIAL] dynabook PORTEGE A30-E/TECRA A30-G,-J/dynabook S Series Maintenance Manual (960-931)
- Page 329 3. Set the USB Flash Memory containing EC/KBC rewriting data. 4. Turn on the power while holding down the Tab key. The EC/KBC rewriting starts. 5. When the EC/KBC rewrite is completed, the system will restart automatically. dynabook PORTEGE A30-E/TECRA A30-G,-J/dynabook S Series Maintenance Manual (960-931) [CONFIDENTIAL] H-1...
- Page 330 Appendix H EC/KBC rewrite procedures Rev.02 < PSZ2*/PSZ3* model > The EC/KBC solely can’t be updated. It is updated at the BIOS update simultaneously. As for the BIOS update, refer to Appendix G. H-2 [CONFIDENTIAL]dynabook PORTEGE A30-E/TECRA A30-G,-J/dynabook S Series Maintenance Manual (960-931)
- Page 331 The following tables show MTBF (Mean Time between Failures) in maximum configuration. Table I-1 MTBF < PSZ1* model > Time (hours) 8,638.87h < PSZ2* model > Time (hours) 8,549.46h Rev.02 < PSZ3* model > Time (hours) 7,223.30h dynabook PORTEGE A30-E/TECRA A30-G,-J/dynabook S Series Maintenance Manual (960-931) [CONFIDENTIAL]...
- Page 332 Appendices Appendix I Reliability I-2 [CONFIDENTIAL] dynabook PORTEGE A30-E/TECRA A30-G,-J/dynabook S Series Maintenance Manual (960-931)
Need help?
Do you have a question about the S Series and is the answer not in the manual?
Questions and answers