
Related Manuals for dynabook Satellite Pro L50-G


Summary of Contents for dynabook Satellite Pro L50-G
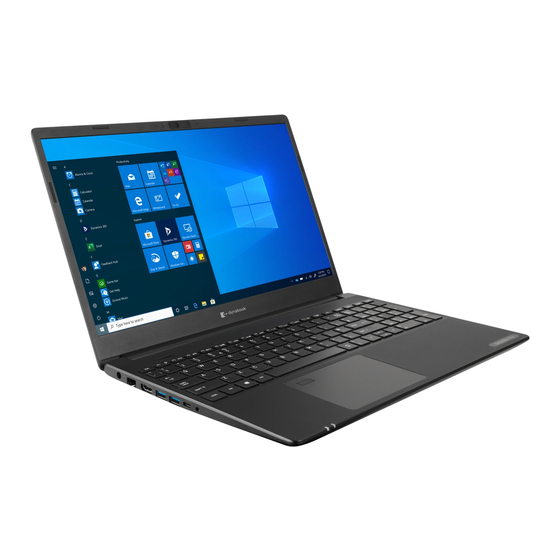
- Page 1 Dynabook Personal Computer Satellite Pro L50-G dynabook P*-C* (PBS10x/PBS11x/PBS12x) (PBS20x/PBS21x/PBS22x) Maintenance Manual DYNABOOK CORPORATION S/ No...
- Page 2 Copyright © 2019 by Dynabook Corporation. All rights reserved. Under the copyright laws, this manualcannot be reproducedin any form without the prior written permission of Dynabook. No patent liability is assumedwith respectto the useof the information contained herein. Dynabook Satellite Pro L50-G / dynabook P*-C* MaintenanceManual First edition Oct.
- Page 3 NOTE: “Note” contains general information that relates to your safemaintenance service. Improper repair of the computer may result in safety hazards.Dynabook requires service technicians and authorized dealersor service providers to ensurethe following safety precautions are adheredto strictly.
- Page 4 The manualis divided into the following parts: Chapter 1 Hardware Overview describesthe Satellite Pro L50-G /dynabook P*- C* system units and eachFRU. Chapter 2 Troubleshooting Proceduresexplains how to diagnoseand resolve FRU problems. Chapter 3 Test and Diagnostics describeshow to perform test anddiagnostic operations for maintenanceservice.
- Page 5 Text that you areinstructed to type in is shown in the boldface type below: DISKCOPY A: B: The display Text generatedby the XXXXX that appearson its display is presentedin the type facebelow: Format complete System transferred Maintenance Manual Satellite Pro L50-G / dynabookP*-C*...
-
Page 6: Table Of Contents
Procedure3 ReplacementCheck................ 2-10 HDD ........................2-11 Procedure2 Connector Check and ReplacementCheck........2-11 Keyboard........................ 2-12 Procedure1 Test Program Check............... 2-12 Procedure2 Connector Check and ReplacementCheck ........2-12 Display ......................... 2-13 Procedure1 External Monitor Check ............... 2-13 Maintenance Manual Satellite Pro L50-G / dynabookP*-C*... - Page 7 Procedure1 Windows Application Test ............2-24 Procedure2 Connector Check and ReplacementCheck ........2-24 2.17 SD card Port ......................2-25 Procedure1 Windows Application Test ............2-25 Procedure2 Connector Check and ReplacementCheck ........2-25 2.18 Camera........................2-26 Maintenance Manual Satellite Pro L50-G / dynabookP*-C*...
- Page 8 3.2.2 CPU Test....................6 3.2.3 Memory Test .....................7 3.2.4 HDD Test ....................11 3.2.5 Video Test ....................13 3.2.6 Keyboard Layout Test ................14 3.2.7 LED Test ....................16 3.2.8 FAN Test ....................19 3.2.9 DMI Read/ Write ...................20 viii Maintenance Manual Satellite Pro L50-G / dynabookP*-C*...
- Page 9 Installing the BaseEnclosure ................4-12 Battery Pack ......................4-13 Removing Battery Pack .................. 4-13 Installing Battery Pack ..................4-15 HDD ........................4-16 RemoveHDD ....................4-16 Installing HDD ....................4-17 SSD ........................4-18 Removing SSD ....................4-18 Maintenance Manual Satellite Pro L50-G / dynabookP*-C*...
- Page 10 LCD Module Mask ....................4-37 Removing LCD Module Mask ................4-37 Installing LCD Module Mask ................4-37 4.17 LED Panel ......................4-38 Removing LED Panel ................... 4-38 Installing LED Panel .....................4-41 4.18 CCD Module ......................4-42 Maintenance Manual Satellite Pro L50-G / dynabookP*-C*...
- Page 11 Removing CCD Module ..................4-42 Installing CCD Module ..................4-42 Maintenance Manual Satellite Pro L50-G / dynabookP*-C*...
- Page 12 Appendices Appendix A Handling the LCD Module ................A-1 Appendix B Board Layout ....................B-1 SystemBoard Front View................... B-1 SystemBoard Back View ................... B-2 Appendix C Keyboard Scan/CharacterCodes..............C-1 Appendix D Key Layout ....................D-1 Maintenance Manual Satellite Pro L50-G / dynabookP*-C*...
-
Page 13: Chapter 1 Hardware Overview
Chapter 1 Hardware Overview MaintenanceManual Satellite Pro L50-G / DynabookP* -C*... - Page 14 Figure 1-4 SystemUnit Block Diagram................... 10 Figure 1-5 SATA HDD ......................15 Figure 1-6 Solid statedriver..................... 16 Tables Table 1-1 HDD Specifications....................15 Table 1-2 SSDSpecifications ....................16 Table 1-3 Battery Specifications....................18 Table 1-4 Quick/Normal Charging Time................. 18 MaintenanceManual Satellite Pro L50-G / DynabookP* -C*...
-
Page 15: Features
1 Hardware Overview 1.1 Features Dynabook Satellite Pro L50-G is a Slim and Light entry notebook PC basedon the mobile Intel Comet lake series Processor, providing high-speed processing capabilities and advancedfeatures. The computer employs a Lithium Ion battery that allows it to be battery-operated for a longer period of time. -
Page 16: Solid Statedrive (Ssd)
15.6" FHD 250nits eDP1920x1080In-Cell touch LED display 15.6” FHD 250nits eDP1920x1080 LED display 15.6" HD 220nits eDP1366x768 LED display 15.6” FHD 470nits eDP1920x1080 LED display Touch Screen(Design capableonly for FHD in-cell touch LED) MaintenanceManual Satellite Pro L50-G / DynabookP* -C*... - Page 17 The computer has four USB ports, two for USB3.0 type A and one of USB3.0 type A support Sleep & Charge Function. Another One is USB type C (USB3.1 Gen1/DP/PD). High-Speed USB3.0/3.1 allows data transfers up to 5Gbps, MaintenanceManual Satellite Pro L50-G / DynabookP* -C*...
- Page 18 FHD(2M). It also supports CameraLED, LED is on when Cameraworking. The internal microphone is embeddedin this cameramodule. Battery The computer has a 4 Cell (2480mAh) Lithium Ion battery pack and integrated RTC battery function. MaintenanceManual Satellite Pro L50-G / DynabookP* -C*...
-
Page 19: Figure 1-1 Id Partsdescription Placement
1.1 Features 1 Hardware Overview Figures 1-1/1-2/1-3 and 1-4 show the computer and its system unit configuration, respectively. Figure 1-1 ID PartsDescription Placement MaintenanceManual Satellite Pro L50-G / DynabookP* -C*... -
Page 20: Figure 1-2 Computerblock Diagram
1 Hardware Overview 1.1 Features Figure 1-2 Computer Block Diagram MaintenanceManual Satellite Pro L50-G / DynabookP* -C*... -
Page 21: Figure 1-3 Systemboard Configurations
1.1 Features 1 Hardware Overview Figure 1-3 SystemBoard Configurations MaintenanceManual Satellite Pro L50-G / DynabookP* -C*... -
Page 22: Systemunit Components
1 Hardware Overview 1.2 SystemUnit Components 1.2 System Unit Components Figure 1-4 is Block Diagram of the SystemUnit. Figure 1-4 SystemUnit Block Diagram MaintenanceManual Satellite Pro L50-G / DynabookP* -C*... - Page 23 − 4096 MB (512M x 64) − 8192 MB (1024M x 64) DDR4 1.2V operation 16 internal Banks (4 Bank Groups) Data transfer rates: PC4-2666 on i3/i5/i7 CPU and PC4-2400 on CPU Celeron 5205U. BIOS ROM (Flash memory) MaintenanceManual Satellite Pro L50-G / DynabookP* -C*...
- Page 24 − Integrated Memory Controller (IMC) Power Management − Graphics Power Management − Intel Turbo Boost Technology 2.0 PowerControl − Configurable TDP (cTDP) and Low Power Mode − Adaptive ThermalMonitor − Digital Thermal Sensor − Intel Memory Thermal Management MaintenanceManual Satellite Pro L50-G / DynabookP* -C*...
- Page 25 − Interface controller function − Power supply sequencecontrol − Overheat shutdown support − LED control − Beep control − Device ON/OFF − Cooling fan speedcontrol − Universal I/O port − Battery capacity check MaintenanceManual Satellite Pro L50-G / DynabookP* -C*...
- Page 26 − IEEE 802.11ac+BT4.2 − IEEE 802.11ax+BT5.0 Data Rate − IEEE 802.11a/g: Standard54M bps − IEEE 802.11ac : Standard433.3M bps − IEEE 802.11ax : Standard1201M bps Frequency Channel − IEEE802.11a/g: 2.4GHz − IEEE802.11ac : 5GHz MaintenanceManual Satellite Pro L50-G / DynabookP* -C*...
-
Page 27: Inchhdd
The HDD is shown in Figure 1-5 and someof its specifications are listed in Table 1-1. Figure1-5 SATA HDD Item Specifications Capacity (GB) 1 TB Rotational Speed (RPM) 5400 rpm Height 7 mm User Data Sectors 1,953,525,168 Bytes / Sector Table 1-1 HDD Specifications MaintenanceManual Satellite Pro L50-G / DynabookP* -C*... -
Page 28: Solid Statedrive (Ssd)
900MB/s 145MB/s 128KB 28131328 SSD Optane M.2 PCIe 128G 512Byte 2,300MB/s 1,800MB/s 128KB 250069280 SSD(Value) 512Byte M.2 PCIe 256G 2,300MB/s 1,800MB/s 128KB 500118192 SSD(Value) 512Byte M.2 PCIe 512G 2,300MB/s 1,800MB/s 128KB 1000215216 SSD(Value) MaintenanceManual Satellite Pro L50-G / DynabookP* -C*... -
Page 29: Power Supply
Monitors the voltage output to the systemblock (load/logic circuit side). Monitors the voltage, over voltage, input/output current of the battery pack. Monitors the internal temperatureof the battery pack. Monitors the supply voltage from the AC adapter. MaintenanceManual Satellite Pro L50-G / DynabookP* -C*... -
Page 30: Batteries
Battery Charge When the AC adapter is attached, the battery is charged by off-state charge when the systemis powered off or by on-state chargewhen it is powered on. Table 1-4 Quick/Normal Charging Time MaintenanceManual Satellite Pro L50-G / DynabookP* -C*... - Page 31 A full charge is detected only when the battery is being charged by quick or normal charge. A full chargeis detectedwhen either of the following conditions is met: The current in the battery charging circuit drops below the predeterminedvalue. The charging time exceedsthe fixed limit. MaintenanceManual Satellite Pro L50-G / DynabookP* -C*...
-
Page 32: Chapter 2 Troubleshooting
概 要 Chapter 2 Troubleshooting... - Page 33 2 Troubleshooting Chapter 2 Contents Outline ........................2-1 Basic Flowchart ......................2-2 Power Supply ......................2-6 Procedure 1 Power Icon Check ................ 2-6 Procedure 2 Connec�on Check ................ 2-8 Procedure 3 Replacement Check ..............2-8 System Board ......................2-9 Procedure 1 Message Check ................2-9 Procedure 2 Test Program Check ..............
- Page 34 2 Troubleshooting Procedure 2 Connector Check and Replacement Check ....... 2-19 2.12 USB Port ........................2-20 Procedure 1 Windows Application Test ............2-20 Procedure 2 Connector Check and Replacement Check ....... 2-20 2.13 Headphone Port ..................... 2-21 Procedure 1 Windows Application Test ............2-21 Procedure 2 Connector Check and Replacement Check .......
- Page 35 2 Troubleshooting Procedure 2 Connector Check and Replacement Check....... 2-30 2.22 Bluetooth ......................2-31 Procedure 1 Windows Applica�on Test ............2-31 Procedure 2 Connector Check and Replacement Check....... 2-31 2.23 LAN Port ......................2-32 Procedure 1 Windows Applica�on Test ............2-32 Procedure 2 Connector Check and Replacement Check.......
- Page 36 2 Troubleshooting Figures Figure 2-1 Basic Flowchart (1/2)..................2-3 SatellitePro L50-G / dynabookP*-C* MaintenanceManual...
-
Page 38: Outline
2.1 Outline 2 Troubleshooting 2.1 Outline This chapter describes the fault diagnostic procedures for field replaceable units (FRUs) in the computer. The FRUs covered here are as follows: 1. SystemBoard 2. HDD 3. Keyboard 4. Display 5. Memory 6. SSD 7. -
Page 39: Basic Flowchart
If the user hasforgotten the systempassword, pleasefollow erase passwordprocess. To obtain necessary details about the process, please contact Tech Support team: EMEA Tech Support contact: tech-support_eu@dynabook.com Make sureWindows® 10 hasbeeninstalled on the HDD. Any other operating system can causethe computer to malfunction. SatellitePro L50-G / dynabookP*-C*... - Page 40 Procedure in Section 2.3 Turn the power on. Follow the system board diagnos�c Any error message is displayed? Procedure in Sec�on 2.4 Message “dynabook” is Follow the display diagnos�c displayed? Procedure in Sec�on 2.7 See the previous page to "Password=" is displayed?? Delete the password.
- Page 41 2 Troubleshooting 2.2 BasicFlowchart Follow the keyboard diagnos�c Keyboard works well?? Procedure in Sec�on 2.6 Insert Bootable USB Memory into USB Port. Follow the USB port diagnos�c Diagnostic Program Procedure in Sec�on 2.12 is loaded? Perform each test with the diagnostic program.
- Page 42 2.2 BasicFlowchart 2 Troubleshooting If diagnos�c program cannot detect an error, the error may be intermittent. Run con�nuous test program repeatedly to isolate problem. Check log utility func�on to confirm which diagnos�c test detects error, and perform appropriate troubleshoo�ng procedures as below: 1.
-
Page 43: Power Supply
2 Troubleshooting 2.3 Power Supply 2.3 Power Supply The power supply in the computer controls many func�ons and components. To check if the power supply is defec�ve or malfunctioning, follow the troubleshoo�ng procedures below as instructed. Procedure 1 Power Icon Check Procedure 2 Connection Check Procedure 3... - Page 44 2.3 Power Supply 2 Troubleshooting If the DC IN/Ba�ery Charge LED is off, follow the steps below: 1. Remove the battery pack and the AC adapterto shut off power supply to the computer. Shut down the computer. Next, remove the AC adapter. Then disassemblethe computer and replace the battery.
-
Page 45: Procedure2 Connection Check
2 Troubleshooting 2.3 Power Supply Procedure 2 Connection Check Power is supplied to the system board as illustrated below: System board adaptor AC power cord AC adaptor cord Battery pack Follow the steps below to check whether each connector has been connected correctly: Check1 Make sure the ACadaptor and ACpower cord have been firmly pluggedinto the DCIN socketand wall outlet, respectively. -
Page 46: Systemboard
2.4 SystemBoard 2 Troubleshooting 2.4 System Board To check if the system board is defec�ve or malfunc�oning, follow the troubleshoo�ng procedures below as instructed. Procedure 1 MessageCheck Procedure 2 Test Program Check Procedure 3 Replacement Check Procedure 1 Message Check When the power is turned on, the system performs the self-diagnos�c Power On Self Test (POST) embedded in the BIOS ROM. -
Page 47: Procedure2 Test Program Check
2 Troubleshooting 2.4 SystemBoard Procedure 2 Test Program Check The maintenance test program contains several programs for diagnosing the system board and CPU. Execute the following test programs using the procedures described in Chapter 3. 1. SystemInformation Test 2. CPU Test 3. -
Page 48: Hdd
2.5 HDD 2 Troubleshooting 2.5 HDD To check if the 7.0mm HDD is defec�ve or malfunc�oning, follow the troubleshoo�ng procedures below as instructed. Procedure 1 Test Program Check Procedure 2 Connector Check and Replacement Check CAUTION: The contents of the HDD will be erased when the HDD diagnostic test or formatting is executed. -
Page 49: Keyboard
2 Troubleshooting 2.6 Keyboard 2.6 Keyboard To check if the computer’s keyboard is defec�ve or malfunc�oning, follow troubleshoo�ng procedures below as instructed. Procedure 1 Test Program Check Procedure 2 Connector Check and Replacement Check Procedure 1 Test Program Check Execute the Keyboard test available as part of the maintenance test program. See Chapter 3 for information on how to perform the test. -
Page 50: Display
2.7 Display 2 Troubleshooting 2.7 Display To check if the computer’s display is defec�ve or malfunc�oning, follow the troubleshoo�ng procedures below as instructed. Procedure1 External Monitor Check(Monitor with HDMI terminal) Procedure 2 Test Program Check Procedure 3 Connector Check and Replacement Check Procedure 1 External Monitor Check Connect an external monitor to the computer's external monitor port, then boot the computer. - Page 51 2 Troubleshooting 2.7 Display 3. If there isstill an error, perform Check2. Check2 The LCDcablemay be faulty. Replaceit with a new one and return to Procedure3. If there isstill an error, perform Check3. Check3 Make sure the LCDcable hasbeen firmly connected to the systemboard and LCDmodule, if the cable islooseor off, reconnectit firmly and return to Procedure3.
-
Page 52: Memory
2.8 Memory 2 Troubleshooting 2.8 Memory To check if the computer’s Memory Module is defective or malfunc�oning, follow the troubleshoo�ng procedures below as instructed. Procedure 1 Test Program Check Procedure 2 Connector Check and Replacement Check Procedure 1 Test Program Check Execute Memory Test Program available as part of the maintenance test program. -
Page 53: Ssd(Solid-State Drive)
2 Troubleshooting 2.9 SSD (Solid-stateDrive) 2.9 SSD (Solid-state Drive) To check if the SSD is defec�ve or malfunc�oning, follow the troubleshoo�ng procedures below as instructed. Procedure 1 Test Program Check Procedure 2 Connector Check and Replacement Check CAUTION: The contents of the SSD will be erased when the SSD diagnostic test or formatting is executed. -
Page 54: Procedure1 Test Program Check
2.9 SSD (Solid-stateDrive) 2 Troubleshooting Procedure 1 Test Program Check Run the storage test program stored on the maintenance test program disk for all test items. See Chapter 3 for details on how to use the test program. If an error is detected during the SSD test, go to Procedure 2. Procedure 2 Connector Checkand Replacement Check The SSD or system board may be faulty. -
Page 55: Audio Test
2 Troubleshooting 2.10 Audio 2.10 Audio Test To check if the computer’s Speaker is defec�ve or malfunc�oning, follow troubleshoo�ng procedures below as instructed. Procedure1 Windows Application Test Procedure 2 Connector Check and Replacement Check Procedure 1 Windows Application Test Speakers are connected to System Board through cable. Please power on the computer into Windows. -
Page 56: Touchpad
2.11 Touchpad 2 Troubleshooting 2.11 Touchpad This model has support two kind types Touch Pad. One is normal touch pad, another is secure pad. To check if the computer’s Touchpad or Secure pad is defec�ve or malfunc�oning, follow troubleshoo�ng procedures below as instructed. Procedure1 Windows Application Test Procedure 2 Connector Check and Replacement Check Procedure 1 Windows Application Test... -
Page 57: Usb Port
2 Troubleshooting 2.12 USB Port 2.12 USB Port To determine if the computer’s USB Port is functioning properly or malfunc�ons, perform following procedures. Start with Procedure 1 and con�nue with the other procedure as instruc�on below. Procedure1 Windows Application Test Procedure 2 Connector Check and Replacement Check Procedure 1 Windows Application Test The USB Port Connector is mounted on System Board. -
Page 58: Headphoneport
2.13 HeadphonePort 2 Troubleshooting 2.13 Headphone Port To determine if the computer’s Headphone Port is func�oning properly or malfunc�ons, perform following procedures. Start with Procedure 1 and con�nue with the other procedure as instruction below. Procedure1 Windows Application Test Procedure 2 Connector Check and Replacement Check Procedure 1 Windows Application Test Headphone Port Connector is mounted on System Board. -
Page 59: Microphone Port
2 Troubleshooting 2.14 Microphone Port 2.14 Microphone Port To determine if the computer’s Microphone Port is func�oning properly or malfunc�ons, perform following procedures. Start with Procedure 1 and con�nue with the other procedure as instruc�on below. Procedure1 Windows Application Test Procedure 2 Connector Check and Replacement Check Procedure 1 Windows Application Test Microphone Port Connector is mounted on System Board. -
Page 60: Smartcard Port
2.15 Smart card Port 2 Troubleshooting 2.15 Smart card Port Smart card Board or System Board may be the reason of Smart card fault. Either of these two components may be damaged. To determine if the computer’s Smart card Board is func�oning properly, perform following procedures. -
Page 61: Hdmi Port
2 Troubleshooting 2.16HDMI Port 2.16 HDMI Port To determine if the computer’s HDMI Port is func�oning properly or malfunc�ons, perform following procedures. Start with Procedure 1 and con�nue with the other procedure as instruc�on below. Procedure1 Windows Application Test Procedure 2 Connector Check and Replacement Check Procedure 1 Windows Application Test The HDMI Port Connector is mounted on System Board. -
Page 62: Sd Card Port
2.17 SD Card Port 2 Troubleshooting 2.17 SD card Port IO Board or System Board may be the reason of SD fault. Either of these two components may be damaged. To determine if the computer’s IO Board is functioning properly, perform following procedures. -
Page 63: Camera
2 Troubleshooting 2.18 Camera 2.18 Camera Camera Module or System Board may be the reason of Camera fault. Either of these two components may be damaged. To determine if the computer’s Camera is functioning properly, perform following procedures. Start with Procedure 1 and con�nue with the other procedure as instruc�on below. -
Page 64: Wireless Lan
2.19 WirelessLAN 2 Troubleshooting 2.19 Wireless LAN Wireless Module or system board may be the reason of Wireless LAN fault. Either of these two components may be damaged. To determine if the computer’s Wireless LAN module is func�oning properly, perform following procedures. Start with Procedure 1 and con�nue with the other procedures as instruc�on below. -
Page 65: Battery Pack
2 Troubleshooting 2.20 Battery Pack 2.20 Battery Pack Ba�ery Pack or system board may be the reason of Ba�ery fault. Either of these two components may be damaged. To determine if the computer’s Ba�ery Pack is func�oning properly, perform following procedures. Start with Procedure 1 and con�nue with the other procedures as instruc�on below. - Page 66 2.200 Battery Pack 2 Troubleshooting System Board Battery Pack And if the connector is disconnected, connect it firmly to the system board and return to Procedure 1 or 2. If a foreign matter is found on Ba�ery Pack, remove it and then return to Procedure 1 or 2. If there is still an error, perform Check 2.
-
Page 67: Finger Print
2 Troubleshooting 2.21 Finger Print 2.21 Finger Print To check if the computer’s Finger Print is defec�ve or malfunc�oning, follow the troubleshoo�ng procedures below as instructed. Procedure 1 Windows Applica�on Test Procedure 2 Connector Check Procedure 1 Windows Application Execute Applica�ons in Windows, move finger above Finger Print Reader. If it can detect finger print, Finger Print is functioning properly. -
Page 68: Bluetooth
2.22 Bluetooth 2 Troubleshooting 2.22 Bluetooth Bluetooth is combo module with Wireless LAN on this model. Bluetooth Module or system board may be the reason of Bluetooth fault. Either of these two components may be damaged. To determine if the computer’s Bluetooth module is func�oning properly, perform following procedures. -
Page 69: Lan Port
2 Troubleshooting 2.23 LAN Port 2.23 LAN Port To determine if the computer’s LAN Port is func�oning properly or malfunc�ons, perform following procedures. Start with Procedure 1 and con�nue with the other procedure as instruc�on below. Procedure1 Windows Application Test Procedure 2 Connector Check and Replacement Check Procedure 1 Windows Application Test The LAN Port Connector is mounted on System Board. -
Page 70: Chapter 3 Diagnostic Programs
Chapter 3 Diagnostic Programs... - Page 71 3 Diagnostic Programs Change History Date Revision Contents Remark 2019-11-19 Released 1.Add pageof Changehistory 2019-11-21 2.Replace Page.19 / 3.2.8 Fan Test figure Satellite Pro L50-G / dynabookP*-C* Maintenance Manual...
- Page 72 LED Test ....................16 3.2.8 FAN Test ....................19 3.2.9 DMI Read/ Write ................... 20 3.2.10 SSDTest ....................22 3.2.11 View Logs ....................24 3.2.12 Exit to UEFI Shell .................. 26 Subtests ........................27 Satellite Pro L50-G / dynabookP*-C* Maintenance Manual...
- Page 73 ...................... 22 IGURE -25 SSDT ................... 23 IGURE ESTING ROCESS -26 V ......................24 IGURE -27 V ..................24 IGURE EMORY -28 V - HDD L ...................25 IGURE -29 V – L ..................25 IGURE ETAIL Satellite Pro L50-G / dynabookP*-C* Maintenance Manual...
-
Page 74: General
Before running the diagnostic programs,get the following tools prepared: A ServiceDiagnosticUSB STICK How to make: 1. Preparea USB STICK and format it asFAT32. 2. Uncompressthe Diagnostic Zip file. 3. Copy [efi] & [EFIDiag] folders to the USB STICK root directory. Satellite Pro L50-G / dynabookP*-C* Maintenance Manual... -
Page 75: Main Menu
3. Hold the <F12> function key until Boot Option Menu show on screen. 4. Select the [EFI USB Device], and press<Enter> key. Figure -1 USB Boot When the systemis booting from Service Diagnostic USB STICK, the following screenwill be displayed: Satellite Pro L50-G / dynabookP*-C* Maintenance Manual... - Page 76 3.2 Main Menu 3 Diagnostic Programs Figure -2 Main Menu Pleaseselect a test item or select 0 to exit to UEFI Shell Command. Satellite Pro L50-G / dynabookP*-C* Maintenance Manual...
-
Page 77: Systeminformation
This function is usedto read the systeminformation. When the test is completed, a file namedAutocfg.log will be savedin the defined location. This function candetectthe following device information: Video Memory During the reading process,the following screenwill be displayed to indicate that the progressis in detection: Satellite Pro L50-G / dynabookP*-C* Maintenance Manual... - Page 78 3.2.1 SystemInformation 3 Diagnostic Programs Figure -3 SystemInformation Testing Process Satellite Pro L50-G / dynabookP*-C* Maintenance Manual...
-
Page 79: Cpu Test
2. CPU FPU Function Test This test item is to check whether the precision of the numeric processorin the float calculation is up to the IEEE standards. Satellite Pro L50-G / dynabookP*-C* Maintenance Manual... -
Page 80: Memory Test
The following screenwill be displayed: Figure -5 Memory Test Item Pleaseselect a test item or select 0 to exit to Main Menu: During the test process,the following screenwill be displayed to indicate that the progressis in testing: Satellite Pro L50-G / dynabookP*-C* Maintenance Manual... - Page 81 The test item is to ensurethat there is no short circuitry issuein memory chip. It will wire eachmemory addressonebit ‘1’ (likes a data1 working) andreadfrom memory to check the write result. 3. Walking 0 Test Satellite Pro L50-G / dynabookP*-C* Maintenance Manual...
- Page 82 10. Pattern BS High Test This test item is to check whether the system memory that could be accessed correctly through writing and reading with a seriesof designedpattern data. Satellite Pro L50-G / dynabookP*-C* Maintenance Manual...
- Page 83 This test item is to check whether the system memory that could be accessed correctly through writing and reading with a seriesof designedpattern data. Parameterformat: Lo-byte and hi-byte are composedwith 0000 (0x0) and 1111(0xF) Parameterlength: Byte Satellite Pro L50-G / dynabookP*-C* Maintenance Manual...
-
Page 84: Hdd Test
Positive SequentialReadWrite Test Negative SequentialReadWrite Test Funnel SequentialReadWrite Test The following screenwill be displayed: Figure -8 HDD Test Item Pleaseselect a test item to run or select 0 to exit to Main Menu: Satellite Pro L50-G / dynabookP*-C* Maintenance Manual... - Page 85 0xA5 write andreadingto HDD. The test has three types sequential asbelow: Positive: From first Sectorto the last Sector(0,1,2,……,N-1,N) Negative: From the last Sectorto the first Sector(N,N-1,……,2,1,0) Funnel: From the first andlast to middle Sector (0,N,1,N-1,2,N-2,……) Satellite Pro L50-G / dynabookP*-C* Maintenance Manual...
-
Page 86: Video Test
Green,Blue, White andBlack) normally in full screenmode. Before test systemwill give a messageasbelow: Figure -10 Video Test User will confirm whether eachvideo modeworks normally by judging whether the display is correct. Figure -11 Video Test Confirmation Satellite Pro L50-G / dynabookP*-C* Maintenance Manual... -
Page 87: Keyboard Layout Test
Due to UEFi Limitation, SomeKeysShow“Gray” Color, Theycan’t be tested Pleaseselect a keyboard type before the keyboard test. The screenis asfollows: Figure -12 Keyboard Layout Test Item The Main PadMap would be shown asbelow ( Satellite Pro L50-G 14 only equips Main Pad): Satellite Pro L50-G Main Keyboard... - Page 88 Information. If keyboardtest fails, programwill terminate the test andreport the fail information when it is time to timeout. The test will end when all keys arepressedor test time is out after 100 seconds. Satellite Pro L50-G / dynabookP*-C* Maintenance Manual...
-
Page 89: Led Test
This test item is to check whether Power OrangeLED work normally. Figure -16 LED Test - Power Orange 3. DC-IN White LED Test This test item is to checkwhetherDC-IN White LED work normally. Satellite Pro L50-G / dynabookP*-C* Maintenance Manual... - Page 90 4. DC-IN OrangeLED Test This test item is to check whether DC-IN OrangeLED work normally. Figure -18 LED Test - DC-IN Orange 5. CapsWhite LED Test This test item is to checkwhether CapsWhite LED work normally. Satellite Pro L50-G / dynabookP*-C* Maintenance Manual...
- Page 91 3 Diagnostic Programs 3.2.7 LED Test Figure -19 LED Test - CapsWhite Satellite Pro L50-G / dynabookP*-C* Maintenance Manual...
-
Page 92: Fan Test
This test is to check whether two status of fan are normal: Stop and Fast Speed. During the test process,the following screenwill be displayed to indicate that the progressis in testing: Figure -20 Fan Testing Process Satellite Pro L50-G / dynabookP*-C* Maintenance Manual... -
Page 93: Dmi Read/ Write
Manufacturer (Only Read),Product Name,Version, Serial Number, SKU Number, andOEM String. Etc. You canselectwhich item you would like to write, after selection, one caninput a new value in the messagedialog box, and press“Enter” when finished. Satellite Pro L50-G / dynabookP*-C* Maintenance Manual... - Page 94 3.2.9 DMI Read/ Write 3 Diagnostic Programs Figure -22 DMI Write Testing Process Write the DMI andreturn “selection menu” for you to changeanotheritem value. Satellite Pro L50-G / dynabookP*-C* Maintenance Manual...
-
Page 95: Ssdtest
The following screenwill be displayed: Figure -24 SSD Test Item Pleaseselect a test item to run or select 0 to exit to Main Menu: The following screenwill be displayed to indicate that the progressis in testing: Satellite Pro L50-G / dynabookP*-C* Maintenance Manual... - Page 96 0xA5 write and reading to SSD. The test has three types sequential asbelow: Positive: From first Sectorto the last Sector(0,1,2,……,N-1,N) Negative: From the last Sectorto the first Sector(N,N-1,……,2,1,0) Funnel: From the first andlast to middle Sector(0,N,1,N-1,2,N-2,……) Satellite Pro L50-G / dynabookP*-C* Maintenance Manual...
-
Page 97: View Logs
User canenter one choice to view a log file on the screenasfollows: Figure -26 View Log Item For Memory, HDD and SSD, sub log menuwill be displayed on the screenas follows: Figure -27 View Log - Memory Log Satellite Pro L50-G / dynabookP*-C* Maintenance Manual... - Page 98 3.2.11 View Logs 3 Diagnostic Programs Figure -28 View Log - HDD Log The log will be display asbelow: Figure -29 View Log – Log Detail Satellite Pro L50-G / dynabookP*-C* Maintenance Manual...
-
Page 99: Exit To Uefi Shell
3 Diagnostic Programs 3.2.12 Exit to UEFI Shell 3.2.12 Exit to UEFI Shell Selectthis item to exit to UEFI Shell CommandMode. Satellite Pro L50-G / dynabookP*-C* Maintenance Manual... -
Page 100: Subtests
Funnel Sequential ReadWrite Test Video Test Purity Color Test Keyboard Layout Main PadMap Test Small Pad Map Test LED Test Green/ White LED Test OrangeLED Test FAN Test SpeedTest DMI Read/ Write Manufacturer Product Name Satellite Pro L50-G / dynabookP*-C* Maintenance Manual... - Page 101 3 Diagnostic Programs 3.3 Subtests Version Serial Number SKU Number OEM String SSD Test ProceedAll Test Items Copy Test Random ReadWrite Test Positive Sequential ReadWrite Test Negative Sequential ReadWrite Test Funnel Sequential ReadWrite Test Satellite Pro L50-G / dynabookP*-C* Maintenance Manual...
-
Page 102: Chapter 4 Replacement Procedures
Chapter 4 Replacement Procedures... - Page 104 HDD ..........................4-16 RemoveHDD ....................... 4-16 Installing HDD .....................4-17 SSD ........................... 4-18 RemoveSSD ......................4-18 Installing SSD ...................... 4-19 Wireless LAN Card ....................4-20 Removing Wireless LAN Card ................4-20 Installing Wireless LAN Card ................4-21 Satellite Pro L50-G / dynabookP*-C* MaintenanceManual 4-iii...
- Page 105 Removing LCD Module Mask................4-37 Installing LCD Module Mask ................4-37 4.17 LCD Panel........................4-38 Removing LCD Panel................... 4-38 Installing LCD Panel.....................4-41 4.18 CCD Module......................4-42 Removing CCD Module ..................4-42 Installing CCD Module..................4-42 4-iv Satellite Pro L50-G / dynabookP*-C* MaintenanceManual...
- Page 106 Figure 4-20 Removing LCD Panelfollow direction 1............4-39 Figure 4-21 Removing the LCD cable ................. 4-40 Figure 4-22 LCD cable below the LCD module cover latch ..........4-41 Figure 4-23 Removing the CCD Module ................4-42 Satellite Pro L50-G / dynabookP*-C* MaintenanceManual...
-
Page 107: General
SSD, Smart Card Board, DC IN harness,and wireless LAN card, all of which are shown abovethe System Board. • For removing the LCD Module: First, remove the display mask, both of which are shown above the LCD module. Satellite Pro L50-G / dynabookP*-C* MaintenanceManual... - Page 108 Never work with damp or wet hands. To avoid personal injury, usecare to avoid the sharp edgesor corners of the components. Satellite Pro L50-G / dynabookP*-C* MaintenanceManual...
- Page 109 Inside the PC are componentsthat becomehot during operation (such as the CPU and cooling module). To avoid burns, let the hot componentscool down before starting inspection or repair task. Satellite Pro L50-G / dynabookP*-C* MaintenanceManual...
-
Page 110: Before You Begin
Seethe appropriate explanations and figures for screw sizes. To avoid personal injury, usecare to handle componentsthat have sharpedgesor corners. After you have replaced a FRU, check that the FRU works correctly to ensurenormal computer operation. Satellite Pro L50-G / dynabookP*-C* MaintenanceManual... -
Page 111: Disassemblyprocedures
Check that all the required screws are usedto securethe FRUs. Using wrong screws can damagethe threads or headsof the screws or does not ensure that the FRUs are secure. After installing a FRU, makesurethat the FRU andcomputer work normally. Satellite Pro L50-G / dynabookP*-C* MaintenanceManual... -
Page 112: Tools And Equipment
Tweezers(for pulling out screws) ESD mats(for the floor and work desks) An ESD wrist strap or heel grounder Anti-static carpetsor flooring Air ionizers (for highly electrostatic sensitive areas) A plastic card (in credit card size) Satellite Pro L50-G / dynabookP*-C* MaintenanceManual... -
Page 113: Screwtightening Torque
M2 (2 mm) 0.22 N・m (1.5 kgf・cm) M2.5 (2.5 mm) 0.36 N・m (2.0 kgf・cm) M2.5 (2.5 mm) x 4.0 0.51 N・m (2.5 kgf・cm) M2.5 (2.5 mm) x 5.0 0.204 N・m (2.5 kgf・cm) Satellite Pro L50-G / dynabookP*-C* MaintenanceManual... -
Page 114: Memory Cover
Removing Memory cover RemoveMemory cover according to the following proceduresand Figure 4-1. 1. Release(notremove) one M2.5x1.6 black Phillips headscrew attachedon it. 2. Pull Memory Cover on screwside, then remove Memory cover. Figure 4-1 RemovingMemory cover Satellite Pro L50-G / dynabookP*-C* MaintenanceManual... -
Page 115: Installing Memory Cover
M e m o r y C o v e r Installing Memory cover Install Memory cover according to the following proceduresandFigure 4-1. 1. PlaceMemory Cover in correct position. 2. SecureMemory Cover with one M2.5x1.6 black Phillips headscrew attached. Satellite Pro L50-G / dynabookP*-C* MaintenanceManual... -
Page 116: Memory Module
Figure 4-2 RemovingMemory Module 1. Spreadout the two memory lock latches so that the Memory Module pops up. 2. Pull the Memory Module up andout at an angle, using careto avoid touching the connectors. Satellite Pro L50-G / dynabookP*-C* MaintenanceManual 4-10... -
Page 117: Installing Memory Module
Setup or TSETUP program to make sure that the installed Memory Module hasbeen recognized by the system. If it hasnot beenrecognized yet, check the connections. 4. If the unit only containsonepcsof Memory Module, insert it into the connector which is near speaker. 4-11 Satellite Pro L50-G / dynabookP*-C* MaintenanceManual... -
Page 118: Baseenclosure
4 Replacement Procedures 4.4 Base Enclosure Base Enclosure Removing BaseEnclosure RemoveBaseEnclosure according to the following proceduresand Figure 4-3. 1. Removenine M2.5x5.0 black Phillips headscrewssecuring BaseEnclosure. 2. Remove BaseEnclosure. Figure 4-3 RemovingBaseEnclosure Satellite Pro L50-G / dynabookP*-C* MaintenanceManual 4-12... -
Page 119: Installing The Baseenclosure
4.4 BaseEnclosure 4 Replacement Procedures Installing BaseEnclosure Install BaseEnclosure according to the following proceduresand Figure 4-3. 1. Place BaseEnclosure in correct position. 2. SecureBaseEnclosure with nine M2.5x5.0 black Phillips headscrews. 4-13 Satellite Pro L50-G / dynabookP*-C* MaintenanceManual... -
Page 120: Battery Pack
Do not drop, hit, twist, or bendthe battery packs.Do not scratch or break up their casing. 1. Disconnect Battery cable from CN6050 on systemboard. 2. Removetwo M2.0x4.0 black Phillips headscrewssecuring Battery. 3. RemoveBattery. Figure 4-4 Removingbattery pack Satellite Pro L50-G / dynabookP*-C* MaintenanceManual 4-14... -
Page 121: Installing Battery Pack
NOTE: Visually checkthe battery'sterminals. If theyare dirty, clean themwith a dry cloth. 1. Take a new or recharged Battery Pack. 2. PlaceBattery Packin correct position. 3. SecureBattery with two M2.0x4.0 black Phillips headscrews. 4. Connect Battery cable to CN6050 on systemboard 4-15 Satellite Pro L50-G / dynabookP*-C* MaintenanceManual... -
Page 122: Hdd
NOTE: Do not disassembletheHDD pack when it is working normally. Disassemble or replacethe HDD packonly if it fails. 3. Place HDD pack on flat surface (such asa desk), and releasefrom two sides for removing the HDD Bumper. 4. DisconnectHDD cable from HDD. Satellite Pro L50-G / dynabookP*-C* MaintenanceManual 4-16... -
Page 123: Installing Hdd
HDD pack. Always hold the HDD pack byits sides. 2. PlaceHDD pack into the correct position in the computer, holding the HDD pack by its sides. 3. Connect HDD cable to CN1700 on systemboard. 4-17 Satellite Pro L50-G / dynabookP*-C* MaintenanceManual... -
Page 124: Ssd
1. Removeone M2.0x2.0 black Phillips headscrew securing the SSD. 2. Pull SSD from CN1951 on systemboard. Figure 4-7 Removing SSD Satellite Pro L50-G / dynabookP*-C* MaintenanceManual 4-18... -
Page 125: Installing Ssd
2. Secureit with one M2.0x2.0 black Phillips headscrew. CAUTION: Do not touch the connectors on SSDand in the computer with your bare hands.SSDcan fail if they are contaminated with sweat,natural oils, etc. from your hands. 4-19 Satellite Pro L50-G / dynabookP*-C* MaintenanceManual... -
Page 126: Wirelesslan Card
1. Remove tapeswhich fasten the antennacable. 2. Disconnect two antennacables with tweezers. 3. Removeone M2.0x2.0 black Phillips headscrew securing Wireless LAN Card. 4. Pull the Wireless LAN Card from CN1300 on systemboard. Figure 4-8 Removingwireless LAN Card Satellite Pro L50-G / dynabookP*-C* MaintenanceManual 4-20... -
Page 127: Installing The Wirelesslan Card
CAUTION: Do not touch the connectors on the Wireless LAN Card and in the computer with your bare hands.Wireless LAN Cards can fail if they are contaminatedwith sweat, natural oils, etc. from your hands. 4-21 Satellite Pro L50-G / dynabookP*-C* MaintenanceManual... -
Page 128: Smartcard Board
Figure 4-9 RemovingSmart Card Board 4. Disconnect Smart Card Board cable from CN9000 on Smart Card board. 5. Remove Rubber from Smart Card Board. 6. DisassembleSmart Card Board Bracket from Smart Card Board. Satellite Pro L50-G / dynabookP*-C* MaintenanceManual 4-22... - Page 129 4.9 Smart Card Board 4 Replacement Procedures Figure 4-10 RemovingSmart Card Board Bracket and cable 4-23 Satellite Pro L50-G / dynabookP*-C* MaintenanceManual...
-
Page 130: Installing Smartcard Board
4. PlaceSmart Card Board in the correct position according to Figures 4-9 & 4-10. 5. Connect Smart Card Board cable to CN201 on the system board. 6. SecureSmart Card Board with three M2.5x5.0 black Phillips headscrews. Satellite Pro L50-G / dynabookP*-C* MaintenanceManual 4-24... -
Page 131: Lcd Module Assembly
5. Open LCD Module Assembly at an angle of 90 degrees. 6. Removefour M2.5x4.0 black Phillips headscrewssecuring LCD Module Assembly with top cover. 7. RemoveLCD Module Assembly. Figure 4-11 Removingthe LCD Module assembly 4-25 Satellite Pro L50-G / dynabookP*-C* MaintenanceManual... -
Page 132: Installing Lcd Module Assembly
5. Routing LCD cable according to Figure 4-11, needto under Rib on Top Cover. 6. Stick tapeto fasten LCD cable. 7. Place antennacablesin correct position. 8. Stick three mylar on top cover to fasten antennacables. Satellite Pro L50-G / dynabook P*-C* MaintenanceManual 4-26... -
Page 133: Dc-In Harness
Installing DC-IN Harness Install DC-IN Harnessaccording to the following proceduresand Figure 4-12. 1. PlaceDC-IN harnessin correct position on systemboard. 2. Connect DC-IN harnesscable to CN6000 on system board. 3. Stick tapeto fasten DC-IN cable. 4-27 Satellite Pro L50-G / dynabookP*-C* MaintenanceManual... -
Page 134: Cpu Cooling Module And Fan
4. Disconnect Fan cable from CN4300 on system board. 5. Removetwo M2.5x3.0 silver Phillips headscrewssecuring Fan. 6. Remove Fan and peel off the spongeon Fan. Figure 4-13 Removingthe CPU Cooling Module and Fan Satellite Pro L50-G / dynabookP*-C* MaintenanceManual 4-28... - Page 135 4.132 CPU Cooling Module and Fan 4 Replacement Procedures Figure 4-14 Applying silicon grease 4-29 Satellite Pro L50-G / dynabookP*-C* MaintenanceManual...
-
Page 137: Installing Cpu Cooling Module And Fan
CPU chip is covered with greaseG7762. 7. Install CPU Cooling Module in correct position on systemboard. 8. Securing CPU Cooling Module with four M2.0x2.5 black Phillips headscrews,asthe order showedfrom 1-2-3-4 on module. Satellite Pro L50-G / dynabookP*-C* MaintenanceManual 4-30... -
Page 138: Systemboard
2. Disconnect IO board cable from CN9502 on IO Board. 3. Removefour M2.0x2.5 black Phillips headscrew securing SystemBoard. 4. RemoveSystemBoard(attached with IO Board cable). 5. Disconnect IO board cable from CN200 on another side of SystemBoard. Figure 4-15 Removing SystemBoard 4-31 Satellite Pro L50-G / dynabookP*-C* MaintenanceManual... - Page 140 - Keyboard cable to CN205. NOTE: Be sure to place all cablesinto the ditch to avoid the damageduring assemblingthe bottom cover. NOTE: Be sure to align Type-C connector to Top Cover, when place systemboard on the unit.. Satellite Pro L50-G / dynabookP*-C* MaintenanceManual 4-32...
-
Page 141: Led Board And Io Board
3. Disconnect LED board cable from CN100 on LED board. 4. Remove LED board cable. 5. Removeone M2.0x4.0 black Phillips headscrewssecuring IO board. 6. Remove IO board. Figure 4-16 RemovingLED board and IO board 4-33 Satellite Pro L50-G / dynabookP*-C* MaintenanceManual... -
Page 142: Installing Led Board Andio Board
2. Securing IO board with one M2.0x4.0 black Phillips headscrews.(▲ mark portions) 3. Connect LED board cable to CN100 on LED board. 4. PlaceLED board in correct position. 5. Securing LED board with two M2.0x2.5 black Phillips headscrews. Satellite Pro L50-G / dynabook P*-C* MaintenanceManual 4-34... -
Page 144: Speakerand Touch Pad(Or Securepad)
4. Removeleft and right Speaker. 5. Removetape on upper left of Touch pad(or Securepad). 6. Removefive M2.0x1.8 black Phillips headscrewssecuring Touch pad(or Securepad). 7. Remove gasket from Touch pad(or Securepad). 8. Remove Touch pad(or Securepad). 4-35 Satellite Pro L50-G / dynabookP*-C* MaintenanceManual... -
Page 146: Installing Speakerand Touch Pad(Or Securepad)
Avoid to pinching the cables. 7. Stick three tapesfor fasten speakercable in correct position. 8. Connect touch pad cable and Securepad cable to Connectors on Touch pad(or Secure pad). Satellite Pro L50-G / dynabookP*-C* MaintenanceManual 4-36... -
Page 147: Lcd Module Mask
1. Install the LCD Module Mask andfollow step3, 2 & 1 to press& lock the latches. NOTE: Wheninstalling the LCD Module Mask, ensurethere is no gap betweenthe LCD Module Mask and the LCD module cover. NOTE: Do not lose the CameraShutter. Satellite Pro L50-G / dynabook P*-C* MaintenanceManual 4-37... -
Page 148: Lcd Panel
4. Turn the LCD upside down. Be sure to place it on a cushioned surface such asa foam pad. 5. Remove the tape and LCD cable connector. Then disconnect the LCD cable asFigure 4-21 shown. 4-38 Satellite Pro L50-G / dynabookP*-C* MaintenanceManual... - Page 149 4.177 LCD Panel 4 Replacement Procedures Figure 4-19 Removingtwo Elastic tapes Figure 4-20 RemovingLCD Panel follow direction 1. Satellite Pro L50-G / dynabook P*-C* MaintenanceManual 4-39...
- Page 150 4 Replacement Procedures 4.177 LCD Panel Figure 4-21 removing the LCD cable 4-40 Satellite Pro L50-G / dynabookP*-C* MaintenanceManual...
- Page 151 5. Check LCD cable below the LCD module cover latch asFigure 4-22 shown. Figure 4-22 LCD cable below the LCD modulecover latch CAUTION: Wheninstalling the LCD module, pleasefollow below instruction: Whenplug in LCD/FL cable into LCD panel connector, needto plug horizontally. Satellite Pro L50-G / dynabook P*-C* MaintenanceManual 4-41...
-
Page 152: Ccd Module
2. Placetape which on the CCD Module connector. 3. Seatthe CCD Module in the correct position. 4. Route the LCD cablesaccording to Figure 4-23, place the cable into the ditch and correct position. Avoid to pinching the cables. 4-42 Satellite Pro L50-G / dynabookP*-C* MaintenanceManual... - Page 153 参 照 元 が 見 つ か り ま せ ん 。 To u c h p a d b o a r d a n d To u c h p a d b r a c k e t Replacement Procedures Satellite Pro L50-G / dynabook P*-C* MaintenanceManual 4-43...
- Page 154 Appendices...
- Page 155 Contents Appendix A Handling the LCD Module ................A-1 Appendix B Board Layout ....................B-1 SystemBoard Front View................... B-1 SystemBoard Back View ................... B-2 Appendix C Keyboard Scan/CharacterCodes..............C-1 Appendix D Key Layout ....................D-1 App-ii Satellite Pro L50-G / dynabookP*-C* Maintenance Manual...
-
Page 156: Appendix A Handling The Lcd Module
LCD cover before securing the module with four screws. Do not force the module into place, becausestresscan affect its performance. Also, the panel’s polarized surface is easily scarred,so be carefully when handling it. Satellite Pro L50-G / dynabookP*-C* Maintenance Manual... - Page 157 Also, never scratch the surface. 4. If water or other liquid is left on the panel’s surface for a long period, it can change the screen’stint or stain it. Be sureto quickly wipe off any liquid. Satellite Pro L50-G / dynabookP*-C* Maintenance Manual...
- Page 158 5. Glass is used in the panel, so be careful not to drop it or let it strike a hard object, which could causebreakageor cracks. 6. CMOS-LSI circuits are used in the module, so guard against damage from electrostatic discharge. Be sure to wear a wrist ankle ground when handling the module. Satellite Pro L50-G / dynabookP*-C* Maintenance Manual...
- Page 159 7. Do not exposethe module to direct sunlight or strong ultraviolet rays for long periods. 8. Do not store the module at temperatures below specifications. Cold can cause the liquid crystals to freeze,lose their elasticity or otherwise suffer damage. Satellite Pro L50-G / dynabookP*-C* Maintenance Manual...
- Page 160 11. For the module with touch screen function, please be careful about the retro type around the LCD bezel. If the retro is broken or dirty, the function of touch screen will beeffect. Satellite Pro L50-G / dynabookP*-C* Maintenance Manual...
-
Page 161: Appendix B Board Layout
Apx. B Board Layout Appendices Appendix B Appendix B Board Layout B.1 System Board Front View Figure B-1 Board Layout (Front) Satellite Pro L50-G / dynabookP*-C* Maintenance Manual... -
Page 162: Systemboard Back View
Appendices Apx. B Board Layout B.2 System Board Back View Figure B-2 Board Layout (Back) Satellite Pro L50-G / dynabookP*-C* Maintenance Manual... -
Page 163: Appendix C Keyboard Scan/Charactercodes
Keyboard Scan/Character Codes Appendix C Keyboard Scan/Character Codes Table C-1 ScanCodes(set 1 and set 2) (1/4) Code set 1 Code set 2 Note Keytop Make Break Make Break ‘ ~ 7 & BkSp Satellite Pro L50-G / dynabookP*-C* Maintenance Manual... - Page 164 Table C-1 ScanCodes(set 1 and set 2) (2/4) Code set 1 Code set 2 Note Keytop Make Break Make Break Caps Lock ‘ “ Enter Shift (L) No.102 , < . > Shift (R) Satellite Pro L50-G / dynabookP*-C* Maintenance Manual...
- Page 165 Table C-1 ScanCodes(set 1 and set 2) (3/4) Code set 1 Code set 2 Note Keytop Make Break Make Break Ctrl Alt (L) Space ALT (R) ← Home ↑ ↓ PgUp PgDn → Satellite Pro L50-G / dynabookP*-C* Maintenance Manual...
- Page 166 This key correspondsto key No. 42 in a 102-key model. 6. * Refer to Table C-6, No. 124 key scancode. 7. * Refer to Table C-7, No. 126 key scancode. 8. * 205~207arefor JAPAN keyboardonly Satellite Pro L50-G / dynabookP*-C* Maintenance Manual...
- Page 167 Shift key, scancodesare changedaslisted below: With left Shift With right Shift Set 1 E0 AA ___________E0 B6 E0 2A ___________ E0 36 Set 2 E0 F0 12_________ E0 F0 59 E0 12____________ E0 59 Satellite Pro L50-G / dynabookP*-C* Maintenance Manual...
- Page 168 Code set 2 Make Break Make Break ← Home ↑ ↓ PgUp PgDn → Table C-4 ScanCodeswith Fn key Code set 1 Code set 2 Keytop Make Break Make Break CTRL LALT ARROW NUMERIC Scrl Satellite Pro L50-G / dynabookP*-C* Maintenance Manual...
- Page 169 Code set 2 Make Break Make Break (–) Table C-6 No.124 key scancode Shift Code set 1 Code set 2 Make Break Make Break Prt Sc Common Ctrl � Shift � Alt � Satellite Pro L50-G / dynabookP*-C* Maintenance Manual...
- Page 170 Apx. C Keyboard Scan/Character Codes Table C-7 No.126 key scancode Shift Code set 1 Code set 2 Make Make Pause Common* E1 1D Ctrl* E0 46 7E E0 F0 7E *: This key generatesonly make codes. Satellite Pro L50-G / dynabookP*-C* Maintenance Manual...
-
Page 171: Appendix D Key Layout
Apx. D Key Layout Appendices Apx. D Key Layout Appendix D Key Layout D.1 USA (US) Keyboard Figure D-1 US keyboard D.2 Taiwanese (TW) Keyboard Figure D-2 TW keyboard Satellite Pro L50-G / dynabookP*-C* Maintenance Manual... - Page 172 Appendices Apx. D Key Layout D.3 Thai (TH) Keyboard Figure D-3 TH keyboard D.4 Japanese (JP) Keyboard Figure D-4 JP keyboard Satellite Pro L50-G / dynabookP*-C* Maintenance Manual...
- Page 173 Apx. D Key Layout Appendices D.5 Hebrew (HE) Keyboard Figure D-5 HE keyboard D.6 Korean (KR) Keyboard Figure D-6 KR keyboard Satellite Pro L50-G / dynabookP*-C* Maintenance Manual...
- Page 174 Appendices Apx. D Key Layout D.7 UK-English (EN) Keyboard Figure D-7 EN keyboard D.8 DU, UE, US International (USE) Keyboard Figure D-8 USE keyboard Satellite Pro L50-G / dynabookP*-C* Maintenance Manual...
- Page 175 Apx. D Key Layout Appendices D.9 Scandinavian (N5) Keyboard Figure D-9 N5 keyboard D.10 Swiss (SL) Keyboard Figure D-10 SL keyboard Satellite Pro L50-G / dynabookP*-C* Maintenance Manual...
- Page 176 Appendices Apx. D Key Layout D.11 Arabic (AR) Keyboard Figure D-11 AR keyboard D.12 Czech (CZ) Keyboard Figure D-12 CZ keyboard Satellite Pro L50-G / dynabookP*-C* Maintenance Manual...
- Page 177 Apx. D Key Layout Appendices D.13 Portuguese (PT) Keyboard Figure D-13 PT keyboard D.14 Latin American (LA) Keyboard Figure D-14 LA keyboard Satellite Pro L50-G / dynabookP*-C* Maintenance Manual...
- Page 178 Appendices Apx. D Key Layout D.15 Italian (IT) Keyboard Figure D-15 IT keyboard D.16 French (FR) Keyboard Figure D-16 FR keyboard Satellite Pro L50-G / dynabookP*-C* Maintenance Manual...
- Page 179 Apx. D Key Layout Appendices D.17 German (GR) Keyboard Figure D-17 GR keyboard D.18 Greek (GK) Keyboard Figure D-18 GK keyboard Satellite Pro L50-G / dynabookP*-C* Maintenance Manual...
- Page 180 Appendices Apx. D Key Layout D.19 Hungarian (HU) Keyboard Figure D-19 HU keyboard D.20 Spanish (SP) Keyboard Figure D-20 SPkeyboard D-10 Satellite Pro L50-G / dynabookP*-C* Maintenance Manual...
- Page 181 Apx. D Key Layout Appendices D.21 Turkish (TR) Keyboard Figure D-21 TR keyboard D.22 Bulgarian (BU) Keyboard Figure D-22 BU keyboard Satellite Pro L50-G / dynabookP*-C* Maintenance Manual D-11...
- Page 182 Appendices Apx. D Key Layout D.23 Belgian (BE) Keyboard Figure D-23 BE keyboard D.24 Canadian Multilingual (CM) Keyboard Figure D-24 CM keyboard D-12 Satellite Pro L50-G / dynabookP*-C* Maintenance Manual...
Need help?
Do you have a question about the Satellite Pro L50-G and is the answer not in the manual?
Questions and answers