
Related Manuals for Major Science MS-NOR-30


Summary of Contents for Major Science MS-NOR-30
- Page 1 MS Orbital Shaker Instruction Manual Catalog No. MS-NOR-30 MS-NOR-3001 www.majorsci.com service@majorsci.com Version 03B Revised on:2014.12.02...
-
Page 2: Packing List
-1x MS Orbital Shaker Instruction Manual Signed by: Date: Major Science is liable for all missing or damaged parts / accessories within 7 days after customer received this instrument package. Please contact Major Science immediately regarding this issue. If no response within such time period from consignee party, that will be consignee party’s whole... -
Page 3: Table Of Contents
Packing list ...................... 1 Warning ......................3 Safety Information ..................4 Environmental Conditions ................4 Avoiding Electrical Shock ................4 Avoiding Damage to the Instrument ............... 5 Equipment Operation ..................5 Symbols ......................6 Section 1 Introduction ................7 Overview ..................... 7 Product Description ................ -
Page 4: Warning
Major Science Orbital Shaker has been tested and found to comply with safety limits for the CE regulation. Also, MS Orbital Shaker is RoHS compliant to deliver confident product which meets the environmental directive. These limits are designed to provide reasonable protection against harmful interference when the equipment is operated in a commercial environment. -
Page 5: Safety Information
Follow the guidelines below to ensure safe operation of the unit. MS Orbital Shaker has been designed to use with shielded wires thus minimizing any potential shock hazard to the user. Major Science recommends against the use of unshielded wires. -
Page 6: Avoiding Damage To The Instrument
be dried out for a period of time (at least 2 hours) and restored to NORMAL CONDITION before each operation. 2. Never connect or disconnect wires loading from the power jacks when the red indicator light of power switch is on. 3. -
Page 7: Symbols
3. Do not operate the unit without lids or covers to prevent possible hazards. 4. A temporary conductivity caused by condensation might occur even though this series is rated Pollution Degree 2 in accordance with IEC 664. Symbols The symbols used on MS Orbital Shaker are explained below. Indicates an area where a potential shock hazard may exist. -
Page 8: Introduction
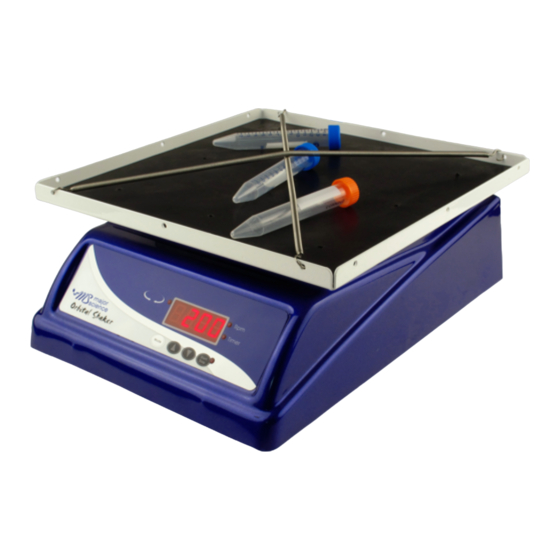
1.1 Overview Major Science Orbital Shaker, using its patented mechanism and function achieves unique motion which drives forward and backward, elicits perfect mixing performance. Agitation is driven with exact measurements, while cycle rotation for forward and backward is controlled by the microprocessor controller with timer. - Page 9 Features Microprocessor controller with digital display Orbital moving in one direction or clockwise / anti-clockwise direction Continuous or timed operation with automatic witch-off Variable shaking speed up to 200rpm Interchangeable / stacking platforms, and accessories for a variety of vessels 10kg carry capacity 30 x 30cm platform...
-
Page 10: Product Specifications
Motion Orbital Moving Feature Orbital moving in one direction or two directions Clockwise and/or 0.1 - 10 circle Anti-clockwise 0.1 circular increment Max. Stroke Length 20 mm Controller Digital microprocessor controller Speed 0 - 200 rpm 1 rpm increment Timer 1 - 9999 minutes with alarm, continuous 1 min increment Motor... -
Page 11: Installation Instructions
Major Science Orbital Shaker is actually a pre-installed instrument. As long as it is placed on a sturdy and level surface in a safe, dry place, and sufficient spare space in the neighborhood for shaking movement, it is ready for operation. - Page 12 Step2. Release the springs and remove the black rubber pad that are on the platform. Step2 Step3. Insert 4 pillars to the holes at 4 corners. And fasten the pillars tightly. Step3...
- Page 13 Step3. And fasten the flathead screws to fix the second platform. Step3 Note (1): After finish the installation of double platforms, remember to put the rubber pads back to the platforms. But note that users might have to cut off small pieces of the rubber pad at 4 corners to avoid blocking the pillars.
- Page 14 Note (2): If users require the double platform with double-layer pillars, just insert another pillar on the first-layer pillar and fasten it tightly; then screw the flathead screw to fix the second platform on the pillars.
-
Page 15: Instruction Of Drilling Holes On The Rubber Mat
Instruction of Drilling Holes on the Rubber Mat (to install the flask holders with the rubber mat on platform.) The standard rubber mat that Major Science provides is without any drilled holes. If you would like to fasten the flask holders on the platform along with the rubber mat, here we offer the instruction of drilling procedure. - Page 16 Step3. Remove the platform from the machine, and put the rubber mat back to the platform, and place a thick cushion (the size should be similar as the size of platform) on the rubber mat and platform. Thick Cushion Step4. Turn over the platform, and use a white marker to mark the screw holes that fasten the flask holders on the rubber mat.
- Page 17 Step5. Use a sharp tool to drill the marked dots on the rubber mat. (The small flathead screwdriver is used for drilling in the picture; it is strongly suggested using the professional drilling tools when drilling the mat.) Step6. The finished rubber mat should be as the picture below. Note: The rubber mat in the illustration below has been drilled for the different sizes of flask holders (from 125 ml to 1000 ml).
- Page 18 125 ml 250 ml 500 ml 1000 ml Step7. Assemble the platform back. Then you’ll be able to install the flask holders on it. Note: Use the correct-sized screws to install the flask holders on the platform along with the rubber mat. We’ll provide a set of holder screws attached to your purchase of MS Orbital Shaker (with flask holders).
- Page 19 If the rubber mat is not required when you install the holders, please use M4 × 8 mm screws to fasten them in case of damages on other parts.
-
Page 20: Operation Instructions
4.1 Controls and Features Front Control Panel Rear of Unit Key – to increase either rpm or time value – to increase shaking cycles rotation for forward and backward Key – to decrease either rpm or time value – to decrease shaking cycles rotation for forward and backward Key –... -
Page 21: Start The Operation
mode. 8. AC Power Switch – to switch the unit power ON/OFF 9. AC Power Cord and Fuse Holder – Power Cord Socket and Fuse Holder 10. Rated Voltage selection switch – For select suitable rated voltage 4.2 Start the operation 1. -
Page 22: Power Recover Function
6. Press Key to start shaking. 7. Press Key again to stop the unit. 4.3 Power Recover function If MS orbital shaker was switched off during the shaking state due to a power outage, upon resume of power the system will start buzzing and countdown from 10 to 0. -
Page 23: Troubleshooting & Maintenance
AC outlet of the appropriate voltage Replacing the Fuse For additional fuses, contact Major Science co. ltd. To replace the fuse: 1. Turn off the main power switch on the rear of MS Orbital Shaker and detach the power cord from the rear of MS Orbital Shaker. - Page 24 Maintenance MS Orbital Shaker may be cleaned with a moist cloth containing a mild soap solution. The belts might need to be replaced after running out its life time, and please contact Major Science or its distributor for this part.
-
Page 25: Ordering Information
8 pcs and flat non-slip rubber mat MS-DIMPLED-30 30 x 30cm dimpled mat MS-FLAT-30 Non-slip rubber mat 30 x 30 cm MS-NOR-30 with 12x 125ml flask holders, 110/220V MS-NOR-30-FH125 MS-NOR-30 with 9x 250ml flask holders, 110/220V MS-NOR-30-FH250 MS-NOR-30 with 5x 500ml flask holders, 110/220V... -
Page 26: Warranty
Major Science warrants apparatus of its manufacture against defects in materials and workmanship, under normal service, for one year from the shipping date to purchaser. This warranty excludes damages resulting from shipping, misuse, carelessness, or neglect. Consumable parts ( O-ring belts, rubber mat and strip spring) are not covered by our warranty.
Need help?
Do you have a question about the MS-NOR-30 and is the answer not in the manual?
Questions and answers