
Related Manuals for Watts bar-positrol


Summary of Contents for Watts bar-positrol
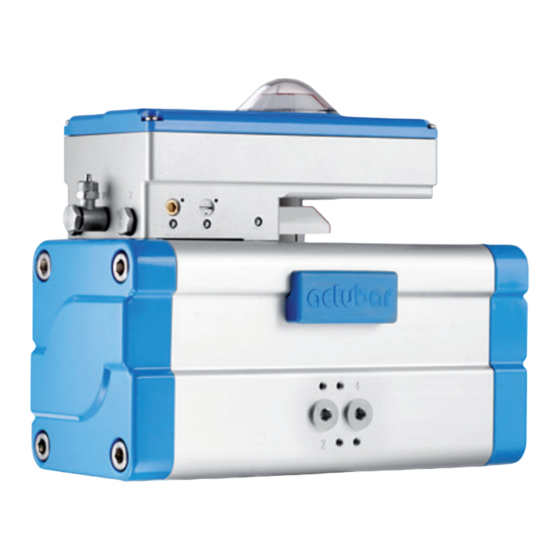
- Page 1 Positioner and 3-position control unit -positrol -positurn2 Sicher und flexibel – die neue Antriebsgeneration actubar Assembly, Mounting and Operating Instructions...
- Page 2 Operating Instructions bar-positurn2 and bar-positrol Read these instructions care fully and keep them near to the device. Read, understand and follow the safety instructions. In General: These operating instructions are an inte gral part of the device. The operating in...
- Page 3 Operating Instructions bar-positurn2 and bar-positrol Safety instructions and warnings: Scope of validity: Before commissioning, read these instruc tions carefully and follow all advice. The aforementioned operating instruc In this documentation we use different tions are valid for barpositurn2 / positrol, types of instructions for safety and war...
- Page 4 Operating Instructions bar-positurn2 and bar-positrol Safety instructions and warnings: Exemption from liability: instructions and warnings. We undertake no liability for damage, resulting directly or We guarantee the faultfree function of our indirectly from the use of accessories and/ product according to our advertising, the...
- Page 5 Operating Instructions bar-positurn2 and bar-positrol Safety instructions and warnings: into actuator pivoting movements. Usage or exchange of those parts with faultless as a 3position control unit with freely se parts. Send the units, for which the claim lectable middle position and binary con...
-
Page 6: Functional Description
Operating Instructions bar-positurn2 and bar-positrol Safety instructions and warnings: Operator of positurn/positrol: portional allocation of the defined pivoting Authorized persons are instructed how to angle to the set value (input) signal. operate barpositurn and barpositrol af In a similar manner, the defined pivoting ter they read and understood this instruc... - Page 7 Operating Instructions bar-positurn2 and bar-positrol Technical data: Device Type positurn positrol Housing GDAlSi 10Mg (Aluminiumdruckguss) Materials Screws A270 (Edelstahl) Viewing glass PMMA Optical fibre Cable connection Pivoting angle 10° to 190° Protection Type IP65 IP67 Mounting position random Ambient temperatur 10°C to + 50°C...
- Page 8 Operating Instructions bar-positurn2 and bar-positrol Technical data: Minivalves: 1,8 W Power consumption Variant D 1,8 W Midivalves: 3,6 W Minivalves: 3,6 W Variant S 3,6 W Midivalves: 7,2 W Minivalves: 3,6 W Variant E 3,6 W Midivalves: 7,2 W Terminal strip Clamping range up to 0,75 mm²...
- Page 9 Operating Instructions bar-positurn2 and bar-positrol Pneumatic Scheme: Pneumatic scheme PLE (singleacting) PLS (doubleacting) for barpositrol PLD Pneumatic schemes for the safetyorientated barpositrol Please note the unit-specific safety descriptions. Delivery and Unpacking: Controlling the Delivery: ment all possible transport damage (e.g.
- Page 10 Operating Instructions bar-positurn2 and bar-positrol Scope of Delivery: Any differences should be registered im about incomplete or damaged deliveries mediately to bar GmbH. Later complaints cannot be accepted. Mounting: Mounting positurn WARNING! • Open the barpositurn2 and set it onto the actuator.
- Page 11 Operating Instructions bar-positurn2 and bar-positrol • Fix in position the barpositurn2 and • Take care to ensure the correct direc solenoid valves by making use of the tion when assembling the housing co mounting materials supplied. ver. The flexible fibreoptic light guides •...
- Page 12 Operating Instructions bar-positurn2 and bar-positrol drill template 80 x 30 vacotrolair ducts drill template 130 x 30 • Open the barpositrol and set it onto the • Place the position indicator on top and actuator. take care to see that the symbol positi...
- Page 13 Operating Instructions bar-positurn2 and bar-positrol positrol on actuator type according to Air supply VDI/VDE 3845: Air supply positrol G1/8“ Throttle Connect working channels according to connection designation (2→2; 4→4). Electric connection / Functional scheme: WARNING! Otherwise there is a real danger of electric shocks.
-
Page 14: Elektrischer Anschluss
Operating Instructions bar-positurn2 and bar-positrol Elektrischer Anschluss: Positioner Electric Connections: model positurn: PN2-D; PN2-E und PN2-S model positrol: PL-D; PL-E und PL-S Refeeding of clamps Activate magnet A (counter-clockwise rotation) Digital Activate magnet B (clockwise rotation) 1, 2, 3 and 8 results Inputs a ccross clamp 14. - Page 15 Operating Instructions bar-positurn2 and bar-positrol Einstellmöglichkeiten: ATTENTION! Do not damage switches! Operating Potentiometer Program switch: analog = Positioner mode = 3Position mode LED indication Current / Voltage switches Initialising switch Button for automatic initialisation Set current / voltage switches according to the signal type for the unit.
- Page 16 Operating Instructions bar-positurn2 and bar-positrol Individual Settings: Set operating direction switch according to the direction of actuation for the valve actuator. Leftrotating actuator in switch position ccw (L) Input and Output signal ccw increasing Rightrotating actuator in switch position cw (R)
- Page 17 Operating Instructions bar-positurn2 and bar-positrol 6. Establish power supply. 9. Start up by switching back the Initialisation switch from „Init“ to „Run“. Press the red button for the automa tic initialisation longer than 2 seconds. Chaser light during the initialisati...
- Page 18 Operating Instructions bar-positurn2 and bar-positrol Manual initialisation of Positioner mode (learning the positions and other specific values): 1. Check whether the operating direction with power for more than 10 seconds switch has been set in accordance with after the end positions are reached.
- Page 19 Operating Instructions bar-positurn2 and bar-positrol ATTENTION! • Please note that all safety functions are immediately available when switching the initialisation switch from „Init“ to „Run“. This can cause an immediate switching of the actuator! • In case of every (even accidental) switching to „Init“, the whole initialisation process must be carried out anew, because the previously learned values will have been lost.
- Page 20 Operating Instructions bar-positurn2 and bar-positrol Manual Initialisation of 3-Position mode (learning end positions and other specific values): 9. Start up by switching back initialisa tion switch from „Init“ to „Run“. 10. Set the middle position by terminal 3 (24 VDC) and adjust via the Potentiometer.
- Page 21 Operating Instructions bar-positurn2 and bar-positrol ATTENTION! • Please note that all safety functions are immediately available when switching the initialisation switch from „Init“ to „Run“. This can cause an immediate switching of the actuator! • In case of every (even accidental) switching to „Init“, the whole initialisation process must be carried out anew, because the previously learned values will have been lost.
- Page 22 Operating Instructions bar-positurn2 and bar-positrol Description of Safety Functions: Positioner mode 4–20 mA: Unit type: PN2-D / PL-D Valve persists in last position • Current supply Terminal 13 + 14 missing Valve persists in last position • Analog input Terminal 8 missing ...
- Page 23 Operating Instructions bar-positurn2 and bar-positrol Description of Safety Functions: Positioner mode 0–20 mA: Unit type: PN2-D / PL-D Valve persists in last position • Current supply Terminal 13 + 14 missing Valve moves to 0 Voltposition • Analog input Terminal 8 missing Unit type: PN2-S / PL-S ...
- Page 24 Operating Instructions bar-positurn2 and bar-positrol Description of Safety Functions: 3-Positions mode: Unit type: PN2-3P-D / PL-3P-D Armatur verharrt • Digital input Terminal 1, 2 and 3 missing Armatur verharrt • Current supply Terminal 13 + 14 missing Unit type: PN2-3P-S / PL-3P-S ...
- Page 25 Operating Instructions bar-positurn2 and bar-positrol Setting the End Positions and the Actuating Speed: positurn: ATTENTION! • When using manual operati on at the pneumatic valves you have to return them to the initial position afterwards. • After every change in the end...
- Page 26 Operating Instructions bar-positurn2 and bar-positrol Changing the safety position: positurn: positrol: Only unit type Only unit type PN2SS or PN2SM! PLS! ACHTUNG! ACHTUNG! • Before loosening any screws, • Before loosening any screws, make sure there is no more make sure there is no more...
- Page 27 Operating Instructions bar-positurn2 and bar-positrol Faults and their Correction: Description Possible Cause Correction Actuator does not move. 1. Air supply not correctly 1. Check air pressure and connected supply line 2. Solenoid valves not 2. Check valve connections. correctly connected 3.
- Page 28 Operating Instructions bar-positurn2 and bar-positrol Cleaning and Maintenance: Cleaning: Maintenance: ATTENTION! ATTENTION! • Never use aggressive clea • Never open the protective ners or materials to clean cover above the delicate the housing of the barposi electronics. This can lead to turn2.
- Page 29 Operating Instructions bar-positurn2 and bar-positrol Guarantee: We guarantee the faultfree function of our are the Terms of Warranty from bar GmbH, product according to our advertising, the which we will send to you upon request. product information and this documentati...
- Page 30 Operating Instructions bar-positurn2 and bar-positrol The bar products are comprehensively tested. The company bar therefore only guarantees the replacement or – at its sole discretion – the free repair of those components of the delivered products which, in the opinion of bar, have demonstrable manufacturing defects.
Need help?
Do you have a question about the bar-positrol and is the answer not in the manual?
Questions and answers