Table of Contents
Advertisement
Quick Links
UK - Installation and Operating Instructions
FR - Manuel d'installation et d'utlisation
ES - Instrucciones para montaje e instalación
IT
- Manuale di installazione ed uso
NL - Installatie- en montagehandleiding
DE - Montage- und Gebrauchsanleitung
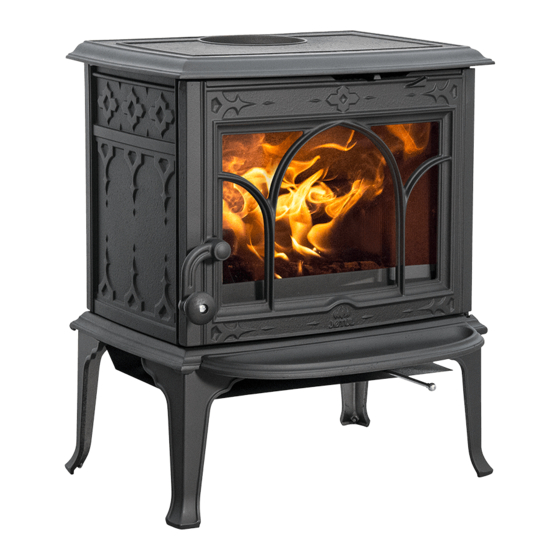
Jøtul F 100 ECO.2 LL
Manualen må oppbevares under hele produktets levetid. Manualen skal opbevares under hele produktets levetid.
Manualen skall sparas under hela produktens levtid. Käyttöohje on säilytettävä tuotteen koko käyttöiän ajan.
Jøtul F 100 ECO.2 LL SE
Jøtul F 100 ECO.2
Jøtul F 100 ECO.2 SL
4
19
33
47
61
75
Jøtul F 100 ECO.2 SL SE
Advertisement
Table of Contents

Summary of Contents for Jøtul F 100 ECO.2 LL
- Page 1 NL - Installatie- en montagehandleiding DE - Montage- und Gebrauchsanleitung Jøtul F 100 ECO.2 LL Jøtul F 100 ECO.2 LL SE Jøtul F 100 ECO.2 SL Jøtul F 100 ECO.2 SL SE Manualen må oppbevares under hele produktets levetid. Manualen skal opbevares under hele produktets levetid.
- Page 2 BS no. 2 15/1186 - 24/04/2015 UK - Datasheet Supplier Jøtul AS Product models Energy efficiency class Direct heat output Energy efficiency index Efficiency at nominal heat output Any specific precautions that shall be taken when the local Fire safety precautions such as safety distances when installing, national standards, local codes and regulations.
- Page 3 EU no. 2 15/1186 - 24/04/2015 Datasheet / Fiche Technique / Ficha técnica / Scheda dati / Datenblatt / Dane techniczne Requirements / Exigences / Requisitos / Requisiti / Vereisten / Forderungen / Wymagania Supplier / Fabricante / Jøtul AS Fornitore / Vereisten / Lieferant/...
-
Page 4: Table Of Contents
Ø150mm/177cm cross-section 10.0 Recycling ............17 Approx. weight: 11.0 Guaranee terms ..........17 Jøtul F 100 ECO.2 LL / Jøtul F 100 ECO.2 LL SE 89 kg Jøtul F 100 ECO.2 SL / Jøtul F 100 ECO.2 SL SE 88 kg... -
Page 5: Safety
The Jøtul F 100 ECO.2 SL, Jøtul F ECO.2 SL SE, Jøtul F 100 other suitable, non-infl ammable material. The recommended ECO.2 LL and Jøtul F 100 ECO.2 LL SE must be fi tted with a minimum thickness is 0,9 mm. - Page 6 ENGLISH...
-
Page 7: Installation
ENGLISH 4.0 Installation Requirements for protection of infl ammable fl oors in front of the fi replace • Before installing the fi replace, check it carefully for any The front plate must comply with national laws and signs of damage. regulations. - Page 8 ENGLISH Requirement for UK 4.2 Installation “The Jotul F 100 ECO.2 stoves have been recommended as Assembly of fl ue pipe with top outlet suitable for use in smoke control areas when burning wood logs and when fi tted with a mechanical stop to prevent primary The product is assembled for a top outlet as standard.
- Page 9 ENGLISH Fig. 6 Fig. 8 3. Install the fl ue pipe into the fl ue outlet. 2. Mount the fl ue outlet (A) into the rear outlet. Assembly of fl ue pipe with rear outlet Fig. 9 If the fl ue pipe is to be rear mounted do the following: NB! In order to make the change, you must fi...
- Page 10 ENGLISH Fig. 10 Fig. 12 3. Fasten the cover (A) with the screws (B). Fig. 11 5. Install the rear heat shield onto the stove. Fig. 13 4. Cut out the part (A) in the heat shield for the fl ue pipe. 6.
- Page 11 ENGLISH Installing the ash lip Fig. 14 Fig. 16 • Install the ash lip by hanging it under the door. 4.3 Chimney and fl ue pipe • Install the fl ue pipe into the fl ue outlet • The fi replace must only be connected to a chimney and fl...
- Page 12 ENGLISH 4.4 Performance check • Check that the afterburning (secondary combustion) starts. This is best indicated by yellow, fl ickering fl ames under the Once the product has been assembled, always check the baffl e. control handles. These should move easily and work in a •...
-
Page 13: Daily Use
ENGLISH Wood consumption Condensed water coming from the fi replace appears as a black, tar-like liquid. This should be wiped off immediately Jøtul F 100 ECO.2 has a nominal heat output of ca. 4,9 kW. to avoid discoloration of the fi replace, fl oor or surrounding Use of wood, with nominal heat emission: Approx. -
Page 14: Maintenance
ENGLISH 6.3 Sweeping of fl ue pipes to the Fig. 20 chimney On certain free-standing fi replaces the top plate can be lifted off and the pipe swept through the top. Otherwise, fl ue pipes must be swept through the fl ue pipe sweeping hatch or through the product’s door opening. -
Page 15: Service
ENGLISH 7.0 Service 7.2 Replacing the baffl e plate, burn plates and fi re grate Any unauthorised modifi cations to the product are prohibited! Only original spare parts may be used! Fig. 22 7.1 Replacing parts in the burn chamber Fig. - Page 16 ENGLISH Fig. 24 Fig. 26 3. Tilt the baffl e plate out. Fig. 25 • Lift the fi re grate and tilt it out. Fig. 27 4. Then remove the other burn plate. • Remove the rear bottom plate (A). When refi...
-
Page 17: Operational Problemes
ENGLISH 8.0 Operational problems - 11.0 Guarantee terms troubleshooting Our guarantee covers: Jøtul AS guarantees that the external cast-iron parts are Poor draught free from defects in materials or manufacturing at the time of purchase. You may extend the guarantee on the external cast- Check the length of the chimney and that it complies with iron parts to 25 years from the date of delivery by registering national laws and regulations.


Need help?
Do you have a question about the F 100 ECO.2 LL and is the answer not in the manual?
Questions and answers