Table of Contents
Advertisement
Quick Links
WET AND DRY VACUUM CLEANER
INSTRUCTION MANUAL
Before operating this appliance, please ensure that you read & understand all the
instructions that apply to it, as failure to comply with these instructions may result in
personal injury to other person, and also increase the risk of fire of electrical shock.
Please ensure that any replacement parts or accessories used with this appliance are correctly
and/or securely fitted before use.
Please retain the instructions for constant reference.
Model No.: WVC-1220
IPX4
1
Advertisement
Table of Contents

Related Manuals for Crown WVC-1220


Summary of Contents for Crown WVC-1220
- Page 1 WET AND DRY VACUUM CLEANER INSTRUCTION MANUAL Model No.: WVC-1220 IPX4 Before operating this appliance, please ensure that you read & understand all the instructions that apply to it, as failure to comply with these instructions may result in personal injury to other person, and also increase the risk of fire of electrical shock.
-
Page 2: Product Characteristics
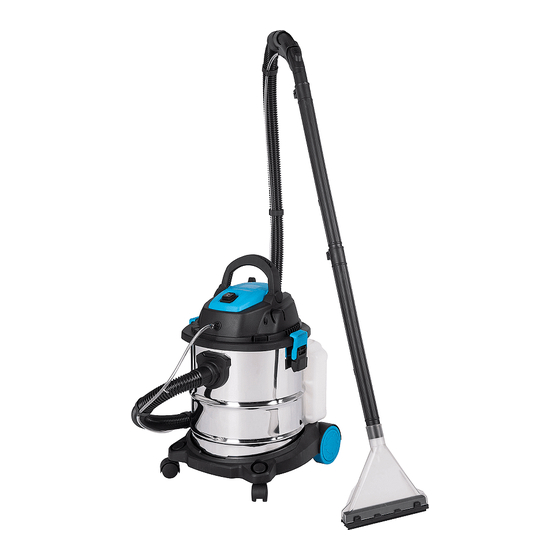
1. Product Characteristics (1) Vacuum cleaner for wet and dry (2) Carpet and sofa washing function (3) Jacks on the base for depositing accessories (4) Blowing function, satisfying different requirements 2. Including Units and Accessories 1. Tank unit ( head, Tank, base ) 9. -
Page 3: Installation Process
3. Installation Process (1). Base & wheels (2). Detergent tank Press the 2pcs front wheels Fit the detergent tank on the base, into the base position, and with the humps into the slots; screw the 2pcs rear wheels. Press the detergent tank onto the stainless steel one, and buckle it. - Page 4 4.Buckle the head unit on the tank well after upper process. (4). Hose, tube, brush & detergent pipe Check the leakproofness and tightness of the following junctures of different parts, in case of suction and sewage leakage. hose end 1. Connect the hose, 2pcs tubes and different kinds of brushes together according to the picture;...
- Page 5 sealing lock of the detergent pipe 2. Before operating the detergent sprayer, fit all the sealing locks at the right position and twist them clockwise. (5). Detergent 1. Fill the detergent tank with detergent; The detergent level indicator should always be under the opening of the the max volume is 3L;...
- Page 6 4. Operation (1). Switch At ‘I’ stage, the unit works as a common wet&dry vacuum cleaner; at ‘O’ stage, it’s switched off; at ‘ ’ stage, the detergent pump and spray gun works. (2). Carpet & sofa washing Choose the corresponding brush for cleaning and please review Part 2 for learning what brush it should be;...
-
Page 7: Floor Cleaning
(3). Floor cleaning (4). Airflow adjustment Press the button on the detergent Use the wet&dry floor brush for spray gun to adjust the suction. cleaning floor, dust, rubbish, spillage, etc. (5). Blowing function blower 1. Insert the end of the plastic hose into hose end The blower, and twist it clockwise to Lock;... -
Page 8: Safety Instruction
5. Safety Instruction (1) Before operation, please check if the local power supply is the same as it’s rated in the label. (2) If there’s any liquid out from the blower, do not overturn the appliance when repairing it in case that water goes into the motor and causes damage. -
Page 9: Maintenance
(14) Do not overturn the machine in (13) Do not collect objects which can case water goes into the motor and easily attach on the filter such as damages the motor. calcareousness powder, gesso and graphite powder. Because those will block the ventilation damage motor. -
Page 10: Lubricating Oil
Moderate lubricating oil should be added to the sealing locks and pipe jacks for Keeping the smooth operation. 8. Tech-data Model Power Voltage Frequency CROWN WVC-1220 1200W 220V-240V~ 50-60Hz 9. Breakdown table Symptom Possible cause Corrective action Dust / liquid / 1. - Page 11 Weak suction 1. Filters / tubes / hose/ suction 1. Clean up the filters and the port is blocked. accessories, or make use of the filter- 2. The tank is not lidded well. cleaning function. 2. Reset the head unit and buckle it on the tank.
Need help?
Do you have a question about the WVC-1220 and is the answer not in the manual?
Questions and answers