
Related Manuals for Altana BYK spectro-guide 45/0 gloss


Summary of Contents for Altana BYK spectro-guide 45/0 gloss
- Page 1 Measure what you see. spectro-guide 45/0 gloss spectro-guide sphere gloss Manual A member of Additives & Instruments...
- Page 2 spectro-guide 45/0 gloss Manual spectro-guide sphere gloss Patent pending 250 020 858 E 1105 BYK-Gardner GmbH BYK - Gardner USA Lausitzer Str. 8 9104 Guilford Road D-82538 Geretsried Columbia, MD 21046 Germany Tel. 0-800-gardner Phone 800-343-7721 (0-800-4273637) 301-483-6500 +49-8171-3493-0 800-394-8215 +49-8171-3493-140 301-483-6555 www.byk.com/instruments...
- Page 3 · Application and Technical Seminars · Repair & Certification Service BYK-Gardner is part of Altana AG and a direct subsidiary of BYK-Chemie GmbH, a leading supplier of additives for coatings and plastics. Together, we offer complete and unique solutions for you, our customer.
-
Page 4: Table Of Contents
Table of content Table of content 1. Safety instructions .................. 5 2. System description and Delivery notes ..........10 3. Power supply ..................12 4. Controls ....................14 5. Getting started ..................17 Turning on and measuring ..............17 Overview of main menu ................18 6. - Page 5 Table of content 10.5 Calibration ....................44 10.6 Setup ......................45 10.6.1 Auto store ..................45 10.6.2 Auto standard .................46 10.6.3 Metamerism index limit ..............47 10.6.4 CMC ratio ..................48 10.6.5 ∆E94 ratio ..................49 10.6.6 Switch off time ................50 10.6.7 Beeper ....................51 10.6.8 Set time ..................52 10.6.9 Trigger adjustment .................53 10.6.10 Language..................54 10.7 Configuration ...................55...
-
Page 6: Safety Instructions
Safety instructions 1. Safety instructions • Before operating the instrument the first time, please read the operating instructions and take particular notice of the safety instructions. • If you use the unit and accessories properly, there are no hazards to fear. • This product is equipped with safety features. Nevertheless, read the safety warnings carefully and use the product only as described in these instructions to avoid accidental injury or damage. - Page 7 Safety instructions The following symbols and terms are used. This symbol warns of the danger of injury. This symbol warns of the danger of injury caused by electricity. This sign points out additional information. DANGER The term DANGER warns of possible severe injuries and danger to life.
- Page 8 Safety instructions DANGER injuries possible • Defects and extraordinary loads If safe operation can no longer be presumed, shut down the device and secure it against unintended operation. The device must be presumed unsafe to operate: • if visible damage is evident • if the instrument is no longer working • if it has been stored for long periods under adverse conditions • after harsh treatment during shipping. • Safety advices for batteries: Do not crush or dismantle, do not heat or incinerate, do not immerse in any liquid.
- Page 9 Safety instructions • When working with the batteries /rechargeable batteries make certain there is no short circuit on the contacts. Metallic objects must not come in contact with the bare contacts. WARNING severe material damage • The measurement unit consists of sensitive optical and electronic precision parts. Prevent it from being dropped, bumped or shaken! • Avoid exposure to continuous humidity and con densation.
- Page 10 Safety instructions • Avoid prolonged high relative humidity and do not allow condensation water. • Do not use any acetone for cleaning the unit! The unit housing is resistant to many solvents. For cleaning you should use a soft, moist cloth. Excessive dirt and dust can be removed with propanol. • In case you intend not to use the instrument for a longer period of time, take out the batteries. Additonal information on use: • You will find the technical data for all system components on the respective manufacturer’s...
-
Page 11: System Description And Delivery Notes
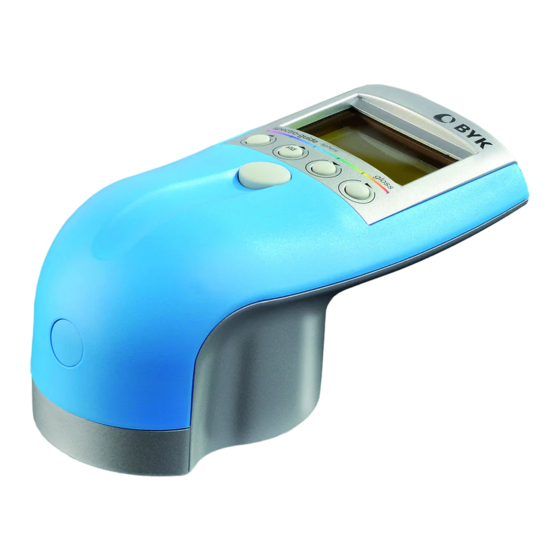
System description and Delivery notes 2. System description and Delivery notes spectro-guide is a portable spectro photometer which can be used to ensure consistent quality in incoming and outgoing QC. It’s operated with batteries to meet the demands of measurements in the field. The measurement principle is based on the measure m ent of spectral reflectance within the visable spectrum from 400–700 nm. - Page 12 System description and Delivery notes The instrument complies with the following standards. Color: DIN 5033, 5036, 6174; ISO 7724; ASTM D2244, E308, E1164. Gloss: DIN 67530; ISO 2813, ISO 7668; JIS Z 8741; ASTM D 523, ASTM D 2457. Instrument type: spectro-guide 45/0 gloss CC-6801 spectro-guide 45/0 gloss-S CC-6802 spectro-guide sphere gloss CD-6834 spectro-guide sphere gloss-S CD-6836 Comes complete with: Measurement device, black calibration standard,...
-
Page 13: Power Supply
Power supply 3. Power supply Before operating the instrument for the first time, please read the operating instructions and pay attention to the safety instructions in Chapter 1. Unpack the device and check to make certain all pieces have been included with delivery (for scope of delivery, see Section Delivery notes). 3.1 Power supply battery-operated The battery must be placed in the measuring unit for operation service. - Page 14 Power supply 3.2 Changing the battery To remove the battery compartment, hold the instrument in one hand and depress the battery compartment release with your index finger. At the same time, pull the battery compart ment out of the instrument with your other hand, as indicated by the arrows in the accompanying illustration. Remove the used batteries.
-
Page 15: Controls
Controls 4. Controls Measuring Instrument Standard Display Standard Box Battery Compartment Diaphragm Measurement Aperture Standard Battery Compartment Black Standard Release Instrument Label with Serial Number Operate Button Sample Area Locator Cursor Buttons Serial Interface... - Page 16 Controls The basic system consists of the measuring instrument, standards for calibration and testing, the sample area locator, and the instrument case. You should calibrate the instrument before starting to measure. The stan dards are provided for this pur pose. Be sure to always set the instrument on the standard in the same direction.
- Page 17 Controls The instrument is operated by means of the Operate button and the cursor buttons. After the instrument is switched on with the Operate button, it is immediately ready to use with the preset parameters. The cursor buttons are used for making menu selections. You can use these buttons to move around in the main menu and open the desired sub menu.
-
Page 18: Getting Started
Getting started 5. Getting started 5.1 Turning on and measuring The device is switched on with the Operate button. The company logo, copyright notice and version number appear. The instrument then enters into the ready-to-measure state. The display indicates the difference measurement. This is the default setting for the basic version. The measurement data for the sample are shown on the left side of the display, while the differences to the last measured standard appear on the right... -
Page 19: Overview Of Main Menu
Getting started 5.2 Overview of main menu File Display Open Standard Sample Mode Sample Difference Smp/Dif Save Standard Std/Dif Sample Smp/Std Sample–>Std. Pass/Fail ∆E* Delete Last Smpl all ∆‘s All Smpl One Std Metamerism All Std Memory Illuminant ⇑ ⇓ Mean On/Off Del last Define N... - Page 20 Getting started Options Optionen lllum/Obs F2/2° Color sys CIELab F2/10° CIELCH F6/2° Spectrum F6/10° F7/2° F7/10° Lab(h) F8/2° FMC2 F8/10° CIELCH94 F10/2° DINLab99 F10/10° DINLCH99 F11/2° Rx Ry Rz F11/10° Index ∆E* U30/2° ∆E(h) U30/10° ∆E CMC Calibr. Chk Green ∆E FMC2 Calibrate ∆E 94...
-
Page 21: Calibrate
Calibrate 6. Calibrate Three calibration standards are supplied with the measuring instrument. These include a black standard and a white standard for calibration of the instrument, as well as a green test standard. To perform the gloss calibration, the instrument is further equipped with a high-gloss standard. - Page 22 Calibrate Clean the standards with a moist cloth. Never use window cleaner or any abrasive cleaning agents. For stubborn stains, saturate the cloth with propa- nol. chk green To determine whether recalibration of the instrument is necessary, perform a test measurement with the green standard.
- Page 23 Calibrate Use the buttons to move the cursor to the “Option” menu. From this menu, use the button to place the cursor on the “Calibr.” option. Press the Operate button. When the submenu opens, use the button to move the cursor to the “Calibrate” option. Now press the Operate button, and calibration will begin. The instrument will first call for the File Display Option black standard. Place the instrument on the black standard and press the Operate button.
-
Page 24: Measuring Procedure
Measuring procedure 7. Measuring procedure 7.1 Measuring Switch the instrument on. The display shows the difference measurement. Set the instrument on the sample to be measured. Now press the Operate button to start measuring. The beep indicates that measurement has been completed. The display will now show the measured values for the new sample as well as the differences to the last measured standard. -
Page 25: Saving
Measuring procedure 7.2 Saving To store the last measurement, use the button from the “File” menu to move the cursor to the “Save” option. The submenu opens when you press the Operate button. Choose “Standard” and press the Operate button again. The input menu for the standard name will now appear. You can select the appropriate letter at the position indicated by the arrow by using the buttons. - Page 26 Measuring procedure If the “AutoStore” function in the Option-Setup menu is activated, readings will be stored automatically. There are three different ways to store a reading: If you started the measurement with the button, you can store it as a new standard with the “Save/Standard” function. If you started the measurement with the Operate button, you can store it as a new sample with the “Save/Sample”...
-
Page 27: Opening
Measuring procedure 7.3 Opening From the “File” menu, use the button to move the cursor to the “Open” option. Press the Operate button. The submenu will open. Use the buttons to move the cursor to “Sample.” Press the Operate button again. The sample selection menu will appear. Use the buttons to select the desired sample and press the Operate button. -
Page 28: Multiple Readings
Multiple readings 8. Multiple readings Multiple readings should always be performed in cases of uneven or structured surfaces. The advantage of multiple readings is that the visual evaluation is supplemented by the calculation of a mean for the meas ured values. This function is activated from the “File”... - Page 29 Multiple readings In the default setting, the difference mode is shown on the display. When multiple readings are performed, the mean value is shown on the left and the differences of the mean are shown on the right. If you like to see the current value, you can select the “Sample Mode” option from the “Display” menu. To do this, use the buttons to place the cursor on the “Display”...
-
Page 30: Storing The Mean
Multiple readings 8.1 Storing the mean From the “File” menu, use the button to move the cursor to the “Save” option. The submenu will open when you press the Operate button. Use the button to move the cursor to “Sample” and press the Operate button. The input menu for the sample name appears. You can select the appropriate letter at the position indicated by the arrow by using the buttons. -
Page 31: Deleting The Last Reading
Multiple readings 8.2 Deleting the last reading If you have performed an invalid measurement and would like to delete the last measured value, go to the “File” menu and use the button to move the cursor to the “Mean” option. The submenu opens when you press the Operate button. Use the button to move the cursor to “Del last” and press the Operate button. -
Page 32: Number Of Readings
Multiple readings 8.3 Number of readings From the “File” menu, use the button to move the cursor to the “Mean” option. The submenu opens when you press the Operate button. Use the button to move the cursor to “Define N” and press the Operate button. The input menu for the number of readings appears. The preset value is 3. You can use the buttons to select the appropriate digit at the position indicated by the arrow. -
Page 33: Display
Display Display 9.1 Sample Mode The instrument is preset to the “Difference” mode. To change to the “Sample Mode” from the “Display” menu, use the button to move the cursor to the “Sample Mode” option. Press the Operate button and the display changes to Sample Mode. The absolute values of the last reading are displayed in an enlarged format, in accordance with the chosen color system. -
Page 34: Difference
Display 9.2 Difference To go to “Difference” mode from the “Display” menu, use the button to move the cursor to the “Difference” option. When you press the Operate button, the display changes to Difference mode. The data is displayed in accordance with the selected display setting. The “Smpl/Dif” setting is preset. The following display options are also possible: “Std/Dif”... -
Page 35: Pass/Fail
Display 9.3 Pass/Fail To go to “Pass/Fail” mode from the “Display” menu, use the button to move the cursor to the “Pass/Fail” option. You can either insert only ∆E* values or individual components as well. To make this selection use the button to “∆E*”... - Page 36 Display The bottom line shows the names of the opened sample and standard. If you like to change the tolerances for a standard, you must open this standard and then store it again under the same name. The input screen for the tolerances will then appear, and you can change the tolerances.
-
Page 37: Metamerism
Display 9.4 Metamerism If the metamerism index is set unequal to zero in “Setup,” the metamerism index will be calculated for each measurement. If it is larger than the value selected in “Setup,” it will be indicated by a reversed “M” in the bottom line of the display. To display the metamerism index for the individual illuminants, use the button to select the “Metamerism”... -
Page 38: Illuminant
Display 9.5 Illuminant ⇑ ⇓ With this option you can scroll through the selected illuminants. From the „Display“ menu, use the button to move the curser to the „Illumin. ⇑ ⇓“ option. When pressing the Operate button, the instrument switches to the next illuminant which is displayed in the lower left corner. Repeat this as many times as needed to display all selected illuminants. -
Page 39: Options
Options 10. Options 10.1 Color system Move the cursor with the button from the “Options”menu to the “Color System” menu. After pressing the Operate button, the submenu opens. Available color systems: Press the CIELab CIELCH keys to browse through the menu and confirm the desired color system by pressing the Operate Spectrum button. The instrument returns to the previous measuring mode and the chosen color system is shown on Lab(h) the display. -
Page 40: Index
Options 10.2 Index From the “Options” menu, use the button to move the cursor to the “Index” option. The submenu will open when you press the Operate button. Available indices : Move through the menu with the ∆E* ∆E(h) buttons and confirm the required index with the Operate button. ∆E CMC The instrument returns to the previous measuring ∆E FMC2 mode. The selected index appears on the display. ∆E94 Use the ∆E99... - Page 41 Options Opacity Opacity can only be performed in Difference mode. To activate this function, move the cursor to the “Opacity” option as described for the “Options/ Index” menu. The instrument then returns to the measuring mode. All values on the display are set to zero. To determine the opacity of a sample, use button to measure the sample over the black background. Then use the Operate button to measure the sample over the white background.
- Page 42 Options Color strength Color strength can only be performed in Difference mode. To activate this function, move the cursor to the “Color Strength” option in the manner descri- bed for the “Options/Index” menu. The instrument will then return to the measuring mode. All the values on the display are set to zero. To display the color strength, use the button to measure the standard.
-
Page 43: Gloss
Options 10.3 Gloss From the “Options” menu, use the button to move the cursor to the “Gloss” option. The submenu will open when you press the Operate button. Move the cursor to “Gloss on” and confirm your choice by pressing the Operate button. The instrument will return to the measuring mode. If you are in the “Display/Sample Mode” and take a reading with the Operate button, the display will show the values of the sample. You can now either save the measured value as Standard or as Sample. -
Page 44: Illuminant/Observer
Options 10.4 Illuminant /observer Here you decide which illuminants are enabled on the display of the instrument. Chapter 9 provides an overview of all available illuminants. From the „Option“ menu, use the button to move the cursor to the „Illum/Obs“ option. The submenu opens when you press the Operate button. The illuminants which will appear on the display are indicated by check marks. You can toggle illuminants on or off by moving the cursor to the illuminant and pressing the Operate button to make the check mark appear or disappear. -
Page 45: Calibration
Options 10.5 Calibration Chk Green From the “Options” menu, use the button to move the cursor to the “Calibr.” option. The submenu opens when you press the Operate button. The “chk green” option is preselected. Take the green test standard and open the lid. Position the instrument so that the display points in the direction of the open lid and the front edge of the instrument is parallel to the edge of the lid. -
Page 46: Setup
Options 10.6 Setup 10.6.1 Auto store When the “AutoStore” function is activated, the sample or standard is automatically stored after each measurement. This function can be toggled on and off. It is possible to assign a seven-digit name and a three-digit starting number. The number is automatically incremented by 1 on each storing operation. -
Page 47: Auto Standard
Options 10.6.2 Auto standard When the “Auto Std” function is activ ated, the standard which corresponds most closely to the sample is automatically chosen from the set of stored standards, and the differences are displayed. This func tion can be toggled on and off. It is only active in the Difference and Pass/Fail modes. -
Page 48: Metamerism Index Limit
Options 10.6.3 Metamerism index limit From the “Options” menu, use the button to move the cursor to the “Setup” option. The submenu opens when you press the Operate button. Move the cursor to the “MI Limit” option and press the Operate button. The input menu for the MI limit appears. Use the buttons to change the underlined digit. Use the button to move the underline to the next digit. End the input operation by pressing the Operate button. -
Page 49: Cmc Ratio
Options 10.6.4 CMC ratio From the “Options” menu, use the button to move the cursor to the “Setup” option. The submenu opens when you press the Operate button. Move the cursor to the “CMC Ratio” option and press the Operate button. The input menu for the CMC Ratio appears. Use the Recommended setting: buttons to change the underlined digit. Use the L : C = 2.00 : 1 button to move the underline to the next digit. -
Page 50: E94 Ratio
Options 10.6.5 ∆E94 ratio From the “Options” menu, use the button to move the cursor to the “Setup” option. The submenu opens when you press the Operate button. Move the cursor to the “∆E94 Ratio” option and press the Operate button. The input menu for the ∆E94 ratio appears. Use the buttons to change the underlined digit. Use the button to move the underline to the next digit. End the input operation by pressing the Operate button. -
Page 51: Switch Off Time
Options 10.6.6 Switch off time From the “Options” menu, use the button to move the cursor to the “Setup” option. The submenu opens when you press the Operate button. Move the cursor to the “Disp Time” option and press the Operate button. The settings mask for the switch off time appears. Use the buttons to move the black bar. Note: As the switch off time increases, the instrument consumes more power. -
Page 52: Beeper
Options 10.6.7 Beeper This function makes it possible to toggle the beep tone on and off. This includes the beep which accompanies cursor movement and the beep which occurs after measurement is completed. From the “Options” menu, use the button to move the cursor to the “Setup” option. The submenu opens when you press the Operate button. -
Page 53: Set Time
Options 10.6.8 Set time From the “Options” menu, use the button to move the cursor to the “Setup” option. The submenu appears when you press the Operate button. Move the cursor to “Set Time.” When you press the Operate button, the input screen for the date and time appears. Use the buttons to change the underlined digit. Use the button to move the underline to the next digit. -
Page 54: Trigger Adjustment
Options 10.6.9 Trigger adjustment The sensitivity of the flexible measuring cone is adjustable. From the “Options” menu, use the button to move the cursor to the “Setup” option. The submenu appears when you press the Operate button. Move the cursor to “Trig adj.” The menu-driven instructions for adjusting the trigger appears. When following the prompts, the menu for adjusting the sensitivity of the measuring cone appears. -
Page 55: Language
Options 10.6.10 Language From the “Options” menu, use the button to move the cursor to the “Setup” option. The submenu opens when you press the Operate button. Move the cursor to the “Language” option and press the Operate button. The language selection menu appears. Use the buttons to select a language. Confirm your selection with the Operate button. The language selection autom atically determines the output format for the time and date. -
Page 56: Configuration
Options 10.7 Configuration Here you decide which functions are enabled for your instrument. The instrument is shipped in the advanced version. To change to the basic version move the cursor to “Basic” and press the Operate button. Chapter 5.2 provides an overview of the functions of the basic and advanced version. It is also possible to define two custom menus and store them. The definition and selection of these menus are secured against improper access by... - Page 57 Options You can toggle menu options on or off by moving the cursor to the option and pressing the Operate button to make the check mark appear or disappear. If you would like to allow only the display time, beeper, and trigger to be set in the “Setup” menu, move the cursor to each option you wish to disable and press the Operate button.
- Page 58 Options Setting Custom1: Setting Custom2:...
-
Page 59: File
File 11. File 11.1 Open From the “File” menu, use the button to move the cursor to the “Open” option and press the Operate button. The submenu opens. Select “Standard.” When you press the Operate button, all stored standards appear. Use the buttons to select the desired standard, then press the Operate button. The cursor is always positioned on the standard which was selected most recently. After the standard has been selected, the instrument returns to the previous measuring mode. -
Page 60: Save
File 11.2 Save From the “File” menu, use the button to move the cursor to the “Save” option. The submenu opens when you press the Operate button. Select “Standard”. Press the Operate button again. The input menu for the standard name appears. You can use the buttons to select the appropriate letter at the position of the arrow. -
Page 61: Delete
File 11.3 Delete Example: “One Std” From the “File” menu, use the button to move the cursor to the “Delete” option. The submenu opens when you press the Operate button. Use the button to move the cursor to “One Std” and press the Operate button. The selection menu for the standard name appears. You can use the buttons to select the standard you wish to delete. When you press the Operate button, a prompt asks you to confirm that you want to delete the selected standard. Confirm your selection with the Operate... -
Page 62: Mean
File 11.4 Mean The “Mean” submenu, which can be selected from the File menu, contains the following options: Del. Last Define N These options are described in detail in Chapter 8 “Multiple Readings”. 11.5 Print You can output data to a connected printer. The following choices are provided: Standards: All stored standards are printed in the format:... -
Page 63: Interface
Interface 12. Interface The measuring instrument has a serial interface which makes it possible to communicate directly with a PC or Printer. Measurement data can be transfered from the instrument’s memory or directly after each reading to Windows™ applications. The easy-link program is included in the standard package for this purpose. -
Page 64: Standards
Standards 13. Standards Color: DIN 5033 Colorimetry; basic concepts. DIN 5036 Radiometric and photometric properties of materials; definitions characteristic. DIN 6174 Colorimetric evaluation of colour differences of surface colours according to the CIELAB formula. ISO 7724 Paints and varnishes - Colorimetry. ASTM D 2244 Standard Test Method for Calculation of Color Differences From Instrumentally Measured Color Coordinates. ASTM E 308 Standard Practice for Computing the Colors of Objects by Using the CIE System. ASTM E 1164 Standard Practice for Obtaining Spectrophotometric Data for Object-Color Evaluation. - Page 65 Standards Gloss: DIN 67530 Reflektometer als Hilfsmittel zur Glanzbeurteilung an ebenen Anstrich- und Kunststoffoberflächen (Reflectometer as a means for gloss assessment of plane surfaces of paint coatings and plastics) ISO 2813 Paints and varnishes - Determination of specular gloss of non-metallic paint films at 20°, 60° and 85° ISO 7668 Anodized aluminium and aluminium alloys - Measurement of specular reflectance and specular gloss at angles of 20°, 45°, 60° or 85°. ASTM D 523 Standard Test Method for Specular Gloss ASTM D 2457 Standard Test Method for Specular Gloss of Plastic Films and Solid Plastics...
-
Page 66: Technical Data
Technical data 14. Technical data Color Measurement geometry 45 circ./0 or d/8 per DIN, ASTM, ISO Spectral range 400-700 nm Spectral interval 10 nm Photometric range 0-100 %, 0.01 resolution Repeatability 0,01 DE*, 1 σ 10 consecutive measurements on white tile Reproducibility 0,2 DE*, 1 σ Average on 12 BCRA II tiles Color systems CIELab, CIELCh, Lab(h), CIELab99, XYZ, Yxy, Rx RyRz Color differences... - Page 67 Technical data Gloss Gloss Range 0-100 GU* Repeatability 0,2 GU* (spectro-guide-S: 0,1 GU*) Reproducibility 1 GU* (spectro-guide-S: 0,5 GU*) Aperture 5 x 10 mm (0,2 x 0,4 in.) General Measurement time 0.4 seconds Measurement interval 1 second Memory 1500 standards/999 samples Language German, English, French, Italian, Spanish, Japanese, Chinese...
-
Page 68: Errors And Warning Messages
Errors and warning messages 15. Errors and warning messages Standard Memory full! The maximum number of standards (1500) is already stored. Delete standards which are no longer needed, or transfer to the PC. Sample Memory full! The maximum number of samples (999) is already stored. -
Page 69: Instrument Reset
Instrument reset 16. Instrument reset The Instrument Reset returns the instrument to the factory settings, i.e., it activates the advanced version with the default settings. Standard memory and sample memory are not deleted. To do the Instrument Reset, press the buttons together until the message “Reset Instrument“ appears. Use the Operate button to confirm Instrument Reset. You can use any other button to cancel the operation. -
Page 70: Cleaning And Maintenance
Cleaning and maintenance 17. Cleaning and maintenance • Do not insert any objects into the measurement aperture for cleaning. The instrument could get damaged - affecting a proper and safe operation. • Do not use any acetone! The instrument housing is resistant to a number of solvents, but cannot be guaranteed to withstand all chemicals. You should therefore use a soft, moist cloth for cleaning. -
Page 71: Service And Certification
Service and Certification 18. Service and Certification Service Besides the repair of your instrument we offer the following additional services: First diagnosis on the telephone or by e-mail Call us or send us an e-mail and we will try to solve your problem. If this is not successful, please send us the instrument for repair. Preventive maintenance, calibration, and recertification For precautionary reasons we recommend... - Page 72 Service and Certification Service Centers for BYK-Gardner products Germany BYK-Gardner GmbH Lausitzer Strasse 8 82538 Geretsried Germany Phone:+49-8171-3493-0 Fax: +49-8171-3493-166 BYK-Gardner USA 9104 Guilford Road Columbia, MD 21046 Phone:+1-301-483-6500 Fax: +1-301-483-6555 China BYK-Gardner Shanghai Office 3/F, Building 22 No. 140 Tian Lin Road Xuhui District Shanghai 200233 P.R.
-
Page 73: Copyright
Copyright 19. Copyright This instruction manual is an important part of this instrument. It contains es- sential information about setting up, placing in service and use. If you pass the device on to another user, please ensure that the instruction manual is included with the instrument. - Page 74 250 020 858 E 1105...
Need help?
Do you have a question about the BYK spectro-guide 45/0 gloss and is the answer not in the manual?
Questions and answers