Table of Contents
Advertisement
Quick Links
4001164
4001164
Instruction Manual for Slicers
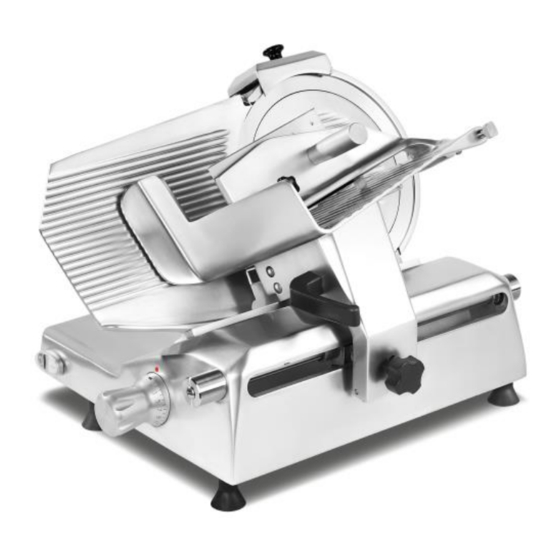
Models MO12 – MO14
For Service on Your Slicer contact your local service company.
Visit our website for information on additional products:
www.italianslicers.com
-
IMPORTANT SAFETY NOTICE
-
This manual contains important safety instructions which
must be strictly followed when using this equipment.
1
Advertisement
Table of Contents

Related Manuals for RHENINGHAUS MO12


Summary of Contents for RHENINGHAUS MO12
- Page 1 4001164 4001164 Instruction Manual for Slicers Models MO12 – MO14 For Service on Your Slicer contact your local service company. Visit our website for information on additional products: www.italianslicers.com IMPORTANT SAFETY NOTICE This manual contains important safety instructions which must be strictly followed when using this equipment.
-
Page 4: Table Of Contents
Index ATTENTION OWNERS AND OPERATORS…………………………………………………………..…………………………..3 KEY COMPONENTS OF THE SLICER......................…………….3 SLICER SAFETY TIPS........................…………….………….4 INSTALLATION..........................………..….……..4 OPERATING INSTRUCTIONS.....................………....………..6 CLEANING & SANITIZING.....................………....…………..7 REASSEMBLE & INSPECTION……………………..………………………………………………………………………………9 BLADE SHARPENING...........................…………………..10 SIMPLE MAINTENANCE AND REPAIR..................……….....……….11 TROUBLE SHOOTING GUIDE........................…………………12 Distributor: Food Service Solutions - 430 Industrial - Milton, Ontario - L9T 5A6 Ph. -
Page 5: Attention Owners And Operators
---Attention Owners and Operators--- This equipment is designed to provide safe and productive processing of food products as long as the equipment is used in accordance with the instructions in this manual and is properly maintained. Importantly, unless the operator is adequately trained and supervised, there is a possibility of serious injury. Owners of this equipment bear the responsibility to make certain that this equipment is used properly and safely, strictly following all the instructions contained in this manual and the requirements of local, state or federal law. -
Page 6: Slicer Safety Tips
Slicer Safety Tips--- TO AVOID SERIOUS PERSONAL INJURY: • NEVER touch this slicer without training and authorization from your supervisor or if you are under 18 years old. Read this instruction manual first. • ONLY install the slicer on a level nonskid surface that is nonflammable and is located in a clean, well-lighted work area away from children and visitors. - Page 7 INSTALLATION 1. Read this manual thoroughly before installation and operation. DO NOT proceed with installation and operation if you have any questions or do not understand anything in the manual. Contact your local representative. 2. Remove the slicer from the corrugated box. All packaging components are classified as solid urban waste; do not dispose of them in the environment.
-
Page 8: Operating Instructions
---Operating Instructions--- TO AVOID SERIOUS PERSONAL INJURY: • NEVER touch this slicer without training and authorization from your supervisor or if you are under 18 years old. Read this instruction manual first. • NEVER operate the slicer without the blade cover securely installed. Keep hands and arms away from all moving parts. •... -
Page 9: Cleaning & Sanitizing
RESET SWITCH The reset switch is actuated to protect the motor when the slicer is submitted to a mechanical type of overload. In case of overload: 1 – Turn the slicer off; 2 - Remove the item(s) that caused overload. If necessary clean the slicer following the cleaning procedure (point 6.1); 3 –... - Page 10 DISASSEMBLY for CLEANING & SANITIZING Turn the slicer off, turn the regulator knob clockwise until it stops so the gauge plate covers the knife’s edge, and unplug the power cord. 1.Remove all of the slicer’s removable parts. Clean, scrub and sanitize all parts. 2.Remove the blade cover (Fig.6) by unscrewing and pushing the blade cover knob (Fig.5).
- Page 11 detergent and warm water. Rinse removed parts with fresh, clean water. Following the instructions on your quaternary sanitizer label, soak removed parts in a proper solution of quaternary sanitizer for a minimum of two minutes. An important step to kill bacteria is to allow the parts to air dry before reassembly! 8.To clean the blade, soak a clean cloth in a mild detergent and warm water solution.
- Page 12 ---Reassemble & Inspection--- REASSEMBLE & REINSTALL REMOVABLE PARTS After cleaning, sanitizing, and allowing the parts to air dry, they must be reinstalled. Make sure the regulator knob is in zero position. 1. Reinstall the blade cover. Carefully place the blade cover on by aligning the center screw over the center of the blade. With one hand applying pressure in the center of the blade cover holding it in place, and one hand on the blade cover release knob (Fig 8-1), turn the release knob clockwise to tighten the blade cover into place.
-
Page 13: Blade Sharpening
Blade Sharpening TO AVOID SERIOUS PERSONAL INJURY: • NEVER touch rotating blade. • ALWAYS keep hands clear of all moving parts. • ALWAYS turn the slicer off and turn the regulator knob clockwise until it stops before sharpening. • NEVER sharpen slicer unless all guards are installed. WHEN AND HOW OFTEN TO SHARPEN THE BLADE 1. -
Page 14: Simple Maintenance And Repair
---Simple Maintenance and Repair--- TO AVOID SERIOUS PERSONAL INJURY: • ALWAYS turn off slicer and unplug slicer before servicing. • NEVER touch this slicer without training and authorization from your supervisor. • ALWAYS keep hands clear of rotating blade and moving parts. •... - Page 15 SBR (SAFE BLADE REMOVAL) INSTRUCTION Slicers with SBR - How to disassemble the blade 0 Lift the sharpening unit up 1 Unscrew and remove blade cover disc. Position SBR in contact with the blade by fitting extractor shaft in the blade central hole Screw the two knobs of the SBR in correspondence of the two holes on the blade...
-
Page 16: Troubleshooting Guide
Troubleshooting Guide SYMPTOM CAUSE SOLUTION Slicer will not start Slicer not plugged in Plug in slicer Switch off Turn switch on Reset switch off Read Reset switch instruction (page 7) Ragged cuts-poor yield Dull blade Sharpen blade Chipped blade Sharpen or have new blade installed Blade-gauge plate gap too Call for service to adjust gauge plate wide...
Need help?
Do you have a question about the MO12 and is the answer not in the manual?
Questions and answers