
Subscribe to Our Youtube Channel
Related Manuals for Bolin Technology DANTE AV D Series


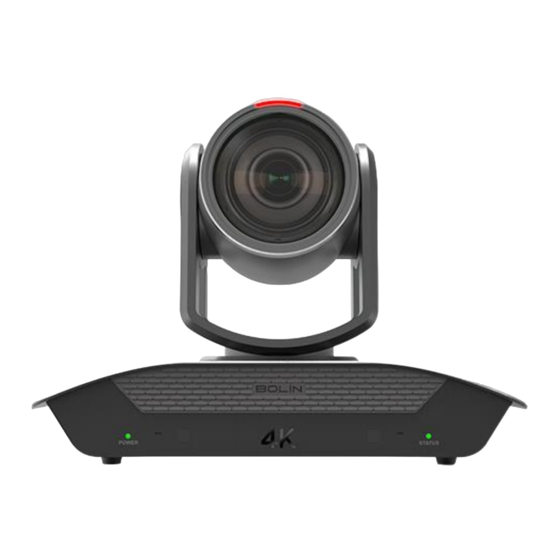
Summary of Contents for Bolin Technology DANTE AV D Series
- Page 1 D Series DANTE AV PTZ Camera USER MANUAL Part Two: Dante AV Use VERSION: D-09232021 D412 D220 © 2021 Bolin Technology...
-
Page 2: Table Of Contents
Contents PRIOR TO USE ................................... 4 ..................................4 QUIPMENT TO REPARE ............................ 4 ANTE ONTROLLER NSTALLING AND PDATING .................................. 5 ETWORKS AND WITCHES AV C ..........................6 ANTE ONNECTION ASIC YSTEM IAGRAM IP S ..........................6 SE FOR THE XISTING ANTE UDIO YSTEM... - Page 3 Part Two: Dante AV Use The following assumptions are made for this section of the manual that involve the usage of Bolin Dante AV devices. • There is an existing operational (new designed) Dante Network that is ready for Dante AV PTZ camera and decoder installation •...
-
Page 4: Prior To Use
Prior To Use Equipment to Prepare To build up a typical Dante AV PTZ camera system, you will need to have the following equipment ready or have the following equipment already in the existing Dante system: • Bolin Dante AV PTZ camera •... -
Page 5: Networks And Switches
From the Dante Controller application menu, select 'Check for Updates'. Checking for Updates Automatically Dante Controller can also check for updates automatically. If an update becomes available, you will be notified via a pop-up message. To activate automatic checking, in the update dialog, select the option to check for updates automatically. -
Page 6: Dante Av Connection Basic System Diagram
Dante AV Connection Basic System Diagram Use for the Existing Dante Audio Over IP System Dante AV – Video Routing Discovery and auto-configuration When a Dante-enabled device is connected to an IP/Ethernet network, it will automatically: Configure its IP address Advertise itself to allow automatic discovery Within seconds of a Dante-enabled device connecting to a network, Dante Controller will automatically discover and display the device, allowing you to configure channels and route media. -
Page 7: Using Dante Controller For Bolin Dante Av Devices
including: • Device name • Channel names • Number of channels • Sample rates and bit depths This information can be seen when viewing a device on Dante Controller and allows Dante devices to determine compatibility with other devices, such as compatible sample rates to allow media to be routed. Using Dante Controller for Bolin Dante AV Devices This section of the manual is for connecting and utilizing Bolin Dante AV PTZ cameras, decoders, and very closely related devices only. -
Page 8: Network View
Network View A typical Network view for a network that includes Bolin video devices (with four types of ancillary channels) is shown below. Expanding the Routing View... -
Page 9: Routing View
In this example: • The 'Video Rx' channel on the Bolin-Decoder-D10H receiver is subscribed to the 'Video Tx' channel on the Bolin-PTZ-Camera-D220 transmitter. This subscription would cause video from the Bolin-PTZ-Camera-D220 to be displayed on the front of house display screen. •... -
Page 10: Clock Status
• Dante Version: The firmware version for hardware devices, or software version for Dante software applications • Device Lock: The lock state of the device. You can also click this field to open the device lock / unlock dialog. • Primary Address: The IP address assigned to the primary interface. - Page 11 Device Name The device name currently associated with the device. Subscription Status The icon in the Subscription Status column displays a summary of subscription states for the device. If any of the device's channels are not successfully subscribed, the relevant icon will be displayed here. Primary Status The Primary Status column indicates the link speed of the primary Dante network interface for the device.
-
Page 12: Device View
transmitter and the receiver). A grey light indicates that the device is not currently subscribed. Packet Errors A red light in the Packet Errors column indicates that one or more media packets have been corrupted in between the switch and the receiver. This is usually due to a faulty Ethernet cable. Use the Clear Counters button in the Device View >... - Page 13 Receive Tab The Receive tab displays a list of all subscribed and dormant receive channels on the current device, plus subscription information for the subscribed channels. It also allows the creation of subscriptions from the Available Channels list. Receive Tab with Bolin Dante AV camera Receive Tab with Bolin Dante AV decoder The tab is split into two panes: Receive Channels, and Available Channels.
- Page 14 Subscriptions can show several symbols in the Status column. Common status icon combinations and their meanings are as follows: Unicast device successfully subscribed to a transmitter Redundant device successfully subscribed on both primary and secondary via unicast Redundant device successfully subscribed on both primary and secondary via multicast Redundant device successfully subscribed...
-
Page 15: Transmit Tab
Transmit Tab The Transmit tab is used to inspect and modify the transmit configuration of a device. Transmit Tab with Bolin Dante AV camera Transmit Tab with Bolin Dante AV decoder The Transmit Tab is arranged into two areas: Transmit Channels: The area on the left pane of the tab shows the Tx channels for the device. It ■... -
Page 16: Status Tab
Multicast Transmit Flows: The area on the right pane of the tab shows the multicast transmit flows ■ that have been configured on the device. Multicast flows are listed in ID order, including the channels contained within the flow. Note: Unicast flow details are displayed in the Flow Information dialog. Changing Tx channel Names To change a Tx channel name double click on the name and type in a new one. - Page 17 The tab is divided into sections. The information presented on this tab can be very useful when investigating networking or clocking issues in the system. The Refresh button can be used to update this information if required. Device Information This provides the following general information about the device: Manufacturer: The name of the device manufacturer.
-
Page 18: Latency Tab
The Rx Utilization includes not only network traffic destined for the Dante device, but any other multicast or broadcast traffic received at this network interface. Note: As a rule of thumb neither the Rx nor the Tx utilization should exceed about 85% of the link speed to guarantee good clock synchronization performance (links are full duplex). -
Page 19: Device Config Tab
Provides Latency information from the TX to the RX. It is measuring for the delay value due to network travel. The purpose of this tab is to help optimize resources and finding the best setting for your application in terms of latency. Data is transmitted throughout the network via packets, when not all packets arrive on time or at all, it can cause undesired results to the audio service. - Page 20 Device Config Tab with Bolin Dante AV decoder Configurable Parameters Rename Device Allows you to enter a new Dante 'friendly name' for the device. The text field displays the current name. To change the device name, enter a new name in the text field and press Enter. Sample Rate Shows the current sample rate of the device, and allows you to change the operating sample rate ■...
- Page 21 Clocking Unicast Delay Requests Delay requests are messages sent by clock followers to the clock leader to establish the time it takes for data to traverse the network between the devices. By default, delay requests are multicast messages, and in networks with lots of devices, they can add up. Enabling 'Unicast Delay Requests' forces clock follower devices to send delay requests to the clock leader using unicast instead, which reduces multicast traffic.
-
Page 22: Video Config Tab
A reboot is required after clearing the configuration for the changes to take effect. Some devices will allow you to automatically reboot after clearing the configuration. If this option is not available, a manual reboot is required. Plugins Some devices may present additional 'plugin' tabs, defined by the device manufacturer, for configuration and display of additional device settings, such as video configuration and/or ancillary channel settings. - Page 23 The purpose of this tab is for the user to make certain convenient changes and obtain information from the Dante Controller regarding Bolin Dante AV devices. WARNING: Changing settings using the Video Config tab will cause the screen to be disconnected and fade to black while the change takes place.
- Page 24 • Video Stream Bandwidth Cap: This function will allow you to set a maximum bandwidth cap of your DanteAV device. Please consult with the bandwidth table for further details. Video Config Tab with Bolin Dante AV decoder...
-
Page 25: Serial Config
On the RX end (the decoder) the user can adjust the following: • Color Space (Selection options: RGB 4:4:4, YCbCr 4:2:2, and YCbCr 4:4:4) • Bit Depth (Selection options: 8 bit, 10 bit, 12 bit) On Both TX and RX end the user can view the following information: •... -
Page 26: Network Config Tab
Most modern equipment uses 8 bits as it matches the size of a byte Older equipment may use other data bits such as 7 • Parity: An error detection method for serial port transmission by adding extra data bit. (Selection options: None, Even, Odd) Default is set to None •... -
Page 27: Flow Information
Switch Configuration Certain devices support specialist switching and/or redundancy configurations for the Ethernet ports. For these devices, the top pane of the Network Config tab will be titled 'Switch Configuration'. Please refer to the manufacturer's technical documentation for information on the supported switching configurations for the device. - Page 28 • When utilized correctly can help optimize network bandwidth • When unmanaged it is like broadcast, where data is transmitted to every recipient, which greatly impacts the network negatively. As such, we recommend using IGMP snooping, so the data is delivered only to the intended recipients Note: There should be only one IGMP querier for each VLAN Note: All switch should have IGMP snooping...
- Page 29 4. Make the proper subscriptions. (Note: multicast must be enabled first before subscriptions can be successfully made.)
-
Page 30: Audio Routing
Audio Routing Camera Audio Bolin Dante AV PTZ camera has audio input via Mic/Line-in port that is on the back panel of the camera. • Audio input signal can be embedded with the camera local HDMI output. • Audio input signal can be embedded with the camera Dante AV IP video streaming. •... -
Page 31: Firmware Upgrade
Firmware Upgrade Dante AV Module Firmware Upgrade Dante Device Firmware is the operating software for Dante AV module that’s developed by Audinate. For Bolin Dante AV devices, there’s Bolin customized version that’s been optimized for Bolin camera and decoder. It is released by Bolin, so please visit Bolin website www.bolintechnology.com to download Dante Device Firmware. - Page 32 3. Click Browse…button to select the DanteAV firmware file, for example for Dante AV Camera, and then go to next; 4. Firmware Update Manager will auto search the DanteAV device, it takes around 10 seconds, then will list all the devices on the network that match the software. 5.
- Page 33 6. Firmware Update Manager will displaying Get file, after around one minute, it will change to displaying Flashing, now firmware upgrade is in processing. 7. Please don’t do any operation during the upgrade process, which takes approximately 5 mins. It will pop-up the Upgrade done window if the upgrade is successful, and the status will change to displaying Update Done, like below picture;...
-
Page 34: Do Not Use Dante Updater
The firmware upgrade process is intended to be performed under the supervision of a BOLIN-Authorized repair technician. For assistance with this, please contact your authorized BOLIN Technology dealer, installer, or integrator. BOLIN Technology Technical Support can also be reached for assistance with this process. -
Page 35: Ptz Camera Controlling
PTZ Camera Controlling Within Dante AV network, Bolin Dante AV PTZ camera can be controlled by: • IR remote control via Dante network • Serial control via Dante network • IP control via Dante network Use IR Remote Controller How to use IR remote controller to directly control the PTZ camera, please refer to the user guide Part One 1. - Page 36 4. Aim IR remote controller to decoder, you can control the Dante AV PTZ camera remotely. 5. When use IR remote controller via decoder, following features with IR control are not functional: • Fn + Scan • Fn + Left Limit •...
-
Page 37: Use Ip Ptz Control
Use IP PTZ Control Within Dante AV network, it supports Visca Over IP protocol via Dante network. VISCA over IP Control With VISCA over IP function, you can control the camera using VISCA protocol on an IP controller via Dante AV Network. -
Page 38: Use Bolin Ptz Camera Controller
• VISCA over IP control port: 52381. Use Network Config Tab within Device View to re-assign the camera IP address if necessary. The following Visca Over IP setup information is based on Bolin PTZ keyboard controller KBD-1010-RNV: Controlling via VISCA over IP With Dante AV PTZ camera connected and set to work with Dante AV network: •... -
Page 39: Use Bolin Ptz Controller For Ip Control
Use Bolin PTZ Controller for IP Control Connect the KBD-1010-RNV keyboard controller to the Dante AV network switch from the IP port on the back of the controller. Use POE to power up the controller. (12VDC power adapter included can also be used.) IP Configuration The controller IP address must be within the same subnet as Dante AV camera. -
Page 40: Adding A Visca-Over-Ip Camera To Keyboard
Configure Visca over IP When all Visca-Over-IP cameras in the system are from the same brand, use the following Visca-Over-IP configuration for the controller. The Visca-Over-IP configuration data will be applied to all Visca-Over-IP cameras in the system. Payload Header: Keyboard Setting Menu Model Info Menu •... -
Page 41: Control The Visca-Over-Ip Camera
• With the cursor on CAM ID, Assign the camera to a CAM ID by rotating the Zoom Speed dial • Click the Zoom Speed dial to save • Move the cursor to the Title, and use the alphanumeric keypad to give the camera a title •... -
Page 42: Use Bolin Ptz Controller For Serial Ptz Control
Use Bolin PTZ Controller for Serial PTZ Control There are two ways of wiring the serial controller to use serial control to control Dante AV camera: 1. At the local location where the camera is, directly connect to the camera’s serial port. 2. - Page 43 Local RS422 Connection to the Camera 1. Use the included (Premade) Ethernet cable or T-568B Standard Ethernet cable direct connect between the controller and the camera. Or you can use CAT5/6 T-568B Standard Ethernet cable direct connect between the camera and the controller to make RS422 connection by following the pin definition below: NOTE: Other ways of making the RS422 connection, please refer to camera and controller user guide.
- Page 44 RS422 Connection to the Decoder at Remote Site At the remote site where the decoder is, connect the KBD-1010-RNV keyboard controller to the Dante AV decoder RS- 422 serial port (RJ45) to control the camera over Dante AV network. Use POE to power up the controller. (12VDC power adapter that’s included with the keyboard can be used.) 1.
- Page 45 Use serial control over Dante AV network, you need to setup Serial Config and run routing check within Dante Controller. • Set up Serial Config Tab within Dante Controller Dante Controller serial RS422 routing check. • The 'RS-422' ancillary channel on the Bolin-PTZ-Camera-D220 receiver is subscribed to the equivalent channels on the Bolin-Decoder-D10H transmitter.
- Page 46 Manually adding serial control cameras On the controller, press the Setup button to go into menu: Main Setup Menu Camera Setting Menu 1. Go to CAMERA SETTING >CAMERA SETTING >CAM001 2. With the cursor on the Camera Selection, KEYBOARD SETTING Title: - use the Zoom Speed dial to select which EXIT...
- Page 47 2082 TECHNOLOGY LLC BOLIN TECHNOLOGY...
Need help?
Do you have a question about the DANTE AV D Series and is the answer not in the manual?
Questions and answers