Table of Contents
Advertisement
Quick Links
HD SMART TV with DVB-T2/C/S2
SRT24HE4203
Bedienungsanleitung
Manuel d'utilisation
Manuale utente
Manual del usuario
Manual do utilizador
Használati útmutató
Uživatelský manuál
Brugervejledning
Brukerveiledning
Gebruiksaanwijzing
Användarhandbok
Korisnički priručnik
Ръководство на потребителя
Посібник користувача
Advertisement
Table of Contents

Related Manuals for Strong SRT24HE4203


Summary of Contents for Strong SRT24HE4203
- Page 1 HD SMART TV with DVB-T2/C/S2 SRT24HE4203 Bedienungsanleitung Brugervejledning Manuel d’utilisation Brukerveiledning Manuale utente Gebruiksaanwijzing Manual del usuario Användarhandbok Manual do utilizador Korisnički priručnik Használati útmutató Ръководство на потребителя Uživatelský manuál Посібник користувача...
- Page 2 0850 15 05 50 +34 91 119 61 76 +386 1 828 08 58 support_fr@strong.tv support_ua@strong.tv +385 1 344 57 66 +380 (44) 238 61 50 Supplied by STRONG Austria Represented by STRONG Ges.m.b.H. Teinfaltstraße 8/4.Stock A-1010 Vienna, Austria Email: support_at@strong.tv...
- Page 3 DISCLAIMER Please be aware that STRONG, its manufacturing partners, the application providers and the providers of the services may collect and use technical data and related information, including but not limited to technical information about this device, system and application software and peripherals. STRONG, its manufacturing partners, the application providers and the providers of the services may use such information to improve its products or to provide services or technologies ta you, as long as it is in a form that does not personally identify you.
-
Page 4: Table Of Contents
Hereby, STRONG declares that the device SRT24HE4203 is in compliance with Directive 2014/53/EU. The full text of the EU declaration of conformity is available at the following internet address: https://www.strong.tv/en/doc Subject to alterations. In consequence of continuous research and development technical specifications, design and appearance of products may change. -
Page 5: Instruction
1. INSTRUCTION 1.1 Safety Instructions Read all of the instructions before operating the set. Keep these instructions well for later use. O nly use attachments/accessories specified or provided by the manufacturer (such as the exclusive supply adapter, battery etc.). P lease refer to the information on the exterior back enclosure for electrical and safety information before installing or operating the apparatus. -
Page 6: Storage
1.2 Storage Your device has been carefully checked and packed before shipping. When unpacking it, make sure that all the parts are included and keep the packaging away from children. We recommend that you keep the carton during the warranty period, to keep your device perfectly protected in the event of repair or warranty. -
Page 7: Installation 2.1 Default Pin Code: 1234
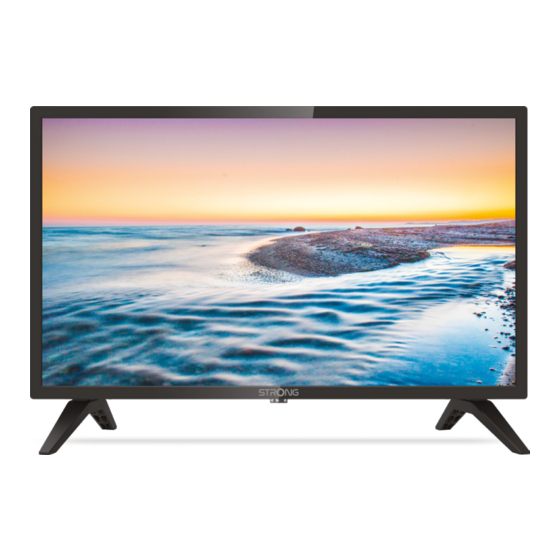
2. INSTALLATION 2.1 Default PIN code: 1234 2.2 Front panel Fig. 2 NOTE: The graphics are for representation only. 1. Power indicator /remote sensor 2. Speakers 3. q / Turns the TV on or in standby. 2.3 Rear panel HDMI3 HDMI2 HDMI1 USB2... -
Page 8: Remote Control
9. S/PDIF (optical) Use an optical cable to connect your TV to a compatible digital amplifier or Home theatre set. 10. AUDIO L/R Audio Left/Right IN. Use RCA Male (Plug) to RCA Male (Plug) to connect your TV at home theatre. 11. -
Page 9: Installing The Batteries
D o not place the remote control under direct sunlight which will cause deformation of the unit by heat. W hen the remote sensor is under direct sunlight or strong lighting, the remote control will not work. If so, please change the lighting or TV's position, or operate the remote control closer to the remote sensor. -
Page 10: First Time Installation
3. FIRST TIME INSTALLATION After all connections have been made properly, switch your TV on. Please follow the initial installation procedure on your screen and complete the installation. It will take a few minutes. 3.1 Home When you have finished the first-time setup, you can enter the screen. -
Page 11: Picture
Now press OK to enter the setting. Picture Sound Network Channel Accessibility System Support 4. PICTURE Press to enter the main menu press to select the picture menu. 1. Press to select the option that you want to adjust in the PICTURE menu. 2. -
Page 12: Apply Picture Settings
Picture Mode Settings Press to select,and press and OK to enter. Picture Mode Se ngs Apply Picture Se ngs Adjust current picture Current Sources mode to apply to all sources or just Backlight current source. Brightness Contrast 4.3 Apply Picture Settings In this menu, you can adjust current picture mode to apply to all sources or just current source. - Page 13 Expert Se ngs Adjust the Hue, Satura on and Colour Tuner Brightness of colour se ngs. White Balance Black Level Auto Gama adjustment Colour Tuner Adjust the Hue, saturation, and brightness of the colour settings. Press [UP/DOWN] to select {Colour Tuner}. Press ...
-
Page 14: Sound
Reset Current Mode The current picture se ngs will revert back to the factory default se ngs. Do you want to con nue? 5. SOUND Press button to display the main menu. Press to select Sound in the main menu. Sound Sound Mode Select a preset sound... -
Page 15: Sound Mode Settings
5.3 Sound Mode Settings Press to select Sound Mode Settings. Press to enter sub-menu. Sound Mode Se ngs Apply Audio Se ngs Adjust current sound Current sources mode to apply to all sources or just the Bass Boost current sources. -
Page 16: Network
Audio Output Press to select Audio Output and enter, then press to select ARC/TV Speaker/SPDIF Only. Digital Audio Output Press button to select Digital Audio Out, then press to select. Digital Audio Delay Press to select Digital Audio Delay, then press to adjust. Lip Sync Press ... -
Page 17: Channel
7. CHANNEL Press button to display the main menu. to select Channel. Channel Auto Scan Automa c channel scan Channel Edit Advanced Se ngs 1. Press to select the option that you want to adjust in the Channel menu. 2. - Page 18 Operator Press to select and press to setup. Operator Auto Channel Scan Vodafone (NRW, Hessen, BW) Pyur Standard Mode setup Press to select Mode setup and press to select Channel/Scan Mode/LCN. Mode Setup Auto Channel Scan Channel All Channels Scan Mode...
- Page 19 Channel Edit Press to select Channel Edit. Channel Management Analogue Edit Antenna Edit Cable Edit Edit ASTRAI 19.2°E Edit FAV1 Edit Edit FAV2 Edit Edit Advanced Settings Press to select Advanced Settings and then press OK / to enter. Advanced Se ngs Manual Scan Perform manual channel...
- Page 20 ATV Manual Scan Press to select ATV Manual Scan and then press OK to enter. ATV Manual Scan Frequency Picture System Auto Sound System Start Channel List Auto-Update Press to select Channel List Auto-Update, then press to select On/Off. Programme Guide Auto Update Press ...
- Page 21 CI+ Module Settings Press to select CI+ Module Settings and you can review the advanced settings menu. Accessibility Press to select Accessibility, then press OK to enter. Accessibility Menu Scheme Dark High Contrast Menu Menu Transparency Medium Hard of hearing Sub tles Audio Type Dialogue Enhancement Menu Scheme...
-
Page 22: System
8. SYSTEM Press the button to display the main menu. Press to select System in the main menu. System Time Timer Se ngs System PIN Parental Control Language and Loca on Amazon Alexa Service Applica on Se ngs HDMI & CEC 1. - Page 23 Timer Settings Press to select Timer Settings. Timer Se ngs Sleep Timer Set the sleep mer to Off automa cally turn the TV off at the specified Power On Timer Power Off Timer Menu Time-Out 60’s Auto sleep Off Auto standby with no signal 15 minutes Sleep Timer...
- Page 24 Menu Timeout Press to select Menu Timeout. (Optional: Off/10s/20s/30s/60s/5min) Auto Sleep Press to select Auto Sleep. (Optional: Off/3H/4H) Auto Standby with No Signal Press to select Auto Standby with No Signal. (Optional: Off/15 Minutes) System PIN Press button to select System PIN. Change your PIN that you use to access Parental Controls,Auto Channel Scan and Reset to Factory Defaults.
- Page 25 Digital Teletext Press to select Digital Teletext. (Optional: WEST EUR/EAST EUR/Russian/Aarabic/Persian/Greek) Amazon Alexa Service Press to select Amazon Alexa Service and press to enter sub-menu and setup. Amazon Alexa Service Turn on and off Alexa Amazon Alexa Service Service.
- Page 26 Prime Video Press to select Prime Video, and press OK / to select. Netflix Press to select Netflix, and press OK / to select. HDMI&CEC Press to select HDMI & CEC, then press Enter button to enter sub-menu to select. Press ...
- Page 27 Advanced Settings Press to select Advanced Settings, then press OK / to enter. Advanced Se ngs TV Name Choose a name for your Smart TV TV. The name will be Power Indicator shown to devices that Screensaver are available for sharing 10 Minutes data.
- Page 28 Support Press to select Support, then press OK / to enter. Support View system System Info informa on. Self Diagnosis E-Manual System Update Disclaimer and Privacy Mobile App Download Reset to Factory Default System Info View System information Press ...
- Page 29 Channel List Press to select Channel List, then press OK to enter sub-menu. Antenna 1 DT29 1080i No programme 2 DT29 576i No programme 3 DT29 576p No programme 4 DT2-46_1080i No programme Press to add FAV or Home Subtitle Press ...
-
Page 30: Media
9. MEDIA Press to select Media on the Home page or press MEDIA button on the remote and press [OK] to enter the Media Center. KINGSTON Search file All media Grid Name KINGSTON/ Press Menu to create list Video Press ... - Page 31 Information Press to select Information, and press OK to view. Play List Press to select Play List, and press OK to display all available videos. Audio Only Press to select Audio Only, and press OK to select. Audio Press ...
-
Page 32: Troubleshooting
Before calling a service technician, review following information for possible causes and solutions for the problem you are experiencing. If the TV does not work properly after checking it, please contact your local service line or STRONG dealer. Alternatively, you can send a support mail via our website www.strong.tv. Problem... -
Page 33: Specifications
Satellite dish is too small, trees or buildings in path. Change to a larger dish or change position of dish. Signal is too strong, dish is oversized. Connect a signal attenuator to the LNB input. Ask a local satellite specialist for advice. - Page 34 2.5 kg Data Protection: Please be aware that STRONG, its manufacturing partners, the application providers and the providers of the services may collect and use technical data and related information, including but not limited to technical information about this device, system and application software and peripherals. STRONG, its manufacturing...
Need help?
Do you have a question about the SRT24HE4203 and is the answer not in the manual?
Questions and answers