Table of Contents
Advertisement
Available languages
Available languages
Quick Links
Advertisement
Chapters
Table of Contents

Related Manuals for Electrolux KEAD7200L


Summary of Contents for Electrolux KEAD7200L
- Page 1 KEAD7200L Afwasautomaat Gebruiksaanwijzing Dishwasher User Manual...
-
Page 2: Table Of Contents
12. TECHNISCHE INFORMATIE................. 28 WIJ DENKEN AAN JOU Bedankt voor je aankoop van een Electrolux-apparaat. Je hebt voor een product gekozen dat decennia aan professionele ervaring en innovatie met zich meebrengt. Ingenieus en stijlvol en ontworpen met jou in het achterhoofd. Dus wanneer je het gebruikt, kan je erop rekenen dat je telkens weer geweldige resultaten krijgt. - Page 3 NEDERLANDS niet verantwoordelijk voor verwondingen of schade die voortvloeit uit de onjuiste installatie of het onjuiste gebruik. Bewaar de instructies altijd op een veilige, toegankelijke plek voor toekomstig gebruik. 1.1 Veiligheid van kinderen en kwetsbare mensen Dit apparaat kan worden gebruikt door kinderen van 8 •...
-
Page 4: Veiligheidsvoorschriften
Volg het maximale aantal 13 plaatsen. • Indien het netsnoer beschadigd is, moet het worden • vervangen door de fabrikant, een erkende serviceverlener of vergelijkbaar gekwalificeerde personen om gevaar te voorkomen. WAARSCHUWING: Messen en andere • gebruiksvoorwerpen met scherpe punten moeten met hun punt naar beneden of horizontaal in de mand geplaatst worden. - Page 5 NEDERLANDS 2.2 Elektrische aansluiting WAARSCHUWING! Gevaar voor brand en elektrische schokken. • Dit apparaat moet worden aangesloten op een geaard stopcontact. • Zorg ervoor dat de parameters op het vermogensplaatje overeenkomen met elektrische vermogen van de WAARSCHUWING! netstroom. Gevaarlijke spanning. •...
-
Page 6: Productbeschrijving
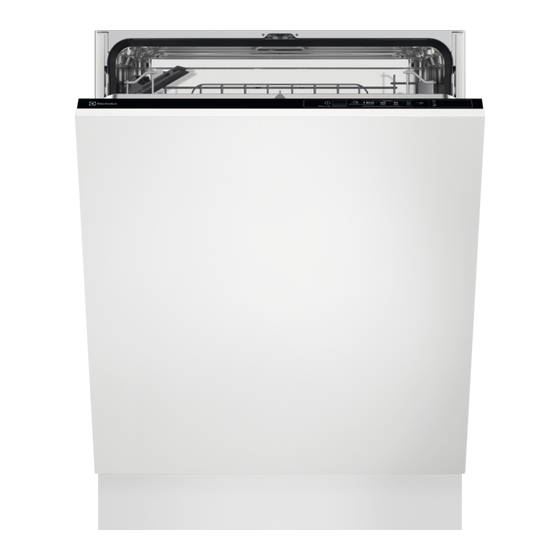
Ze zijn niet bedoeld voor gebruik in drukschakelaars, thermostaten en andere toepassingen en zijn niet sensoren, software en firmware, geschikt voor verlichting in inclusief resetsoftware. Houd er huishoudelijke ruimten. rekening mee dat sommige van deze •... - Page 7 NEDERLANDS Bovenste sproeiarm Glansmiddeldoseerbakje Onderste sproeiarm Afwasmiddeldoseerbakje Filters Bestekmand Typeplaatje Onderste korf Zoutreservoir Bovenste korf Luchtventilatie 3.1 Beam-on-Floor De Beam-on-Floor gaat uit wanneer het apparaat wordt Beam-on-Floor wordt er een lampje op uitgeschakeld. de vloer onder de deur van het apparaat weergegeven.
-
Page 8: Bedieningspaneel
4. BEDIENINGSPANEEL Aan-uittoets / resetknop ExtraPower-toets Delay Start-toets AUTO Sense-toets Indicatielampjes MY TIME keuzebalk 4.1 Indicatielampjes Indicatie‐ Beschrijving lampje ECO programma-indicatielampje. Geeft de milieuvriendelijkste pro‐ grammakeuze aan voor een normaal bevuilde lading. Raadpleeg “Programmaselectie”. Indicatielampje glansspoelmiddel. Dit is aan als het glansspoelmiddel‐... - Page 9 NEDERLANDS programma. De optie verhoogt de • Voorspoelen (15min) is een wastemperatuur en verlengt de duur. programma voor het afspoelen van voedselresten van de vaat. De ExtraPower optie is van toepassing Het voorkomt geurvorming in het op de volgende programma’s: 30min, apparaat.
- Page 10 Programma Type lading Mate van vervui‐ Programmafasen ling • Vaatwerk • Normaal • Voorspoelen • Bestek • Licht aange‐ • Wassen 50 °C • Potten koekt • Tussentijdse • Pannen spoeling • Laatste spoeling 55 °C • Drogen • AirDry AUTO Sense •...
-
Page 11: Basisinstellingen
NEDERLANDS Raadpleeg voor andere vragen serviceboekje dat met je apparaat is betreffende je vaatwasmachine het meegeleverd. 6. BASISINSTELLINGEN U kunt het apparaat configureren door de basisinstellingen naar uw behoefte te wijzigen. Aantal Instellingen Waarden Omschrijving Waterhardheid Van niveau 1 Aanpassen van het niveau van de water‐ tot niveau 10 verzachter afgestemd op de hardheid (standaard: 5) - Page 12 + pauze + 5 Navigeren in de knipperingen... = niveau 5). instellingenmodus 2. Druk op OK om de instelling te bevestigen. U kunt met gebruik van de keuzebalk • Het indicatielampje dat verband MY TIME in de instellingenmodus houdt met de instelling gaat aan.
- Page 13 NEDERLANDS Duitse hard‐ Franse hard‐ mmol/l Clarke- Wateronthard‐ heid (°dH) heid (°fH) hardheid ingsniveau 43 - 46 76 - 83 7,6 - 8,3 53 - 57 37 - 42 65 - 75 6,5 - 7,5 46 - 52 29 - 36 51 - 64 5,1 - 6,4 36 - 45...
- Page 14 Er klinken ook Deze activiteit verhoogt het totale geluidssignalen als er zich in waterverbruik van een programma met 4 het apparaat een storing liter en het totale energieverbruik van voordoet. Het is niet mogelijk een programma met 2 Wh.
-
Page 15: Voordat U Het Apparaat Voor De Eerste Keer Gebruikt
NEDERLANDS 6.6 Geluiden Wanneer AirDry de deur opent, Beam-on-Floor is De knoppen op het bedieningspaneel mogelijk niet volledig maken een klikgeluid als u ze indrukt. U zichtbaar. Kijk naar het kunt dit geluid uitschakelen. bedieningspaneel om te zien of het programma is voltooid. -
Page 16: Dagelijks Gebruik
7.2 Het 1. Druk op de ontgrendelingsknop (D) om het deksel te openen (C). glansspoelmiddelreservoir 2. Giet het glansmiddel in het vullen doseerbakje (A) tot het vulniveau 'max'. 3. Verwijder gemorst glansspoelmiddel met een absorberend doekje om te voorkomen dat er te veel schuim ontstaat. - Page 17 NEDERLANDS aan de binnenkant van de deur van ExtraPower is geen het apparaat. permanente optie en moet 4. Sluit het deksel. Zorg ervoor dat de elke keer voordat u een ontgrendelknop op zijn plaats programma start worden vergrendelt. geactiveerd. Raadpleeg de instructies van de fabrikant op de ExtraPower kunnen niet verpakking van het product...
-
Page 18: Aanwijzingen En Tips
Als u de Houd ongeveer 3 seconden deur weer sluit, gaat het apparaat verder ingedrukt. vanaf het moment van onderbreking. Het apparaat keert terug naar de programmakeuze. Als de deur tijdens de droogfase langer dan 30 Als u de uitgestelde start... - Page 19 NEDERLANDS – Vul de zoutcontainer indien nodig verhoogde hoeveelheid zout in het bij. water leiden tot roest op bestek. – Gebruik de aanbevolen dosering 9.3 Wat moet u doen als u wilt van het wasmiddel en spoelglansmiddel. stoppen met het gebruik van –...
-
Page 20: Onderhoud En Reiniging
9.6 De rekken uitruimen • Reinig geen voorwerpen in het apparaat die water kunnen 1. Laat de borden afkoelen voordat u absorberen (sponzen, deze uit het apparaat neemt. Hete keukenhanddoeken). borden zijn gevoelig voor • Plaats holle voorwerpen (bijv. kopjes, beschadigingen. - Page 21 NEDERLANDS • Gebruik om de prestaties van uw apparaat te onderhouden minstens elke twee maanden een reinigingsproduct dat specifiek is ontwikkeld voor vaatwassers. Volg de instructies op de verpakking van de producten zorgvuldig op. • Start voor optimale schoonmaakresultaten het programma Machine Care.
- Page 22 LET OP! Een onjuiste plaatsing van de filters kan leiden tot slechte wasresultaten en het apparaat beschadigen. 10.6 De onderste sproeiarm reinigen We raden u aan om de onderste sproeiarm regelmatig schoon te maken, om te voorkomen dat de gaten verstopt raken met vuil.
-
Page 23: Probleemoplossing
NEDERLANDS 11. PROBLEEMOPLOSSING zonder contact op te nemen met een WAARSCHUWING! erkend servicecentrum. Onjuiste reparatie van het Zie de onderstaande tabel voor apparaat kan een gevaar informatie over mogelijke problemen. voor de veiligheid van de gebruiker vormen. Bij sommige problemen knipperen de Reparaties moeten worden lampjes die in verband staan met uitgevoerd door... - Page 24 Probleem en alarmcode Mogelijke oorzaak en oplossing De machine pompt geen • Controleer of de gootsteenafvoer niet verstopt is. water weg. • Controleer of het binnenfiltersysteem niet verstopt is. • De lampjes die in ver‐ • Controleer of de afvoerslang geen knikken of boch‐...
- Page 25 NEDERLANDS Probleem en alarmcode Mogelijke oorzaak en oplossing Technische storing van het • Schakel het apparaat uit en aan. apparaat. • De lampjes die in ver‐ band staan met de MY TIME selectiebalk knipperen af en toe 12 keer. • Er klinkt af en toe een geluidssignaal.
- Page 26 Probleem en alarmcode Mogelijke oorzaak en oplossing Het apparaat maakt kort‐ • De stroomsterkte is niet voldoende om alle appara‐ sluiting. ten tegelijkertijd te voeden. Controleer de stroom‐ sterkte van het stopcontact en de capaciteit van de meter of schakel een van de apparaten die in gebruik zijn uit.
- Page 27 NEDERLANDS Probleem Mogelijke oorzaak en oplossing De glazen en borden verto‐ • De vrijgegeven hoeveelheid glansmiddel is niet vol‐ nen vlekken en droge water‐ doende. Zet de dosering van het glansspoelmiddel druppels. op een hogere stand. • De kwaliteit van het glansspoelmiddel kan de oor‐ zaak zijn.
-
Page 28: Technische Informatie
Probleem Mogelijke oorzaak en oplossing Dof, ontkleurd of afgeschil‐ • Zorg ervoor dat alleen vaatwasserbestendige voor‐ ferd serviesgoed. werpen in het apparaat worden gewassen. • Laad de korf voorzichtig in en uit. Raadpleeg de folder voor het laden van de korven. -
Page 29: Safety Information
12. TECHNICAL INFORMATION................. 52 WE’RE THINKING OF YOU Thank you for purchasing an Electrolux appliance. You’ve chosen a product that brings with it decades of professional experience and innovation. Ingenious and stylish, it has been designed with you in mind. So whenever you use it, you can be safe in the knowledge that you’ll get great results every time. - Page 30 Always keep the instructions in a safe and accessible location for future reference. 1.1 Children and vulnerable people safety This appliance can be used by children aged from 8 • years and above and persons with reduced physical,...
-
Page 31: Safety Instructions
The appliance is to be connected to the water mains • using the new supplied hose-sets. Old hose sets must not be reused. 2. SAFETY INSTRUCTIONS 2.1 Installation www.youtube.com/electrolux www.youtube.com/aeg WARNING! Only a qualified person must How to install your 60 cm install this appliance. - Page 32 2.4 Use be replaced, this must be carried out by our Authorised Service Centre. • Do not put flammable products or • Connect the mains plug to the mains items that are wet with flammable socket only at the end of the products in, near or on the appliance.
-
Page 33: Product Description
ENGLISH including hoses, valves, filters and and seals, other seals, spray arms, aquastops, structural and interior drain filters, interior racks and plastic parts related to door assemblies, peripherals such as baskets and lids. printed circuit boards, electronic 2.7 Disposal displays, pressure switches, thermostats and sensors, software WARNING! and firmware including reset software. -
Page 34: Control Panel
Upper basket 3.1 Beam-on-Floor Beam-on-Floor is off when the appliance is deactivated. Beam-on-Floor is a light displayed on the floor below the appliance door. When AirDry is activated • When the programme starts, a red during the drying phase, the... -
Page 35: Programme Selection
ENGLISH 5. PROGRAMME SELECTION 5.1 MY TIME C. ECO is the longest programme (3h 47min) offering the most efficient use Using MY TIME selection bar, you can of energy and water consumption for select a suitable wash cycle based on crockery and cutlery with normal soil. - Page 36 Programme Type of load Degree of soil Programme pha‐ • Crockery • Normal • Prewash • Cutlery • Lightly dried-on • Wash 50 °C • Pots • Intermediate • Pans rinse • Final rinse 55 °C • Drying • AirDry AUTO Sense •...
-
Page 37: Basic Settings
ENGLISH 6. BASIC SETTINGS You can configure the appliance by changing basic settings according to your needs. Number Settings Values Description Water hard‐ From level 1 to Adjust the level of the water softener ac‐ ness level 10 (de‐ cording to the water hardness in your fault: 5) area. - Page 38 Use OK to enter the selected setting and 4. Press OK to confirm the setting. to confirm changing its value. • The new setting is saved. • The appliance returns to the setting selection. How to change a setting 5.
- Page 39 ENGLISH Regardless of the type of detergent in the same cycle or at the beginning of used, set the proper water hardness the next programme. This activity level to keep the salt refill indicator increases the total water consumption of active.
-
Page 40: Before First Use
6.4 End sound The duration of the drying phase and the door opening time vary depending on the You can activate an acoustic signal that selected programme and options. sounds when the programme is CAUTION! completed. Do not try to close the... - Page 41 ENGLISH 3. Fill the salt container with 1 kg of salt CAUTION! (until it is full). The compartment (A) is for rinse aid only. Do not fill it with detergent. CAUTION! Only use rinse aid designed specifically for dishwashers. 1. Press the release button (D) to open the lid (C).
-
Page 42: Daily Use
8. DAILY USE 8.2 How to select and start a 1. Open the water tap. programme using MY TIME 2. Press and hold until the appliance is activated. selection bar 3. Fill the salt container if it is empty. -
Page 43: Hints And Tips
ENGLISH 2. Close the appliance door to start the Make sure that there is program. detergent in the detergent The appliance senses the type of load dispenser before you start a and adjusts a suitable wash cycle and its new programme. duration. - Page 44 Adjust the amount of appliance. detergent based on the water • Soak or slightly scour cookware with hardness. Refer to the instructions on firmly cooked-on or baked-on food the detergent packaging. before washing it in the appliance.
-
Page 45: Care And Cleaning
ENGLISH • Use the appliance to wash • Put cutlery and small items in the dishwasher-safe items only. cutlery basket. • Do not wash in the appliance items • Make sure that the spray arms can made of wood, horn, aluminium, move freely before you start a pewter and copper as they could programme. - Page 46 (e.g. pieces of glass, plastic, bones or toothpicks, etc) decrease the cleaning performance and can cause damage to the drain pump. CAUTION! If unable to remove the foreign objects, contact an Authorised Service Centre. 2. Remove the filter (C) out of filter (B).
-
Page 47: Troubleshooting
ENGLISH 8. Put back the filter (B) in the flat filter 2. Wash the spray arm under running (A). Turn it clockwise until it locks. water. Use a thin pointed tool, e.g. a toothpick, to remove particles of soil from the holes. CAUTION! An incorrect position of the filters can cause bad... - Page 48 With some problems, the lights related to intermittently to indicate a malfunction MY TIME selection bar flash and the alarm code. Problem and alarm code Possible cause and solution You cannot activate the • Make sure that the mains plug is connected to the appliance.
- Page 49 ENGLISH Problem and alarm code Possible cause and solution Malfunction of the wash • Switch the appliance off and on. pump or the drain pump. • The lights related to MY TIME selection bar flash 5 times intermit‐ tently. • An acoustic signal sounds intermittently.
- Page 50 Problem and alarm code Possible cause and solution The appliance door is diffi‐ • The appliance is not levelled. Loosen or tighten the cult to close. adjustable feet (if applicable). • Parts of the tableware are protruding from the bas‐...
- Page 51 ENGLISH Problem Possible cause and solution There are whitish streaks or • The released quantity of rinse aid is too high. Ad‐ bluish layers on glasses and just the rinse aid dosage to a lower level. dishes. • The quantity of detergent is too high. There are stains and dry wa‐...
-
Page 52: Technical Information
Refer to "Before first use", "Daily use", or "Hints and tips" for other possible causes. 12. TECHNICAL INFORMATION Dimensions Width / height / depth (mm) 596 / 818 - 898 / 550 Voltage (V) 220 - 240 Electrical connection... - Page 56 www.electrolux.com/shop...
Need help?
Do you have a question about the KEAD7200L and is the answer not in the manual?
Questions and answers