Table of Contents
Advertisement
Quick Links
Advertisement
Table of Contents

Subscribe to Our Youtube Channel
Related Manuals for ICI TITAN HD Series


Summary of Contents for ICI TITAN HD Series
- Page 1 Edit Text Industry TITAN HD SERIES QUICK START GUIDE ICI cameras fall under US Federal Law and Export Control. 2105 W. Cardinal Dr. Beaumont, TX 77705 Phone: (409) 861-0788 Toll Free: (866) 861-0788 infraredcameras.com support@infraredcameras.com We Are IR ™...
- Page 2 IN NO EVENT SHALL ICI BE LIABLE FOR ANY INDIRECT, SPECIAL, CONSEQUENTIAL, OR INCIDENTAL DAMAGES, INCLUDING, WITHOUT LIMITATION, LOST PROFITS OR LOSS OR DAMAGE TO DATA ARISING OUT OF THE USE OR INABILITY TO USE THIS MANUAL, EVEN IF ICI HAS BEEN ADVISED OF THE POSSIBILITY OF SUCH DAMAGES.
-
Page 3: Package Includes
Package Includes Type-C Cable HDMI Cable USB Cable Titan HD Device Power Adapter Battery x2 SD Card Charging Base ENSURE ALL SYSTEM EQUIPMENT AND COMPONENT ITEMS ARE PRESENT BEFORE BEGINNING INSTALLATION... - Page 4 Set Up The camera can be used as Mount the fully charged device a handheld device. to a tripod using the ¼”-20 mount located on the body. MAKE SURE TRIPODS DO NOT BLOCK THE DIRECT PATH OF PERSON(S) TO BE IMAGED TO ENSURE THE EQUIPMENT WILL NOT BE MOVED OR KNOCKED DOWN.
- Page 5 TURN ON THE CAMERA BY PRESSING AND HOLDING THE POWER BUTTON FOR AT LEAST TWO SECONDS. Power on device. PRESS AND HOLD THE POWER BUTTON FOR MORE THAN 5 SECONDS TO SHUT DOWN THE CAMERA. THE THERMAL IMAGER NEEDS SUFFICIENT WARM-UP TIME FOR THE MOST ACCURATE TEMPERATURE MEASUREMENTS AND BEST IMAGE QUALITY.
-
Page 6: Battery Installation
Battery Installation MAKE SURE TO HOLD THE CAMERA FIRMLY IN BOTH HANDS WHEN REMOVING OR REPLACING THE BATTERY. Slide the battery bay cover latch. Open the battery bay cover. Ensure metal contacts are To replace a battery held in the aligned;... - Page 7 MAKE SURE TO HOLD THE CAMERA FIRMLY IN BOTH HANDS WHEN REMOVING OR REPLACING THE BATTERY. Close the battery bay. Slide the battery bay latch to secure the battery bay cover. ENSURE BATTERY COVER IS PROPERLY CLOSED. IMPROPER CLOSURE OF BATTERY COVER MAY EXPOSE THE BATTERY AND INTERNAL ELECTRONICS TO ELEMENTAL DAMAGE.
-
Page 8: Memory Card
Memory Card Align the contact pins of a memory card to the front of the device and insert the card into the proper slot (SD or Micro-SD) on the side of the device until a clicking sound is heard. To eject the memory card, press down until a click is heard;... - Page 9 Charging Instructions: Option 1 Plug the other end of the cable While a battery is inside the device, into the proper slot (Type-C or plug the Type-C end of either the USB) of the power adapter. Type-C Cable or USB Cable into the Type-C port of the device.
- Page 10 Charging Instructions: Option 2 REMOVE THE BATTERIES FROM THE DEVICE BEFORE CONTINUING WITH THIS METHOD OF CHARGING. Insert batteries into the Plug the Type-C end of either battery charging base. the Type-C Cable or USB Cable into the back of the battery charging base.
- Page 11 CHARGE THE BATTERY FOR A MINIMUM OF 4 HOURS BEFORE USING THE DEVICE. ICI DOES NOT RECOMMEND CHARGING THE DEVICE WHILE IT IS ON A TRIPOD. LAY DEVICE FACE DOWN ON A FLAT AND STABLE DESK OR TABLE WHILE CHARGING.
-
Page 12: Lens Cover
Lens Cover MAKE SURE TO HOLD THE CAMERA FIRMLY IN BOTH HANDS WHEN REMOVING OR REPLACING THE LENS COVER. Firmly grip around the outer lens ring. Pull the lens cover from the lens. Replace lens cover by firmly pressing lens cover onto the lens. REPLACE THE LENS COVER WHEN THE DEVICE IS NOT IN USE. -
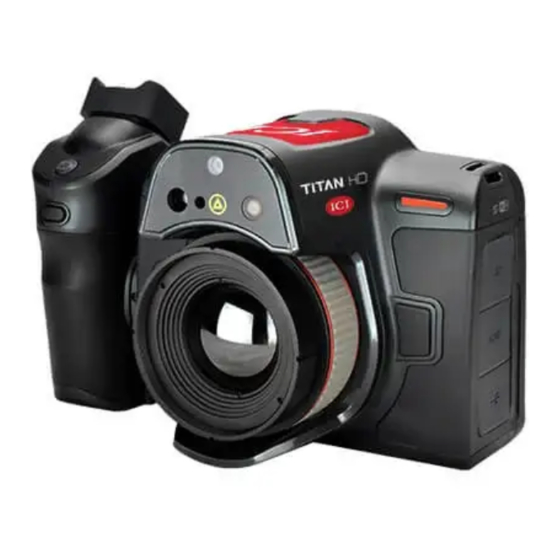
Page 13: Lens Installation
Lens Installation MAKE SURE TO HOLD THE CAMERA FIRMLY IN BOTH HANDS WHEN CHANGING THE LENS. Firmly grip around the outer Pull the lens from the lens mount. lens ring and rotate the lens 90° counter-clockwise. Push the lens into the lens mount; Align the index marks on the then, rotate the lens 90°... - Page 14 Website: www.infraredcameras.com You may reach a representative by phone or email Mon – Fri 8:00AM - 5:00PM CST. ICI manufactures complete systems and software. We can provide complete engineering, software, and OEM solutions. Our Fortune 500 clients rely on us for infrared equipment and thermography training (which we offer through the Infrared Training Institute).
Need help?
Do you have a question about the TITAN HD Series and is the answer not in the manual?
Questions and answers