Advertisement
Quick Links
®
Unpacking -
Check that you have the parts shown on the right
Consumables
Note: To complete installation
and begin using your printer
you will require a dye film
cassette and CR80 PVC cards
(See reverse side for part
numbers).
Location
The Tempo is small and easy to locate near your PC, but please ensure
that you allow for top access (for dye film replacement) and rear access
(for disconnecting the power supply and operating the 'test' button). In
normal operation, only front access is required.
The printer should be installed in a dust-free, office
type environment which is maintained at a
temperature between 10°C and 30°C (50°F to 85°F)
and with a relative humidity of 20 - 70%. The printer
should also be protected from direct sunlight and
rapid temperature changes.
Installing the driver CD and connecting to your PC
C a u t i o n : It is very important that the printer is powered OFF during the initial stages of driver software installation. Follow the on-scre e n
instructions which will tell you when to power ON. (The printer is powered OFF by unplugging the low-voltage power connector on the re a r
panel, and powered on by reconnecting it).
Unplug the power connector and connect the printer to the PC using the USB cable supplied. Insert the Tempo CD into the CD ROM drive on
the PC. The software should autorun, but if this is disabled on your PC go to 'Start', 'Run' and enter 'D:\autorun' where D is
the correct letter for your CD drive. Select 'Install Software' and follow the on-screen instructions to install the driver software ,
reconnecting the power when instructed to do so.
Note 1: If you wish to print sample cards from your PC before installing your badgemaking software, go to the
Technical Support section of the Tempo CD ROM where you will find a selection of self-printing test card images in
jpeg format.
Note 2: If you are short of USB ports on your PC you can add a low cost powered USB hub to provide extra ports.
How to
get service or support if things go wrong
If you have a problem with the installation or operation of your Magicard
printer, then first please re-check to ensure that you have followed the
instructions given in this guide.
TEMPO PRINTER SUPPORT
We also recommend that you visit our website
www.ultramagicard.com
where additional FAQs and technical support information are available,
together with a 'contact us' E-mail form to report any problems.
If you still have a problem you will be covered by our standard warranty.
Follow instructions on reverse side under 'Warranty' to obtain assistance.
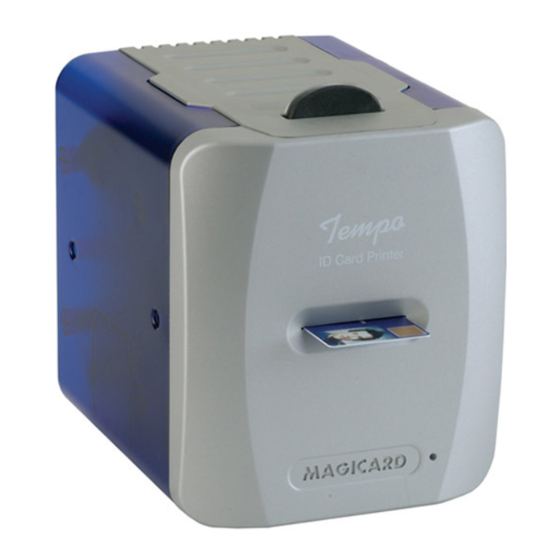
Tempo & Tempo M Printer QuickStart Guide
Tempo printer
power supply
Loading the dye film
Open the printer lid. Remove the white bracket and the tape on the cleaning roller assembly.
Unwrap the dye film. Insert the empty spool into the holder at the back of the printer, ensuring that
the teeth on the spool match up with the gear on the right hand side. Now insert the front spool and
close the lid, listening for a 'click' as the latch closes. Now insert the Printer Security Card into the
slot in the top-right of the printer, as shown. The Printer Security Card must remain in
the printer during printing. You can remove it to prevent un-authorized use of your
p r i n t e r, but you must put it back in before printing. Always use the same Printer
Security Card that came with the dye film. When the dye film is finished, dispose of
the Printer Security Card together with the dye film.
How to
clean your Tempo printer
Open the lid of the printer and remove the dye film cassette. Ensure the printer has power applied. Open
the foil packet and withdraw the cleaning card which should be wet to the touch. Briefly press the small
'test' button on the rear panel. The printer will start and the cleaning card can
then be fed into the card feed slot on the front panel. The card will be drawn
into the printer, the rollers will 'scrub' against the card and the card will be
ejected. Repeat using the reverse of the card to ensure the print rollers are
perfectly clean.
Note 1: Clean your Tempo when replacing the dye film cassette, but
you may clean less often in dust free environments.
Note 2: The pen in the cleaning kit (supplied separately) can be
drawn across the printhead to clean off any dye film re s i d u e .
How to
print a test card without
How to
using a PC
Reach behind the printer to locate the small
With the rear of the printer facing towards you, clip the Return Plate into position,
'test' button on the right of the rear panel and
ensuring the three plastic locating projections clip into the corresponding holes in the re a r
press it. The green LED will flash for several
of the printer. Tilt the plate as necessary to ease attachment. With the plate installed, the
seconds as a test image is composed. While
this is happening you should insert a card
into the printer's card aperture on the front
panel until resistance is felt. When the printer
is ready to print, the LED will flash again,
together with motor noise, and the card
should be drawn into the printer and a test
card will be printed.
w w w. u l t r a m a g i c a rd . c o m
usb cable
CD rom
Printing Cards
You can print from most ID badging software package or most PC graphics applications. You should set up your
page size to 1060 x 642 pixels before designing your card design. When printing cards, the printer driver is used to
setup print parameters. The most common adjustments to the driver are :
• Choosing Landscape or Portrait orientation. Choose the one that matches your on-screen card layout.
• Selecting the Color Format. Use YMCK for color prints. Use KR for black ribbon only.
• O v e rc oat should always be enabled, as it protects the card from fading. Only turn Overcoat off if the cards are
to be laminated in a separate laminator after printing.
• Tu rning the HoloKote watermark on or off. HoloKote puts a visible watermark pattern across the card surface for
extra security.
• Under 'Advanced Settings' : Change the printer head power (Ye l l o w, Magenta, Cyan setting) to achieve a lighter
or darker image.
Removing
cleaning
roller
use magstripe encoding (Tempo M only)
Tempo M printer is ready to print and encode data on tracks
1 and 2 using HiCo card stock. Consumable packages are
available which include HiCo cards.
Note 1: When feeding HiCo cards, the magstripe should be
face down on the right-hand side.
Note 2: The plate can be removed by grasping the rear of
the plate and pulling carefully. A stronger pull may be
front view
required while changing the angling or tilting upwards.
cleaning card
Note: Tempo M only
Power up
Connect the power cable to the power supply 'brick' and plug the
power connector into a suitable AC power supply ( 100 - 240v 50 -60
Hz). Plug the small DC output connector into the socket on the right of
the printer rear panel. With AC power connected, the action of
inserting the DC connector will switch on the Te m p o ,
and motor noises will be heard as the dye film panels
a re positioned, followed by the illumination of the gre e n
LED on the front panel. Your printer is now re a d y.
N o t e : Printer operation can now be tested by printing a
test card, even without connection to a PC. (See panel
below - 'How to print a test card without a PC').
Congratulations!
You are now ready
There is a Cleaning Roller in the inside of the Tempo. The Cleaning Roller is designed to
remove dust and dirt from cards as they enter the printer, to ensure a quality print. You
should clean the Cleaning Roller from time to time :
-
Every time you change the dye film, remove the Cleaning
Roller and clean it using sticky tape to remove dust and dirt
from the roller.
-
After every few rolls of dye film, or as needed,
wash the Cleaning Roller in soapy water, and
Cleaning
let it dry before putting it back in the printer.
Roller
How to
set up your Tempo printer to use
HoloPatch™ Cards
When used with HoloPatch™ card stock, the HoloKote™ watermark provides a
powerful defense against fake cards. Cards with this feature are available for both
plain and magstripe formats. To select this feature, ensure that the card design
allows space for the HoloPatch™ cut-out, go to 'Printer
Settings' from the start menu on your PC. Open the
'Magicard Tempo Printer'. Set HoloPatch™ to 'Yes' and
click OK. Cards will be printed with a 'cookie cutter' hole in
the image lining up with the gold patch on the card.
Note: HoloPatch™ cards should be fed with the gold patch
on top, and on the left-hand side.
Tempo & Tempo M QuickStart Guide, Issue 1, June 2005 (Stock No. M9006-911).
return plate
to print your
first ID card!
Advertisement

Related Manuals for Magicard Tempo


Summary of Contents for Magicard Tempo
- Page 1 Unplug the power connector and connect the printer to the PC using the USB cable supplied. Insert the Tempo CD into the CD ROM drive on the PC. The software should autorun, but if this is disabled on your PC go to ‘Start’, ‘Run’ and enter ‘D:\autorun’ where D is the correct letter for your CD drive.
- Page 2 Limited Warranty Information APPROVALS 1) Coverage: Ultra Electronics Ltd Warrants that the MAGICARD printer shipped with this Wa r r a n t y statement will conform to the manufacturers specifications and be free from defects in materials or Federal Communications Commission (FCC) Statement...
Need help?
Do you have a question about the Tempo and is the answer not in the manual?
Questions and answers