
Subscribe to Our Youtube Channel
Related Manuals for Milesight TS2866-X4TPC


Summary of Contents for Milesight TS2866-X4TPC
- Page 1 blank Intelligent Traffic Camera User Manual Intelligent Traffic Camera User Manual Version: V1.0 Date: 2022-11-23...
-
Page 2: Table Of Contents
Setting the Camera over the LAN................. 11 Dynamic IP Connection..................11 2.4 Accessing the Network Camera................12 Assigning an IP Address..................12 Accessing from the Web Browser................. 19 Accessing from Milesight Back-end Software............20 2.5 Live View........................ 22 Live Video......................22 LPR Mode......................26 2.5 Playback........................29 Playback......................... - Page 3 Setting the Camera over the LAN............... 141 Dynamic IP Connection..................141 3.4 Accessing the Network Camera................142 Assigning an IP Address..................142 Accessing from the Web Browser............... 149 Accessing from Milesight Back-end Software............150 3.5 Live View.......................152 Live Video......................152 PTZ Mode......................156 LPR Mode......................163 3.6 Playback........................167...
- Page 4 Contents 4.1.6 Related Documents..................304 4.2 Configuration Flow....................305 4.3 Network Connection....................306 Setting the Camera over the LAN............... 306 Dynamic IP Connection..................307 4.4 Accessing the Network Camera................307 Assigning an IP Address..................307 Accessing from the Web Browser............... 314 4.5 Live View.......................315 Live Video......................
-
Page 5: Chapter 1. Introduction
We will readily improve or update the products or procedures described in the manual. This Manual explains how to use and manage Milesight Intelligent Traffic cameras. Milesight innovatively combines video surveillance with AI, ANPR, 3D Radar and other cutting-edge technologies to perfectly meet the demands of road traffic management, entrance &... -
Page 6: Revision History
Intelligent Traffic Camera User Manual | 1 - Introduction | 6 Warnings: Serious injury or death may be caused if any of these warnings is neglected. • This installation must be conducted by a qualified service person and should strictly comply with the electrical safety regulations of the local region •... -
Page 7: Chapter 2. Entrance And Exit Management
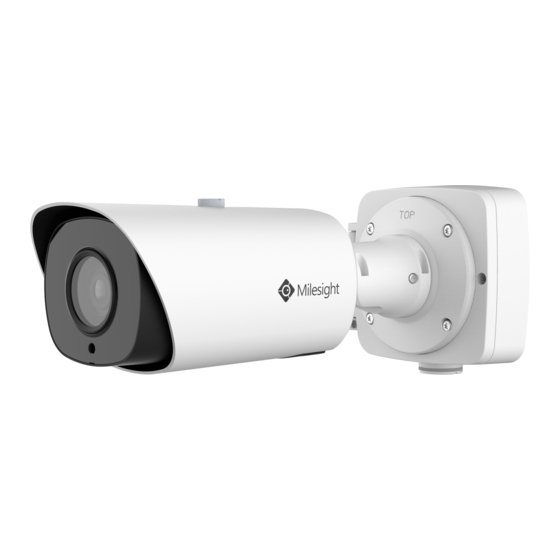
2.1 Product Description 2.1.1 Product Overview Milesight Entrance & Exit Management Camera combines video surveillance with AI, ANPR and other cutting-edge technologies to help traffic management systems intelligently monitor and manage traffic behavior at entrances and exits. Based on real-time data, valuable insights are obtained to optimize the traffic flow at the entrance and exit, reduce the risk of accidents, and deal with emergencies more efficiently. - Page 8 Intelligent Traffic Camera User Manual | 2 - Entrance and Exit Management | 8 • Entrance & Exit Supplement Light AI LPR Pro Bullet Plus Camera • Entrance & Exit AI LPR Pro Dome Camera...
-
Page 9: Related Documents
Intelligent Traffic Camera User Manual | 2 - Entrance and Exit Management | 9 2.1.4 Related Documents Table 3. Document Type Link Entrance&Exit Management Camera https://www.milesight.com/static/file/en/download/datasheet/ipc/traffic/Milesight- Datasheet Entrance-and-Exit-Management-Datasheet-en.pdf https://www.milesight.com/static/file/en/download/user-manual/ipc/Milesight- Quick Start Guide Network-Camera-Quick-Start-Guide.pdf 2.2 Configuration Flow The configuration flow of Entrance&Exit Management Camera is shown in the following... - Page 10 LAN or (page 11) dynamic IP connection. Accessing from IP address, web Accessing the Network Camera browser and Milesight back-end Assigning an IP Address (page 12) software are available. After login the camera, you can Video (page 33)
-
Page 11: Network Connection
Intelligent Traffic Camera User Manual | 2 - Entrance and Exit Management | 11 2.3 Network Connection Setting the Camera over the LAN Connecting the camera to a switch or a router is the most common connection method. The camera must be assigned an IP address that is compatible with its LAN. Connect the Camera to the PC Directly In this method, only the computer connected to the camera will be able to view the camera. -
Page 12: Accessing The Network Camera
Step2: Start Smart Tools, click the IPC Tools page, then enter the device information, such as IP address, MAC address, Status, Port number, Netmask, and Gateway, then all related Milesight network camera in the same network will be displayed. Details are shown as the figure below;... - Page 13 Intelligent Traffic Camera User Manual | 2 - Entrance and Exit Management | 13 Step3: Select a camera or multiple cameras according to the MAC addresses; Select single camera: Select multiple cameras:...
- Page 14 Intelligent Traffic Camera User Manual | 2 - Entrance and Exit Management | 14 Step4: If the selected camera shows "Inactive" in the status bar, click "Activate" to set the password when using it for the first time. You can also set the security questions when activating the camera in case that you forget the password (You can reset the password by answering three security questions correctly).
- Page 15 Intelligent Traffic Camera User Manual | 2 - Entrance and Exit Management | 15 Step5: After activation, you can change the IP address or other network values, and then click “Modify” button. Step6: By double clicking the selected camera or the browser of interested camera, you can access the camera via web browser directly.
- Page 16 Intelligent Traffic Camera User Manual | 2 - Entrance and Exit Management | 16 More usage of Smart Tools, please refer to the Smart Tools User Manual. Assign An IP Address via Browser If the network segment of the computer and that of the camera are different, please follow the steps to change the IP address: Step1: Change the IP address of computer to 192.168.5.0 segment, here are two ways as below:...
- Page 17 Click “Advanced”, and then click “IP settings”--> “IP address”--> “Add”. In the pop-up window, enter an IP address that in the same segment with Milesight network camera ( e.g. 192.168.5.61, but please note that this IP address shall not conflict with the IP address on...
- Page 18 Intelligent Traffic Camera User Manual | 2 - Entrance and Exit Management | 18 Step2: Start the browser. In the address bar, enter the default IP address of the camera:http://192.168.5.190; Step3: You need to set the password first when using it for the first time. And you can also set three security questions for your device after activation.
-
Page 19: Accessing From The Web Browser
Android system. Both H.265&H.264 video codec are supported in Plugin-Free Mode for camera, and it will play the secondary stream by default. Note: • For more details about set plugin-free mode of Milesight camera, please refer to https:// milesight.freshdesk.com/a/solutions/articles/69000643388. -
Page 20: Accessing From Milesight Back-End Software
Accessing from Milesight NVR (Network Video Recorder) Milesight NVR Series can work with Milesight network cameras. Based on embedded Linux operation system, Milesight NVR Series manages and stores HD video data. It owns multi- disk management systems, front end HD device management system, HD video analysis system and high-capacity system for video. - Page 21 Intelligent Traffic Camera User Manual | 2 - Entrance and Exit Management | 21 Please install Milesight CMS; then launch the program to add the camera to the channel list. For detailed information about how to use the software, please refer to Milesight CMS User Manual.
-
Page 22: Live View
Intelligent Traffic Camera User Manual | 2 - Entrance and Exit Management | 22 2.5 Live View Live Video After logging in the network camera web GUI successfully, user is allowed to view live video as follows. - Page 23 Intelligent Traffic Camera User Manual | 2 - Entrance and Exit Management | 23 Table 5. Description of the buttons Parameter Description Click to access the live view page. Live Video Click to access the playback page. Playback Click to access the configuration page. Settings Click to access the LPR Mode.
- Page 24 Intelligent Traffic Camera User Manual | 2 - Entrance and Exit Management | 24 Parameter Description When recording, the icon appears. Recording When an alarm of Motion Detection was triggered, the icon appears. Alarm Except for the kinds of alarms above, when other alarms were triggered, the icon appears.
- Page 25 Intelligent Traffic Camera User Manual | 2 - Entrance and Exit Management | 25 Parameter Description Zoom: Adjust the Zoom length of the lens. Note: Only work when your camera is equipped with motorized lens. Focus-/Focus+: Adjust focus of the lens. Note: Only work when your camera is equipped with motorized lens.
-
Page 26: Lpr Mode
Intelligent Traffic Camera User Manual | 2 - Entrance and Exit Management | 26 LPR Mode Milesight LPR Camera supports professional LPR Live View interface , it can show the real-time license plate recognition results and display the snapshots of detected license plates ,which realizes a stand-alone LPR solution. - Page 27 Intelligent Traffic Camera User Manual | 2 - Entrance and Exit Management | 27 Table 6. Description of the buttons Parameter Description Click to access the live view page. Live Video Click to access the playback page. Playback Click to access the configuration page. Settings Click to access the LPR Mode page.
- Page 28 Intelligent Traffic Camera User Manual | 2 - Entrance and Exit Management | 28 Parameter Description Choose the options (Hide Detection Region/LPR) to hide/ show detection region on the current video window. Stop/Play live view. Stop/Play When the Black List license plates passing by, the icon appears.
-
Page 29: Playback
Intelligent Traffic Camera User Manual | 2 - Entrance and Exit Management | 29 Parameter Description Click to display images at a window size. Window Size Click to display images at full-screen. Full Screen Click to view selected license plate with a large picture. Click to add the selected license plate to White/Black List. - Page 30 Intelligent Traffic Camera User Manual | 2 - Entrance and Exit Management | 30 Step1: Click the “Search” botton, choose the data and record type when the window pops Step2: The timeline displays the video files for the day and show different colors according to selected record type.
- Page 31 Intelligent Traffic Camera User Manual | 2 - Entrance and Exit Management | 31 Note: You can also input the time and click to locate the playback point in the filed. You can also click to zoom out/in the progress bar. Step3: Click to play the video files found on this date.
- Page 32 Intelligent Traffic Camera User Manual | 2 - Entrance and Exit Management | 32 Parameter Description Play/Pause the video. Play/Pause Stop the video. Stop Select the time that want to locate. Search Time Go To. Jump Table 8. Description of the buttons Parameter Description Click to enable the audio.
-
Page 33: Settings
Intelligent Traffic Camera User Manual | 2 - Entrance and Exit Management | 33 2.6 Settings 2.6.1 Media Video Stream parameters can be set in this module, adapting to different network environments and demands. Primary Stream Settings Secondary Stream Settings... - Page 34 Intelligent Traffic Camera User Manual | 2 - Entrance and Exit Management | 34 Tertiary Stream Settings Table 9. Description of the buttons...
- Page 35 Intelligent Traffic Camera User Manual | 2 - Entrance and Exit Management | 35 Parameters Function Introduction General & Event are available only for Primary Stream. General refers to continuous record video, while Event includes events that can trigger alarms, such as Motion, Exception, LPR and so on.
- Page 36 Intelligent Traffic Camera User Manual | 2 - Entrance and Exit Management | 36 Parameters Function Introduction Profile The option is for H.264, Main/High/Base can be selected as needed. Set the I-frame interval to 1~120, 50 for the default. This item is optional only if you I-frame Interval select the H.265/H.264.
- Page 37 Intelligent Traffic Camera User Manual | 2 - Entrance and Exit Management | 37 Table 10. Description of the buttons Parameters Function Introduction Brightness Adjust the Brightness of the scene. Contrast Adjust the color and light contrast. Adjust the Saturation of the image. Higher Saturation makes colors appear Saturation more "pure"...
- Page 38 Intelligent Traffic Camera User Manual | 2 - Entrance and Exit Management | 38 Table 11. Description of the options Parameters Function Introduction Select this option to automatically control the White LED Light based on the image. You can customize the sensitivity and delay time. Auto Light Control •...
- Page 39 Intelligent Traffic Camera User Manual | 2 - Entrance and Exit Management | 39 Parameters Function Introduction Select this option to customize the Start Time and End Time of the White LED Light. Customize Users can customize the brightness, levels 1-100 are available, the higher the Brightness level, the brighter the White LED Light.
- Page 40 Intelligent Traffic Camera User Manual | 2 - Entrance and Exit Management | 40 Parameters Function Introduction Switch to Night Mode according to the parameters of night mode. Night Note: There are several parameters such as Exposure Level, Maximum Exposure Time and IR-CUT Interval, etc, associated with the mode. Switch to Day Mode according to the parameters of day mode.
- Page 41 Intelligent Traffic Camera User Manual | 2 - Entrance and Exit Management | 41 Parameters Function Introduction Select this option to automatically adjust the strength of the Low-Beams LED, High-Beams LED and IR LED Supplement Light on the basis of the Zoom ratio. Auto Note: •...
- Page 42 Intelligent Traffic Camera User Manual | 2 - Entrance and Exit Management | 42 [Day/Night Parameters] Table 14. Description of the buttons Parameters Function Introduction Exposure Level Level 0~10 are available to meet your need. Minimum Shutter is the same as Maximum Exposure Time. Set the minimum Minimum Shutter Shutter to 1~1/100000s.
- Page 43 Intelligent Traffic Camera User Manual | 2 - Entrance and Exit Management | 43 Parameters Function Introduction Here you can customize your special demands for different time, then the Day mode and Night mode will switch automatically according to your settings. Advanced Schedule Mode [Exposure] Table 15.
- Page 44 Intelligent Traffic Camera User Manual | 2 - Entrance and Exit Management | 44 Parameters Function Introduction Auto Mode, Manual Mode and Schedule Mode are available. Auto Mode: The camera will adjust the brightness according to the light environment automatically. Manual Mode: The camera will adjust the brightness according to the value you set, you can set the exposure time from 1~1/100000s, the higher the value is, the brighter the image is.
- Page 45 BLC/WDR/HLC mode. Backlight Mode Note: • For more details about Milesight WDR on & off Video, you can click to the YouTube: https://www.youtube.com/watch?v=McoOL0Pyk0w • For more details about Milesight Ultra Low-light Video Demo - HLC, you can click to the YouTube: https://www.youtube.com/watch?v=ly8uKWbii40...
- Page 46 Intelligent Traffic Camera User Manual | 2 - Entrance and Exit Management | 46 Table 17. Description of the buttons Parameters Function Introduction To restore white objects, removed color distortion caused by the light of the environment. Mode: General and Schedule are available. General Mode: Select a white balance mode as required •...
- Page 47 Intelligent Traffic Camera User Manual | 2 - Entrance and Exit Management | 47 Parameters Function Introduction Schedule Mode: Select this option that you can customize the schedule to enable/ disable above modes. [Image Enhancement] Table 18. Description of the buttons Parameters Function Introduction There is an option to turn On/Off the IR LED.
- Page 48 YouTube: https://www.youtube.com/watch?v=-vynrami51s Better image effect in foggy weather. Note: Defog Mode • For more details about Milesight Defog, you can click to the YouTube: https://www.youtube.com/watch?v=a9od7Trao4U Digital Image Stabilisation Decrease the blur and shakiness of the image. [Display] Table 19. Description of the buttons...
- Page 49 Intelligent Traffic Camera User Manual | 2 - Entrance and Exit Management | 49 Parameters Function Introduction There are three options available, you can select one to meet your need. Off: Keep the image in normal direction. Corridor Mode Clockwise 90°: Rotate the image by 90° clockwise. Anticlockwise90°: Rotate the image by 90°...
- Page 50 Intelligent Traffic Camera User Manual | 2 - Entrance and Exit Management | 50 Table 20. Description of the buttons Parameters Function Introduction Video Stream Enable to set OSD for primary stream and secondary stream. Font Size Smallest/Small/Medium/Large/Largest/Auto are available for title and date. Font Color Enable to set different color for title and date.
- Page 51 Intelligent Traffic Camera User Manual | 2 - Entrance and Exit Management | 51 Parameters Function Introduction Date Position Date display position on the image. Date Format The format of date. Copy to Other Streams Copy the settings to other streams. Privacy Mask Privacy mask enables to cover certain areas on the live video to prevent certain spots in the surveillance area from being viewed and recorded.
- Page 52 Users can select up to 8 key regions of a scene to transmit through separate streams for targeted preview and recording. By using Milesight ROI technology, more than 50% of bit rate can be saved and therefore less bandwidth demanded and the storage usage reduced. So according to this, you can set a small bit rate for high resolution.
- Page 53 Intelligent Traffic Camera User Manual | 2 - Entrance and Exit Management | 53 Parameters Function Introduction Enable Check the checkbox to enable the ROI function. Video Stream Choose the Video Stream. Enable/disable the selected ROI areas. Delete the selected ROI areas. Delete All Clear all areas you drew before.
- Page 54 Intelligent Traffic Camera User Manual | 2 - Entrance and Exit Management | 54 Table 23. Description of the buttons Parameters Function Introduction Enable Check on the checkbox to enable audio feature. Audio Mode Audio Input/Audio Output/Both Audio Input & Output are optional. Denoise: Set it as On/Off.
-
Page 55: Network
Intelligent Traffic Camera User Manual | 2 - Entrance and Exit Management | 55 Note: • The Audio mode and Audio Output are only for certain modules. • Only support ‘.wav’ audio files with codec type PCM/PCMU/PCMA, 64kbps or 128 kbps and no more than 500k. - Page 56 Intelligent Traffic Camera User Manual | 2 - Entrance and Exit Management | 56 Table 24. Description of the buttons Parameters Function Introduction Type: Static Type and DHCP Type are optional for user to get IPv4 address automatically or use fixed IP address. IPv4 Address: An address that used to identify a network camera on the network.
- Page 57 Enable: Start or stop using HTTPs. Port: Web GUI login port via HTTPS, the default is 443. HTTPs Note: For more details about how to use enable HTTPS access, please refer to https://milesight.freshdesk.com/a/solutions/articles/69000797384. Installed Certificate Attributes Upload and set the SSL certificate.
- Page 58 Intelligent Traffic Camera User Manual | 2 - Entrance and Exit Management | 58 Stream Main Stream http://username:password@IP:port/ipcam/mjpeg.cgi http://username:password@IP:port/ipcam/mjpegcif.cgi Secondary Stream Tertiary Stream http://username:password@IP:port/ipcam/mjpegthird.cgi RTSP Table 27. Description of the buttons Parameters Function Introduction RTSP Port The port of RTSP, the default is 554. Playback Port The port of playback, the default is 555.
- Page 59 Intelligent Traffic Camera User Manual | 2 - Entrance and Exit Management | 59 Parameters Function Introduction QoS DSCP The valid value range of the DSCP is 0-63. Save the configuration. Table 28. RTSP URL are as below: Stream Primary Stream rtsp://IP:RTSP Port/main Secondary Stream rtsp://IP:RTSP Port/sub...
- Page 60 DDNS allows you to access the camera via domain names instead of IP address. It manages to change IP address and update your domain information dynamically. You need to register an account from a provider. Note: For more details about how to set DDNS, please refer to https:// milesight.freshdesk.com/a/solutions/articles/69000643406.
- Page 61 Intelligent Traffic Camera User Manual | 2 - Entrance and Exit Management | 61 You can choose “ddns.milesight.com” as provider for DDNS. After enabling it, you can access the device via the URL “http://ddns.milesight.com/MAC address”. Table 30. Description of the buttons...
- Page 62 Function Introduction Save the configuration. Note: • Please do the Port Forwarding of HTTP Port and RTSP Port before you use Milesight DDNS. • Make sure that the internal and the external port number of RTSP are the same. Email Alarm video files can be sent to specific mail account through SMTP server.
- Page 63 Intelligent Traffic Camera User Manual | 2 - Entrance and Exit Management | 63 Parameters Function Introduction Password The password of the sender. Email Server The email server IP address or host name(e.g. smtp.gmail.com). The default TCP/IP port for SMTP is 25(not secured). For SSL/TLS port, it Email Port depends on the mail you use.
- Page 64 Intelligent Traffic Camera User Manual | 2 - Entrance and Exit Management | 64 Table 32. Description of the buttons Parameters Function Introduction FTP Type FTP and SFTP are optional. Server Address FTP/SFTP server address. The port of the FTP server. Generally it is 21. Server Port FTP Server Settings The port of the SFTP server.
- Page 65 Intelligent Traffic Camera User Manual | 2 - Entrance and Exit Management | 65 Parameters Function Introduction Multilevel If the storage path is more than two levels, enter Multilevel FTP Folder Name storage path here manually. Alarm Action Choose the default(YYYY-MM-DD) or customize the alarm action file File Name name.
- Page 66 Intelligent Traffic Camera User Manual | 2 - Entrance and Exit Management | 66 Note: About how to set up VLAN in switches, please refers to your switches user manual. PPPoE This camera supports the PPPoE auto dial-up function. The camera gets a public IP address by ADSL dial-up after the camera is connected to a modem.
- Page 67 Intelligent Traffic Camera User Manual | 2 - Entrance and Exit Management | 67 • The obtained IP address is dynamically assigned via PPPoE, so the IP address always changes after rebooting the camera. To solve the inconvenience of the dynamic IP, you need to get a domain name from the DDNS provider (e.g.
- Page 68 Intelligent Traffic Camera User Manual | 2 - Entrance and Exit Management | 68 Parameters Function Introduction Enable SNMP v3: Provide encryption and the HTTPS protocol must be enabled. Read Security Name: Input the name of Read Security Community. Level of Security: There are three levels available: (auth, priv), (auth, no priv) and (no auth, no priv).
- Page 69 Intelligent Traffic Camera User Manual | 2 - Entrance and Exit Management | 69 Bonjour Bonjour is based on Apple's multicast DNS service. Bonjour devices can automatically broadcast their service information and listen to the service information of other devices. If you don't know the camera information, you can use the Bonjour service on the same LAN to search for network camera devices and then to access the devices.
- Page 70 24hrs to activate the account for using live function. • For RTMP, since G.711 is not available for YouTube, so you can only play video from Milesight Network Camera with H.264 video coding and AAC audio coding on YouTube.
- Page 71 Intelligent Traffic Camera User Manual | 2 - Entrance and Exit Management | 71 To use this function, the settings in SIP page must be configured properly. There are two ways to get video through SIP, one is to dial the IP address directly, the other is account registration mode.
- Page 72 Intelligent Traffic Camera User Manual | 2 - Entrance and Exit Management | 72 Table 34. Description of the buttons Parameters Function Introduction Start or stop using SIP. Enable Note: SIP supports Direct IP call. Choose to use Enable mode or Disable mode. Enable mode means to use SIP Register Mode with register account.
- Page 73 Intelligent Traffic Camera User Manual | 2 - Entrance and Exit Management | 73 Parameters Function Introduction Enable Audio in SIP Call Enable/disable audio in SIP call. Max Call Duration The max call duration when use SIP. Status SIP registration status. Display “Unregistered” or “Registered” . [Alarm Phone List] Table 35.
- Page 74 Intelligent Traffic Camera User Manual | 2 - Entrance and Exit Management | 74 Table 36. Description of the buttons Parameters Function Introduction Enable White List Number Filter When enabled, only the designated phone number or IP address can visit Phone Type: Phone Number(Call by phone number) &...
-
Page 75: Storage
Intelligent Traffic Camera User Manual | 2 - Entrance and Exit Management | 75 Table 37. Description of the buttons Parameters Function Introduction Enable: Enable/disable the Push Message function Push Event Type: You can click to choose the types of Events' message which will be pushed to M-sight Pro App as shown below: Push Message Settings Here you can choose whether to enable or disable camera ONVIF function. - Page 76 Intelligent Traffic Camera User Manual | 2 - Entrance and Exit Management | 76 Note: Before you start: • To configure record settings, please make sure that you have the network storage device within the network or the SD card inserted in your camera. •...
- Page 77 SMB/CIFS is selected. Note: • Up to 5 NAS disks can be connected to the camera. • For more details about how to use NAS on Milesight Network Camera, please refer to https://milesight.freshdesk.com/a/solutions/ articles/69000797902.
- Page 78 Intelligent Traffic Camera User Manual | 2 - Entrance and Exit Management | 78 Table 39. Description of the buttons Parameters Function Introduction Enable Recycle Enable/Disable Recycle Storage, if you enable this option, it will delete the files when the free Storage disk space reaches a certain value.
- Page 79 Intelligent Traffic Camera User Manual | 2 - Entrance and Exit Management | 79 Parameters Function Introduction Copy the schedule area to another date. Schedule Settings Select all schedule. Clear all schedule. Save the configuration. Note: SD Card or NAS are available. Snapshot Settings Table 40.
- Page 80 Intelligent Traffic Camera User Manual | 2 - Entrance and Exit Management | 80 Parameters Function Introduction Enable Timing Snapshot: Check the checkbox to enable the Timing Snapshot function Interval: Set the snapshots interval, input the number and choose the unit(millisecond, second, minute, hour, day).
- Page 81 Intelligent Traffic Camera User Manual | 2 - Entrance and Exit Management | 81 Parameters Function Introduction Clear all schedule. Save the configuration. Explorer Files will be seen on this page when they are configured to save into SD card or NAS. You can set time schedule every day for recording videos and save video files to your desired location.
-
Page 82: Event
Motion Detection Note: For more details about how to set motion detection, please refer to https:// milesight.freshdesk.com/a/solutions/articles/69000643423. Settings steps are shown as follows: Step1: Check the checkbox to enable the motion detection. Step2: Check the check box to enable the motion analysis. - Page 83 Intelligent Traffic Camera User Manual | 2 - Entrance and Exit Management | 83 Parameters Function Introduction When Motion Analysis is enabled, the moving region will turn yellow so that the user can know exactly where the motion occurred. Note: Only support when HTTP is selected in Live View. Enable Motion Analysis Click the button, the motion in the area will be detected.
- Page 84 Intelligent Traffic Camera User Manual | 2 - Entrance and Exit Management | 84 Table 42. Description of the buttons Parameters Function Introduction Normal Mode and Advanced Mode are available for the option. When Advanced Detection Mode Mode is selected, users can configure up to 4 detection regions and sensitivity for each detection region.
- Page 85 Intelligent Traffic Camera User Manual | 2 - Entrance and Exit Management | 85 Parameters Function Introduction Copy the schedule area to another date. Select all schedule. Clear all schedule. [Alarm Action] Step6: Set alarm action; Table 44. Description of the buttons...
- Page 86 Intelligent Traffic Camera User Manual | 2 - Entrance and Exit Management | 86 Parameters Function Introduction Duration: Selected the duration time of alarm. 5s/10s/15s/20s/25s/30s are available. Record Linkage: Save alarm recording files into SD Card or NAS or Upload the recording files via FTP.
- Page 87 Intelligent Traffic Camera User Manual | 2 - Entrance and Exit Management | 87 [Basic Settings] Table 45. Description of the buttons Parameters Function Introduction Audio Alarm will be triggered when the thresholds reaches to a certain Alarm Threshold value from 0 to 100. Audio Sample Value The current value of the audio sample.
- Page 88 Intelligent Traffic Camera User Manual | 2 - Entrance and Exit Management | 88 Refer to the table Table 3 (page 85) for the meanings of the items, here will not repeat again. External Output [Normal Status Settings] Please set the Normal Status firstly, when the Current Status is different with Normal Status, it will lead to the alarm.
- Page 89 Intelligent Traffic Camera User Manual | 2 - Entrance and Exit Management | 89 [Manual External Output] You can set the manual external output. Table 46. Description of the buttons Parameters Function Introduction Manual Output Click to Start/Stop manual external output. External Output Action Time Manual Control/Customize/10 s/1 min./5 min./10 min.
-
Page 90: Lpr
Note: • The LPR1 version does not require a license. • For more details about how to set ANPR solution, please refer to https:// milesight.freshdesk.com/a/solutions/articles/69000640021. • For more details about how to set LPR1, please refer to https:// milesight.freshdesk.com/a/solutions/articles/69000797908. • For more details about how to set LPR2, please refer to https:// milesight.freshdesk.com/a/solutions/articles/69000797905. - Page 91 Intelligent Traffic Camera User Manual | 2 - Entrance and Exit Management | 91 Table 48. Description of the buttons Parameters Function Introduction Enable Detection Enable/disable the LPR detection function. Country/ Region Select country/ region to detect the license plate. (Only for LPR1, LPR4, LPR_AP and LPR_AM) Normal: configure the LPR detection regions for the current area.
- Page 92 Intelligent Traffic Camera User Manual | 2 - Entrance and Exit Management | 92 Table 49. Description of the buttons Parameters Function Introduction To enable LPR Image Mode, parameters of Backlight, Exposure and Day/ Enable LPR Image Mode Night Switch will be set to special values. Level 1~5 are available.
- Page 93 Intelligent Traffic Camera User Manual | 2 - Entrance and Exit Management | 93 Note: The detection area can be drawn as an irregular quadrilateral, which greatly enhances the scene adaptability.
- Page 94 Intelligent Traffic Camera User Manual | 2 - Entrance and Exit Management | 94 Table 50. Description of the buttons Parameters Function Introduction Draw the screen to select the area interested, then click “Add” button to add the area, only four recognition areas can be added. You can edit the name of the area or delete the area in the list below.
- Page 95 Intelligent Traffic Camera User Manual | 2 - Entrance and Exit Management | 95 Parameters Function Introduction Processing Resolution Resolution of the stream for LPR analysis, including 1920*1280, 1280*720, 640*360, 320*176. (Only for LPR1, LPR2, LPR3 and LPR4) Always: in this mode, camera will always detect license plates. Detection Trigger Alarm Input: in this mode, camera will only detect license plates during Alarm Input is being triggered.
- Page 96 Intelligent Traffic Camera User Manual | 2 - Entrance and Exit Management | 96 Table 52. Description of the buttons Parameters Function Introduction Check the checkbox to enable LPR Message Post. It will push information to Enable LPR Message Post some third-party devices or software that are compatible with ours.
- Page 97 Intelligent Traffic Camera User Manual | 2 - Entrance and Exit Management | 97 Table 53. Description of the buttons Parameters Function Introduction Copy the schedule area to another date. Select all schedule. Clear all schedule. Advanced In the interface, you can set display information on snapshot of license plate recognition, and also customize the file name of snapshots which are uploaded via FTP or Email or stored on local LPR Picture File Path.
- Page 98 Intelligent Traffic Camera User Manual | 2 - Entrance and Exit Management | 98 [Snapshot OSD] Table 54. Description of the buttons...
- Page 99 Intelligent Traffic Camera User Manual | 2 - Entrance and Exit Management | 99 Parameters Function Introduction Smallest/Small/Medium/Large/Largest are available for OSD information. Font Size Note: Snapshot OSD font size and Image OSD font size are corresponded. Enable to set different colors for OSD information. Font Color Note: Snapshot OSD font color and Image OSD font color are corresponded.
- Page 100 Intelligent Traffic Camera User Manual | 2 - Entrance and Exit Management | 100 Parameters Function Introduction Customize the OSD content. You can set OSD Information as shown below: When license plate is recognized and the alarm is triggered, the snapshot OSD Information of license plate recognition will show as below: [Snapshot File Name]...
- Page 101 Intelligent Traffic Camera User Manual | 2 - Entrance and Exit Management | 101 Table 55. Description of the buttons Parameters Function Introduction “-”, “_” and Space are available for File Name Separator format. Separator The default separator is “-”. You can customize the snapshot file name according to items chosen.
- Page 102 Intelligent Traffic Camera User Manual | 2 - Entrance and Exit Management | 102 Note: You need to check at least one item. For example, you can choose items, separator and items sorting as below:...
- Page 103 Intelligent Traffic Camera User Manual | 2 - Entrance and Exit Management | 103 Once license plate is recognized, and the snapshot will be uploaded via FTP or Email or stored on your local LPR Picture File Path. Then, You can see the snapshot file name which you customize as shown below: Full-snapshot Recognized successfully Full-snapshot Recognized failed...
- Page 104 Intelligent Traffic Camera User Manual | 2 - Entrance and Exit Management | 104 License plate snapshot Recognized successfully License plate snapshot Recognized failed Note: • If the item checked is not recognized successfully, then the item will be displayed with the specific symbol “#”.
- Page 105 Intelligent Traffic Camera User Manual | 2 - Entrance and Exit Management | 105 When adding the license plates, you can also define the ID card number for the license plate, when the camera identifies these license plates and recognizes the attached ID card number, it will send the ID card number to your parking system through the Wiegand protocol, and then your system can respond based on the received information, such as access control.
- Page 106 Intelligent Traffic Camera User Manual | 2 - Entrance and Exit Management | 106 Parameters Function Introduction Select the license plate type as black or white, enter the ID Card number and license plate, click the “Add” button, the license plate will be added successfully. Add License Plate You can add a csv form with the license plate you want to add, click the "Browse"...
- Page 107 Intelligent Traffic Camera User Manual | 2 - Entrance and Exit Management | 107 Parameters Function Introduction Click the “Edit” button to customize a rule. And then set the license plate to Schedule Mode and choose a custom schedule rule that can configure the license plate as Black List or White List at different Schedule Rules times.
- Page 108 Intelligent Traffic Camera User Manual | 2 - Entrance and Exit Management | 108 Step1: Select the List Type. Check the check box to enable Black List/White List/Visitor mode. Step2: The corresponding alarm icon is triggered when the Black List/White List/Visitor vehicles passing by.
- Page 109 Intelligent Traffic Camera User Manual | 2 - Entrance and Exit Management | 109 White List:...
- Page 110 Intelligent Traffic Camera User Manual | 2 - Entrance and Exit Management | 110 Visitor:...
- Page 111 Intelligent Traffic Camera User Manual | 2 - Entrance and Exit Management | 111 [Schedule Settings] Step3: Schedule Settings. Table 57. Description of the buttons...
- Page 112 Intelligent Traffic Camera User Manual | 2 - Entrance and Exit Management | 112 Parameters Function Introduction Copy the schedule area to another date. Select all schedule. Clear all schedule. [Alarm Action] Step4: Set Alarm Action. Table 58. Description of the buttons...
- Page 113 Intelligent Traffic Camera User Manual | 2 - Entrance and Exit Management | 113 Parameters Function Introduction Duration: Selected the duration time of alarm. 5s/10s/15s/20s/25s/30s are available. Record Linkage: Save alarm recording files into SD Card or NAS or Upload the recording files via FTP.
- Page 114 Address. And the camera name of the evidence camera can be customized. Note: • Up to 2 evidence cameras can be added. • Evidence camera captures primary stream picture by default. • For the Address, input evidence camera IP directly for Milesight camera, and snapshot URL is supported for third-party camera.
- Page 115 Intelligent Traffic Camera User Manual | 2 - Entrance and Exit Management | 115 Step3: The added evidence cameras will be listed in the interface, and users can edit these cameras separately. For the meaning of the buttons on the interface, please refer to the following table. Table 59.
- Page 116 Intelligent Traffic Camera User Manual | 2 - Entrance and Exit Management | 116 Parameters Function Introduction Edit the evidence camera. Delete the evidence camera. Step4: Set Capture Conditions. Currently it only supports the always option, which means that as long as the camera recognizes the license plate, the evidence camera will be triggered to capture a picture of the entire scene.
- Page 117 Intelligent Traffic Camera User Manual | 2 - Entrance and Exit Management | 117 Users can also search and export the image captured by evidence camera in the Smart Search interface.
- Page 118 Intelligent Traffic Camera User Manual | 2 - Entrance and Exit Management | 118 Smart Search The real-time detection results will be displayed on the right side of Smart Search page, including detected time, live screenshot, license plate and vehicle attributes. Step1: Select Plate Type and Vehicle Attributes or directly enter the license plate number and then select Start Time and End Time.
- Page 119 Intelligent Traffic Camera User Manual | 2 - Entrance and Exit Management | 119 • It supports displaying 4,000 logs. • Only when there is a SD Card or NAS has been set on the storage management , then the logs can be stored and showed on Smart Search page. Step2: Click on the thumbnail photo under the LPR Logs, then the license plate details will be shown as below : Note: If the evidence feature is enabled, you can also click the arrow button on the...
- Page 120 Intelligent Traffic Camera User Manual | 2 - Entrance and Exit Management | 120 Step3: Click the "Export" or “Export All” button to export the desired files in the current list to a local folder. Step4: Click the "Auto Export" button to automatically export the logs to FTP, Email or Storage.
-
Page 121: System
Intelligent Traffic Camera User Manual | 2 - Entrance and Exit Management | 121 2.6.6 System System Setting Here you can check System information and Date&Time. System info All information about the hardware and software of the camera can be checked on this page. - Page 122 Intelligent Traffic Camera User Manual | 2 - Entrance and Exit Management | 122 Table 60. Description of the buttons Parameters Function Introduction Device Name The device name can be customized. Product Model The product model of the camera. Hardware Version The hardware version of the camera.
- Page 123 Intelligent Traffic Camera User Manual | 2 - Entrance and Exit Management | 123 Parameters Function Introduction The number of Alarm Output interface. Alarm Output Note: The Alarm Output will appear only when the camera have alarm input/ output interface. Uptime The elapsed time since the last restarted of the device.
- Page 124 Intelligent Traffic Camera User Manual | 2 - Entrance and Exit Management | 124 Parameters Function Introduction Synchronize Mode: NTP server, Manual and Synchronize with computer time are optional. NTP server: Input the address of NTP server. NTP Sync: Regularly update your time according to the interval time. Manual: Set the system time manually.
- Page 125 Intelligent Traffic Camera User Manual | 2 - Entrance and Exit Management | 125 Parameters Function Introduction Click “Edit” button to set three security questions for your camera. In case that you forget the password, you can click “Forget Password” button on login page to reset the password by answering three security questions correctly.
- Page 126 Intelligent Traffic Camera User Manual | 2 - Entrance and Exit Management | 126 Parameters Function Introduction Click “Add” button, it will display Account Management page. You can add an account to the camera by entering Admin Password, User Level, User Name, New Password, Confirm, and edit user privilege by clicking .
- Page 127 Intelligent Traffic Camera User Manual | 2 - Entrance and Exit Management | 127 Parameters Function Introduction Refresh Click to get latest status of user accessing to camera. Record serial number of user logging in camera. Note: • There are at most 30 records shown at the list. •...
- Page 128 Intelligent Traffic Camera User Manual | 2 - Entrance and Exit Management | 128 Parameters Function Introduction Filter type: Allow or deny access. Rule: Single, Network and Range are available. IP address: Input the address to get the access to the device. Access List Delete all the access list.
- Page 129 Intelligent Traffic Camera User Manual | 2 - Entrance and Exit Management | 129 Watermark Watermarking is an effective method to protect information security, realizing anti- counterfeiting traceability and copyright protection. Milesight Network cameras supports Watermark function to ensure information security. About...
- Page 130 Intelligent Traffic Camera User Manual | 2 - Entrance and Exit Management | 130 User can view some open source software licenses about the camera by clicking the View Licenses button. Logs The logs contain the information about the time and IP that has accessed the camera through web.
- Page 131 Intelligent Traffic Camera User Manual | 2 - Entrance and Exit Management | 131 Parameters Function Introduction Go to Input the number of logs’ page. Maintenance Here you can configure System Maintenance and Auto Reboot. System Maintenance Table 67. Description of the buttons...
- Page 132 Intelligent Traffic Camera User Manual | 2 - Entrance and Exit Management | 132 Parameters Function Introduction Software Version: The software version of the camera. Local Upgrade: Click the “Browse” button and select the upgrading file, then click the “Upgrade” button to upgrade. After the system reboots successfully, the update is done.
- Page 133 Intelligent Traffic Camera User Manual | 2 - Entrance and Exit Management | 133 Parameters Function Introduction Reset: Click “Reset” button to reset the camera to factory default settings. Keep the IP Configuration: Check this option to keep the IP configuration when resetting the camera.
- Page 134 Intelligent Traffic Camera User Manual | 2 - Entrance and Exit Management | 134 Set the date and time to enable Auto Reboot function, the camera will reboot automatically according to the customized time in case that camera overload after running a long time.
-
Page 135: Chapter 3. Road Traffic Management
Chapter 3. Road Traffic Management 3.1 Product Description 3.1.1 Product Overview Milesight Road Traffic Management Camera combines video surveillance with AI, ANPR, 3D Radar and other cutting-edge technologies to help traffic management agencies systematically and intelligently monitor and understand road users' behavior and gain valuable insights based on real-time data to optimize traffic flow, minimize accident risks, and respond to emergencies more efficiently. - Page 136 Intelligent Traffic Camera User Manual | 3 - Road Traffic Management | 136 Product Name AI Road Traffic Speed Dome Camera AI Road Traffic Supplement Light Pro Bullet Plus Camera 3.1.3 Hardware Overview • AI Road Traffic Pro Bullet Plus Camera •...
- Page 137 Intelligent Traffic Camera User Manual | 3 - Road Traffic Management | 137 • AI Road Traffic PTZ Bullet Camera • AI Road Traffic PTZ Bullet Plus Camera...
- Page 138 Intelligent Traffic Camera User Manual | 3 - Road Traffic Management | 138 • AI Road Traffic Speed Dome Camera • AI Road Traffic Supplement Light Pro Bullet Plus Camera...
-
Page 139: Related Documents
Intelligent Traffic Camera User Manual | 3 - Road Traffic Management | 139 3.1.4 Related Documents Table 69. Document Type Link Road Traffic Management Camera https://www.milesight.com/static/file/en/download/datasheet/ipc/traffic/Milesight- Datasheet Road-Traffic-Management-Datasheet-en.pdf https://www.milesight.com/static/file/en/download/user-manual/ipc/Milesight- Quick Start Guide Network-Camera-Quick-Start-Guide.pdf 3.2 Configuration Flow The configuration flow of Road Traffic Management Camera is shown in the following figure. - Page 140 LAN or (page 11) dynamic IP connection. Accessing from IP address, web Accessing the Network Camera browser and Milesight back-end Assigning an IP Address (page 12) software are available. Video (page 33) After login the camera, you can...
-
Page 141: Network Connection
Intelligent Traffic Camera User Manual | 3 - Road Traffic Management | 141 3.3 Network Connection Setting the Camera over the LAN Connecting the camera to a switch or a router is the most common connection method. The camera must be assigned an IP address that is compatible with its LAN. Connect the Camera to the PC Directly In this method, only the computer connected to the camera will be able to view the camera. -
Page 142: Accessing The Network Camera
Step2: Start Smart Tools, click the IPC Tools page, then enter the device information, such as IP address, MAC address, Status, Port number, Netmask, and Gateway, then all related Milesight network camera in the same network will be displayed. Details are shown as the figure below;... - Page 143 Intelligent Traffic Camera User Manual | 3 - Road Traffic Management | 143 Step3: Select a camera or multiple cameras according to the MAC addresses; Select single camera: Select multiple cameras:...
- Page 144 Intelligent Traffic Camera User Manual | 3 - Road Traffic Management | 144 Step4: If the selected camera shows "Inactive" in the status bar, click "Activate" to set the password when using it for the first time. You can also set the security questions when activating the camera in case that you forget the password (You can reset the password by answering three security questions correctly).
- Page 145 Intelligent Traffic Camera User Manual | 3 - Road Traffic Management | 145 Step5: After activation, you can change the IP address or other network values, and then click “Modify” button. Step6: By double clicking the selected camera or the browser of interested camera, you can access the camera via web browser directly.
- Page 146 Intelligent Traffic Camera User Manual | 3 - Road Traffic Management | 146 More usage of Smart Tools, please refer to the Smart Tools User Manual. Assign An IP Address via Browser If the network segment of the computer and that of the camera are different, please follow the steps to change the IP address: Step1: Change the IP address of computer to 192.168.5.0 segment, here are two ways as below:...
- Page 147 Click “Advanced”, and then click “IP settings”--> “IP address”--> “Add”. In the pop-up window, enter an IP address that in the same segment with Milesight network camera ( e.g. 192.168.5.61, but please note that this IP address shall not conflict with the IP address on...
- Page 148 Intelligent Traffic Camera User Manual | 3 - Road Traffic Management | 148 Step2: Start the browser. In the address bar, enter the default IP address of the camera:http://192.168.5.190; Step3: You need to set the password first when using it for the first time. And you can also set three security questions for your device after activation.
-
Page 149: Accessing From The Web Browser
Android system. Both H.265&H.264 video codec are supported in Plugin-Free Mode for camera, and it will play the secondary stream by default. Note: • For more details about set plugin-free mode of Milesight camera, please refer to https:// milesight.freshdesk.com/a/solutions/articles/69000643388. - Page 150 Accessing from Milesight NVR (Network Video Recorder) Milesight NVR Series can work with Milesight network cameras. Based on embedded Linux operation system, Milesight NVR Series manages and stores HD video data. It owns multi- disk management systems, front end HD device management system, HD video analysis system and high-capacity system for video.
- Page 151 Intelligent Traffic Camera User Manual | 3 - Road Traffic Management | 151 Please install Milesight CMS; then launch the program to add the camera to the channel list. For detailed information about how to use the software, please refer to Milesight CMS User Manual.
-
Page 152: Live View
Intelligent Traffic Camera User Manual | 3 - Road Traffic Management | 152 3.5 Live View Live Video After logging in the network camera web GUI successfully, user is allowed to view live video as follows. - Page 153 Intelligent Traffic Camera User Manual | 3 - Road Traffic Management | 153 Table 71. Description of the buttons Parameter Description Click to access the live view page. Live Video Click to access the playback page. Playback Click to access the configuration page. Settings Click to access the LPR Mode.
- Page 154 Intelligent Traffic Camera User Manual | 3 - Road Traffic Management | 154 Parameter Description When recording, the icon appears. Recording When an alarm of Motion Detection was triggered, the icon appears. Alarm Except for the kinds of alarms above, when other alarms were triggered, the icon appears.
- Page 155 Intelligent Traffic Camera User Manual | 3 - Road Traffic Management | 155 Parameter Description Zoom: Adjust the Zoom length of the lens. Note: Only work when your camera is equipped with motorized lens. Focus-/Focus+: Adjust focus of the lens. Note: Only work when your camera is equipped with motorized lens.
-
Page 156: Ptz Mode
Intelligent Traffic Camera User Manual | 3 - Road Traffic Management | 156 PTZ Mode After logging in the PTZ network camera web GUI successfully, user is allowed to view live video as follows. Operations on Live View Page Note: For description of other buttons, you can refer to Table 1 (page 23). - Page 157 Intelligent Traffic Camera User Manual | 3 - Road Traffic Management | 157 Parameter Description Click to zoom in and zoom out. Zoom-/Zoom+ Click to focus near or far of the lens. Focus-/Focus+ Lens Initialization, Auxiliary Focus and Auto Iris. Note: The Auto Iris is turned on by default.
- Page 158 Intelligent Traffic Camera User Manual | 3 - Road Traffic Management | 158 • Hold down the left mouse button and drag the mouse to the lower right or upper right on the Live View, then you can see a blue rectangle. The corresponding position will be moved to the center of the Live View and Zoom in.
- Page 159 Intelligent Traffic Camera User Manual | 3 - Road Traffic Management | 159 Step2: Use the PTZ control buttons to move the lens to the interested position; Step3: Click to save the setting of the current preset; Step4: Click to delete the chosen preset. Note: Up to 300 presets can be configured (18 presets are not modifiable).
- Page 160 Intelligent Traffic Camera User Manual | 3 - Road Traffic Management | 160 Special Preset Function Special Preset Function Auto Flip(Speed Dome only) Path7 Go to Zero Path8 Self Check Pattern1 Patrol Pattern2 Path1 Pattern3 Path2 Pattern4 Path3 Stop Scan Path4 Auto Scan Path5...
- Page 161 Intelligent Traffic Camera User Manual | 3 - Road Traffic Management | 161 Step1: In the PTZ control panel, click to enter the patrol settings interface; Step2: Select a patrol number, the setting icon will appear , click it; Step3: Click to add presets to this patrol, as shown in Figure;...
- Page 162 Intelligent Traffic Camera User Manual | 3 - Road Traffic Management | 162 Note: The three buttons behind the Patrol list means: Play, Set and Delete. Set / Call a pattern A pattern is a memorized series of pan, tilt, zoom and preset functions. It can be called on the pattern settings interface.
-
Page 163: Lpr Mode
Also, 3D Positioning operation is not supported. LPR Mode Milesight LPR Camera supports professional LPR Live View interface , it can show the real-time license plate recognition results and display the snapshots of detected license plates ,which realizes a stand-alone LPR solution. - Page 164 Intelligent Traffic Camera User Manual | 3 - Road Traffic Management | 164 Left Panel: Live View interface of LPR cameras. Right Panel: Snapshots of the real-time vehicle and display the information of the vehicle according to the snapshot. Bottom Panel: Display the information of the vehicles recently detected. Note: •...
- Page 165 Intelligent Traffic Camera User Manual | 3 - Road Traffic Management | 165 Parameter Description Click to access the configuration page. Settings Click to access the LPR Mode page. LPR Mode Click to select system language. Display the user name and click to logout. Choose the Stream (Primary/Secondary/Tertiary) to show on the current video window.
- Page 166 Intelligent Traffic Camera User Manual | 3 - Road Traffic Management | 166 Parameter Description When the Visitor license plates passing by, the icon appears. Alarm Click to capture the current image and save to the configured path. The default path is: C:VMS\+-1\ IMAGE-MANUAL. Snapshot Click to Start Recording video and save to the configured path.
-
Page 167: Playback
Intelligent Traffic Camera User Manual | 3 - Road Traffic Management | 167 3.6 Playback Playback Click to enter playback interface. In this part, you can search and playback the recorded video files stored in SD cards or NAS. The Playback interface is as below: Step1: Click the “Search”... - Page 168 Intelligent Traffic Camera User Manual | 3 - Road Traffic Management | 168 Step2: The timeline displays the video files for the day and show different colors according to selected record type. Drag the progress bar with the mouse to locate the exact playback point as needed.
- Page 169 Intelligent Traffic Camera User Manual | 3 - Road Traffic Management | 169 Table 76. Description of the buttons Parameter Description For LPR camera, the record type include All/General/Basic Event/LPR. The timeline will show different colors according to selected record type as below: Adjust the speed of video playback.
- Page 170 Intelligent Traffic Camera User Manual | 3 - Road Traffic Management | 170 Parameter Description Stop the video. Stop Select the time that want to locate. Search Time Go To. Jump Table 77. Description of the buttons Parameter Description Click to enable the audio. Mute Click to take a snapshot.
-
Page 171: Settings
Intelligent Traffic Camera User Manual | 3 - Road Traffic Management | 171 3.7 Settings 3.7.1 Media Video Stream parameters can be set in this module, adapting to different network environments and demands. Primary Stream Settings Secondary Stream Settings... - Page 172 Intelligent Traffic Camera User Manual | 3 - Road Traffic Management | 172 Tertiary Stream Settings Table 78. Description of the buttons...
- Page 173 Intelligent Traffic Camera User Manual | 3 - Road Traffic Management | 173 Parameters Function Introduction General & Event are available only for Primary Stream. General refers to continuous record video, while Event includes events that can trigger alarms, such as Motion, Exception, LPR and so on.
- Page 174 Intelligent Traffic Camera User Manual | 3 - Road Traffic Management | 174 Parameters Function Introduction Profile The option is for H.264, Main/High/Base can be selected as needed. Set the I-frame interval to 1~120, 50 for the default. This item is optional only if you I-frame Interval select the H.265/H.264.
- Page 175 Intelligent Traffic Camera User Manual | 3 - Road Traffic Management | 175 Table 79. Description of the buttons Parameters Function Introduction Brightness Adjust the Brightness of the scene. Contrast Adjust the color and light contrast. Adjust the Saturation of the image. Higher Saturation makes colors appear Saturation more "pure"...
- Page 176 Intelligent Traffic Camera User Manual | 3 - Road Traffic Management | 176 Table 80. Description of the options Parameters Function Introduction Select this option to automatically control the White LED Light based on the image. You can customize the sensitivity and delay time. Auto Light Control •...
- Page 177 Intelligent Traffic Camera User Manual | 3 - Road Traffic Management | 177 Parameters Function Introduction Select this option to customize the Start Time and End Time of the White LED Light. Customize Users can customize the brightness, levels 1-100 are available, the higher the Brightness level, the brighter the White LED Light.
- Page 178 Intelligent Traffic Camera User Manual | 3 - Road Traffic Management | 178 Parameters Function Introduction Switch to Night Mode according to the parameters of night mode. Night Note: There are several parameters such as Exposure Level, Maximum Exposure Time and IR-CUT Interval, etc, associated with the mode. Switch to Day Mode according to the parameters of day mode.
- Page 179 Intelligent Traffic Camera User Manual | 3 - Road Traffic Management | 179 Parameters Function Introduction Select this option to automatically adjust the strength of the Low-Beams LED, High-Beams LED and IR LED Supplement Light on the basis of the Zoom ratio. Auto Note: •...
- Page 180 Intelligent Traffic Camera User Manual | 3 - Road Traffic Management | 180 [Day/Night Parameters] Table 83. Description of the buttons Parameters Function Introduction Exposure Level Level 0~10 are available to meet your need. Minimum Shutter is the same as Maximum Exposure Time. Set the minimum Minimum Shutter Shutter to 1~1/100000s.
- Page 181 Intelligent Traffic Camera User Manual | 3 - Road Traffic Management | 181 Parameters Function Introduction Here you can customize your special demands for different time, then the Day mode and Night mode will switch automatically according to your settings. Advanced Schedule Mode [Exposure] Table 84.
- Page 182 Intelligent Traffic Camera User Manual | 3 - Road Traffic Management | 182 Parameters Function Introduction Auto Mode, Manual Mode and Schedule Mode are available. Auto Mode: The camera will adjust the brightness according to the light environment automatically. Manual Mode: The camera will adjust the brightness according to the value you set, you can set the exposure time from 1~1/100000s, the higher the value is, the brighter the image is.
- Page 183 BLC/WDR/HLC mode. Backlight Mode Note: • For more details about Milesight WDR on & off Video, you can click to the YouTube: https://www.youtube.com/watch?v=McoOL0Pyk0w • For more details about Milesight Ultra Low-light Video Demo - HLC, you can click to the YouTube: https://www.youtube.com/watch?v=ly8uKWbii40...
- Page 184 Intelligent Traffic Camera User Manual | 3 - Road Traffic Management | 184 Table 86. Description of the buttons Parameters Function Introduction To restore white objects, removed color distortion caused by the light of the environment. Mode: General and Schedule are available. General Mode: Select a white balance mode as required •...
- Page 185 Intelligent Traffic Camera User Manual | 3 - Road Traffic Management | 185 Parameters Function Introduction Schedule Mode: Select this option that you can customize the schedule to enable/ disable above modes. [Image Enhancement] Table 87. Description of the buttons Parameters Function Introduction There is an option to turn On/Off the IR LED.
- Page 186 YouTube: https://www.youtube.com/watch?v=-vynrami51s Better image effect in foggy weather. Note: Defog Mode • For more details about Milesight Defog, you can click to the YouTube: https://www.youtube.com/watch?v=a9od7Trao4U Digital Image Stabilisation Decrease the blur and shakiness of the image. [Display] Table 88. Description of the buttons...
- Page 187 Intelligent Traffic Camera User Manual | 3 - Road Traffic Management | 187 Parameters Function Introduction There are three options available, you can select one to meet your need. Off: Keep the image in normal direction. Corridor Mode Clockwise 90°: Rotate the image by 90° clockwise. Anticlockwise90°: Rotate the image by 90°...
- Page 188 Intelligent Traffic Camera User Manual | 3 - Road Traffic Management | 188 Table 89. Description of the buttons Parameters Function Introduction Video Stream Enable to set OSD for primary stream and secondary stream. Font Size Smallest/Small/Medium/Large/Largest/Auto are available for title and date. Font Color Enable to set different color for title and date.
- Page 189 Intelligent Traffic Camera User Manual | 3 - Road Traffic Management | 189 Parameters Function Introduction Date Position Date display position on the image. Date Format The format of date. Copy to Other Streams Copy the settings to other streams. Privacy Mask Privacy mask enables to cover certain areas on the live video to prevent certain spots in the surveillance area from being viewed and recorded.
- Page 190 Users can select up to 8 key regions of a scene to transmit through separate streams for targeted preview and recording. By using Milesight ROI technology, more than 50% of bit rate can be saved and therefore less bandwidth demanded and the storage usage reduced. So according to this, you can set a small bit rate for high resolution.
- Page 191 Intelligent Traffic Camera User Manual | 3 - Road Traffic Management | 191 Parameters Function Introduction Enable Check the checkbox to enable the ROI function. Video Stream Choose the Video Stream. Enable/disable the selected ROI areas. Delete the selected ROI areas. Delete All Clear all areas you drew before.
- Page 192 Intelligent Traffic Camera User Manual | 3 - Road Traffic Management | 192 Table 92. Description of the buttons Parameters Function Introduction Enable Check on the checkbox to enable audio feature. Audio Mode Audio Input/Audio Output/Both Audio Input & Output are optional. Denoise: Set it as On/Off.
-
Page 193: Network
Intelligent Traffic Camera User Manual | 3 - Road Traffic Management | 193 Note: • The Audio mode and Audio Output are only for certain modules. • Only support ‘.wav’ audio files with codec type PCM/PCMU/PCMA, 64kbps or 128 kbps and no more than 500k. - Page 194 Intelligent Traffic Camera User Manual | 3 - Road Traffic Management | 194 Table 93. Description of the buttons Parameters Function Introduction Type: Static Type and DHCP Type are optional for user to get IPv4 address automatically or use fixed IP address. IPv4 Address: An address that used to identify a network camera on the network.
- Page 195 Enable: Start or stop using HTTPs. Port: Web GUI login port via HTTPS, the default is 443. HTTPs Note: For more details about how to use enable HTTPS access, please refer to https://milesight.freshdesk.com/a/solutions/articles/69000797384. Installed Certificate Attributes Upload and set the SSL certificate.
- Page 196 Intelligent Traffic Camera User Manual | 3 - Road Traffic Management | 196 Stream Main Stream http://username:password@IP:port/ipcam/mjpeg.cgi http://username:password@IP:port/ipcam/mjpegcif.cgi Secondary Stream Tertiary Stream http://username:password@IP:port/ipcam/mjpegthird.cgi RTSP Table 96. Description of the buttons Parameters Function Introduction RTSP Port The port of RTSP, the default is 554. Playback Port The port of playback, the default is 555.
- Page 197 Intelligent Traffic Camera User Manual | 3 - Road Traffic Management | 197 Parameters Function Introduction QoS DSCP The valid value range of the DSCP is 0-63. Save the configuration. Table 97. RTSP URL are as below: Stream Primary Stream rtsp://IP:RTSP Port/main Secondary Stream rtsp://IP:RTSP Port/sub...
- Page 198 DDNS allows you to access the camera via domain names instead of IP address. It manages to change IP address and update your domain information dynamically. You need to register an account from a provider. Note: For more details about how to set DDNS, please refer to https:// milesight.freshdesk.com/a/solutions/articles/69000643406.
- Page 199 Intelligent Traffic Camera User Manual | 3 - Road Traffic Management | 199 You can choose “ddns.milesight.com” as provider for DDNS. After enabling it, you can access the device via the URL “http://ddns.milesight.com/MAC address”. Table 99. Description of the buttons...
- Page 200 Function Introduction Save the configuration. Note: • Please do the Port Forwarding of HTTP Port and RTSP Port before you use Milesight DDNS. • Make sure that the internal and the external port number of RTSP are the same. Email Alarm video files can be sent to specific mail account through SMTP server.
- Page 201 Intelligent Traffic Camera User Manual | 3 - Road Traffic Management | 201 Parameters Function Introduction Password The password of the sender. Email Server The email server IP address or host name(e.g. smtp.gmail.com). The default TCP/IP port for SMTP is 25(not secured). For SSL/TLS port, it Email Port depends on the mail you use.
- Page 202 Intelligent Traffic Camera User Manual | 3 - Road Traffic Management | 202 Table 101. Description of the buttons Parameters Function Introduction FTP Type FTP and SFTP are optional. Server Address FTP/SFTP server address. The port of the FTP server. Generally it is 21. Server Port FTP Server Settings The port of the SFTP server.
- Page 203 Intelligent Traffic Camera User Manual | 3 - Road Traffic Management | 203 Parameters Function Introduction Multilevel If the storage path is more than two levels, enter Multilevel FTP Folder Name storage path here manually. Alarm Action Choose the default(YYYY-MM-DD) or customize the alarm action file File Name name.
- Page 204 Intelligent Traffic Camera User Manual | 3 - Road Traffic Management | 204 Note: About how to set up VLAN in switches, please refers to your switches user manual. PPPoE This camera supports the PPPoE auto dial-up function. The camera gets a public IP address by ADSL dial-up after the camera is connected to a modem.
- Page 205 Intelligent Traffic Camera User Manual | 3 - Road Traffic Management | 205 • The obtained IP address is dynamically assigned via PPPoE, so the IP address always changes after rebooting the camera. To solve the inconvenience of the dynamic IP, you need to get a domain name from the DDNS provider (e.g.
- Page 206 Intelligent Traffic Camera User Manual | 3 - Road Traffic Management | 206 Parameters Function Introduction Enable SNMP v3: Provide encryption and the HTTPS protocol must be enabled. Read Security Name: Input the name of Read Security Community. Level of Security: There are three levels available: (auth, priv), (auth, no priv) and (no auth, no priv).
- Page 207 Intelligent Traffic Camera User Manual | 3 - Road Traffic Management | 207 Bonjour Bonjour is based on Apple's multicast DNS service. Bonjour devices can automatically broadcast their service information and listen to the service information of other devices. If you don't know the camera information, you can use the Bonjour service on the same LAN to search for network camera devices and then to access the devices.
- Page 208 24hrs to activate the account for using live function. • For RTMP, since G.711 is not available for YouTube, so you can only play video from Milesight Network Camera with H.264 video coding and AAC audio coding on YouTube.
- Page 209 Intelligent Traffic Camera User Manual | 3 - Road Traffic Management | 209 To use this function, the settings in SIP page must be configured properly. There are two ways to get video through SIP, one is to dial the IP address directly, the other is account registration mode.
- Page 210 Intelligent Traffic Camera User Manual | 3 - Road Traffic Management | 210 Table 103. Description of the buttons Parameters Function Introduction Start or stop using SIP. Enable Note: SIP supports Direct IP call. Choose to use Enable mode or Disable mode. Enable mode means to use SIP Register Mode with register account.
- Page 211 Intelligent Traffic Camera User Manual | 3 - Road Traffic Management | 211 Parameters Function Introduction Enable Audio in SIP Call Enable/disable audio in SIP call. Max Call Duration The max call duration when use SIP. Status SIP registration status. Display “Unregistered” or “Registered” . [Alarm Phone List] Table 104.
- Page 212 Intelligent Traffic Camera User Manual | 3 - Road Traffic Management | 212 Table 105. Description of the buttons Parameters Function Introduction Enable White List Number Filter When enabled, only the designated phone number or IP address can visit Phone Type: Phone Number(Call by phone number) & Direct IP Call. Phone Number/IP Address: Including the phone number or IP address on the white list.
-
Page 213: Storage
Intelligent Traffic Camera User Manual | 3 - Road Traffic Management | 213 Table 106. Description of the buttons Parameters Function Introduction Enable: Enable/disable the Push Message function Push Event Type: You can click to choose the types of Events' message which will be pushed to M-sight Pro App as shown below: Push Message Settings Here you can choose whether to enable or disable camera ONVIF function. - Page 214 Intelligent Traffic Camera User Manual | 3 - Road Traffic Management | 214 Note: Before you start: • To configure record settings, please make sure that you have the network storage device within the network or the SD card inserted in your camera. •...
- Page 215 SMB/CIFS is selected. Note: • Up to 5 NAS disks can be connected to the camera. • For more details about how to use NAS on Milesight Network Camera, please refer to https://milesight.freshdesk.com/a/solutions/ articles/69000797902.
- Page 216 Intelligent Traffic Camera User Manual | 3 - Road Traffic Management | 216 Table 108. Description of the buttons Parameters Function Introduction Enable Recycle Enable/Disable Recycle Storage, if you enable this option, it will delete the files when the free Storage disk space reaches a certain value.
- Page 217 Intelligent Traffic Camera User Manual | 3 - Road Traffic Management | 217 Parameters Function Introduction Copy the schedule area to another date. Schedule Settings Select all schedule. Clear all schedule. Save the configuration. Note: SD Card or NAS are available. Snapshot Settings Table 109.
- Page 218 Intelligent Traffic Camera User Manual | 3 - Road Traffic Management | 218 Parameters Function Introduction Enable Timing Snapshot: Check the checkbox to enable the Timing Snapshot function Interval: Set the snapshots interval, input the number and choose the unit(millisecond, second, minute, hour, day).
- Page 219 Intelligent Traffic Camera User Manual | 3 - Road Traffic Management | 219 Parameters Function Introduction Clear all schedule. Save the configuration. Explorer Files will be seen on this page when they are configured to save into SD card or NAS. You can set time schedule every day for recording videos and save video files to your desired location.
-
Page 220: Event
Motion Detection Note: For more details about how to set motion detection, please refer to https:// milesight.freshdesk.com/a/solutions/articles/69000643423. Settings steps are shown as follows: Step1: Check the checkbox to enable the motion detection. Step2: Check the check box to enable the motion analysis. - Page 221 Intelligent Traffic Camera User Manual | 3 - Road Traffic Management | 221 Parameters Function Introduction When Motion Analysis is enabled, the moving region will turn yellow so that the user can know exactly where the motion occurred. Note: Only support when HTTP is selected in Live View. Enable Motion Analysis Click the button, the motion in the area will be detected.
- Page 222 Intelligent Traffic Camera User Manual | 3 - Road Traffic Management | 222 Table 111. Description of the buttons Parameters Function Introduction Normal Mode and Advanced Mode are available for the option. When Advanced Detection Mode Mode is selected, users can configure up to 4 detection regions and sensitivity for each detection region.
- Page 223 Intelligent Traffic Camera User Manual | 3 - Road Traffic Management | 223 Parameters Function Introduction Copy the schedule area to another date. Select all schedule. Clear all schedule. [Alarm Action] Step6: Set alarm action; Table 113. Description of the buttons...
- Page 224 Intelligent Traffic Camera User Manual | 3 - Road Traffic Management | 224 Parameters Function Introduction Duration: Selected the duration time of alarm. 5s/10s/15s/20s/25s/30s are available. Record Linkage: Save alarm recording files into SD Card or NAS or Upload the recording files via FTP.
- Page 225 Intelligent Traffic Camera User Manual | 3 - Road Traffic Management | 225 [Basic Settings] Table 114. Description of the buttons Parameters Function Introduction Audio Alarm will be triggered when the thresholds reaches to a certain Alarm Threshold value from 0 to 100. Audio Sample Value The current value of the audio sample.
- Page 226 Intelligent Traffic Camera User Manual | 3 - Road Traffic Management | 226 Refer to the table Table 3 (page 85) for the meanings of the items, here will not repeat again. External Output [Normal Status Settings] Please set the Normal Status firstly, when the Current Status is different with Normal Status, it will lead to the alarm.
- Page 227 Intelligent Traffic Camera User Manual | 3 - Road Traffic Management | 227 [Manual External Output] You can set the manual external output. Table 115. Description of the buttons Parameters Function Introduction Manual Output Click to Start/Stop manual external output. External Output Action Time Manual Control/Customize/10 s/1 min./5 min./10 min.
- Page 228 Intelligent Traffic Camera User Manual | 3 - Road Traffic Management | 228 PTZ parameters are mainly include the Basic parameters, Auto Home, PTZ Limits, Initial Position(PTZ Bullet), Privacy Mask, Scheduled Tasks, Config Clear, RS485(Speed Dome), Wiper(Speed Dome). Basic [Basic] Table 117.
- Page 229 Intelligent Traffic Camera User Manual | 3 - Road Traffic Management | 229 Parameters Function Introduction If you enabled Preset Freezing, the live view of preset position will be showed directly instead of showing both the moving path to the position and Preset the live view.
- Page 230 Intelligent Traffic Camera User Manual | 3 - Road Traffic Management | 230 Table 118. Description of the buttons Parameters Function Introduction Zoom Status 2s/ 5s/ 10s/Always Open/ Always Close are available. Pan & Tilt Status 2s/ 5s/ 10s/Always Open/ Always Close are available. Preset Status 2s/ 5s/ 10s/Always Open/ Always Close are available.
- Page 231 Intelligent Traffic Camera User Manual | 3 - Road Traffic Management | 231 Table 119. Description of the buttons Parameters Function Introduction If the camera stop working for a longer time than predefined, the position of it will be recorded. And it will resume to the position after going back to the normal work from power off.
- Page 232 Intelligent Traffic Camera User Manual | 3 - Road Traffic Management | 232 Auto Home allows the PTZ camera to return to a predefined Home Position automatically after a period of latency time. Check the checkbox to enable the Auto Home mode. Table 120.
- Page 233 Intelligent Traffic Camera User Manual | 3 - Road Traffic Management | 233 Step1: Check the checkbox to enable the PTZ Limit function. Step2: Choose the limit mode as Manual limit or scanning limit. • Manual Limit: When Manual limit stops are set, you can operate the PTZ control panel manually only in the limited surveillance area.
- Page 234 Intelligent Traffic Camera User Manual | 3 - Road Traffic Management | 234 You can configure the Initial Position for PTZ cameras as a zero point. Step1: Click the PTZ control buttons as the Initial Position of the PTZ bullet, you can also call a defined preset and set it as the Initial Position.
- Page 235 Intelligent Traffic Camera User Manual | 3 - Road Traffic Management | 235 You can select the color type and mosaic type to use for the cover certain areas on the live video. The mosaic type can maintain the continuity of the picture and improve the visual effect.
- Page 236 Intelligent Traffic Camera User Manual | 3 - Road Traffic Management | 236 Parameters Function Introduction Type Select the type to use for the privacy areas, there are two types available: Mask and Mosaic. Drew an privacy area on the live video as needed. Clear the area you drew on the live video.
- Page 237 Intelligent Traffic Camera User Manual | 3 - Road Traffic Management | 237 Step4: Set the Task Recovery Time (from 5 to 720 seconds). You can set the time(a period of inactivity) before the PTZ camera starts the schedule and task details. Step5: Click button to save all the configurations.
- Page 238 Intelligent Traffic Camera User Manual | 3 - Road Traffic Management | 238 Note: This function is only for Speed Dome. Wiper Users can enable the wiper function in this interface, it will detect the rainwater through the rain gauge smart sensor, and then start the wiper to automatically wipe twice to clean the lens and get a clearer view.
- Page 239 Intelligent Traffic Camera User Manual | 3 - Road Traffic Management | 239 In the live view interface, it also supports manually enabling the wiper to wipe twice by clicking the wiper button or directly calling the preset 53. Note: •...
-
Page 240: Lpr
Intelligent Traffic Camera User Manual | 3 - Road Traffic Management | 240 Status Here you can see the status information for PTZ camera, including temperature and fan status. 3.7.5 LPR Settings The LPR function will automatically detect and capture license plate in real time and compares to a predefined list, then takes appropriate action such as generating an alert once the license plate is on the predefined black list. - Page 241 Intelligent Traffic Camera User Manual | 3 - Road Traffic Management | 241 • For more details about how to set ANPR solution, please refer to https:// milesight.freshdesk.com/a/solutions/articles/69000640021. • For more details about how to set LPR1, please refer to https:// milesight.freshdesk.com/a/solutions/articles/69000797908.
- Page 242 Intelligent Traffic Camera User Manual | 3 - Road Traffic Management | 242 Step1: Check the check box to enable the LPR detection function. Select country/ region to detect the license plate. [Image Settings] Step2: The LPR Night Mode supports the optimal LPR night recognition effect by adjusting different parameter levels.
- Page 243 Intelligent Traffic Camera User Manual | 3 - Road Traffic Management | 243 Note: The detection area can be drawn as an irregular quadrilateral, which greatly enhances the scene adaptability.
- Page 244 Intelligent Traffic Camera User Manual | 3 - Road Traffic Management | 244 Table 125. Description of the buttons Parameters Function Introduction Draw the screen to select the area interested, then click “Add” button to add the area, only four recognition areas can be added. You can edit the name of the area or delete the area in the list below.
- Page 245 Intelligent Traffic Camera User Manual | 3 - Road Traffic Management | 245 Parameters Function Introduction Processing Resolution Resolution of the stream for LPR analysis, including 1920*1280, 1280*720, 640*360, 320*176. (Only for LPR1, LPR2, LPR3 and LPR4) Always: in this mode, camera will always detect license plates. Detection Trigger Alarm Input: in this mode, camera will only detect license plates during Alarm Input is being triggered.
- Page 246 Intelligent Traffic Camera User Manual | 3 - Road Traffic Management | 246 Table 127. Description of the buttons Parameters Function Introduction Check the checkbox to enable LPR Message Post. It will push information to Enable LPR Message Post some third-party devices or software that are compatible with ours. Post Type Information can be pushed by RTSP, TCP or HTTP.
- Page 247 Intelligent Traffic Camera User Manual | 3 - Road Traffic Management | 247 Table 128. Description of the buttons Parameters Function Introduction Copy the schedule area to another date. Select all schedule. Clear all schedule. Advanced In the interface, you can set display information on snapshot of license plate recognition, and also customize the file name of snapshots which are uploaded via FTP or Email or stored on local LPR Picture File Path.
- Page 248 Intelligent Traffic Camera User Manual | 3 - Road Traffic Management | 248 [Snapshot OSD] Table 129. Description of the buttons...
- Page 249 Intelligent Traffic Camera User Manual | 3 - Road Traffic Management | 249 Parameters Function Introduction Smallest/Small/Medium/Large/Largest are available for OSD information. Font Size Note: Snapshot OSD font size and Image OSD font size are corresponded. Enable to set different colors for OSD information. Font Color Note: Snapshot OSD font color and Image OSD font color are corresponded.
- Page 250 Intelligent Traffic Camera User Manual | 3 - Road Traffic Management | 250 Parameters Function Introduction Customize the OSD content. You can set OSD Information as shown below: When license plate is recognized and the alarm is triggered, the snapshot OSD Information of license plate recognition will show as below: [Snapshot File Name]...
- Page 251 Intelligent Traffic Camera User Manual | 3 - Road Traffic Management | 251 Table 130. Description of the buttons Parameters Function Introduction “-”, “_” and Space are available for File Name Separator format. Separator The default separator is “-”. You can customize the snapshot file name according to items chosen. Item of File Name Each time when an item is checked, the list will add the item row, including the item name and sorting operation.
- Page 252 Intelligent Traffic Camera User Manual | 3 - Road Traffic Management | 252 Note: You need to check at least one item. For example, you can choose items, separator and items sorting as below:...
- Page 253 Intelligent Traffic Camera User Manual | 3 - Road Traffic Management | 253 Once license plate is recognized, and the snapshot will be uploaded via FTP or Email or stored on your local LPR Picture File Path. Then, You can see the snapshot file name which you customize as shown below: Full-snapshot Recognized successfully Full-snapshot Recognized failed...
- Page 254 Intelligent Traffic Camera User Manual | 3 - Road Traffic Management | 254 License plate snapshot Recognized successfully License plate snapshot Recognized failed Note: • If the item checked is not recognized successfully, then the item will be displayed with the specific symbol “#”.
- Page 255 Intelligent Traffic Camera User Manual | 3 - Road Traffic Management | 255 When adding the license plates, you can also define the ID card number for the license plate, when the camera identifies these license plates and recognizes the attached ID card number, it will send the ID card number to your parking system through the Wiegand protocol, and then your system can respond based on the received information, such as access control.
- Page 256 Intelligent Traffic Camera User Manual | 3 - Road Traffic Management | 256 Parameters Function Introduction Select the license plate type as black or white, enter the ID Card number and license plate, click the “Add” button, the license plate will be added successfully. Add License Plate You can add a csv form with the license plate you want to add, click the "Browse"...
- Page 257 Intelligent Traffic Camera User Manual | 3 - Road Traffic Management | 257 Parameters Function Introduction Click the “Edit” button to customize a rule. And then set the license plate to Schedule Mode and choose a custom schedule rule that can configure the license plate as Black List or White List at different Schedule Rules times.
- Page 258 Intelligent Traffic Camera User Manual | 3 - Road Traffic Management | 258 Step1: Select the List Type. Check the check box to enable Black List/White List/Visitor mode. Step2: The corresponding alarm icon is triggered when the Black List/White List/Visitor vehicles passing by.
- Page 259 Intelligent Traffic Camera User Manual | 3 - Road Traffic Management | 259 White List:...
- Page 260 Intelligent Traffic Camera User Manual | 3 - Road Traffic Management | 260 Visitor:...
- Page 261 Intelligent Traffic Camera User Manual | 3 - Road Traffic Management | 261 [Schedule Settings] Step3: Schedule Settings. Table 132. Description of the buttons...
- Page 262 Intelligent Traffic Camera User Manual | 3 - Road Traffic Management | 262 Parameters Function Introduction Copy the schedule area to another date. Select all schedule. Clear all schedule. [Alarm Action] Step4: Set Alarm Action. Table 133. Description of the buttons...
- Page 263 Intelligent Traffic Camera User Manual | 3 - Road Traffic Management | 263 Parameters Function Introduction Duration: Selected the duration time of alarm. 5s/10s/15s/20s/25s/30s are available. Record Linkage: Save alarm recording files into SD Card or NAS or Upload the recording files via FTP.
- Page 264 Intelligent Traffic Camera User Manual | 3 - Road Traffic Management | 264 Settings steps are shown as follows: Step1: Select an event rule and enable it. Note: Up to 4 attribute event rules can be set. Step2: Set the Alarm Trigger as No-plate detection or other attributes. Note: •...
- Page 265 Intelligent Traffic Camera User Manual | 3 - Road Traffic Management | 265 Table 134. Parameters Function Introduction Copy the schedule area to another date. Select all schedule. Clear all schedule. Step4: Set the alarm actions.
- Page 266 Intelligent Traffic Camera User Manual | 3 - Road Traffic Management | 266 Table 135. Parameters Function Introduction Duration: Selected the duration time of alarm. 5s/10s/15s/20s/25s/30s are available. Record Linkage: Save alarm recording files into SD Card or NAS or Upload the recording files via FTP.
- Page 267 Address. And the camera name of the evidence camera can be customized. Note: • Up to 2 evidence cameras can be added. • Evidence camera captures primary stream picture by default. • For the Address, input evidence camera IP directly for Milesight camera, and snapshot URL is supported for third-party camera.
- Page 268 Intelligent Traffic Camera User Manual | 3 - Road Traffic Management | 268 Step3: The added evidence cameras will be listed in the interface, and users can edit these cameras separately. For the meaning of the buttons on the interface, please refer to the following table. Table 136.
- Page 269 Intelligent Traffic Camera User Manual | 3 - Road Traffic Management | 269 Parameters Function Introduction Edit the evidence camera. Delete the evidence camera. Step4: Set Capture Conditions. Currently it only supports the always option, which means that as long as the camera recognizes the license plate, the evidence camera will be triggered to capture a picture of the entire scene.
- Page 270 Intelligent Traffic Camera User Manual | 3 - Road Traffic Management | 270 Users can also search and export the image captured by evidence camera in the Smart Search interface.
- Page 271 In this page, you can configure the Traffic Detection of Radar model. Note: • Make sure your camera model is Milesight Radar AI LPR Cameras. • For more details, please refer to https://milesight.freshdesk.com/a/solutions/ articles/69000797257.
- Page 272 Intelligent Traffic Camera User Manual | 3 - Road Traffic Management | 272 Note: For users who are using the Radar AI LPR Camera for the first time, we recommend clicking the icon on the right to get the quick start guide.
- Page 273 Intelligent Traffic Camera User Manual | 3 - Road Traffic Management | 273 Step2: Fill in the road and installation information as shown below. Table 137. Description of the buttons Parameters Function Introduction Please fill in the number of lanes and the width of each lane according to the Number of Lanes &...
- Page 274 Intelligent Traffic Camera User Manual | 3 - Road Traffic Management | 274 Parameters Function Introduction After completing the above configuration, you can click the test button, then the above configuration will be automatically saved and the radar module will start to test with the maximum sensitivity and maximum detection range, which is not limited by the lane configuration.
- Page 275 For the Oncoming Vehicles: Trigger Distance For the Leaving Vehicles: Note: To ensure relative accuracy, users need to fill in the trigger distance after actual measurement, we recommend three ways to get the trigger distance. For more details, please refer to https:// milesight.freshdesk.com/a/solutions/articles/69000797257.
- Page 276 It supports the compatibility of radar data with back-end software via TCP, Radar Message Post Settings such as Milesight VMS Enterprise. After completing the Road&Installation Settings and Detection Settings, these information will be dynamically matched with the coordinate map in the lower left corner, and the detected target will also be dynamically displayed on the coordinate map, which is convenient for users to view the detection results in real time.
- Page 277 Intelligent Traffic Camera User Manual | 3 - Road Traffic Management | 277 Step5: Traffic OSD Settings. Customers can choose the information that needs to be displayed in Live Video and the display format, such as color, size, etc. Table 139. Description of the buttons...
- Page 278 Intelligent Traffic Camera User Manual | 3 - Road Traffic Management | 278 Parameters Function Introduction Users can choose the information they want to display in Live Video, including Show OSD Speed, Direction, Distance, Azimuth and Vehicle Counting. The font size and color of the OSD display, the default size is Medium; When Speed, Direction, and Vehicle Counting are checked, the Live View interface is displayed as shown in the figure below: Font Size&Font Color...
- Page 279 Intelligent Traffic Camera User Manual | 3 - Road Traffic Management | 279 [Enable Auto Export Logs]: Support regular automatic export of logs to FTP, Email and Storage.
- Page 280 Intelligent Traffic Camera User Manual | 3 - Road Traffic Management | 280 Step7: Traffic Alarm Threshold. Used to set traffic alarm thresholds, such as maximum and minimum speed limits, and vehicle counting limits. • OSD Blink You need to enable the corresponding OSD first as shown in Figure 19. And then when an alarm is triggered, the OSD information will flash and alarm, and you can also set the duration of the OSD Blink Time, which supports 1~10s.
- Page 281 Intelligent Traffic Camera User Manual | 3 - Road Traffic Management | 281 • Send Email You need to configure the correct email information first. And then when an alarm is triggered, it will send the detection result to the corresponding email as shown below, including the license plate number, event type, vehicle speed, etc.
- Page 282 Intelligent Traffic Camera User Manual | 3 - Road Traffic Management | 282 Smart Search The real-time detection results will be displayed on the right side of Smart Search page, including detected time, live screenshot, license plate and vehicle attributes. Step1: Select Plate Type and Vehicle Attributes or directly enter the license plate number and then select Start Time and End Time.
- Page 283 Intelligent Traffic Camera User Manual | 3 - Road Traffic Management | 283 Note: If the evidence feature is enabled, you can also click the arrow button on the snapshot to check the image captured by the evidence camera.
- Page 284 Intelligent Traffic Camera User Manual | 3 - Road Traffic Management | 284 Step3: Click the "Export" or “Export All” button to export the desired files in the current list to a local folder. Step4: Click the "Auto Export" button to automatically export the logs to FTP, Email or Storage.
-
Page 285: System
Intelligent Traffic Camera User Manual | 3 - Road Traffic Management | 285 3.7.6 System System Setting System info All information about the hardware and software of the camera can be checked on this page. Table 140. Description of the buttons Parameters Function Introduction Device Name... - Page 286 Intelligent Traffic Camera User Manual | 3 - Road Traffic Management | 286 Parameters Function Introduction License Status Show present license status, including Valid and Invalid (Only for LPR2, LPR3, Note: Only for LPR Series. LPR 4, LPR EU, LPR AP and LPR AM) MAC Address Media Access Control address.
- Page 287 Intelligent Traffic Camera User Manual | 3 - Road Traffic Management | 287 Parameters Function Introduction Current System Time Current date&time of the system. Time Zone: Choose a time zone for your location. Daylight Saving time: Enable the daylight saving time. Synchronize Mode: NTP server, Manual and Synchronize with computer time are optional.
- Page 288 Intelligent Traffic Camera User Manual | 3 - Road Traffic Management | 288 Note: Please make sure the camera has been correctly connected to your parking system through the Wiegand interface as shown below. • GND and A (Wet contact for External Output). •...
- Page 289 Intelligent Traffic Camera User Manual | 3 - Road Traffic Management | 289 Parameters Function Introduction Click “Edit” button to set three security questions for your camera. In case that you forget the password, you can click “Forget Password” button on login page to reset the password by answering three security questions correctly.
- Page 290 Intelligent Traffic Camera User Manual | 3 - Road Traffic Management | 290 Parameters Function Introduction Click “Add” button, it will display Account Management page. You can add an account to the camera by entering Admin Password, User Level, User Name, New Password, Confirm, and edit user privilege by clicking .
- Page 291 Intelligent Traffic Camera User Manual | 3 - Road Traffic Management | 291 Parameters Function Introduction Refresh Click to get latest status of user accessing to camera. Record serial number of user logging in camera. Note: • There are at most 30 records shown at the list. •...
- Page 292 Intelligent Traffic Camera User Manual | 3 - Road Traffic Management | 292 Parameters Function Introduction Filter type: Allow or deny access. Rule: Single, Network and Range are available. IP address: Input the address to get the access to the device. Access List Delete all the access list.
- Page 293 Intelligent Traffic Camera User Manual | 3 - Road Traffic Management | 293 Watermark Watermarking is an effective method to protect information security, realizing anti- counterfeiting traceability and copyright protection. Milesight Network cameras supports Watermark function to ensure information security. About...
- Page 294 Intelligent Traffic Camera User Manual | 3 - Road Traffic Management | 294 User can view some open source software licenses about the camera by clicking the View Licenses button. Logs The logs contain the information about the time and IP that has accessed the camera through web.
- Page 295 Intelligent Traffic Camera User Manual | 3 - Road Traffic Management | 295 Parameters Function Introduction Go to Input the number of logs’ page. Maintenance Here you can configure System Maintenance and Auto Reboot. System Maintenance Table 147. Description of the buttons...
- Page 296 Intelligent Traffic Camera User Manual | 3 - Road Traffic Management | 296 Parameters Function Introduction Software Version: The software version of the camera. Local Upgrade: Click the “Browse” button and select the upgrading file, then click the “Upgrade” button to upgrade. After the system reboots successfully, the update is done.
- Page 297 Intelligent Traffic Camera User Manual | 3 - Road Traffic Management | 297 Parameters Function Introduction Reset: Click “Reset” button to reset the camera to factory default settings. Keep the IP Configuration: Check this option to keep the IP configuration when resetting the camera.
- Page 298 Intelligent Traffic Camera User Manual | 3 - Road Traffic Management | 298 Set the date and time to enable Auto Reboot function, the camera will reboot automatically according to the customized time in case that camera overload after running a long time.
-
Page 299: Chapter 4. Parking Management
4.1 Product Description 4.1.1 Product Overview Milesight AI Outdoor Parking Management Pro Bullet Plus Camera is designed for outdoor parking management. High-accuracy outdoor parking space detection based on AI algorithm enables simultaneous detection and management of up to 100 parking spaces. -
Page 300: Benefits Of The Camera
Intelligent Traffic Camera User Manual | 4 - Parking Management | 300 4.1.4 Benefits of the Camera • Intelligent AI Parking Space Detection Algorithm High-accuracy outdoor parking space detection based on AI algorithm can realize simultaneous detection and management of up to 100 parking spaces with up to 98% detection accuracy, which greatly helps guide parking and realizes more efficient and intelligent parking management. -
Page 301: Installation Guide
Intelligent Traffic Camera User Manual | 4 - Parking Management | 301 third-party platforms. The network protocol such as HTTP(s) offers a wide range of options for data processing. The parking information is transmitted to the third-party parking system to help form a complete set of solutions, guide the driver to find the parking space quickly and realize intelligent management. - Page 302 Intelligent Traffic Camera User Manual | 4 - Parking Management | 302 3. Recommended installation height: 3.5m~10m. The higher the height, the less obscuring and the better the algorithm accuracy will be. • Example 1:...
- Page 303 Intelligent Traffic Camera User Manual | 4 - Parking Management | 303 Table 149. Parking Space Information Parking Space Size Lane Width Number of Parking Spaces 2.5mx5m 7x14=98 Table 150. Camera Information Number of Installation Installation Min. Distance to Cameras Height Angle Parking Space...
- Page 304 Intelligent Traffic Camera User Manual | 4 - Parking Management | 304 Note: The red car area is detected by Camera A, and the blue car area is detected by Camera B. Table 151. Parking Space Information Parking Space Size Lane Width Number of Parking Spaces 2.5mx5m...
- Page 305 Intelligent Traffic Camera User Manual | 4 - Parking Management | 305 Document Type Link https://www.milesight.com/static/file/en/download/datasheet/ipc/Milesight-AI- Datasheet Outdoor-Parking-Management-Pro-Bullet-Plus-Camera-Datasheet-en.pdf https://www.milesight.com/static/file/en/download/user-manual/ipc/Milesight- Quick Start Guide Network-Camera-Quick-Start-Guide.pdf 4.2 Configuration Flow The configuration flow of AI Outdoor Parking Management Camera is shown in the following figure.
- Page 306 Intelligent Traffic Camera User Manual | 4 - Parking Management | 306 Configuration Description Reference Accessing from IP address, web Accessing the Network Camera browser and Milesight back-end Assigning an IP Address (page 12) software are available. After login the camera, you can Video (page 33) Configure Basic Parameters adjust the video/image/audio/network parameters as needed.
- Page 307 Assigning an IP Address The Network Camera must be assigned an IP address to be accessible. The default IP address of Milesight network cameras is 192.168.5.190. You can also change the IP address of the camera via Smart Tools or browser. Please...
- Page 308 Step2: Start Smart Tools, click the IPC Tools page, then enter the device information, such as IP address, MAC address, Status, Port number, Netmask, and Gateway, then all related Milesight network camera in the same network will be displayed. Details are shown as the figure below;...
- Page 309 Intelligent Traffic Camera User Manual | 4 - Parking Management | 309 Select single camera: Select multiple cameras:...
- Page 310 Intelligent Traffic Camera User Manual | 4 - Parking Management | 310 Step4: If the selected camera shows "Inactive" in the status bar, click "Activate" to set the password when using it for the first time. You can also set the security questions when activating the camera in case that you forget the password (You can reset the password by answering three security questions correctly).
- Page 311 Intelligent Traffic Camera User Manual | 4 - Parking Management | 311 Step6: By double clicking the selected camera or the browser of interested camera, you can access the camera via web browser directly. The Internet Explorer window will pop up. More usage of Smart Tools, please refer to the Smart Tools User Manual.
- Page 312 Click “Advanced”, and then click “IP settings”--> “IP address”--> “Add”. In the pop-up window, enter an IP address that in the same segment with Milesight network camera ( e.g. 192.168.5.61, but please note that this IP address shall not conflict with the IP address on...
- Page 313 Intelligent Traffic Camera User Manual | 4 - Parking Management | 313 Step2: Start the browser. In the address bar, enter the default IP address of the camera:http://192.168.5.190; Step3: You need to set the password first when using it for the first time. And you can also set three security questions for your device after activation.
- Page 314 Android system. Both H.265&H.264 video codec are supported in Plugin-Free Mode for camera, and it will play the secondary stream by default. Note: • For more details about set plugin-free mode of Milesight camera, please refer to https:// milesight.freshdesk.com/a/solutions/articles/69000643388.
- Page 315 Intelligent Traffic Camera User Manual | 4 - Parking Management | 315 4.5 Live View Live Video After logging in the network camera web GUI successfully, user is allowed to view live video as follows. Table 155. Description of the buttons Parameter Description Click to access the live view page.
- Page 316 Intelligent Traffic Camera User Manual | 4 - Parking Management | 316 Parameter Description Display the user name and click to logout. Choose the stream (Primary/Secondary/Tertiary) to show on the current video window. Choose the options (Hide Detection Region/Parking Space Detection) to hide/display detection region on the current video window.
- Page 317 Intelligent Traffic Camera User Manual | 4 - Parking Management | 317 Parameter Description When enabled, you can zoom in a specific area of video image with your mouse wheel. Digital Zoom Manually trigger Camera Alarm Output. Manual Output Click to display images at a window size. Window Size Click to display images at full-screen.
- Page 318 Intelligent Traffic Camera User Manual | 4 - Parking Management | 318 4.6 Playback Playback Click to enter playback interface. In this part, you can search and playback the recorded video files stored in SD cards or NAS. The Playback interface is as below: Step1: Click the “Search”...
- Page 319 Intelligent Traffic Camera User Manual | 4 - Parking Management | 319 Step2: The timeline displays the video files for the day and show different colors according to selected record type. Drag the progress bar with the mouse to locate the exact playback point as needed.
- Page 320 Intelligent Traffic Camera User Manual | 4 - Parking Management | 320 Table 156. Description of the buttons Parameter Description Search the recorded videos by record type ( All/General/ Basic Event). The timeline will show different colors according to selected record type as below: Adjust the speed of video playback.
- Page 321 Intelligent Traffic Camera User Manual | 4 - Parking Management | 321 Parameter Description Click to take a snapshot. Snapshot Click to start/stop recording. Start/Stop recording Click to zoom on/off . Digital Zoom Full Screen. Full Screen Time narrow/expand. Time Expand/Narrow 4.7 Settings 4.7.1 Media Video...
- Page 322 Intelligent Traffic Camera User Manual | 4 - Parking Management | 322 Secondary Stream Settings Tertiary Stream Settings...
- Page 323 Intelligent Traffic Camera User Manual | 4 - Parking Management | 323 Table 158. Description of the buttons Parameters Function Introduction General & Event are available only for Primary Stream. General refers to continuous record video, while Event includes events that can trigger alarms, such as Motion, Exception, LPR and so on.
- Page 324 Intelligent Traffic Camera User Manual | 4 - Parking Management | 324 Parameters Function Introduction Transmitting bits of data per second, this item is optional only if you select the H.265/ H.264 Bit Rate Set the bitrate to 16~16384 Kbps. The higher value corresponds to the higher video quality, and the higher bandwidth is required as well.
- Page 325 Intelligent Traffic Camera User Manual | 4 - Parking Management | 325 [Image Adjustment] Table 159. Description of the buttons Parameters Function Introduction Brightness Adjust the Brightness of the scene. Contrast Adjust the color and light contrast. Adjust the Saturation of the image. Higher Saturation makes colors appear Saturation more "pure"...
- Page 326 Intelligent Traffic Camera User Manual | 4 - Parking Management | 326 Parameters Function Introduction Adjust the Sharpness of image. Higher Sharpness sharps the pixel boundary Sharpness and makes the image looks “more clear”. 2D DNR Adjust the noise reduction level. 3D DNR Restore brightness, contrast and saturation to default settings.
- Page 327 Intelligent Traffic Camera User Manual | 4 - Parking Management | 327 Parameters Function Introduction Switch to Day Mode according to the parameters of night mode. Note: There are several parameters such as Exposure Level, Maximum Exposure Time and IR-CUT Interval, etc, associated with the mode. Select this option to automatically switch the Day/Night Mode based on the image.
- Page 328 Intelligent Traffic Camera User Manual | 4 - Parking Management | 328 [Day/Night Parameters] Table 162. Description of the buttons Parameters Function Introduction Exposure Level Level 0~10 are available to meet your need. Minimum Shutter is the same as Maximum Exposure Time. Set the minimum Minimum Shutter Shutter to 1~1/100000s.
- Page 329 Intelligent Traffic Camera User Manual | 4 - Parking Management | 329 Parameters Function Introduction Here you can customize your special demands for different time, then the Day mode and Night mode will switch automatically according to your settings. Advanced Schedule Mode [Exposure] Table 163.
- Page 330 Intelligent Traffic Camera User Manual | 4 - Parking Management | 330 Parameters Function Introduction Auto Mode, Manual Mode and Schedule Mode are available. Auto Mode: The camera will adjust the brightness according to the light environment automatically. Manual Mode: The camera will adjust the brightness according to the value you set, you can set the exposure time from 1~1/100000s, the higher the value is, the brighter the image is.
- Page 331 BLC/WDR/HLC mode. Backlight Mode Note: • For more details about Milesight WDR on & off Video, you can click to the YouTube: https://www.youtube.com/watch?v=McoOL0Pyk0w • For more details about Milesight Ultra Low-light Video Demo - HLC, you can click to the YouTube: https://www.youtube.com/watch?v=ly8uKWbii40...
- Page 332 Intelligent Traffic Camera User Manual | 4 - Parking Management | 332 Table 165. Description of the buttons Parameters Function Introduction To restore white objects, removed color distortion caused by the light of the environment. Mode: General and Schedule are available. General Mode: Select a white balance mode as required •...
- Page 333 Intelligent Traffic Camera User Manual | 4 - Parking Management | 333 Parameters Function Introduction Schedule Mode: Select this option that you can customize the schedule to enable/ disable above modes. [Image Enhancement] Table 166. Description of the buttons Parameters Function Introduction There is an option to turn On/Off the IR LED.
- Page 334 YouTube: https://www.youtube.com/watch?v=-vynrami51s Better image effect in foggy weather. Note: Defog Mode • For more details about Milesight Defog, you can click to the YouTube: https://www.youtube.com/watch?v=a9od7Trao4U Digital Image Stabilisation Decrease the blur and shakiness of the image. [Display] Table 167. Description of the buttons...
- Page 335 Intelligent Traffic Camera User Manual | 4 - Parking Management | 335 Parameters Function Introduction There are three options available, you can select one to meet your need. Off: Keep the image in normal direction. Corridor Mode Clockwise 90°: Rotate the image by 90° clockwise. Anticlockwise90°: Rotate the image by 90°...
- Page 336 Intelligent Traffic Camera User Manual | 4 - Parking Management | 336 Parameters Function Introduction Enable to set different colors for display information background on screen. You can set different colors for font and background of image , then the image OSD will show as below: Background Color Show Video Title...
- Page 337 Intelligent Traffic Camera User Manual | 4 - Parking Management | 337 Table 169. Description of the buttons Parameters Function Introduction Enable Check the check box to enable the Privacy Mask function. Type Select the type to use for the privacy areas, there are two types available: Mask and Mosaic. Drew an privacy area on the live video as needed.
- Page 338 Intelligent Traffic Camera User Manual | 4 - Parking Management | 338 By using Milesight ROI technology, more than 50% of bit rate can be saved and therefore less bandwidth demanded and the storage usage reduced. So according to this, you can set a small bit rate for high resolution.
- Page 339 Intelligent Traffic Camera User Manual | 4 - Parking Management | 339 • You can set a low bit rate. For example, you can set a bit rate with 512Kbps and a resolution with 1080P, then you can see the image quality of ROI is more clear and fluent than the other region.
- Page 340 Intelligent Traffic Camera User Manual | 4 - Parking Management | 340 Parameters Function Introduction Denoise: Set it as On/Off. When you set the function on, the noise detected can be filtered. Encoding: G.711-ULaw, G.711-ALaw, AAC LC, G.722 and G.726 are available Audio Bit Rate: The function is available only for AAC LC, and supports up to 48kbps.
- Page 341 Intelligent Traffic Camera User Manual | 4 - Parking Management | 341 4.7.2 Network Basic TCP/IP Table 172. Description of the buttons Parameters Function Introduction Type: Static Type and DHCP Type are optional for user to get IPv4 address automatically or use fixed IP address. IPv4 Address: An address that used to identify a network camera on the network.
- Page 342 Intelligent Traffic Camera User Manual | 4 - Parking Management | 342 Parameters Function Introduction IPv6 Mode: Choose different modes for IPv6: Manual/Route Advertisement/ DHCPv6 IPv6 Address: IPv6 Address used to identify a network camera on the network IPv6 IPv6 Prefix: Define the prefix length of IPv6 address IPv6 Default Gateway: The default router IPv6 address Maximum Transmission Unit.
- Page 343 Enable: Start or stop using HTTPs. Port: Web GUI login port via HTTPS, the default is 443. HTTPs Note: For more details about how to use enable HTTPS access, please refer to https://milesight.freshdesk.com/a/solutions/articles/69000797384. Installed Certificate Attributes Upload and set the SSL certificate.
- Page 344 Intelligent Traffic Camera User Manual | 4 - Parking Management | 344 Table 175. Description of the buttons Parameters Function Introduction RTSP Port The port of RTSP, the default is 554. Playback Port The port of playback, the default is 555. Playback Port Note: Port 0 means closing playback function.
- Page 345 Intelligent Traffic Camera User Manual | 4 - Parking Management | 345 Note: • DSCP refers to the Differentiated Service Code Point; and the DSCP value is used in the IP header to indicate the priority of the data. • A reboot is required for the settings to take effect. UPnP Universal Plug and Play (UPnP) is a networking architecture that provides compatibility among networking equipment, software and other hardware devices.
- Page 346 Note: For more details about how to set DDNS, please refer to https:// milesight.freshdesk.com/a/solutions/articles/69000643406. You can choose “ddns.milesight.com” as provider for DDNS. After enabling it, you can access the device via the URL “http://ddns.milesight.com/MAC address”. Table 178. Description of the buttons...
- Page 347 Display DDNS running status. Save the configuration. Note: • Please do the Port Forwarding of HTTP Port and RTSP Port before you use Milesight DDNS. • Make sure that the internal and the external port number of RTSP are the same.
- Page 348 Intelligent Traffic Camera User Manual | 4 - Parking Management | 348 Table 179. Description of the buttons Parameters Function Introduction Enable Check the checkbox to enable Email function. User Name The sender's name. It is usually the same as the account name. Sender Email Address Email address to send video files attached emails.
- Page 349 Intelligent Traffic Camera User Manual | 4 - Parking Management | 349 Parameters Function Introduction Alarm Snapshot File Name: Default(YYYY-MM-DD) /MM-DD-YYYY/ DD- MM-YYYY/ Add prefix/ Overwrite with the base file name/ Customize are available. Snapshot Settings Timing Snapshot File Name: Default(YYYY-MM-DD) /MM-DD-YYYY/ DD- MM-YYYY/ Add prefix/ Overwrite with the base file name/ Customize are available.
- Page 350 Intelligent Traffic Camera User Manual | 4 - Parking Management | 350 Table 180. Description of the buttons Parameters Function Introduction FTP Type FTP and SFTP are optional. Server Address FTP/SFTP server address. The port of the FTP server. Generally it is 21. Server Port FTP Server Settings The port of the SFTP server.
- Page 351 Intelligent Traffic Camera User Manual | 4 - Parking Management | 351 Parameters Function Introduction Multilevel If the storage path is more than two levels, enter Multilevel FTP Folder Name storage path here manually. Alarm Action Choose the default(YYYY-MM-DD) or customize the alarm action file File Name name.
- Page 352 Intelligent Traffic Camera User Manual | 4 - Parking Management | 352 Note: About how to set up VLAN in switches, please refers to your switches user manual. PPPoE This camera supports the PPPoE auto dial-up function. The camera gets a public IP address by ADSL dial-up after the camera is connected to a modem.
- Page 353 Intelligent Traffic Camera User Manual | 4 - Parking Management | 353 • The obtained IP address is dynamically assigned via PPPoE, so the IP address always changes after rebooting the camera. To solve the inconvenience of the dynamic IP, you need to get a domain name from the DDNS provider (e.g.
- Page 354 Intelligent Traffic Camera User Manual | 4 - Parking Management | 354 Parameters Function Introduction Enable SNMP v3: Provide encryption and the HTTPS protocol must be enabled. Read Security Name: Input the name of Read Security Community. Level of Security: There are three levels available: (auth, priv), (auth, no priv) and (no auth, no priv).
- Page 355 Intelligent Traffic Camera User Manual | 4 - Parking Management | 355 Bonjour Bonjour is based on Apple's multicast DNS service. Bonjour devices can automatically broadcast their service information and listen to the service information of other devices. If you don't know the camera information, you can use the Bonjour service on the same LAN to search for network camera devices and then to access the devices.
- Page 356 24hrs to activate the account for using live function. • For RTMP, since G.711 is not available for YouTube, so you can only play video from Milesight Network Camera with H.264 video coding and AAC audio coding on YouTube.
- Page 357 Intelligent Traffic Camera User Manual | 4 - Parking Management | 357 To use this function, the settings in SIP page must be configured properly. There are two ways to get video through SIP, one is to dial the IP address directly, the other is account registration mode.
- Page 358 Intelligent Traffic Camera User Manual | 4 - Parking Management | 358 Table 182. Description of the buttons Parameters Function Introduction Start or stop using SIP. Enable Note: SIP supports Direct IP call. Choose to use Enable mode or Disable mode. Enable mode means to use SIP Register Mode with register account.
- Page 359 Intelligent Traffic Camera User Manual | 4 - Parking Management | 359 Parameters Function Introduction Enable Audio in SIP Call Enable/disable audio in SIP call. Max Call Duration The max call duration when use SIP. Status SIP registration status. Display “Unregistered” or “Registered” . [Alarm Phone List] Table 183.
- Page 360 Intelligent Traffic Camera User Manual | 4 - Parking Management | 360 Table 184. Description of the buttons Parameters Function Introduction Enable White List Number Filter When enabled, only the designated phone number or IP address can visit Phone Type: Phone Number(Call by phone number) & Direct IP Call. Phone Number/IP Address: Including the phone number or IP address on the white list.
- Page 361 Intelligent Traffic Camera User Manual | 4 - Parking Management | 361 Table 185. Description of the buttons Parameters Function Introduction Enable: Enable/disable the Push Message function Push Event Type: You can click to choose the types of Events' message which will be pushed to M-sight Pro App as shown below: Push Message Settings Here you can choose whether to enable or disable camera ONVIF function.
- Page 362 Intelligent Traffic Camera User Manual | 4 - Parking Management | 362 Note: Before you start: • To configure record settings, please make sure that you have the network storage device within the network or the SD card inserted in your camera. •...
- Page 363 SMB/CIFS is selected. Note: • Up to 5 NAS disks can be connected to the camera. • For more details about how to use NAS on Milesight Network Camera, please refer to https://milesight.freshdesk.com/a/solutions/ articles/69000797902.
- Page 364 Intelligent Traffic Camera User Manual | 4 - Parking Management | 364 Table 187. Description of the buttons Parameters Function Introduction Enable Recycle Enable/Disable Recycle Storage, if you enable this option, it will delete the files when the free Storage disk space reaches a certain value.
- Page 365 Intelligent Traffic Camera User Manual | 4 - Parking Management | 365 Parameters Function Introduction Copy the schedule area to another date. Schedule Settings Select all schedule. Clear all schedule. Save the configuration. Note: SD Card or NAS are available. Snapshot Settings Table 188.
- Page 366 Intelligent Traffic Camera User Manual | 4 - Parking Management | 366 Parameters Function Introduction Enable Timing Snapshot: Check the checkbox to enable the Timing Snapshot function Interval: Set the snapshots interval, input the number and choose the unit(millisecond, second, minute, hour, day).
- Page 367 Intelligent Traffic Camera User Manual | 4 - Parking Management | 367 Parameters Function Introduction Clear all schedule. Save the configuration. Explorer Files will be seen on this page when they are configured to save into SD card or NAS. You can set time schedule every day for recording videos and save video files to your desired location.
- Page 368 Motion Detection Note: For more details about how to set motion detection, please refer to https:// milesight.freshdesk.com/a/solutions/articles/69000643423. Settings steps are shown as follows: Step1: Check the checkbox to enable the motion detection. Step2: Check the check box to enable the motion analysis.
- Page 369 Intelligent Traffic Camera User Manual | 4 - Parking Management | 369 Parameters Function Introduction When Motion Analysis is enabled, the moving region will turn yellow so that the user can know exactly where the motion occurred. Note: Only support when HTTP is selected in Live View. Enable Motion Analysis Click the button, the motion in the area will be detected.
- Page 370 Intelligent Traffic Camera User Manual | 4 - Parking Management | 370 Table 190. Description of the buttons Parameters Function Introduction Normal Mode and Advanced Mode are available for the option. When Advanced Detection Mode Mode is selected, users can configure up to 4 detection regions and sensitivity for each detection region.
- Page 371 Intelligent Traffic Camera User Manual | 4 - Parking Management | 371 Parameters Function Introduction Copy the schedule area to another date. Select all schedule. Clear all schedule. [Alarm Action] Step6: Set alarm action; Table 192. Description of the buttons...
- Page 372 Intelligent Traffic Camera User Manual | 4 - Parking Management | 372 Parameters Function Introduction Duration: Selected the duration time of alarm. 5s/10s/15s/20s/25s/30s are available. Record Linkage: Save alarm recording files into SD Card or NAS or Upload the recording files via FTP.
- Page 373 Intelligent Traffic Camera User Manual | 4 - Parking Management | 373 [Basic Settings] Table 193. Description of the buttons Parameters Function Introduction Audio Alarm will be triggered when the thresholds reaches to a certain Alarm Threshold value from 0 to 100. Audio Sample Value The current value of the audio sample.
- Page 374 Intelligent Traffic Camera User Manual | 4 - Parking Management | 374 Refer to the table Table 3 (page 85) for the meanings of the items, here will not repeat again. External Output [Normal Status Settings] Please set the Normal Status firstly, when the Current Status is different with Normal Status, it will lead to the alarm.
- Page 375 Intelligent Traffic Camera User Manual | 4 - Parking Management | 375 [Manual External Output] You can set the manual external output. Table 194. Description of the buttons Parameters Function Introduction Manual Output Click to Start/Stop manual external output. External Output Action Time Manual Control/Customize/10 s/1 min./5 min./10 min.
- Page 376 Intelligent Traffic Camera User Manual | 4 - Parking Management | 376 98% detection accuracy, which greatly helps guide parking and realizes more efficient and intelligent parking management. Setting steps are as shown below: Step 1: Click the button to enable the Parking Space Detection. Step 2: You can click the button to enable the Parking Image Enhancement, which can help to ensure the detection of parking lots at night, providing 24/7 surveillance monitoring.
- Page 377 Intelligent Traffic Camera User Manual | 4 - Parking Management | 377 Parameters Function Introduction Level 1~10 are available, the default level is 5. The higher the sensitivity, the parking space will be judged to be occupied if it is slightly occupied for a while; the lower the sensitivity, the parking space needs to be occupied for a certain period of time before it is judged to be Occupancy Sensitivity occupied.
- Page 378 Intelligent Traffic Camera User Manual | 4 - Parking Management | 378 Note: The total number of parking spaces should be less than or equal to 100. Table 197. Description of the buttons Parameters Function Introduction The name of the detection area can be edited. Such as A1, A2, B1, B2. Area Name Note: Valid content: 1~10 digits or letters! Enter the number of parking spaces on the drawn detection area.
- Page 379 Intelligent Traffic Camera User Manual | 4 - Parking Management | 379 Parameters Function Introduction Define the distribution of parking spaces. Horizontal and Vertical are available. For example, the distribution of Area A is Horizontal, and the distribution of Area B is Vertical: Distribution Define the parking space numbering scheme and the starting numbers.
- Page 380 Intelligent Traffic Camera User Manual | 4 - Parking Management | 380 Step 6: After the configuration, the occupied parking spaces in the detection area will be covered with red to provide a more intuitive interface. And the parking information containing total number, occupied number and available number will be displayed on the interface.
- Page 381 Intelligent Traffic Camera User Manual | 4 - Parking Management | 381 Table 198. Description of the buttons Parameters Function Introduction Report Protocol Support to report the parking informations to specified HTTP URL. The HTTP URL format can be customized,for example: http://{ip}:{port}/api/ httpEvent?xxxxxx Enable Start or stop using HTTP.
- Page 382 Intelligent Traffic Camera User Manual | 4 - Parking Management | 382 [Parking Information transfer for Post Method] Camera will post the parking information data in JSON format in real time when it is triggered. The content will be sent is as follows: Trigger Post POST /post HTTP/1.1 User-Agent: httpclient...
- Page 383 Intelligent Traffic Camera User Manual | 4 - Parking Management | 383 "coordinate_y2": 220, "coordinate_x3": 3, "coordinate_y3": 330, "coordinate_x4": 13, "coordinate_y4": 330, "snapshot": "/9j/4AAQSkZJRgABAQAAAQABAAD/2wDFABALDA4MChAODQ4SERATGCgaGBY... (Image code)” Table 199. Sample of Value Description event Parking Space Detection The event name of the parking information data. The Device Name which can be configured on the System device Network Camera...
- Page 384 Intelligent Traffic Camera User Manual | 4 - Parking Management | 384 Sample of Value Description The snapshot of the event, depends on whether it is snapshot (Image code) configured to send together. Interval Post POST /post HTTP/1.1 User-Agent: httpclient Host: 192.168.2.24:1234 Content-Type: application/json Content-Length: 108615...
- Page 385 Intelligent Traffic Camera User Manual | 4 - Parking Management | 385 "occupancy": [1,0,0,1,0,1,1,0,1] "area_name": "C", "numbering_scheme": [11,10,9,8,7,6,5,4,3], "occupancy": [1,0,0,1,0,1,1,0,1]} "snapshot": "/9j/4AAQSkZJRgABAQAAAQABAAD/2wDFABALDA4MChAODQ4SERATGCgaGBY... (Image code)” Table 200. Sample of Value Description Parking Space event The event name of the parking information data. Detection The Device Name which can be configured on the device...
- Page 386 Intelligent Traffic Camera User Manual | 4 - Parking Management | 386 Sample of Value Description The status of parking space detection of the current occupancy [1,0,0,1,0,1,1,0,1] parking detection area, 1 indicates occupied and 0 indicates available. area_name The parking space detection area name. The parking space number of the current parking numbering_scheme [11,10,9,8,7,6,5,4,3]...
- Page 387 Intelligent Traffic Camera User Manual | 4 - Parking Management | 387 Parameters Function Introduction Device Name The device name can be customized. Product Model The product model of the camera. Hardware Version The hardware version of the camera. Software Version The software version of the camera can be upgraded.
- Page 388 Intelligent Traffic Camera User Manual | 4 - Parking Management | 388 Parameters Function Introduction Current System Time Current date&time of the system. Time Zone: Choose a time zone for your location. Daylight Saving time: Enable the daylight saving time. Synchronize Mode: NTP server, Manual and Synchronize with computer time are optional.
- Page 389 Intelligent Traffic Camera User Manual | 4 - Parking Management | 389 Parameters Function Introduction Allow anonymous viewing: Check the checkbox to enable visit from whom doesn’t Manage Privilege have account of the device. Click “Edit” button to set three security questions for your camera. In case that you forget the password, you can click “Forget Password”...
- Page 390 Intelligent Traffic Camera User Manual | 4 - Parking Management | 390 Parameters Function Introduction Click “Add” button, it will display Account Management page. You can add an account to the camera by entering Admin Password, User Level, User Name, New Password, Confirm, and edit user privilege by clicking .
- Page 391 Intelligent Traffic Camera User Manual | 4 - Parking Management | 391 Parameters Function Introduction Refresh Click to get latest status of user accessing to camera. Record serial number of user logging in camera. Note: • There are at most 30 records shown at the list. •...
- Page 392 Intelligent Traffic Camera User Manual | 4 - Parking Management | 392 Parameters Function Introduction Filter type: Allow or deny access. Rule: Single, Network and Range are available. IP address: Input the address to get the access to the device. Access List Delete all the access list.
- Page 393 Intelligent Traffic Camera User Manual | 4 - Parking Management | 393 Watermark Watermarking is an effective method to protect information security, realizing anti- counterfeiting traceability and copyright protection. Milesight Network cameras supports Watermark function to ensure information security. About...
- Page 394 Intelligent Traffic Camera User Manual | 4 - Parking Management | 394 User can view some open source software licenses about the camera by clicking the View Licenses button. Logs The logs contain the information about the time and IP that has accessed the camera through web.
- Page 395 Intelligent Traffic Camera User Manual | 4 - Parking Management | 395 Parameters Function Introduction Go to Input the number of logs’ page. Maintenance Here you can configure System Maintenance and Auto Reboot. System Maintenance Table 208. Description of the buttons...
- Page 396 Intelligent Traffic Camera User Manual | 4 - Parking Management | 396 Parameters Function Introduction Software Version: The software version of the camera. Local Upgrade: Click the “Browse” button and select the upgrading file, then click the “Upgrade” button to upgrade. After the system reboots successfully, the update is done.
- Page 397 Intelligent Traffic Camera User Manual | 4 - Parking Management | 397 Parameters Function Introduction Reset: Click “Reset” button to reset the camera to factory default settings. Keep the IP Configuration: Check this option to keep the IP configuration when resetting the camera.
- Page 398 Intelligent Traffic Camera User Manual | 4 - Parking Management | 398 Set the date and time to enable Auto Reboot function, the camera will reboot automatically according to the customized time in case that camera overload after running a long time.
- Page 399 Chapter 5. Services Milesight provides customers with timely and comprehensive technical support services. End-users can contact your local dealer to obtain technical support. Distributors and resellers can contact directly with Milesight for technical support. Technical Support Mailbox: support@milesight.com Web: http://www.milesight.com Online Problem Submission System: http://www.milesight.com/service/feedback.asp...
Need help?
Do you have a question about the TS2866-X4TPC and is the answer not in the manual?
Questions and answers