Table of Contents
Advertisement
Advertisement
Table of Contents

Subscribe to Our Youtube Channel
Related Manuals for Magellan eXplorist GC


Summary of Contents for Magellan eXplorist GC
-
Page 2: Important Safety Warnings
IMPORTANT SAFETY WARNINGS The Magellan eXplorist GC receiver is a navigation aid designed to assist you in arriving at your selected destination. When using the Magellan eXplorist GC receiver, these safety rules must be followed to prevent accidents that can result in injury or death to yourself or others: IN THE INTERESTS OF SAFETY, DO NOT USE THIS NAVIGATION DEVICE This device is not a car navigation system. -
Page 3: Federal Communication Commission Interference Statement
The Magellan eXplorist GC receiver must be installed and operated at a distance no closer then 8 inches (20 cm) from the user. - Page 4 Maximum operating temperature is 60°C/140°F. © 2010 MiTAC International Corporation. The Magellan logo, Magellan and Magellan eXplorist GC are registered trademarks of MiTAC International Corporation. All other trademarks and registered trademarks are property of their respective owners.
-
Page 5: Table Of Contents
Geocache Details ... 5 Waypoint Details ... 6 Keyboard ... 6 Icons ... 7 Navigating the Magellan eXplorist GC Receiver ... 8 The Main Menu ... 8 Accessing the Main Menu ... 8 Selecting an Function ... 8 The Map Screen ... 8 Accessing the Map Screen ... - Page 6 Changing the Number of Navigation Fields ... 12 Selecting Heading Up or North Up ... 12 Viewing the Details of Your Destination Waypoint ... 12 Viewing Waypoint Description ... 13 Canceling a Route ... 13 Viewing the Dashboard ... 13 Marking your Destination Geocache or Waypoint as a Favorite ...
- Page 7 Setting the Track Logging Intervals ... 23 Clearing Tracks Displayed on Map ... 23 Proximity Alarm Options ... 23 Setting the Proximity Distance for Alarm ... 23 Selecting the Alarm Sound ... 24 Turning the GPS Alarm On/Off ... 24 ...20...
- Page 8 Selecting the Map Datum ... 25 Selecting the North Reference ... 25 GPS Options ... 25 Turning GPS On/Off ... 25 Setting the GPS Position ... 25 Connectivity Options ... 26 Setting the Connectivity Mode ... 26 Memory Options ... 26 Viewing Memory Use ...
- Page 9 Turning Screen Capture On/Off ... 29 Capturing Screens ... 29 Viewing Saved Screen Captures ... 29 Diagnostics ... 29 Testing the Magellan eXplorist GC receiver ... 29 Owner Information ... 29 Entering Owner Details ... 29 Working with Geocaches ... 30 Installing Geocaches (Send to GPS) ...
-
Page 10: Magellan Explorist Gc Receiver
The beeper (audio output) is also found on the back in the upper left. Replacing the Batteries The Magellan eXplorist GC receiver uses two AA batteries (lithium, alkaline or rechargeable) which are installed from the back of the receiver. Turn the receiver over and turn the battery door retaining screw 1/4 turn counterclockwise. -
Page 11: Maintenance
Clear screen protectors are available at most electronic stores or anywhere cell phone accessories are sold. The ideal size screen protector for the Magellan eXplorist GC receiver would be 1” x 2” but larger sizes can be cut down. -
Page 12: Magellan Explorist Gc Screens
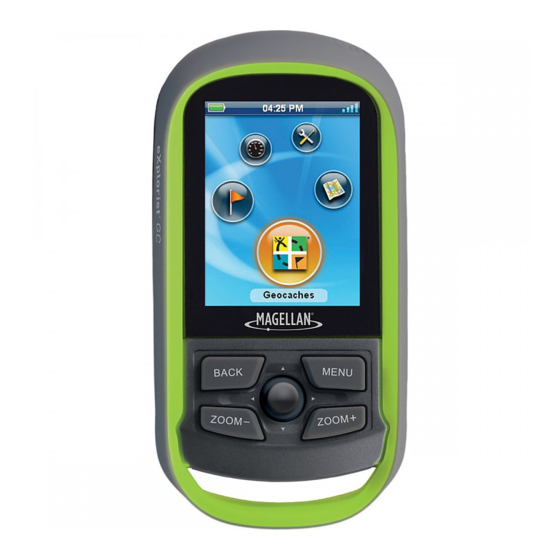
Magellan eXplorist GC receiver. The Main Menu Screen The Main Menu screen is the hub for all of the activities in the Magellan eXplorist GC receiver. From the Main Menu you can access the Map screen, Geocaching functions, Waypoint functions, the Dashboard and Tools for setting up your receiver to meet your requirements. -
Page 13: The Map Screen
Current Location . Normally the Map screen will display your current location against a map background. Your current location is displayed as an arrow pointing in the direction of your current heading or last heading if you are standing still. Pan Mode. -
Page 14: The Dashboard
The Dashboard can be used for navigating or accessing more information about your current trip. The Screen is split into two regions, the top displays information about your current route and the bottom provides customizable Nav Fields. The following items describe the elements of the Dashboard and ways to customize the screen. -
Page 15: Waypoint Details
Under the header bar is a details section that uses star ratings to indicate difficulty and terrain and a bar graph for size. To the right is the Geocache ID (GCID) identifier number and the date it was hidden. Scroll and highlight the buttons below to access additional information about the geocache. -
Page 16: Icons
Icons Geocache Found Not Found Favorite Not Attempted Needs Maintenance Associated Waypoints Travel Bug Pictures Description Hints Recent Logs... -
Page 17: Navigating The Magellan Explorist Gc Receiver
Accessing the Main Menu Power On: When turning the Magellan eXplorist GC receiver on, the Main Menu is the first screen displayed. Normal Operation: The Main Menu is the starting point for all operations. After entering a function (Map, Tools, etc.) press the BACK button to return to the previous screen. -
Page 18: Zooming In And Zooming Out
The Magellan eXplorist GC receiver also has a feature that is called Auto Zoom. When Auto Zoom is turned on and you are travelling to a geocache or a waypoint, the map scale is automatically set to the scale that will display your current position as well as your destination. -
Page 19: Go To A Waypoint While Panning
Turns off the display and other software features, but the GPS receiver remains tracking. Press the Power button to resume. Disables the keypad preventing accidently button presses. Hold the MENU button down until the pop-up window disappears to unlock. Turns the eXplorist GC receiver off. -
Page 20: Additional Options Menu Items While Routing
A trip is defined as a recording of your movement or track. This trip can then be viewed in the Magellan VantagePoint software and provides a permanent record of your travel. Starting Trip: Press MENU and highlight ‘Start Trip’. Press ENTER. The Trip Odometer and Trip Timer are reset to zero and, if turned off, track recording is turned on. -
Page 21: Resetting The Trip Odometer And Trip Timer
Pausing Trip: If you want to pause the trip to temporarily stop recording, press MENU and highlight ‘Pause Trip’. Press ENTER. Resume Trip: After pausing the trip, you can turn trip recording back on by pressing MENU and selecting ‘Resume Trip’. Ending Trip: When you have come to the end point of your trip, press MENU and select ‘Stop and Save Trip’. -
Page 22: Viewing Waypoint Description
3. The Waypoint Details screen is displayed for your destination waypoint. 4. Press BACK to return to the Map screen. Viewing Waypoint Description This is available only while travelling on a route to a waypoint or geocache. 1. Press MENU. 2. -
Page 23: Setting Destination Geocache As Found Or Not Found
Setting Destination Geocache as Found or Not Found This is available only while travelling on a route to a geocache. 1. Press MENU. 2. Highlight ‘Found’ or ‘Not Found’ and press ENTER. 3. You will be asked if you add comments. Select Yes or No. 4. -
Page 24: Selecting The Current Location Icon
Geocaches can be uploaded from www.geocaching.com or you can create your own geocache that you can share with others. There are two basic screens used in the Magellan eXplorist GC receiver for selecting and viewing your geocaches. The Geocache List displays all of the geocaches that are in your receiver and the Geocache Details displays useful information about a specific geocache you select. -
Page 25: Going To A Geocache From The Geocache List
Going to a Geocache from the Geocache List 1. While viewing the Geocache List, move the joystick up or down to scroll through the list. 2. With the desired geocache selected, move the joystick to the right. 3. Your current position and the geocache chosen is displayed on the Map screen and a route is active. -
Page 26: Sorting Geocaches In The Geocache List
Sorting Geocaches in the Geocache List 1. Press MENU and select ‘Sort & Search’ from the Options menu. 2. Use the joystick to highlight the “Sort By” button and press ENTER. 3. Use the joystick to highlight the criteria that you want the geocache list sorted by. 4. -
Page 27: Geocache Details Options Menu
Geocache Details Options Menu View Waypoints Found Not Found Need Maintenance Flag the geocache as being in need of maintenance and add Add a Field Note Edit My Last Log Delete My Last Log Delete the log file. Favorites Delete Dashboard Accessing the Dashboard 1. -
Page 28: Tools
Only some of the functions found in Tools have Options menus. They will be noted here for reference. Accessing the Tools Options 1. Press BACK until the Main Menu is displayed. 2. Use the joystick (L/R) to highlight the ‘Tools’ icon. 3. -
Page 29: Power Options
Power Options Set Suspend Timer To help conserve battery life you can set a time duration that puts the receiver into suspend mode automatically if no keys have been pressed. During suspend mode the receiver is in power save mode but continues to log your track and compute your current position. 1. -
Page 30: Selecting Time Format
Selecting Time Format 1. Access the Tools menu and select ‘Settings’. 2. Highlight ‘Date & Time’ and press ENTER. 3. Use the joystick to select the time format. 4. Press ENTER. 5. Press BACK. Setting the Time Zone 1. Access the Tools menu and select ‘Settings’. 2. -
Page 31: Selecting Poi (Points Of Interest) Icons To Be Displayed
Selecting POI (Points of Interest) Icons to be Displayed You can select what format POI icons are displayed on the Map screen. 1. Access the Tools menu and select ‘Settings’. 2. Highlight ‘Map Options’ and press ENTER. 3. Highlight the POI Icons field and press ENTER. 4. -
Page 32: Track Options
Proximity Alarm Options You can choose to have an audible alarm to play when you are near your destination or when you lose the GPS fix. Setting the Proximity Distance for Alarm 1. Access the Tools menu and select ‘Settings’. -
Page 33: Selecting The Alarm Sound
5. Press BACK. Turning the GPS Alarm On/Off 1. Access the Tools menu and select ‘Settings’. 2. Highlight ‘Proximity Alarm’ and press ENTER. 3. Highlight the ‘GPS Fix’ field and press ENTER. 4. Select ON or OFF. 5. Press BACK. Compass Options You can select the type of compass graphic to be used when viewing the compass from the Map screen or from the Dashboard. -
Page 34: Selecting The North Reference
Set GPS position provides a way to view map areas other then you present position. When setting GPS position, the GPS Sirf chip is disabled and the screen is set to the location you have select either by entering in a set of known coordinates or panning on the map. -
Page 35: Viewing Product Information/Eula/Copyright Information
1. Connect the eXplorist to your PC select "Connect To PC" when pop up appears on GPS 2. Double click onto my computer and browse to the "Magellan" drive letter and double click onto 3. You will see the folders containing your saved Geocaches and Waypoints select the Geocache... -
Page 36: Projecting And Saving A Waypoint From Your Current Location
3. The product information is displayed. To view the EULA, highlight the EULA field and press ENTER. To view the copyright information, highlight the Copyright filed and press ENTER. Trip Summary Viewing the Last Trip Summary Page 1. Access the Tools menu and select ‘Trip Summary’. 2. -
Page 37: Glossary Of Terms
9. Press MENU. 10. Select ‘Save’. Getting Started Viewing the Getting Started with Geocaching Page 1. Access the Tools menu and select ‘Getting Started’. 2. The “Getting Started with Geocaching” page is displayed. 3. Press BACK. Glossary of Terms Viewing the Glossary of Terms Page 1. -
Page 38: Testing The Magellan Explorist Gc Receiver
4. Press BACK when done. Diagnostics Testing the Magellan eXplorist GC receiver 1. Access the Tools menu and select ‘Diagnostics’. 2. Use the joystick to select the diagnostic test to be run (audio, video or keypad). -
Page 39: Installing Geocaches With 'Send To Gps' (List Page)
Send to GPS, Upload Field Notes, and transfer Pocket Queries. Your purchase of an eXplorist GC receiver comes with a 30 day free trial for a Geocaching.com premium membership*. A premium membership will enable the download of more than 20 unique attributes for each geocache, access to “members only”... -
Page 40: Installing Geocaches With 'Send To Gps' (Detail Page)
The Magellan Communicator The Magellan Communicator is used to communicate between geocaching.com and your Magellan GPS receiver. You can install the plug-in by using the steps above or by going to the Magellan web site as explained here. The ‘GPX eXchange File button is greyed out for non-premium users. -
Page 41: Installing Geocaches With Drag 'N Drop
4. On the Magellan Communicator page (www.magellangps.com/products/ map.asp?tab=0&PRODID=2301) select the Download button. 5. When the download is complete, run the Magellan Communicator file to install the drivers. (If you get a Security Warning, press ‘Run’ to continue.) 6. When the Installation Wizard is done installing the files, select ‘Finish’ to complete the installation. -
Page 42: Installing Pocket Queries From Vantagepoint
Installing Pocket Queries from VantagePoint VantagePoint is a software package from Magellan that is the perfect add-on for Magellan eXplorist GC receiver users that want to get the most from their receiver. To get your free copy of VantagePoint, go to http://www.magellangps.com/products/map.asp?tab=0&PRODID=1903... -
Page 43: Uploading Field Notes And Logs From Receiver
3. Under your status pane, select “Access Your Field Notes”. (http://www.geocaching.com/my/ fieldnotes.aspx) 4. Look for the Magellan Supported Devices and click on the link to upload your Field Notes. 5. Turn on your receiver and connect it to your PC with the USB cable. -
Page 44: Uploading Field Notes And Logs From Vantagepoint
6. VantagePoint launches geocaching.com in a new window. Click on the “Browse” button and go to the geocaches folder in the MAGELLAN directory. 7. Select the file named “newlogs.txt”. (Note: the newlogs.txt file contains all the field notes and logs your have created since the creation of the newlogs.txt file.) -
Page 45: Installing Geocaches To Geocaching.com With Vantagepoint
Using the Magellan eXplorist GC receiver you can create a geocache and submit it to geocaching.com using the Magellan VantagePoint software described under Installing Pocket Queries. Installing Geocaches to Geocaching.com with VantagePoint 1. Save a geocache to your GPS receiver. -
Page 46: Glossary Of Terms
Pocket Query. Benchmark Using your GPS receiver and/or written directions provided by NOAA's National Geodetic Survey (NGS), you can seek out NGS survey markers and other items that have been marked in the USA. See benchmark hunting for more details. - Page 47 Datum A datum is something used as a basis for calculating and measuring. In the case of GPS, datums are different calculations for determining longitude and latitude for a given location. Currently, Geocaching uses the WGS84 datum for all caches. Many maps still use NAD27, which can cause confusion if your GPS receiver is set to NAD27.
- Page 48 Ground Zero (GZ) The point where your GPS receiver shows that you have reached the cache location. At Ground Zero, you are zero feet (or zero meters) away from your destination.
- Page 49 NAD27 Stands for North American Datum 1927. The precursor to WGS84. Many maps still use the NAD27 datum, so always check before using a GPS receiver with a map. Pocket Query (PQ) A Premium Member feature, a Pocket Query is custom geocache search that you can have emailed to you on a daily or weekly basis.
- Page 50 Spoiler A spoiler is information that can give details away and ruin the experience of something. For example, telling someone the end of a movie before they see it. In geocaching, a spoiler gives away details of a cache location and can ruin the experience of the find. SWAG An acronym often referred to as standing for 'Stuff We All Get."...
- Page 51 WGS84 The most current geodetic datum used for GPS is the World Geodetic System of 1984 (WGS84). The significance of WGS84 comes about because GPS receivers rely on WGS84. Geocaching uses the WGS84 datum by default.
-
Page 52: Geocache Types
Wherigo Cache Wherigo is a toolset for creating and playing GPS-enabled adventures in the real world. By integrating a Wherigo experience, called a cartridge, with finding a cache, the geocaching hunt can be an even richer experience. Among other uses, Wherigo allows geocachers to interact with physical and virtual elements such as objects or characters while still finding a physical geocache container. - Page 53 GPS Adventures Maze Exhibit A GPS Adventures Exhibit Cache represents attendance at the GPS Adventures Maze Exhibit or a regional variation of this Exhibit. GPS Adventures Mazes are designed to teach people of all ages about GPS technology and geocaching through interactive science experiences.
Need help?
Do you have a question about the eXplorist GC and is the answer not in the manual?
Questions and answers