Table of Contents
Advertisement
Quick Links
3410330
ABBATTITORI/SURGELATORI DI TEMPERATURA
CELLULES DE REFROIDISSEMENT RAPIDE/CELLULES MIXTES
SCHNELLKÜHLER/SCHOCKFROSTER
BLAST CHILLERS/FREEZERS
ABATIDORES/CONGELADORES RAPIDOS DE TEMPERATURA
ISTRUZIONI ORIGINALI - MANUALE D'USO E INSTALLAZIONE
INSTRUCTIONS ORIGINALES - MANUEL D'UTILISATION ET D'INSTALLATION
URSPRÜNGLICHE BEDIENUNGSANLEITUNG - BEDIEN- UND INSTALLATIONSHANDBUCH
ORIGINAL INSTRUCTIONS - USE AND INSTALLATION MANUAL
INSTRUCCIONES ORIGINALES - MANUAL DE USO E INSTALACIÓN
Rev.2
11/2022
Advertisement
Table of Contents

Related Manuals for Sagi 51H Series


Summary of Contents for Sagi 51H Series
- Page 1 3410330 ABBATTITORI/SURGELATORI DI TEMPERATURA CELLULES DE REFROIDISSEMENT RAPIDE/CELLULES MIXTES SCHNELLKÜHLER/SCHOCKFROSTER BLAST CHILLERS/FREEZERS ABATIDORES/CONGELADORES RAPIDOS DE TEMPERATURA ISTRUZIONI ORIGINALI - MANUALE D’USO E INSTALLAZIONE INSTRUCTIONS ORIGINALES - MANUEL D’UTILISATION ET D’INSTALLATION URSPRÜNGLICHE BEDIENUNGSANLEITUNG - BEDIEN- UND INSTALLATIONSHANDBUCH ORIGINAL INSTRUCTIONS - USE AND INSTALLATION MANUAL INSTRUCCIONES ORIGINALES - MANUAL DE USO E INSTALACIÓN Rev.2 11/2022...
- Page 2 Leggere attentamente le avvertenze contenute nel presente libretto in quanto forniscono importanti indicazioni riguardanti la sicurezza, d’uso e di manutenzione. Conservare con cura questo libretto per ogni ulteriore consultazione dei vari operatori. Il costruttore si riserva il diritto di apportare modifiche al presente manuale, senza preavviso e responsabilità...
-
Page 3: Table Of Contents
INDEX SAFETY WARNINGS AND INFORMATION ................6 GENERAL INFORMATION ............................6 PERSONAL PROTECTIVE EQUIPMENT ........................7 GENERAL SAFETY ..............................8 GENERAL SAFETY RULES ............................8 LOADING AND DISCHARGING OF FOODSTUFFS FROM THE MACHINE ..............11 CLEANING AND MAINTENANCE OF THE MACHINE ....................11 WARRANTY TERMS AND EXCLUSIONS ................ - Page 4 PROGRAMS ................................38 BLAST-CHILLING ................................38 AUTOMATIC BLAST-CHILLING ............................39 BLAST-FREEZING ................................40 AUTOMATIC BLAST-FREEZING ............................41 SLOW COOKING ................................42 THAWING ..................................43 LEAVENING ................................... 44 SPECIAL CYCLES ................................46 BLAST-CHILLING/BLAST-FREEZING CYCLE ....................... 48 MODIFY PARAMETERS ..............................50 CYCLE INFO ................................... 51 RECIPE SAVING ................................
- Page 5 Foreword Read the following instructions, including the terms of warranty, before installing and using the machine. The installation, operation and maintenance manual provides users with useful information for using the machine correctly and safely. The instructions in this manual constitute a series of warnings whose purpose is to guarantee the performance of the machine and to prevent damage to persons, animals and property as a result of incorrect conditions of use.
-
Page 6: Safety Warnings And Information
SAFETY WARNINGS AND INFORMATION GENERAL INFORMATION It is necessary to be familiar with the terms and conventions used in the manual in order to allow safe use and understanding of the machine. Below is a list of symbols to identify the various types of warnings and dangers. WARNING –... -
Page 7: Personal Protective Equipment
Do not remove, tamper with or render the machine marking illegible. Destroy the marking when scrapping the machine. Keep these instructions carefully for reference by the various operators. PERSONAL PROTECTIVE EQUIPMENT Summary table of personal protective equipment (PPE) to be used during machine work. -
Page 8: General Safety
GENERAL SAFETY The machines are equipped with electrical and/or mechanical safety devices to protect workers and the machine itself. Tampering with the machine or having it operate without guards or safety devices is strictly prohibited. Do not make any modifications to the parts supplied with the equipment. Please note that the parts of the manual illustrating parts without guards are used to facilitate understanding. - Page 9 Danger of electrocution (displayed on electrical components with indication of voltage) (tab 2) Discontinued use • In case of prolonged non-use of the equipment, it is advisable to render it inoperative by disconnecting the power cable from the mains. Warnings for use and maintenance There are mainly mechanical, thermal and electrical hazards on the machine.
- Page 10 Reasonably foreseeable misuse Any use other than that specified in this manual is considered incorrect. Other types of work or activities are not permitted during machine operation that are to be considered as misuse or that may generally lead to safety hazards for operators and damage to equipment.
-
Page 11: Loading And Discharging Of Foodstuffs From The Machine
Residual risk Description of dangerous situation Operators may slip due to the presence of water or dirt on Slip or fall the floor. Burns/abrasion (e.g. heating Operators intentionally or unintentionally touch certain elements, cold pan, cooling components inside the machine without using protective fins and pipes) gloves. - Page 12 • Use a ladder with a guard-rail when working on equipment with accessibility from above. • Use suitable personal protective equipment. • Maintenance and inspection work, as well as machine overhauls, must only be carried out by specialised personnel or by customer service equipped with suitable personal protective equipment, tools and aids.
- Page 13 Spare parts and accessories • Only use original accessories and/or spare parts. The use of non-original accessories and/or spare parts will invalidate the manufacturer's warranty and may render the machine non-compliant with safety standards. Maintenance intervals • Maintenance intervals depend on the actual operating conditions of the machine and the environmental conditions (presence of dust, humidity, etc.), so no definite time intervals can be given.
-
Page 14: Warranty Terms And Exclusions
WARRANTY TERMS AND EXCLUSIONS If the purchase of this equipment includes warranty coverage, it is provided in accordance with local regulations and on the condition that the product is installed and used for the purposes intended and described in the corresponding equipment documentation. The warranty is applicable if the user has used only original spare parts and has performed maintenance in accordance with Angelo PO maintenance and user documentation made available in hard copy or electronic format. -
Page 15: General Information
GENERAL INFORMATION WARNING Refer to the chapter “Safety warnings and information”. INTRODUCTION The following provides information on the intended use of this equipment, its testing, and describes the symbols used (which mark and allow you to recognise the type of warning), definitions of terms used in the manual, and a range of useful information for equipment users. -
Page 16: Testing
List of rates shown on the rating plate: Fuse current Model Coolant type Manufacturer’s name and address Coolant q.ty CE mark Temperature grade Year of make Max hydraulic supply pressure Serial number Cabinet temperature Power insulation class Expanding fluid Electrical device casing protection WEEE Symbol rating Heater presence... -
Page 17: Copyrights
COPYRIGHTS This manual is intended exclusively for consultation by operators and may only be handed over to third parties with the permission of the company Angelo PO. STORING THE MANUAL The manual must be kept intact for the entire life of the machine up to its demolition. If the machine is transferred, sold, hired, leased or rented out, the manual must accompany the machine itself. -
Page 18: Responsibility
The person who has purchased the machine and/or who User operates and uses it (e.g. company, contractor, business). Electrocution Accidental discharge of electric current onto the human body. (tab 7) RESPONSIBILITY No liability is accepted for damage or malfunctions caused by: •... -
Page 19: Normal Use Of The Machine
NORMAL USE OF THE MACHINE WARNING Refer to the chapter “Safety warnings and information” CHARACTERISTICS OF PERSONNEL TRAINED IN ROUTINE USE OF THE MACHINE The user must make sure that those assigned to routine use of the machine are suitably trained and demonstrate competence in carrying out their tasks, taking care of their own safety and that of third parties. -
Page 20: Unpacking
UNPACKING Installation must be carried out by authorised and specialised personnel. After removing the packaging, ensure the integrity of the equipment and verify that all the parts or components are present and that the characteristics and state correspond to the specifications of the your order. -
Page 21: Dimensions
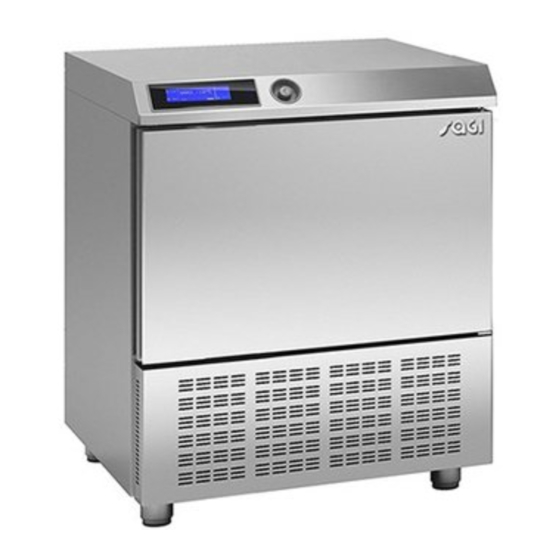
DIMENSIONS Please refer to the dimensions of your own appliance. 3410330_GB... -
Page 22: Technical Data
TECHNICAL DATA Please refer to the technical data of your own appliance. …51H …51M …101L …101S Model Gross weight Net weight Dimensions 929x795x750 747x795x900 802x851x1782 802x851x1782 Capacity Mass /cycle [kg] (+90°C ÷ +3°C) Mass /cycle [kg] (+90°C ÷ -18°C) Internal volume [l] Rails GN1/1 GN1/1... -
Page 23: Electrical Connection
ELECTRICAL CONNECTION The electrical connection and connection systems of the unit must comply with the regulations in force in the country of installation and must be carried out by qualified personnel authorised by the manufacturer. CAUTION: do not use adapters or extension cords for connection to the mains. -
Page 24: Water Connection
Fit an electrical plug (not supplied) of a type and capacity suitable for the maximum current absorbed by the unit or make a direct connection to an electrical panel. The guarantee will cease and the Manufacturer will not be liable for any damage to appliances or operators arising from the non-compliance with the and tamperings to any part of the appliance (electric, thermodynamic or hydraulic plant). -
Page 25: Suggestions On Filtration Systems
CAUTION: If the equipment is operated with feed water that does not have the characteristics listed in the above table, malfunctions and damage may occur for which the Manufacturer accepts no liability. CAUTION: The Manufacturer's warranty on parts damaged by a water supply that does not correspond to the characteristics listed in the above table may be invalidated. -
Page 26: Water Connection
WATER CONNECTION CAUTION: Make the connection in compliance with the relevant laws in force, using the appropriate and prescribed material. Connect the mains pipe with the connection pipe to the equipment, interposing a stopcock to interrupt the water supply when necessary. -
Page 27: Control And Safety Systems
CONTROL AND SAFETY SYSTEMS The following information concerns skilled staff only. ▪ Door micro-switch: Prevents the appliance from working when the door is open ▪ Overall protection fuses: Protect the whole power circuit from and short-circuits and overloads ▪ Compressor thermal relay: Operates in case of an overload or working failures ▪... -
Page 28: Refrigerant Material Safety Data Sheet
REFRIGERANT MATERIAL SAFETY DATA SHEET R452A: fluid components • pentafluoroethane (HFC 125) • tetrafluoropropene (HFC 1234yf) • difluoromethane (HFC 32) GWP = 2141 ODP = 0 1) Hazard identification Overexposure through inhalation may cause anaesthetic effects. Acute overexposure may cause cardiac rhythm disorders and sudden death. Product mists or sprays may cause ice burns of eyes and skin. - Page 29 disposal by treatment and/or final collection. Dispose of special waste in accordance with the laws in force with regard to protection of the environment in the country of the user. PROCEDURE FOR ROUGH DISMANTLING THE APPLIANCE All couintries have different legislation; provision laid down by the laws and the authorised bodies of the countries where the demolition takes place are therefore to be observed.
-
Page 30: Operation
OPERATION SETTING UP Before setting to operation thoroughly clean the cooling cabinet with a suitable detergent or sodium bycarb dissolved in lukewarm water. Clean the appliance inside to remove any condensate caused by the Manufacturer's final testing. a) Cooling and freezing speed depends on the following factors: b) container shape, type and material;... -
Page 31: Machine Loading
MACHINE LOADING Do not pile up foodstuffs to be cooled. Thickness should be lower than 50mm in negative quick cooling and lower than 80mm in positive quick cooling. 0.5 - 2 cm. Make sure air circulation is not hampered between food trays. The grid-holding frame (included in those models which include trolleys) is to be located at the centre of the cabinet. -
Page 32: Temperatures
TEMPERATURES Avoid leaving cooked products at room temperature. It is advisable to start the blast-chilling/blast-freezing program as soon as the preparation or cooking phase has ended, taking care to place the product in the unit at a temperature no lower than +70°C. You can place the cooked product in the unit even at very high temperatures, above +100°C, as long as the cabinet has been pre-cooled. -
Page 33: Control Panel
CONTROL PANEL Allows the core temperature of the product to quickly reach +3°C, reduces the natural evaporation of the food, retains humidity and prevents bacterial growth after cooking. The blast-chilling function lets you plan preparations in advance, increase productivity, preserve the taste, colour, aroma and weight and eliminate the risk of poisoning and waste. -
Page 34: Icons On The Touch Screen
ICONS ON THE TOUCH SCREEN Cabinet temperature and setpoint value (-40°C to +85°C) Needle temperature and setpoint value (-40°C to +85°C) Humidity and setpoint value Missing time and setpoint time (00:00 to 24h:00) Set fan speed (1 to 5) Core temperature of the product during probe thawing process and setpoint value Surface temperature during probe thawing process and setpoint value... -
Page 35: Warning Icons On The Touch Screen
Skip preheating phase button – During the preheating phase the machine arrives at the set setpoint without introducing humidity and without giving the start at the beginning of the cycle – When the temperature has been reached the following dialogue box appears (*) Button to view the phases following the current one –... -
Page 36: Main Cycle Icons
MAIN CYCLE ICONS Blast-chilling in progress Blast-freezing in progress Infinity cycle in progress Low temperature cooking cycle Thawing cycle Leavening cycle Preservation cycle Pasteurization cycle Drying cycle Yogurt cycle Chocolate cycle Sanitation cycle Defrost cycle 3410330_GB... -
Page 37: First Start-Up
FIRST START-UP At first start-up, the operator will be asked to choose the language. LANGUAGE SETTING Select the desired language. Select button to confirm and access the main menu. 3410330_GB... -
Page 38: Programs
PROGRAMS BLAST-CHILLING Cycle carried out through probe at the core or time-controlled, suitable for chilling foods up to +3°C, using a cabinet temperature varying from -5°C to 1°C. SOFT +3°C Cycle suitable for delicate products such as mousse, puddings, desserts, vegetables or foods that are not very thick Cycle carried out through probe at the core or time-controlled, suitable for chilling foods up to +3°C, using a cabinet temperature varying from -15°C... -
Page 39: Automatic Blast-Chilling
AUTOMATIC BLAST-CHILLING RED MEATS WHITE MEATS VEGETABLES MUSHROOMS LASAGNE SOUPS AND SAUCES RICE AND PASTA CROISSANT SHEET DOUGH Cycles developed by the company to facilitate the user in the blast-chilling process MOULDED LEAVENED PUDDINGS PANNA COTTA LEAVENED +3 LEAVENED +10 SHORT PASTRY FILLED PRODUCTS TART... -
Page 40: Blast-Freezing
BLAST-FREEZING Cycle carried out through probe at the core or time-controlled, suitable for chilling foods up to -18°C, using a cabinet temperature varying from 1°C to -40°C. SOFT -18°C Cycle suitable for leavened products, baked or cooked foods that are not very thick Cycle carried out through probe at the core or time-controlled, suitable for chilling foods up to -18°C, using a cabinet temperature... -
Page 41: Automatic Blast-Freezing
AUTOMATIC BLAST-FREEZING LASAGNE SOUPS AND SAUCES RICE AND PASTA MEATS FISH RAW FISH SUSHI COOKED VEGETABLES Cycles developed by the company to facilitate the user in the LEAVENED CAKES blast-freezing process COOKED TART PRE-COOKED TART COOKED BREAD RAW BREAD ICE CREAM -14°C ICE CREAM -18°C MOUSSE MONO MOULD MOUSSE... -
Page 42: Slow Cooking
SLOW COOKING List of cycles developed by the company for low temperature AUTOMATIC SLOW cooking, including a user-managed customised cycle with the COOKING possibility of making it a favourite. List of cycles developed by the company for low temperature AUTOMATIC cooking in vacuum cooking mode, including a user-managed VACUUM COOKING customised cycle with the possibility of making it a favourite. -
Page 43: Thawing
THAWING Thawing cycle carried out in time mode in compliance with HACCP requirements with no danger of high surface temperatures. The user TIME can modify the parameters pre-set by the company following HACCP risk assessment. Multi-point core probe thawing cycle. Correct positioning of the probe inside the product enables compliance with HACCP requirements. -
Page 44: Leavening
LEAVENING Cycle for the direct leavening process to facilitate the end user to be LEAVENING immediately operational using his/her experience. Cycle for the scheduled leavening process to facilitate the end user STOP to set up a process using his/her experience. Lets the user set the LEAVENING date and time of the end of the process, managing the following phases: Cooling –... - Page 45 PUFF LEAVENED PRODUCTS SMALL CROISSANT CROISSANT Cycles for the leavening process to facilitate the end user to PANETTONE be immediately operational using the company's experience. PIZZA ROLLS BREAD 3410330_GB...
-
Page 46: Special Cycles
SPECIAL CYCLES I.F.R. is the patented positive blast-chilling system that automatically optimises the process for any type of food, no matter the size and quantity, chilling its surface thanks to the use of a three-sensor multi- point needle probe. PRESERVATION Cold holding cycle for both positive and negative temperatures. - Page 47 NEEDLE PROBE Probe heating cycle to facilitate extraction from thick frozen foods. HEATING Defrost cycle in order to eliminate the ice formed on the fins of the DEFROST evaporating coil. 3410330_GB...
-
Page 48: Blast-Chilling/Blast-Freezing Cycle
BLAST-CHILLING/BLAST-FREEZING CYCLE Blast-chilling/blast-freezing cycles predefined by the manufacturer and activated from the blast-chilling/blast-freezing screen SOFT, HARD, HARD PLUS, INFINITY. When the desired cycle is selected, the machine starts to run. During execution of the cycle the parameters can be viewed and modified temporarily. - Page 49 At the end of the cycle because it has reached the core probe value or due to time, the machine will thermostat at the set preservation temperature until the user decides to stop the cycle. 3410330_GB...
-
Page 50: Modify Parameters
MODIFY PARAMETERS Parameters can be modified either by unit increments or macro increments using the scroll bar. Select the parameter to be modified. Once the change has been made, press OK to confirm and exit the change menu or cancel the modification request. 3410330_GB... -
Page 51: Cycle Info
CYCLE INFO Information on the current cycle can be displayed. 3410330_GB... -
Page 52: Recipe Saving
RECIPE SAVING Type on the SAVE icon and the controller will ask for the location where to save the program (P1, P2, etc.). If the user chooses to overwrite an existing program, the controller will ask for confirmation and will propose the existing name or its modification. Subsequently, accessing the favorite cycles icon, it is possible to view the list of available recipes. -
Page 53: Low Temperature Cooking Cycle
LOW TEMPERATURE COOKING CYCLE Low temperature cooking cycle with the possibility of setting a second phase for cold preservation or warm holding. When the desired cycle is selected, the machine waits for the second phase to be selected before starting to run. While the cycle is running, it is possible to view the set points and modify them. -
Page 54: Direct Leavening Cycle
DIRECT LEAVENING CYCLE Direct leavening is used for bread and pastry doughs by managing temperature, humidity and time. This process improves product quality and eliminates long waits for bakers; the doughs are in fact prepared and once ready are processed by the equipment through the selection of parameters such as temperature, humidity and ventilation. -
Page 55: Scheduled Leavening Cycle
SCHEDULED LEAVENING CYCLE Scheduled leavening is used for bread and pastry doughs by managing temperature, humidity and time. This process improves product quality and eliminates the night work of the bakers; the doughs are prepared during the day and once ready they are fed into the equipment. Scheduled leavening requires that the user set the time and day of the end of the cycle. -
Page 56: Timed Thawing Cycle
TIMED THAWING CYCLE The timed thawing process lets the user have food ready to be cooked. To start the cycle, set the ra and end day and confirm/modify air temperatures, times and ventilation for each of the 8 process steps. Bear in mind that the preset parameters for the 8 phases (cabinet temperature, ventilation and times) have been optimized in order to ensure that during a thawing process the food is treated in compliance with... -
Page 57: Probe Thawing Cycle
PROBE THAWING CYCLE The probe thawing process lets the user start the cycle by accepting the sequence of surface temperature, core probe and fan speed settings suggested by the company through 5 process steps. At the end of the process the machine will go into a cold holding phase. It is possible to save the cycle in favorites. -
Page 58: Special Cycles - I.f.r
SPECIAL CYCLES - I.F.R. The IFR is an innovative patented system of positive quick cooling which allows the cycle optimisation for each type of foodstuffs by preventing superficial freezing. Temperatures are detected by a three-sensor multipoint needle probe. The position inside the foodstuff is determined univocally by a reference disk located along the needle. -
Page 59: Settings
SETTINGS SERVICE Set the password “-19” to access the Service menu. PARAMETERS CONFIGURATION and other items can be selected in the SETUP menu. 3410330_GB... -
Page 60: Water Data Setting
WATER DATA SETTING The following parameters can be selected on the setting page so that the controller tells the user what maintenance to do to the atomiser nozzle in order to ensure correct water supply in processes where humidity is required. IMPORTANT Refer to the chapter “WATER CONNECTION”... -
Page 61: Haccp Data
HACCP DATA On the HACCP DATA page, you can view data on the cycles performed. DOWNLOAD HACCP DATA Insert a pen drive (not supplied) into the USB port at the bottom of the circuit board holder. Press the button Choose the option “HACCP DATA DOWNLOAD”. - Page 62 Select the date and time of the start of data logging using the -/+ buttons and confirm to proceed. Upon completion of the DOWNLOAD, the successful download will be indicated. You can now remove the pen drive. 3410330_GB...
-
Page 63: Maintenance
MAINTENANCE WARNING Refer to the chapter “Safety warnings and information” ROUTINE MAINTENANCE The following care operations must be carried out by an operator. IMPORTANT Problems resulting from a lack of care as described below will not be covered by the warranty. WARNING Before any operation, disconnect the equipment from the electrical mains. -
Page 64: Needle Probe Cleaning
NEEDLE PROBE CLEANING IMPORTANT Take particular care uses the needle probe, bearing in mind that it is a sharp object that must be handled with particular care when cleaning. We recommend cleaning the needle probe periodically to ensure its optimal operation. -
Page 65: Cleaning The Air Condenser
Do not aim jets of water directly at the unit to clean it, especially avoid the use of pressure lances. Do not rinse with sharp or abrasive tools, especially the evaporator. You may clean inside the evaporator after loosening the knobs and rotating the protection component. -
Page 66: Precautions In The Case Of Long Periods Of Inactivity
PRECAUTIONS IN THE CASE OF LONG PERIODS OF INACTIVITY Observe the following precautions during long periods of inactivity: • Disconnect the power supply; • Remove all food from the cabinet and/or drawers and clean the interior and accessories; • Clean the cabinet vigorously and all stainless steel surfaces using a cloth slightly soaked in Vaseline oil, so as to spread a protective film;... - Page 67 In some cases, faults can be resolved quickly and easily by following the instructions in the following troubleshooting guide: Type of anomaly Description Possible Causes Actions Problem with the internal clock battery. • Control interface battery is flat. Clock functions will not work correctly (e.g. Low battery level.
- Page 68 The blast-chiller is locked and only the Compressor overload. Compressor condenser fan remains in operation. Inadequate power supply. THERMAL SWITCH thermal switch Check for any obstructions in the (connector disconnected). tripped. condensing coil. Damaged compressor. CALL CUSTOMER SERVICE. Reposition the machine to ensure proper The working ambient ventilation.
- Page 69 • The cycle can be started in time mode if all points are faulty Call Service to restore full functionality. The machine restarts, signalling intervention of the alarm. The cycle restarts automatically as soon as No power. power is restored. Power system failure.
- Page 70 Level the machine by operating the Unit not level. adjustable feet. Water collection tray located Remove the water in the tray and adjust External noise/vibration with cycle ON. underneath the motor vibrating. the support guides. Condenser panel not secured. Secure the condenser panel. If the problem persists, call Service.
- Page 71 Once the above checks have been carried out, if the defect persists, contact Customer Service, remembering to indicate: • The nature of the defect • The machine code (1) • The serial number (5) 3410330_GB...
-
Page 72: Extraordinary Maintenance
EXTRAORDINARY MAINTENANCE The information and instructions in this section are reserved for specialised personnel, authorised to operate on the equipment components. VIDEO BOARD MAINTENANCE CHECKLIST Turn the mains switch OFF. Disconnect the plug. To access the video board and the encoder: Unscrew the two screws securing the board holder. - Page 73 When nozzle maintenance is complete, select settings, water data to reset the number of injections. 3410330_GB...
-
Page 74: Maintenance Of Panel Board
MAINTENANCE OF PANEL BOARD Turn the mains switch OFF. Disconnect the plug. To be able to access the electric picture: Mod. …51M Unhook the front guard, pulling it towards you. Remove the closing panel screws. Remove the closing panel. Remove the electrical panel locking screw. -
Page 75: Updating The Firmware (Software) Of The Electronic Circuit Boards
UPDATING THE FIRMWARE (SOFTWARE) OF THE ELECTRONIC CIRCUIT BOARDS Check the firmware version now present on the unit boards. • Select SETTINGS. • Check the firmware version now present on the unit boards. UPDATE PROCEDURE The procedure should only be performed by specialised personnel. To update the firmware (software) of the circuit boards, it is necessary to have a pen drive (FAT32 formatting) on which the controller's operating system files are stored (files with the extension eiml.ucjb and work.ucjb). -
Page 76: Condensing System Maintenance
CONDENSING SYSTEM MAINTENANCE Mod. …51M – …101L – …101S To access the condensing system, remove the rear protective grille, undoing the screws. Mod. …51H To access the condensing system, remove the side panel, undoing the screws. REPLACEMENT CORE PROBE Turn the connector anti-clockwise, completely unscrewing it so as to disconnect the core probe cable. -
Page 77: Further Information
FURTHER INFORMATION ERGONOMIC FEATURES CERTIFICATION The ergonomic characteristics of the product, which can influence the physical and cognitive interaction the user has with it, have been assessed and certified. In fact, a product with ergonomic features meets specific ergonomic requirements belonging to three different areas: polytechnical, biomedical and psychosocial (usability and satisfaction). -
Page 78: Recommended Handling Of Trays According To Their Weight
RECOMMENDED HANDLING OF TRAYS ACCORDING TO THEIR WEIGHT Try to position the trays in the cabinets with their weight as suggested by the images below. 3410330_GB... -
Page 79: Energy Consumption Chart (*)
ENERGY CONSUMPTION CHART (*) tab 1 …51H …51M …101L Modello - Model …101S Abbattitore/surgelatore Tipo di prodotto – Type of product Blast chiller and freezer Refrigerating fluid R452A 2141 Refrigerant load [kg] Program used for the blast-chilling process Hard Blast-chilling Program used for the freezing process Hard Freezing Unit... -
Page 80: Wiring Diagram Plate
WIRING DIAGRAM PLATE The electrical diagram is shown on the last page of the booklet. DESCRIPTION DESCRIPTION COMPRESSOR FUSE-HOLDER WITH UNIPOLAR FUSE CONDENSER FAN LIQUID LINE SOLENOID VALVE THERMOSTATED CONDENSER FAN MAGNETIC MICRO-SVWITCH GENERAL TERMINAL BOARD COMPARTMENT PROBE GENERAL TERMINAL BOARD EVAP./DEFROST PROBE GENERAL TERMINAL BOARD MULTIPOINT NEEDLE CORE PROBE...
Need help?
Do you have a question about the 51H Series and is the answer not in the manual?
Questions and answers