
Related Manuals for Fluke DewK


Summary of Contents for Fluke DewK
- Page 1 Test Equipment Depot - 800.517.8431 - 99 Washington Street Melrose, MA 02176 TestEquipmentDepot.com 1620A “DewK” Thermo-Hygrometer Getting Started Revision 671901...
- Page 2 Limited Warranty & Limitation of Liability Each product from Fluke Corporation, Hart Scientific Division (“Hart”) is warranted to be free from defects in material and workmanship under normal use and service. The warranty period is one year for the Thermo-Hygrometer. The war- ranty period begins on the date of the shipment.
-
Page 3: Table Of Contents
Table of Contents Before You Start ................1 Introduction......................1 Symbols.Used......................1 Safety.Information....................3 WARNINGS........................3 CAUTIONS........................4 Authorized.Service.Centers.................4 Specifications and Environmental Conditions ......7 Specifications......................7 Environmental.Conditions..................8 Quick Start ..................9 Unpacking......................9 Use.Proper.Care....................9 Learn.About.the.Features.and.Components............9 Install.the.Battery....................9 Connect.the.Sensor...................10 Connect.the.Power.Source................10 Switch.the.Power.On. - Page 4 Battery.......................17 Sensor.Configuration..................18 Power.Switch.....................18 Power.On.Self-Test.....................18 Display.Contrast....................18 Display.......................18 Alarm.Screen.....................18 Measuring......................19 Unit.of.Temperature...................19 Recording.Measurements.................19 Sensors......................19 Sensor.Accuracy......................19...
-
Page 5: Before You Start
1 Before You Start... - Page 6 1620A “DewK” Thermo-Hygrometer Getting Started Symbol Description Battery Complies with European Union directives Double Insulated Electric Shock Fuse PE Ground Hot Surface (Burn Hazard) Read the User’s Guide (Important Information) Canadian Standards Association OVERVOLTAGE (Installation) CATEGORY II, Pollution Degree 2 per IEC1010-1 refers to the level of Impulse Withstand Voltage protection provided.
-
Page 7: Safety.information
1 Before You Start Symbol Description The European Waste Electrical and Electronic Equipment (WEEE) Directive (2002/96/ EC) mark. Safety Information Use this instrument only as specified in this manual. Otherwise, the protection provided by the instrument may be impaired. The following definitions apply to the terms “WARNING” and “CAUTION”. “WARNING”... -
Page 8: Cautions
Keep the sensors clean and away from fluids and dust. ● Authorized Service Centers Please contact one of the following authorized Service Centers to coordinate service on your Hart product: Fluke Corporation, Hart Scientific Division 799 E. Utah Valley Drive American Fork, UT 84003-9775 Phone: +1.801.763.1600 Telefax: +1.801.763.1010 E-mail: support@hartscientific.com... - Page 9 1 Before You Start Phone: +86-10-6-512-3436 Telefax: +86-10-6-512-3437 E-mail: xingye.han@fluke.com.cn Fluke South East Asia Pte Ltd. Fluke ASEAN Regional Office Service Center 60 Alexandra Terrace #03-16 The Comtech (Lobby D) 118502 SINGAPORE Phone: +65 6799-5588 Telefax: +65 6799-5588 E-mail: antng@singa.fluke.com...
-
Page 11: Specifications And Environmental Conditions
10 Base-T, 100 Base-TX, IP, TCP, DHCP, Ping, HTTP, HTML Wireless Range 30 m (100 ft) typical unobstructed Enclosure The DewK may be wall-mounted (hardware included) or set on a benchtop Power 12 V DC from external 100-240 V AC power supply Battery Backup... -
Page 12: Environmental.conditions
1620A “DewK” Thermo-Hygrometer Getting Started Guide Environmental Conditions Although the instrument has been designed for optimum durability and trouble-free operation, it must be handled with care. The instrument should not be operated in an excessively dusty, dirty, or wet environment. Maintenance and cleaning recommendations can be found in the Maintenance section of the User’s Guide. -
Page 13: Quick Start
3 Quick Start Quick Start This section briefly explains the basics of setting up and operating your thermo-hygrometer. Unpacking Carefully unpack the thermo-hygrometer and inspect the instrument to make sure all compo- nents are present and in satisfactory condition. Verify that the following items are present: 1620A Thermo-Hygrometer ●... -
Page 14: Connect.the.sensor
1620A “DewK” Thermo-Hygrometer Getting Started Guide Connect the Sensor The sensor for channel 1 connects to the socket at the top-right, and the sensor for channel 2, if used, connects to the socket on the right side. Either sensor may be used with an optional exten- sion cable up to 100 feet (30 meters) in length. -
Page 15: Parts And Controls
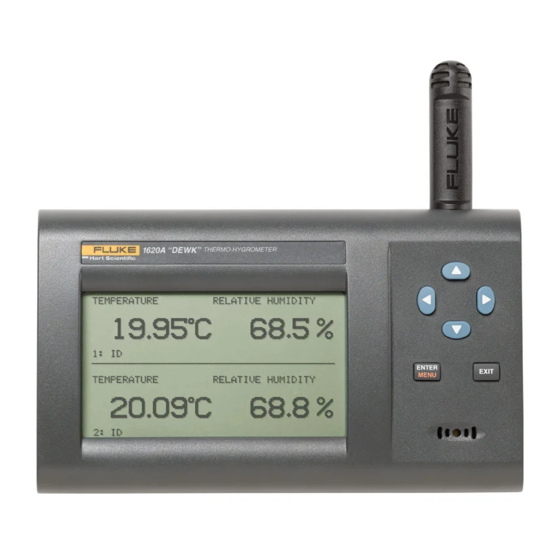
4 Parts and Controls Parts and Controls The functions of the various features of the thermo-hygrometer are described below. Front Panel The front panel buttons ENTER/MENU, Up/Down/Left/Right Arrows, and EXIT are used to select and alter the functions of the thermo-hygrometer (see Figure 1). Figure 1. -
Page 16: Top.panel
1620A “DewK” Thermo-Hygrometer Getting Started Guide ENTER/MENU - This button is used to select a menu item, to accept a choice, or save changes to a parameter. EXIT - This button is used to return from a menu or window or cancel changes to a parameter. -
Page 17: Back.panel
4 Parts and Controls Alarm Port - The alarm port allows external alarm indicators to be connected to the instrument and activated when an alarm event occurs. The port outputs 0V when inactive and 12V DC (up to 20 mA) when active. The jack accepts a 2.5 mm two-conductor subminature plug (Switch- craft #850). -
Page 18: Quick.buttons
1620A “DewK” Thermo-Hygrometer Getting Started Guide Battery Compartment - The battery compartment holds a 9V alkaline battery used as a backup power source to maintain continuous measurement during a power outage. Power Switch - The power switch turns the power on and off to the thermo-hygrometer, includ- ing power from the battery. -
Page 19: Accessories
9936A-LST License, LogWare III, site ● 9936A-UPG Software, 9936A Upgrade from v1.X ● 2633-RF Option, Factory Installed Wireless, Dewk (Model 2633-USB or Model 2633- ● 232 receiver required to communicate with this option) 2633-USB Wireless Modem, USB to wireless (requires 2633-RF) ●... -
Page 21: General Operation
5 General Operation General Operation This section explains basic operation of the thermo-hygrometer. Detailed operation of the thermo-hygrometer is explained in Sections 7 and 8 of the User’s Guide. Section 7 explains the menu structure and the functions available in the menu structure and Section 8 explains the communications interface for operating the thermo-hygrometer remotely. - Page 22 1620A “DewK” Thermo-Hygrometer Getting Started Guide Replace the battery cover. Replace the DC power cord and switch the power on. Used batteries must be disposed of properly. See the WARNINGS section at the beginning of this guide. Sensor Configuration The thermo-hygrometer can be used with one or two sensors of either type attached at either of the two ports.
- Page 23 5 General Operation Measuring The thermo-hygrometer will automatically make measurements on enabled channels at the set period when a sensor is attached. Channels are enabled using the CHANNEL SETTING func- tion in the CHANNEL menu. The measurement period is also set with this function. Unit of Temperature The thermo-hygrometer is capable of displaying temperature in Celsius (C) or Fahrenheit (F).
- Page 24 1620A “DewK” Thermo-Hygrometer Getting Started Guide First, consider that the sensor actually measures its own temperature, not necessarily the tem- perature of the air around it. Ideally, the sensor’s temperature will be the same as the air, but they might be different under less than ideal conditions.
- Page 25 5 General Operation...
Need help?
Do you have a question about the DewK and is the answer not in the manual?
Questions and answers