
Subscribe to Our Youtube Channel
Related Manuals for KAYO MOTOR KMB60 2021


Summary of Contents for KAYO MOTOR KMB60 2021
- Page 1 ZHEJIANG KAYO MOTOR CO., LTD. KAYO MOTO KMB60 SERVICE MANUAL 2021 WWW.KAYOMOTO.COM www.kayomoto.com...
- Page 2 ZHEJIANG KAYO MOTOR CO., LTD. This service manual is prepared by Zhejiang KAYO Motor Co., Ltd. No part of this publication may be deleted or altered without written permission. This publication includes the latest production information available before printing. www.kayomoto.com...
- Page 3 ZHEJIANG KAYO MOTOR CO., LTD. Zhejiang KAYO Motor Co., Ltd reserves the right to make changes at any time without notice and without incurring any obligation. PREFACE Thank you for choosing Kayo KMB pit motorcycle. We believe you and your child will enjoy your riding.
-
Page 4: Table Of Contents
ZHEJIANG KAYO MOTOR CO., LTD. CONTENTS Symbols and Technical Terms ....................... 8 General Safety ............................9 Component Locations .......................... 10 Serial Number ............................12 Chassis Number ..........................12 Engine number ..........................12 General Parameters ..........................13 Operating Controls ..........................14 Front brake ............................ - Page 5 ZHEJIANG KAYO MOTOR CO., LTD. Checking the front shock ......................23 Adjusting handlebar ........................24 Service Work ............................24 Raising your motorcycle ....................... 24 Front brake removal ........................24 Front shock removal ........................25 Removing triple clamp ........................25 Checking condition of steering head..................... 25 Greasing the steering head bearing ....................
- Page 6 ZHEJIANG KAYO MOTOR CO., LTD. Checking tyre air pressure ......................34 Checking rim spoke ........................35 Installing Engine ..........................36 Service and Adjust Work on Engine ....................36 Checking the bolts and nuts of cylinder head and cylinder ............36 Checking the valve clearance ......................
- Page 7 ZHEJIANG KAYO MOTOR CO., LTD. Overhauling right crankcase and clutch ..................57 Installing the right crankcase and clutch ..................59 Maintain the valve mechanism ..................... 59 Dismounting valve mechanism II ....................60 Overhauling the valve mechanism ....................61 Installing valve mechanism......................62 Magneto and electric start mechanism ..................
-
Page 8: Symbols And Technical Terms
ZHEJIANG KAYO MOTOR CO., LTD. Symbols and Technical Terms Requires professional operation. If you can’t handle it on your own, please send motorcycle to maintenance shop or consult Kayo after-sales service. → Page reference (more information is provided on the specified page). -
Page 9: General Safety
ZHEJIANG KAYO MOTOR CO., LTD. General Safety This model is designed for younger riders. We suggest parents and youngsters read this manual carefully. Wear a Helmet Helmets can reduce the number and severity of head injuries significantly while riding. We urge you always wear property safety gear such as helmets, gloves, boots. -
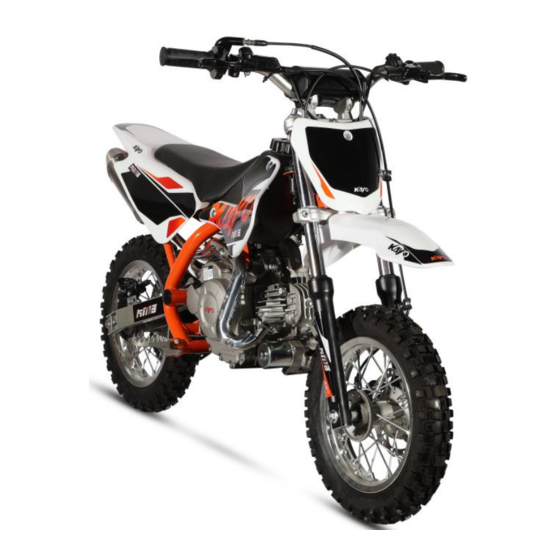
Page 10: Component Locations
ZHEJIANG KAYO MOTOR CO., LTD. Component Locations 10 11 Item Item Front fender Front shock Front panel Fuel tank Handle bar Carburetor Breather pipe Footrest www.kayomoto.com... - Page 11 ZHEJIANG KAYO MOTOR CO., LTD. Fuel tank cap Side stand Fuel tank tap Chain cover Chain slider Chain Front brake disc Chain cover Front brake caliper Rear sprocket Item Item Rear fender Rear brake disc Muffler Rear brake caliper seat...
-
Page 12: Serial Number
ZHEJIANG KAYO MOTOR CO., LTD. Lower raiser Serial Number Chassis Number Chassis number is engraved on the top of frame. Engine number Engine number is on the rear left of engine crankcase. www.kayomoto.com... -
Page 13: General Parameters
ZHEJIANG KAYO MOTOR CO., LTD. General Parameters motorcycle L*W*H(mm) 1250×600×810 wheelbase(mm) Dry weight(kg) Tyre size F 2.50-10;R 2.50-10 Seat height(mm) Ground clearance(mm) Fuel tank capacity(L) Engine Type Single-cylinder, 4-stroke, Air cooling, Full-auto Displacement 56.8cc Max. Power(kw/r/min) 1.6/7000 Max. Torque(N•m/r/min) 2.7/4000 Compression Ratio 8.5:1... -
Page 14: Operating Controls
ZHEJIANG KAYO MOTOR CO., LTD. Frame/shock/Brake/Wheel Frame Steel Front shock L=540mm,non-adjustable Rear shock L=245mm,non-adjustable Swing arm Steel Handlebar Alloy F 1.40×10,R 1.40×10;Alloy Hydraulic,disc Φ160mm Front brake Hydraulic,disc Φ160mm Rear brake Other part Air filter Sponge Operating Controls Front brake The front brake lever is used to slow or stop the motorcycle. -
Page 15: Throttle
ZHEJIANG KAYO MOTOR CO., LTD. Throttle The throttle controls speed. To speed up, rotate the grip toward you. To slow down, rotate the grip away from you. The throttle will automatically return to the closed position when you remove your handle. -
Page 16: Fuel Tap
ZHEJIANG KAYO MOTOR CO., LTD. Stop switch Fuel tap Fuel tap is under the left side of fuel tank. The tap is used to control the flow of fuel from thank to carburetor. Turning the fuel tap ON before starting engine allows the fuel to flow from tank to carburetor. -
Page 17: Side Stand
ZHEJIANG KAYO MOTOR CO., LTD. Side stand The side stand is used to support your motorcycle while parked. To operate, use your foot to lower the stand. Before riding, raise the stand. Preparation before Riding Advice to Beginners 1. Before ride, read this owner's manual especially “Operating Controls” and “Riding Instructions”. -
Page 18: Riding Instructions
ZHEJIANG KAYO MOTOR CO., LTD. Running in is an important phrase of your preparation work before using motorcycle. Good running-in can ensure great engine performance. Running-in phrase Maximum engine performance 0-2.5h 50%~75%, long time at one speed and rapidly accelerate is forbidden, 50%~75%, full throttle is allowed but not exceed 5-10s. -
Page 19: Starting Procedure
ZHEJIANG KAYO MOTOR CO., LTD. 7. Check the chain. 8. Check the rear sprocket, engine sprocket and drive chain. 9. Check the chain adjuster. 10. Check the tire surface. 11. Check tire pressure. 12. Check the battery power. 13. Check the front brake disc thickness. -
Page 20: Parking Cautions
ZHEJIANG KAYO MOTOR CO., LTD. Parking Cautions 1、Before stopping, slow down to avoid emergency braking. 2、Lower the side stand to support your motorcycle. 3、To stop motorcycle, shift into neutral before parking. Maintenance Schedule Every 30 hours Every 20 hours Every 10 hours/After every race Every 1 hour ●... - Page 21 ZHEJIANG KAYO MOTOR CO., LTD. ● ● ● Brake disc ● ● ● Brake hose ● ● ● Rear brake lever freeplay ● ● ● Frame ● ● ● Top of shock ● ● ● shock connecting rod ○ ●...
-
Page 22: Suspension System
ZHEJIANG KAYO MOTOR CO., LTD. Suspension System Checking the basic chassis setting with the rider’s weight. For optimal motorcycle riding characteristics and to avoid damage to swing arm, shock, rocker arm and frame, the basic settings of the suspension system must match the ride’s weight. -
Page 23: Measuring The Riding Sag
ZHEJIANG KAYO MOTOR CO., LTD. Measuring the riding sag 1. With another person holding the motorcycle vertical, the rider sits on the seat in a normal normal sitting position. 2. Measure the distance between rear axle and the fixed point, mark the value as “A3”. -
Page 24: Adjusting Handlebar
ZHEJIANG KAYO MOTOR CO., LTD. Adjusting handlebar procedure 1. Remove the pad and cover. 2. Loosen the screws on clamp. 3. Adjust the handlebar to required position. 4. Tighten the screws. Service Work Raising your motorcycle Raise your motorcycle firmly with a lift stand. -
Page 25: Front Shock Removal
ZHEJIANG KAYO MOTOR CO., LTD. Front shock removal Removal, Installation 1. Remove front brake. 2. Remove front wheel. 3. Remove the two bolts on front shock clamp. 4. Remove the front shock. 5. Installation is in the reverse order of removal. -
Page 26: Greasing The Steering Head Bearing
ZHEJIANG KAYO MOTOR CO., LTD. 1. Raise the motorcycle with a lift stand. 2. Move the handlebar to and fro to check if it works smoothly. 3. If it’s hard to move it, remove the triple clamps and check the steering head bearing. -
Page 27: Removing And Installing The Rear Shock
ZHEJIANG KAYO MOTOR CO., LTD. 1. Remove screws. 2. Remove the front fender. 3. Installation is in the reverse order of removal. Removing and installing the rear shock Check if there’s any damage on rear shock before removing. 1. Remove the screws which connect the shock and frame. -
Page 28: Cleaning And Maintenance The Air Filter
ZHEJIANG KAYO MOTOR CO., LTD. 1. Release the fixed hoop. 2. Take out the air filter. 3. Installation is in the reverse order of removal. Cleaning and maintenance the air filter Make inspection before maintenance. Contents as bellows: 1. Check if there is crack on the filter surface. -
Page 29: Removing The Muffler
ZHEJIANG KAYO MOTOR CO., LTD. Removing the muffler If the exhaust pipe rusts or get broken, replace it. High noisy or bad engine performance, replace it. About muffler cleaning, please consult to KAYO dealers. Removing procedures: 1. Removing mounting bolts of muffler. -
Page 30: Checking The Chain Tension
ZHEJIANG KAYO MOTOR CO., LTD. 1. Remove spring washer from the chain. 2. Remove the active section. 3. Pull the chain out from the bottom of sprocket. 4. Installation is in the reverse order of removal. Checking the chain tension 1. -
Page 31: Checking The Frame
ZHEJIANG KAYO MOTOR CO., LTD. Chain guide roller chain guide cover Checking the frame 1. Check the painting layer of frame surface. 2. Check the if the frame has deformation. 3. Check the if the frame has cracks. Checking the swingarm 1. -
Page 32: Check And Maintain The Brake System
ZHEJIANG KAYO MOTOR CO., LTD. Check and Maintain the Brake System Checking the free play of brake lever Put your right hand on grip, pull the lever with your index and middle fingers. Push the lever then let go, check the resistance at same time. If the process feel loosen, it maybe caused by air in oil pump or oil pipe. -
Page 33: Checking The Play Of Foot Brake Pad
ZHEJIANG KAYO MOTOR CO., LTD. is 1mm, if the thickness is less than 1mm, change new pad. Note: brake pad should be replaced in completely set. Better to consult KAYO dealer. Front braking pad Checking the play of foot brake pad Pull the lever, if the distance to grip is less than 5mm, adjust the play. -
Page 34: Check And Maintain The Wheels
ZHEJIANG KAYO MOTOR CO., LTD. Check and maintain the wheels Removing the front wheel 1. Raise the motorcycle with a lift stand. 2. Loose the locking nut from wheel spindle. 3. Holding the front wheel, withdraw the wheel spindle. 4. Remove the front wheel. -
Page 35: Checking Rim Spoke
ZHEJIANG KAYO MOTOR CO., LTD. 250kPa 250kPa Note: check tyre air pressure, when tyre is colk. Checking rim spoke Check spoke tension regularly, if the tension is too low correct spoke tension. spoke www.kayomoto.com... -
Page 36: Installing Engine
ZHEJIANG KAYO MOTOR CO., LTD. Installing Engine 1. Hang the engine in the motorcycle frame. 2. Install the carburetor on air inlet pipe, then fasten with bolts and nuts. 3. Install throttle cable and air filter, seal the connectors. Install clutch cable. -
Page 37: Tuning The Engine
ZHEJIANG KAYO MOTOR CO., LTD. Screw off the spark plug. Put the pressure gauge and connector into spark plug hole firmly. Turn the grip to full throttle. Use the motor to start engine for several times, mark the biggest pressure value. -
Page 38: Cleaning Air Filter
ZHEJIANG KAYO MOTOR CO., LTD. Cleaning air filter Clean the carburetor after each ride. 1. Put a container under the carburetor. 2. Close the fuel tank tap. 3. Remove the oil drain bolt and drain the fuel out completely. 4. Mount the screw. -
Page 39: Checking The Lubricating Oil
ZHEJIANG KAYO MOTOR CO., LTD. Checking the lubricating oil Stand the motorcycle upright on a horizontal surface. The lubricating oil level should between the minimum and maximum scales. Lubricating oil window Changing lubricating oil Changing the lubricating oil when engine is warm. -
Page 40: Overhauling The Engine
ZHEJIANG KAYO MOTOR CO., LTD. Overhauling the Engine Cylinder head and valve mechanism I Note: 1. Make sure valve clearance meet the standards after each disassembly work of rocker group. 2. Keep the oil passage on cylinder head cover is open. -
Page 41: Troubleshooting
ZHEJIANG KAYO MOTOR CO., LTD. Troubleshooting Faults Possible causes Remark Wrong valve clearance Poorly sealed valve Wrong valve timing Valve spring broken Leakage between the connector of spark plug and cylinder head. Low pressure in cylinder Poorly cylinder head seal group... -
Page 42: Dismounting The Valve Mechanism I
ZHEJIANG KAYO MOTOR CO., LTD. Valve mechanism I: 1——CG125D valve collet (improved_RoHS) 2——ZL60 valve spring retainer (upper) 3——CG125D oil shield assembly 4——ZL60 valve spring 5——ZL60 intake valve 6——ZL60 exhaust valve 7——ZL60 rocker mounting bolt (Ⅰ) 8——ZL60 rocker mounting bolt (Ⅱ) 9——ZL60 valve rocker assembly (integral) -
Page 43: Overhauling The Valve Mechanism I
ZHEJIANG KAYO MOTOR CO., LTD. 3. Remove the fastening screws on rocker assembly. 4. Remove mounting bolts, rocker assembly and push rod. Overhauling the valve mechanism I www.kayomoto.com... - Page 44 ZHEJIANG KAYO MOTOR CO., LTD. 1. Check the valve clearance. Remove the big and small access covers, use a socket spanner turn turn the magneto as is shown in picture, make the T line aligns with the left access cover gap.
-
Page 45: Installing The Valve Mechanism I
ZHEJIANG KAYO MOTOR CO., LTD. Installing the valve mechanism I 1. Installation is in the reverse order of removal. 2. Torque tightening table: Item Torque N.m Cylinder head covet bolts M6 Rocket assembly fastening bolts Cylinder head fastening bolts Spark plug... -
Page 46: Overhauling Cylinder Head Pars
ZHEJIANG KAYO MOTOR CO., LTD. 4. Put cylinder head on the fixture, press the inlet and exhaust valve springs, remove the inlet and exhaust valve collets at last. Note: do not compress the springs too much to avoid permanent deformation. - Page 47 ZHEJIANG KAYO MOTOR CO., LTD. Valve seat grinding - clean up the carbon deposit on valve seat. - Smear abrasive on the valve seat - use a grinding tool with a rubber head to suck the valve up, then grind the valve.
- Page 48 ZHEJIANG KAYO MOTOR CO., LTD. the valve guide. 4. Overhauling the valve - clean the carbon deposit - check if the valves bent, burn or worn out. - measure stem diameter of valves. Limits: Air inlet valve 5.43 mm Exhaust valve 5.41 mm Check the contact surface of valve, if the surface is rough, rust or uneven, replace it.
-
Page 49: Install Cylinder Head Assembly
ZHEJIANG KAYO MOTOR CO., LTD. - Measure the gap between the spark plug electrode and the center electrode and ensure that the spark plug gap is 0.6 ~ 0.7mm Install cylinder head assembly 1. Installation is in the reverse order of removal. -
Page 50: Cylinder And Piston
ZHEJIANG KAYO MOTOR CO., LTD. Install the cylinder head assembly - worn or defective seal is forbidden, replace new seal. - make sure the oil path on cylinder head is open. - make sure the locating pin in right place before installing cylinder head. -
Page 51: Dismounting The Cylinder Block, Piston And Piston Ring
ZHEJIANG KAYO MOTOR CO., LTD. Low or unstable pressure in cylinder Abnormal wear of cylinder block or piston ring Abnormal wear of cylinder block, piston or piston ring Black smoke emission Incorrectly installed piston ring Scratches or scrapes on piston or cylinder walls... -
Page 52: Overhauling Of Cylinder Block, Piston And Piston Ring
ZHEJIANG KAYO MOTOR CO., LTD. 3. The removed parts should be properly placed to avoid damage and loss. Overhauling of cylinder block, piston and piston ring 1. Inspect the cylinder block - Clean the residual gasket on the surface of cylinder block and the carbon deposit on the edge of cylinder hole. -
Page 53: Installing The Cylinder Block, Piston And Piston Ring
ZHEJIANG KAYO MOTOR CO., LTD. - Check and measure piston skirt diameter Limits: φ43.90 mm - Check and measure piston ring groove width - According to piston ring groove width and piston ring thickness calculation fit clearance Fit clearance limits: First ring clearance: 0.06 mm... - Page 54 ZHEJIANG KAYO MOTOR CO., LTD. The clearance between each ring in the oil ring should be matched with the clearance of the other ring. When installing the oil ring, install the spacer ring first, and then install the side guide rail.
-
Page 55: Clutch And Valve Mechanism Ii
ZHEJIANG KAYO MOTOR CO., LTD. Clutch and valve mechanism II Note: When maintain clutch and driven gear parts, only need to remove right crankcase. Cam shaft parts excluded. Main parameters and maintenance standards Item Standard Limits Remark Free height of active disc tension spring 21.2... -
Page 56: Dismounting The Right Crankcase And Clutch
ZHEJIANG KAYO MOTOR CO., LTD. Driving disc axle sleeves worn or damaged Incorrect valve adjustment Valve stuck or valve spring broken Excessive wear of camshaft and rocker Inaccurate valve timing Abnormal driving speed or noise Timing chain wear Tension arm wear... -
Page 57: Overhauling Right Crankcase And Clutch
ZHEJIANG KAYO MOTOR CO., LTD. 4. Remove axle sleeve of clutch, bushes and driven gear. Overhauling right crankcase and clutch 1. Inspect right crankcase - check if there is crack or defect. - check the right inspection window for leakage. - Page 58 ZHEJIANG KAYO MOTOR CO., LTD. damaged replace new one. 4. Inspect axle sleeve of clutch - make sure axle sleeve in good condition. - measure the inner aperture of axle sleeve. Limits: φ20.55 mm 4.3 - measure the outer aperture of axle sleeve.
-
Page 59: Installing The Right Crankcase And Clutch
ZHEJIANG KAYO MOTOR CO., LTD. Installing the right crankcase and clutch 1. Installation is in reverse order of removal. 2. Torque table Item Torque N.m Fastening bolts M6 of right crankcase Clutch locking nuts 3. Installation precautions for right crankcase and clutch - apply thread fastening glue when assemble the clutch locking nuts. -
Page 60: Dismounting Valve Mechanism Ii
ZHEJIANG KAYO MOTOR CO., LTD. Valve mechanism I: 1——CG125D valve collet (improved_RoHS) 2——ZL60 valve-spring retainer (upper) 3——CG125D oil shield assembly 4——ZL60 valve spring 5——ZL60 air inlet valve 6——ZL60 exhaust valve 7——ZL60 rocker mounting bolts (Ⅰ) 8——ZL60 rocker mounting bolts (Ⅱ) 9——ZL60 valve rocker assembly (unitary) -
Page 61: Overhauling The Valve Mechanism
ZHEJIANG KAYO MOTOR CO., LTD. driven chain and driving wheel Overhauling the valve mechanism www.kayomoto.com... -
Page 62: Installing Valve Mechanism
ZHEJIANG KAYO MOTOR CO., LTD. 1. Inspect push rod seat cover - if the cover has abnormal wear, replace it. 2. Inspect timing chain - if timing chain with wear or defect, maintain or replace it. - measure the chain length when in tension. -
Page 63: Magneto And Electric Start Mechanism
ZHEJIANG KAYO MOTOR CO., LTD. - The oil pump is driven by the screws at the small end of the camshaft. When installing, make sure the oil pump shaft is accurately assembled into the screw slot of the camshaft. - if the camshaft is removed and the engine is reinstalled. Opening the cylinder head immediately when the engine is ignited for the first time, and check if the oil channel of the cylinder head has oil pumped, if yes the pump oil circuit is normal. -
Page 64: Electric Start Mechanism Breakdown
ZHEJIANG KAYO MOTOR CO., LTD. 1——ZL60 Magneto rotor assembly (12V6 pole) 2——GB6177.1 nut M10×1.25(blue white zinc) 3——GB16674 bolt M6×12(blue white zinc) 4——BK70 Magneto wire clamp 5——GB5783 bolt M5×12(blue white zinc) 6——GB16674 bolt M6×18(blue white zinc) 7——ZL60 Magneto stator assembly Electric start mechanism breakdown 1——ZL60 starting motor... - Page 65 ZHEJIANG KAYO MOTOR CO., LTD. 3. Using a tooling remove magneto rotor, remove rotor and stator assembly. Note: 1. Using special tools to remove magneto rotor. Do not knock the magneto rotor. 2. If the rotor and stator is hit or dropped, replace new parts.
-
Page 66: Overhauling The Magneto And Electric Start Mechanism
ZHEJIANG KAYO MOTOR CO., LTD. Overhauling the magneto and electric start mechanism 1. Overhaul the magneto - Check the stator circumference of the magneto to see if there is any friction mark with the stator coil. If there is any friction mark, it is necessary to check whether the stator is loose, and open the box to check the crankshaft connecting rod condition. -
Page 67: Installing The Magneto And Electric Start Mechanism
ZHEJIANG KAYO MOTOR CO., LTD. Make sure disc plate seal, counter shaft seal and lip are in good condition, any wear or defect replace new parts. Installing the magneto and electric start mechanism 1. Installation is reverse of the removal. -
Page 68: Main Parameters And Maintenance Standards
ZHEJIANG KAYO MOTOR CO., LTD. Note - Dismount the left and right crankcases before maintaining the crankcase, crankshaft, oil pump, main shaft and auxiliary shaft. - Remove cylinder head, cylinder, piston, clutch, oil pump, gear shift mechanism, balance gear, magneto and adapter board before dismounting the crankcases. -
Page 69: Dismounting Crankcase, Crankshaft, Oil Pump And Main And Auxiliary Shafts
ZHEJIANG KAYO MOTOR CO., LTD. Dismounting crankcase, crankshaft, oil pump and main and auxiliary shafts 1. Remove cylinder block. 2. Remove camshaft refer dismount valve mechanism Ⅱ. 3. Remove magneto and electric start mechanism. 4. Remove the crankcase fastening screw, gently knock the crankshaft and auxiliary shaft with a rubber hammer, then remove the right crankcase. -
Page 70: Overhauling Crankcase, Crankshaft, Oil Pump And Main And Auxiliary Shafts
ZHEJIANG KAYO MOTOR CO., LTD. 8. Remove the bearing, two gaskets, oil pump rotors and oil pump shaft. Overhauling crankcase, crankshaft, oil pump and main and auxiliary shafts 1. Overhaul left crankcase - make sure there is no crack of defect on left crankcase, if any replace new one. - Page 71 ZHEJIANG KAYO MOTOR CO., LTD. - Check the crankshaft connecting rod condition, if there is any abnormal wear or defect, replace new parts. - Place the crankshaft on the V-iron and measure the radial run-out value of the crankshaft with a dial indicator.
-
Page 72: Installing Crankcase, Crankshaft, Oil Pump And Main And Auxiliary Shafts
ZHEJIANG KAYO MOTOR CO., LTD. - Measure the clearance of inner and outer rotor. Limits: 0.20mm - Clearance between oil pump rotors and end face of pump body Limits: 0.15mm Installing crankcase, crankshaft, oil pump and main and auxiliary shafts 1. -
Page 73: Engine Troubleshooting
ZHEJIANG KAYO MOTOR CO., LTD. Engine Troubleshooting Below items are essential to support a engine work well. 1. Qualified fuel: There is a certain proportion of combustible mixture in the cylinder. 2. Spark: The spark plug emits a strong spark in limited time. - Page 74 ZHEJIANG KAYO MOTOR CO., LTD. Improper adjustment of not start carburetor adjusting screw Air inlet pipe leakage No ignition Incorrect ignition timing Carburetor oil level is too high Damp Carburetor choke is closed Remove spark plug too tight Large throttle...
-
Page 75: Cleaning The Motorcycle
ZHEJIANG KAYO MOTOR CO., LTD. The gas tank cap vent is line is blocked sufficient fuel flow blocked Carburetor gauge hole is blocked Check filter and carburetor Float stuck nozzles for blockage Filter blocked Adjust valve timing Wrong Check valve timing... -
Page 76: Storage
ZHEJIANG KAYO MOTOR CO., LTD. 5. Rinse with low pressure water. 6. Let the motorcycle air dry. 7. Drive the motorcycle for a short time until the engine reaches operating temperature. 8. Lubricate the chain and all other parts that need lubrication. -
Page 77: Service Work
ZHEJIANG KAYO MOTOR CO., LTD. 1. Remove the cover on muffler exhaust outlet. 2. Tight the spark plug. 3. Fill up fuel to tank. 4. Install battery. 5. Check items that need to be checked before daily driving. 6. Make routinely lubrication. - Page 78 ZHEJIANG KAYO MOTOR CO., LTD. fuel should be changed again, and then again within 500km. After three times, the water in the carburetor is basically gone. If water got in cylinder, in the case of flameout, repeatedly step on the starting rod.
- Page 79 ZHEJIANG KAYO MOTOR CO., LTD. Carbon accumulates in the combustion Consult to KAYO after sales service chamber Gasoline inferior Replace gasoline Spark plugs in poor condition or wrong The exhaust pipe backfires Replace the spark plug with a new one...
- Page 80 ZHEJIANG KAYO MOTOR CO., LTD. Lower the front fork oil level to Front fork oil level is too high appropriate position Replace the front fork oil with the right Front fork oil is too viscous viscosity Hard damping Front fork bending...
-
Page 81: Tightening Torques
ZHEJIANG KAYO MOTOR CO., LTD. Check the clearance of steering shaft Excessive tolerance of steering shaft pressure bearing Steering shaft nut loosened, handlebar Check and re-tighten unsecured Chassis bend Consult to KAYO after sales service Improper steering adjustment Check and readjust. - Page 82 ZHEJIANG KAYO MOTOR CO., LTD. Chain adjusting nut 40~70 Connecting bolt of rear brake and M10×40×1.25 40~70 frame Mounting bolt of rear brake disc M6×16 7~11 Rear sprocket mounting screw M8×20 10.9 27~35 Rear axle nut M12×1.25 90~120 Rear brake disc cover mounting bolt 7~11...
Need help?
Do you have a question about the KMB60 2021 and is the answer not in the manual?
Questions and answers
My son was riding his kmb60 dirt bike and the chain came off. He pushed it back to the house and put the chain back on. Once he went to ride it the transmission stopped pulling. When I rev up the engine and when the rpms are coming back down you can hear something spinning from the right side. What do I need to look for.
If the KAYO MOTOR KMB60 dirt bike's transmission stops pulling after the chain came off, the following should be checked:
1. Check if the chain is in the correct position from the rear of the motorcycle.
2. Turn the rear wheel by hand to see if the chain moves smoothly.
3. Look for dirt accumulation on the chain.
4. Check the chain tension; the normal slack should be 30–40 mm.
5. Inspect for possible chain damage or misalignment.
6. Ensure the chain is properly reinstalled.
If the issue persists, inspect the sprockets and related transmission components for damage.
This answer is automatically generated