Advertisement
- 1 Overview
- 2 Cautions
- 3 Controls
- 4 Listening to DAB radio
- 5 The DAB radio menu
- 6 Showing DAB information on the display
- 7 Listening to FM radio
- 8 Using the System setting menu
- 9 Manually setting the time and date
- 10 Setting the alarms
- 11 Sleep timer
- 12 Nap timer
- 13 Listening to music via Bluetooth streaming
- 14 Headphone socket
- 15 USB socket for iPhone / Smartphone charging
- 16 Specifications
- 17 Documents / Resources
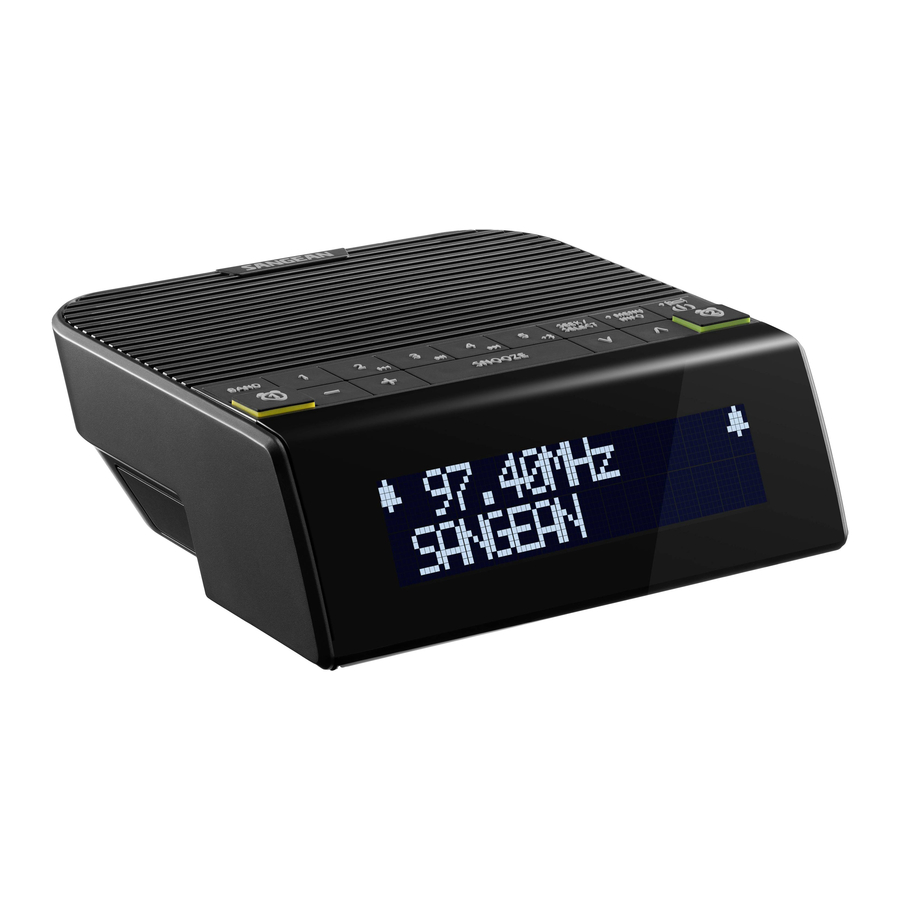
Overview

The Bluetooth® word mark and logos are registered trademarks owned by Bluetooth SIG, Inc. and any use of such marks by SANGEAN ELECTRONICS INC. is under license.
Cautions

Do not allow this clock radio to be exposed to water, steam or sand. Do not leave your clock radio where excessive heat could cause damage such as in a parked car where the heat from the sun can build up even though the outside temperature may not seem too high.
- The name plate is located on the underside of the unit.
- Your clock radio should not be exposed to dripping or splashing and that no objects filled with liquids, such as vases, shall be placed on the clock radio.
- It is recommended to operate the product such that there is a minimum distance (10cm recommended) to adjacent objects in order to ensure good ventilation.
- The ventilation of the product should not be restricted by covering it or its ventilation openings with items such as newspapers, tablecloths, curtains etc.
- No naked flame sources such as lighted candles should be placed on the product.
- It is recommended to avoid using or storing the product at extremes of temperature. Avoid leaving the unit in cars, on window sills, in direct sunlight etc.
Controls
- Band button
- Preset 1 button
- Preset 2 / Previous track / Rewind button
- Preset 3 / Play / Pause button
- Preset 4 / Next track / Fast-forward button
- Speaker
- Preset 5 / Bluetooth pairing button
- Seek / Select button
- Menu / Info button
- Power / Sleep button
- Alarm 2 button
- Tuning up / down button
- Snooze / Backlight button
- LCD display
- Volume up / down button
- Alarm 1 button
- USB socket
- Headphone socket
- Wire antenna
- DC jack socket
Listening to DAB radio
Tuning into DAB stations
To tune into DAB radio stations, follow these steps:
- Insert the supplied adaptor plug into the DC socket located on the rear of your clock radio. Plug the adaptor into a standard mains socket outlet.
- Fully extend the wire aerial located on the rear of your clock radio. Place the wire antenna so that it is as straight as possible extending either above or below the radio.
- Turn on the radio using the Power button.
- Select the DAB radio mode by repeatedly pressing the Band button.
- If this is the first time the DAB radio mode is being used, the radio will automatically perform a full scan in order to find all available DAB radio stations. If the radio has been used before the last used station will be selected.
- During the scanning process, as new stations are detected the station counter will increase and the stations will be added to the list which is stored in the radio. The bar graph indicates the progress of the scan.
- When the scanning is completed the first station (in numeric-alpha order 0...9...A....Z) will be selected.
- Press the Tuning up or Tuning down button to scroll through the list of stations and press the Select button to tune into a station.
- Use the Volume up / down button to set the sound level as needed.
 NOTE
NOTE
- The clock will be auto adjusted by the DAB station you tune to or you may refer to "Manually setting the time and date" described later for clock setting.
- The display will revert to a conventional time display 10 seconds after the last button press except when displaying scrolling text.
- If after selecting a station the station does not tune it may be necessary to relocate your radio to a position giving better reception.

The mains adaptor is used as the means of connecting the clock radio to the mains supply. The mains socket used for the clock radio must remain accessible during normal use. In order to disconnect the clock radio from the mains completely, the adaptor should be removed from the mains socket outlet completely.
The DAB radio menu
You can enter the DAB radio menu by pressing and holding the Menu button while the radio is in the DAB radio mode.
Use the Tuning up or Tuning down button to select one of the options and then press the Select button to confirm your choice.
The radio's default and recommended settings are indicated using an asterisk.
The DAB radio menu offers the following options:
- [Scan]: Select this option to perform a full scan and store all DAB radio stations that were found in the station list.
- [Manual Tune]: Select this option to manually tune into a DAB channel / frequency.
- [Station Order]: Select this option and subsequently [Alphanumeric] to sort the station list alphanumerically or select [Ensemble] to sort the station list by DAB multiplex.
- [Prune invalid]: Select this option to delete all unavailable stations from the station list.
- [DRC]: Dynamic Range Control (also known as DRC) can make quieter sounds easier to hear when your radio is used in a noisy environment by reducing the dynamic range of the audio signal.
Select this option and then use the Tuning up or Tuning down button to highlight the required
DRC setting:- [Off]: DRC is switched off. Broadcast DRC will be ignored.
- [Low]: DRC level is set to 1 / 2 that sent by broadcaster.
- [High]: DRC is set as sent by broadcaster.
Press the Select button to confirm the setting.
NOTE
Not all DAB broadcasts use the DRC function. If the broadcast does not provide DRC information, then the DRC setting in the radio will have no effect.
- [System Setting]: Select this option to go to the system menu settings and configure the radio (refer to the chapter "Using the System setting menu" for details).
Showing DAB information on the display
When listening to a DAB radio broadcast, repeatedly press the Info button to cycle through the following information on the radio's display:
Scrolling text, Program type, Multiplex name, Channel & frequency, Bit rate & audio type, Signal strength, Time & date.
Listening to FM radio
Tuning into FM stations
To tune into FM radio stations, follow these steps:
- Fully extend the wire aerial located on the rear of your clock radio. Place the wire antenna so that it is as straight as possible extending either above or below the radio.
- Turn on the radio using the Power button.
- Select the FM radio mode by repeatedly pressing the Band button.
- Press the Seek button to perform automatic scanning. Or press and hold the Tuning up or Tuning down button to automatically tune into an FM station with a higher or lower frequency respectively. Your radio will stop scanning when it finds a station of sufficient strength. The display will show the frequency of the signal which has been found. If RDS information is available, after a few seconds the display will show the radio station name.
- Press the Tuning up or Tuning down button to fine-tune the frequency with steps of 0.05MHz if needed.
- Repeat the steps 4 and 5 to tune into other radio stations.
- Use the Volume up / down button to set the sound level as needed.
NOTE
The display will revert to a conventional time display 10 seconds after the last button press except when displaying scrolling text.
The FM radio menu
You can enter the FM radio menu by pressing and holding the Menu button while the radio is in the FM radio mode.
Use the Tuning up or Tuning down button to select one of the options and then press the Select button to confirm your choice.
The radio's default and recommended settings are indicated using an asterisk.
The FM radio menu offers the following options:
- [FM Audio]: Select this option to configure if the radio should only play FM stations in mono. Forcing the radio to play FM broadcasts in mono can help reduce noise when listening to FM broadcasts. To switch back to Auto (stereo) mode, select the "Auto" option.
- [FM Scan Zone]: Select this option to configure if the radio should only look for strong signals("Local") or all signals("Distant") when using the automatic tuning feature.
- [System Setting]: Select this option to go to the system menu settings and configure the radio (refer to the chapter "Using the System setting menu" for details).
Showing FM information on the display
When listening to a FM radio station that is also broadcasting RDS data, repeatedly press the Info button to cycle through the following information on the radio's display: Radio text, Program type, Frequency, Audio type, Time & date.
Presetting stations in DAB and FM modes
There are 5 presets each for DAB and FM radio. They are used the same way for each operating mode.
- Press the Power button to switch on your radio.
- Tune to the required radio station as previously described.
- Press and hold down the required Preset button until the display shows, for example, "Preset 1 stored". The currently tuned station will be stored under the chosen preset button.
- Repeat this procedure as needed for the remaining presets. Stations which are already stored in the presets may be overwritten by following the above procedure. The radio station presets are retained in memory when the radio is switched off.
Recalling a preset in DAB and FM modes
- Press the Power button to switch on your radio.
- Select the required operating mode using the Band button.
- Momentarily press the required Preset button. Your clock radio will tune to the station stored in the preset memory.
Using the System setting menu
The System setting menu can be used to configure the radio. Follow these steps to access the system settings:
- Turn on the radio using the Power button.
- Press and hold the Menu button to enter the menu for the current mode.
- Use the Tuning up or Tuning down button to select [System Setting] and press the Select button to enter the menu setting.
You can also press and hold the menu button to enter the [System Setting] menu in the standby mode.
The System setting menu offers the following options:
Use the Tuning up or Tuning down button to select one of the options and then press the Select button to confirm your choice. Press the Menu button to go back one step in the radio's menus.
The radio's default and recommended settings are indicated using an asterisk.- [Time]: Select this option to set the time and date manually, to set the source for automatically updating the time and date and set the time format.
- [Alarm]: Select this option to set the radio's alarms.
- [Contrast]: Select this option to adjust the contrast of the display. Use the Tuning up or Tuning down button to adjust the contrast level and press the Select button to confirm.
- [Snooze duration]: The snooze timer setting can be adjusted between 5 and 20 minutes. Select this option to set the desired snooze time.
- [Language]: Select this option to configure the language in which the radio's menus are shown.
- [Backlight]: Select this option to configure the brightness of the radio's backlight. You can also directly press the Snooze button to adjust the backlight.
- [Software Upgrade]: Software updates for your radio may be available in the future. As software updates become available software and information on how to update your radio can be found at Sangean website. Select this option to perform a software upgrade.
- [Factory Reset]: Select this option to reset the radio to the default factory settings. After confirmation, all user settings and preset stations will be erased.
- [SW Version]: Select this option to view the software version of the radio. To exit the software display, press the Menu button.
Manually setting the time and date
If you would be unable to automatically update the time and date using the DAB or FM, follow these steps to manually set the time and date:
- Enter the [System Setting] menu using the steps previously described.
- Select [Time] and then press the Select button.
The Time submenu offers the following options:- [Set Time / Date]: Select this option to manually configure the time and date.
- [Auto update]: Select this option to select a source for automatically updating the time and date.
- [Set 12 / 24 hour]: Select this option to select the 12 or 24 hour format.
- Select [Set Time / Date] and press the Select button to manually set the radio's time and date.
- The hour digits will blink on the display.
- Use the Tuning up or Tuning down button to select the current hour and press the Select button to confirm.
- Next, the minute digits will blink on the display.
- Use the Tuning up or Tuning down button to select the current minutes and press the Select button to confirm. If the radio has been set to use a 12 hour format, there will be an option here for setting AM or PM for the clock time. Press the Tuning up or Tuning down button to select AM or PM. Press the Select button to confirm the setting.
- After setting the time you will be asked to set the day, month and year.
- Press the Tuning up or Tuning down button to select a value and press the Select button to confirm.
Setting the alarms
Your clock radio has two alarms which can be set to wake you to either radio or buzzer alarm.
NOTE
Ensure that the time is set correctly before setting the alarms. If you make a mistake at any point while setting the alarms, press the Menu button to go back to the previous screen.
- Press the Alarm 1 or Alarm 2 button to enable the alarm. The corresponding alarm icon will show on the display.
- Enter the [System Setting] menu using the steps previously described.
- Press the Tuning up or Tuning down button to select [Alarm] and then press the Select button.
- Press the Tuning up or Tuning down button to select the alarm that you want to set. (Alarm 1 or Alarm 2)
- Press the Select button to confirm. (Note: If the clock time is not set before setting the alarms, "No time set" will show on the display. Use the Tuning up, Tuning down and Select buttons to set the time and date.)
- Use the Tuning up, Tuning down and Select buttons to set the alarm time.
- Press the Tuning up or Tuning down button to set the mode that is used for the alarm. Press the Select button to confirm.
- When your alarm is set to wake up by DAB or FM, press the Tuning up or Tuning down button to select a preset or the last listened station as the alarm source. Press the Select button to confirm.
- Press the Tuning up or Tuning down button to select the alarm frequency, the available settings here are [Daily], [Once], [Weekdays] and [Weekends]. Press the Select button to confirm. If you choose [Once], then you need to set the date.
- Press the Tuning up or Tuning down button to set the alarm volume. Press the Select button to confirm. "Alarm Saved" will show on the display. Your alarm setting is now completed.
NOTE
- When an alarm sounds, press the Power button to turn off the alarm and switch the radio back to the standby mode. If the radio cannot connect to the specified radio station, the buzzer alarm will be used instead. When the radio or buzzer alarm sounds, pressing any button other than the Power and Volume buttons will snooze the alarm for the selected number of minutes.
While the snooze timer is active the remaining snooze time is shown on the display. To cancel the Snooze timer while the alarm is suspended, press the Power button. - Alarms will stop sounding after 60 minutes have elapsed since the start of the alarm.
- Alarms can be quickly enabled and disabled by repeatedly pressing the corresponding Alarm button.
Sleep timer
Your clock radio can be set to turn off after a preset time has elapsed.
- Press and hold the Sleep button to enter the sleep and nap timer menu setting.
- Press the Tuning up or Tuning down button to select "Sleep".
- Press the Select button to confirm.
- Press the Tuning up or Tuning down button to select the desired sleep time. The sleep timer can be set to between 15 and 120 minutes, or to "Sleep off". Press the Select button to confirm the setting. After the sleep timer is set, "S" will appear in the clock mode. Your clock radio will switch off after the preset time has elapsed.
- To view the remaining sleep time, go back into the sleep timer settings (steps 1 to 3 above).
- To cancel the sleep timer function before the preset time has elapsed, press the Power button. To cancel the sleep timer without switching off your radio, follow the procedures above and select the "Sleep off" setting.
Nap timer
- Press and hold the Sleep button to enter the sleep and nap timer menu setting.
- Press the Tuning up or Tuning down button to select "Nap".
- Press the Select button to confirm.
- Use the Tuning up and Tuning down buttons to set your desired nap time. Press the Select button to confirm. After the nap timer is set, "N" will appear in the clock mode.
- To cancel a sounding Nap timer, press the Power button. When the alarm sounds, pressing any button other than the Power button will activate the snooze function.
Listening to music via Bluetooth streaming
You need to pair your Bluetooth device with your radio before you can auto-link to play / stream Bluetooth music through your radio. Pairing creates a 'bond' so the two devices can recognize each other.
Pairing and playing your Bluetooth device for the first time
- With your radio switched on, press the Band button to select Bluetooth function. "Bluetooth Pairing" will show on the display.
- Activate Bluetooth on your device according to the device's user manual to link to the radio.Locate the Bluetooth device list and selectthe device named "DCR-90BT" (With some Smartphone's that are equipped with earlier versions than BT2.1 Bluetooth device, you may need to input the pass code "0000").
- Once connected, there will be a confirmation tone sound. You can simply select and play any music from your Bluetooth device.
- The volume control can be adjusted from your Bluetooth device, or directly from the radio. Use the controls on your Bluetooth-enabled device or on the radio to play / pause and navigate tracks.
NOTE
- If 2 Bluetooth devices are pairing for the first time, both will search for your radio, it will show its availability on both devices. However, if one device links with this unit first, then the other Bluetooth device will not find it on the list.
- If you take your source device out of range, the connection will be temporarily disconnected to your radio. Your radio will automatically reconnect if the source device is brought back in range. Be aware that during the period of disconnection, no other Bluetooth device can pair or link with your radio.
- If "DCR-90BT" shows in your Bluetooth device list but your device cannot connect with it, please delete the item from your list and pair the device with the radio again following the steps described previously.
- The effective operation range between the system and the paired device is approximately 10 meters (30 feet). Any obstacle between the system and the device can reduce the operational range.
- Bluetooth connectivity performance may vary depending on the connected Bluetooth devices. Please refer to the Bluetooth capabilities of your device before connecting to your radio. All features may not be supported on some paired Bluetooth devices.
- With some mobile phones, making / receiving calls, text messages, e-mails or any other activities unrelated to audio streaming may mute the Bluetooth audio streaming or even temporarily disconnect from your device. Such behavior is a function of the connected device and does not indicate a fault with your DCR-90BT.
Playing audio files in Bluetooth mode
When you have successfully connected your radio with the chosen Bluetooth source device you can start to play your music using the controls on your connected Bluetooth device.
- Once playing has started, the volume can be adjusted both on the radio using the Volume buttons and on the Bluetooth device using the volume control of the device.
- Use the controls on your Bluetooth device to play / pause and navigate tracks. Alternatively, control the playback using Play / Pause, Next track, Previous track buttons on your radio.
- Press and hold the Fast-forward or Rewind button to move through the current track. Release the button when the desired point is reached.
NOTE
Not all player applications or devices may respond to all of these controls.
Bluetooth display options
If your connected device can provide information from the track being played, your radio can display the following in Bluetooth mode:
Title, Artist, Album, Genre, Device Name, Time & date. Press the Info button to cycle through the various options.
Please note that the availability of information depends on the specific media format.
Reconnecting a previously-paired Bluetooth source device
The radio can memorize up to 8 sets of paired Bluetooth devices, when the memory exceeds this amount, the earliest paring device will be overwritten from the device.
If your Bluetooth device already paired with the radio previously, the unit will memorize your Bluetooth device and it attempts to reconnect with a Bluetooth device in memory which is last connected.
Disconnecting your Bluetooth device
Press and hold the Bluetooth pairing button for 2-3 seconds until "Pairing" appears on the display or turn off Bluetooth on your Bluetooth device to disable the connection.
You can also press the Band button to select any mode other than Bluetooth mode to disable the connection.
Headphone socket
A 3.5mm headphone socket located on the right side of your clock radio is provided for use with either headphones or an earpiece. Inserting a headphone plug automatically mutes the internal loudspeaker except for the alarm sound.

Excessive sound pressure from earphones and headphones can cause hearing loss. To prevent possible hearing damage, do not listen at high volume levels for long periods.
USB socket for iPhone / Smartphone charging
Your radio has a USB socket which is intended only for charging an iPhone, smart phone or similar devices. Charge time may vary and in some cases may take longer to charge than when using the manufacturers charging unit supplied with the smart phone.
The radio can charge the iPhone, smart phone or similar devices when the radio is in power on or standby mode.
Connect your smart phone to the USB charging socket on the right hand side of your radio.
Once your iPhone or smart phone has fully charged remove the USB cable.
- The charger may not supply power to some USB devices.
- When not using or after charging, remove the USB cable.
- Do not connect power source to USB port. Otherwise there is a risk of fire. The USB port is only intended for charging lower voltage device.
- Do not insert a nail, wire, etc. into the USB power supply port. Otherwise a circuit short may cause smoke and fire.
- Do not connect this USB socket with your PC USB port, as it is highly possible that it may cause breakdown of the units.
- Never use the USB socket in rainy or moist conditions to prevent moisture from entering the radio.
Specifications
| Power Requirements | |
| Mains | AC 100~240V 50/60 Hz, DC 9V / 1.2A (AC / DC switching adaptor) |
| Frequency Coverage | |
| FM | 87.5-108 MHz |
| DAB | 174.928-239.200 MHz |
| Bluetooth | |
| Bluetooth specification | Bluetooth ® Ver 5.2 |
| Profile Support | A2DP, AVRCP |
| Bluetooth Audio CODEC | SBC, AAC |
| Transmitting Power Specification | Power Class 2 |
| Line of sight range | 10meters / 30feet |
| The frequency and maximum transmitted power | 2402MHz ~ 2480MHz: 3.888dBm (Bluetooth EDR) |
| Circuit Feature | |
| Loudspeaker | 4Ohm 5W |
| Output Power | 2.1Watt |
| Headphone socket | 3.5mm diameter |
| Aerial System | FM Wire aerial DAB Wire aerial |
| USB socket | 5V / 1A Max. |
| Operating temperature range | 0°C to + 35°C |
|
|
 |
 |
The company reserves the right to amend the specifications without notice.
![]()
If at any time in the future you should need to dispose of this product please note that: Waste electrical products should not be disposed of with household waste. Please recycle where facilities exist. Check with your Local Authority or retailer for recycling advice. (Waste Electrical and Electronic Equipment Directive)


Documents / ResourcesDownload manual
Here you can download full pdf version of manual, it may contain additional safety instructions, warranty information, FCC rules, etc.
Advertisement


Need help?
Do you have a question about the DCR-90BT and is the answer not in the manual?
Questions and answers