
Related Manuals for royer R-121L


Summary of Contents for royer R-121L
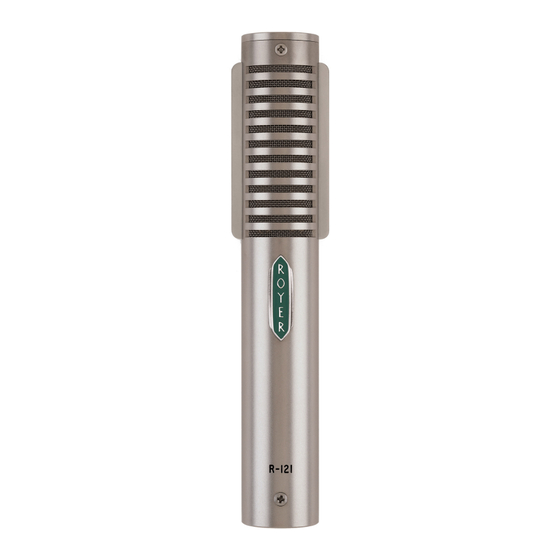
- Page 1 Royer Labs Model R-121 Mono Ribbon Velocity Microphone Operation Instructions Manual & User Guide Made in U.S.A.
-
Page 2: Table Of Contents
Other Types of Microphones Proximity Effect and Working Distance The Sound That Is “More Real than Real” Microphone Techniques General Tips for Using the Royer R-121 Recording Loud or Plosive Sounds Stereophonic Microphone Techniques Classic Blumlein Technique Mid-Side (M-S) Technique... -
Page 3: Introduction
Applications The Royer Labs model R-121 is a versatile microphone and is ideally suited for many critical recording applications. Its smooth frequency response characteristics and ability to capture detail make it a fine choice for many instruments, as well as for general broadcast applications. -
Page 4: Ribbons In The Digital World
characteristics. Phase-related distortion and irregular frequency peaks are conspicuously absent. Electric guitar amplifiers sound big and natural, without unnatural coloration, when reproduced with the R-121. The R-121 ribbon microphone is an ideal choice for strings, woodwinds, percussion, organ and amplified instruments. Acoustic pianos can be captured accurately without the comb filtering effects associated with condenser microphones. -
Page 5: Amplification Considerations
(supplied with every Royer microphone) over it until it is to be used. Do not carry the microphone around without placing a mic sock over it. Failure to follow this common sense practice may yield a stretched ribbon and compromised performance. -
Page 6: Equalization & Ribbon Microphones
Ribbon microphones generate a highly accurate signal, but the average ribbon mic generates approximately 20dB less output than condenser microphones. Remember, the ribbon transducer does not have the benefit of a condenser mic’s built-in “head amp,” so a non-powered ribbon microphone relies solely on the microphone preamp for all its gain! The so-called ideal preamplifier is the proverbial “straight wire with gain.”... -
Page 7: Hum, Noise & Mic Orientation
This is not to say that a ribbon microphone can substitute for a quality condenser mic in all cases, but the EQ friendliness inherent in ribbon microphones does allow for an enormous amount of flexibility. Ribbon mics take EQ so well because of their inherent low self-noise, unusually smooth frequency response characteristics, and freedom from off-axis coloration. -
Page 8: Other Types Of Microphones
There are only general rules as to where the sweet spot may be found for any given microphone, and usually experimentation reveals it. The sweet spot can be extremely variable since it depends on the quirks of a given microphone and a given room. Once the sweet spot is discovered, this placement can become a rule of thumb starting point for future microphone placement with similar sound sources. - Page 9 Typical relationship of microphone distance to frequency response for ribbon-velocity bidirectional microphone. This bass-boosting characteristic can become quite intense and, if desired, can be corrected by equalization. However, for a multiple microphone setup, the pronounced bass boosting (due to proximity effect) can be turned to an advantage. If an instrument, such as a trumpet, is extremely close-miked and the bass is cut to restore flat response, unwanted low-frequency sounds are cut back by upwards of 20dB compared to an unequalized microphone with a flat response.
-
Page 10: Microphone Techniques
Microphone Techniques General Tips for Using the Royer R-121 The following are good basic starting places for recording with the R-121. These positions are known to produce good results, but experimentation is the key to getting the most out of your recordings! Photographs of many of the following techniques can be found at www.royerlabs.com. -
Page 11: Recording Loud Or Plosive Sounds
A kick drum should be miked at a distance of at least 18 inches and possibly used in conjunction with a blast filter to prevent excessive ribbon movement. If the front head has a hole cut in it, position the microphone away from the hole to avoid excessive air blasts. An R-121 used as a mono room mic, four to six feet in front of the kit and compressed, will yield a surprisingly large, full drum sound. - Page 12 2. Example of Horizontal Positioning Technique Angling the microphone slightly will minimize stressing the ribbon. Due to the microphone’s pickup pattern, sound will not be affected. 3. Side View of Kick Drum Miking Technique A) Close miking—angle mic so that pressure wave is off-axis Standard miking position 4.
-
Page 13: Stereophonic Microphone Techniques
Stereophonic Microphone Techniques Classic Blumlein Technique For many years, several coincident microphone setups have been widely used for recording in stereo as naturally as possible. The “Blumlein” technique, named for A.D. Blumlein of England, involves the use of two figure- eight microphones positioned as in the sketch (see Figure 1), so that one faces left and the other right, at an angle of 90 degrees (i.e. - Page 14 Figure 2 - Typical M-S Miking Technique In M-S recording, one mic faces sideways, one faces forward as shown in Figure 2, and they are connected as shown in Figure 3. If the outputs of the two microphones are equal (or made equal using gain controls), the stereo pickup will be similar to that of two microphones placed as a Blumlein X-Y pair, delivering a wide stereo image.
-
Page 15: Specialized Recording Techniques
When recording vocals on either side of an R-121, a quality pop filter (such as the Royer PS-101 metal pop screen) is essential to protect the ribbon element from wind blasts. As with any figure- 8 microphone, the front side of the R-121 is in-phase and the back side is out-of-phase. -
Page 16: Care & Maintenance
Care & Maintenance The R-121 is a hand-built precision instrument. All that is required to ensure proper operation of this microphone is to follow some common sense rules. 1. Avoid transducer damage by not exposing the microphone to severe shock or vibration. If the microphone is accidentally dropped, test it to see if damage has occurred before returning it to service. -
Page 17: Features
30HZ – 15,000HZ ±3dB Sensitivity: -49dBv Ref 1 v/pa Output Impedance: 300 Ohms (nominal) balanced Rated Load Impedance: > 1500 Ohms Maximum SPL: > 135dB Output Connector: Male XLR 3 pin (Pin 2 Hot) All Royer monaural microphones are available in matched pairs. -
Page 18: Mechanical Specifications
158mm x 25mm (6.13” L xW) Finish: Dull Satin Nickel or Matte Chrome Accessories: Protective wood case, protective mic sock Optional Accessories: Shock mount, popscreen To learn more about Royer products and their usage, visit our website at www.royerlabs.com. Polar Pattern Frequency Response... -
Page 19: Warranty
First re-ribbon free SCOPE OF WARRANTY: From the date of original purchase and for the respective periods specified above, Royer Labs agrees to repair, at its sole expense, all Royer Labs products which are defective in material and workmanship. EXCLUSIONS: This warranty does not cover the following: 1.
Need help?
Do you have a question about the R-121L and is the answer not in the manual?
Questions and answers