Firman P03612 Owner's Manual
Hide thumbs
Also See for P03612:
- Owner's manual (123 pages) ,
- Quick reference manual (2 pages) ,
- Owner's manual (40 pages)
Table of Contents
Advertisement
Quick Links
OWNER'S MANUAL
PORTABLE GENERATOR
IMPORTANT:
Record product information to reference when ordering parts or
obtaining warranty coverage.
DO NOT RETURN TO
STORE!
Read all safety precautions and instructions carefully
before operating equipment.
Ensure engine is stopped and level before performing
any maintenance or service.
MODEL NUMBER
P03612
Rev Level:00
Advertisement
Table of Contents

Related Manuals for Firman P03612


Summary of Contents for Firman P03612
- Page 1 OWNER’S MANUAL PORTABLE GENERATOR MODEL NUMBER P03612 Rev Level:00 Read all safety precautions and instructions carefully IMPORTANT: before operating equipment. Ensure engine is stopped and level before performing any maintenance or service. Record product information to reference when ordering parts or obtaining warranty coverage.
-
Page 2: Table Of Contents
Table of Contents ......1 Maintenance And Storage....23 Introduction Safety Precautions . -
Page 3: Introduction
Save these original instructions for future reference. This manual covers operation and maintenance of the FIRMAN generators. All information in this publication is based on the latest production information available at the time of approval for printing. -
Page 4: Safety Precautions
SAFETY PRECAUTIONS WARNING WARNING • WARNING POISONOUS GAS HAZARD. • • • • Page 02... - Page 5 CORRECT USAGE Example location to reduce risk of carbon monoxide poisoning • ONLY use outside and downwind, far away from windows, doors and vents. • Direct exhaust away from occupied spaces. INCORRECT USAGE Do not operate in any of the following locations: Near any door, window or vent Garage Basement...
- Page 6 WHEN OPERATING EQUIPMENT WARNING • • DO NOT tip engine or equipment at angle which causes fuel to spill. • DO NOT stop engine by moving choke • control to “Start” position. WHEN TRANSPORTING, MOVING • OR REPAIRING EQUIPMENT • NEVER start or stop engine with electrical Transport/move/repair with fuel tank devices plugged in and turned on.
- Page 7 • When using generator for backup power, WARNING notify utility company. Unintentional sparking • Use a ground fault circuit interrupter (GFCI) could cause fire or in any damp or highly conductive area, electric shock resulting such as metal decking or steel work. in death or serious •...
-
Page 8: Unpacking The Generator
NOTE: 1. Axle pin ....... . .2 Improper treatment of generator could damage 2. -
Page 9: Removal Of Shipping Supports
REMOVAL OF SHIPPING SUPPORTS Before you can run your new generator, follow these simple instructions: CAUTION 3. You may discard these brackets, as it is no longer Failure to remove these items can result required for normal operation of your generator. in damage to your generator, possible Your generator is now ready for use. -
Page 10: Assembly
ASSEMBLY Install the Handle The generator requires some assembly prior to 1. Place the handle K over the mounting channel usage. on the frame. Install the Wheel Kit 2. Secure the handle to the frame using the two handle flange bolts H(M8x45). 3. -
Page 11: Battery Cable Connection
Battery Cable Connection You will need to use 8mm box wrenches to connect the battery cables to battery. NOTE: The generator comes equiped with the positive red cable(red cable) already attached. 1. Verify the positive (+) battery cable (red boot) is securely tightened to the positive (+) battery post. -
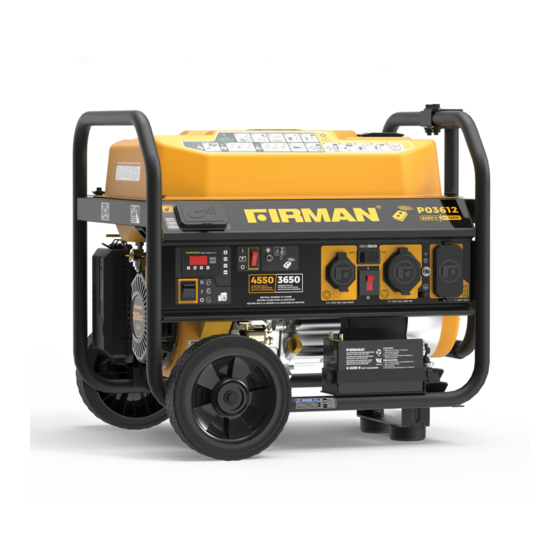
Page 12: Controls And Features
12- Oil Filler Cap 5- Fuel Valve 13- Battery 6- Air Filter 14- Outlet Cover 7- 208cc FIRMAN OHV Engine 15- Control Panel 8- Recoil Starter 16- Handle 9- Bottle Opener *We are always working to improve our products. Therefore, the enclosed product may differ slightly from the image on this page. -
Page 13: Control Panel
Control Panel 120V 240V NOTE: Total power drawn from all receptacles must not exceed the name plate rating. Engine Start Switch – Used to start engine Voltage Selector Switch – To select from the starter motor(Electric start model between 120 Volt or 240 Volt. only). -
Page 14: Remote Start
2. Flip the battery switch to the "ON"(l) position. Remote Start This generator is equipped with a wireless remote start system for starting and stopping. The Remote Start functions are enabled when: 1.The Engine Switch is in the “RUN”(l) position, AND 2.The Battery Switch is in the “ON”(l) position. -
Page 15: Specifications
SPECIFICATIONS Model P03612 Starting Watts 4550 3650 Running Watts Rated AC Voltage 120/240V Rated Fequency 60Hz Phase Single Voltage Regulator Power Factor Alternator Type Brushed Engine FIRMAN Engine Type Single Cylinder, 4-Stroke OHV Air Cooled Displacement 208cc Low Oil Shutdown... - Page 16 4.Using oil funnel, slowly pour contents of ADD ENGINE OIL provided oil bottle into oil fill opening to the "H" mark on dipstick. Be careful do not CAUTION overfill. Overfilling with oil could cause the engine to not start or hard starting. NOTE: Degrees Celsiusº(Outside) 5.Replace oil fill cap/dipstick and fully tighten.
-
Page 17: Add Fuel
ADD FUEL Fuel must meet these requirements: • Clean, fresh, unleaded gasoline. • Use regular UNLEADED gasoline with the generator engine with a minimum 87 octane / 87 AKI (91 RON). For high altitude use, see "Operation at High Altitude". •... -
Page 18: Grounding
THE GENERATOR (STATOR WINDING) AND THE Installation instructions are also available in the FRAME. Technical Bulletin area of the FIRMAN internet site. The part number and recommended minimum Connecting to a Building's Electrical System altitude for the application of the high altitude carburetor main jet is listed in the table below. -
Page 19: Operation
5. OPERATION • Generator Location WARNING Make sure you review each warning in order to • prevent fire hazard. Keep area clear of inflammables or other hazardous materials. Select a site that is dry, well ventilated and protected from the weather. •... -
Page 20: Starting The Generator (Recoil Start)
Starting the Generator (Recoil Start) 7. Move the choke lever to the “START” position. 1. Before starting the generator, check for loose or missing parts and for any damage which may have occurred during shipment. 2. Check oil level and fuel. 8. -
Page 21: Starting The Generator (Electric Start)
4. Turn the fuel valve to the “ON” (l)position. Starting the Generator (Electric Start) Electric Start and Remote Start Operations 5. Flip the engine switch to the "RUN"(l) position. WARNING 6. Flip the battery switch to the "ON"(l) position. WARNING 7. -
Page 22: Starting The Generator (Remote Start)
9. Do not over-choke. As soon as engine starts and warms up, move the choke lever to the “RUN” position. 4. Turn the fuel valve to the “ON” (l)position. 10. Allow generator to run at no load for few minutes upon each initial start-up to permit engine and generator to stablize. -
Page 23: Connecting Electrical Loads
If the engine fails to start within 3 to 5 seconds, the engine will attempt to start five additional times. If the generator failed to start, the remote start indicator light will flash. If the generator fails to start after a total of six attempts, the start button on the remote control must be pushed again to begin another cycle of six start attempts. -
Page 24: Low Oil Shutdown
If oil level is between LOW and HIGH mark on dipstick: 1.DO NOT try to restart the engine. 2.Contact an Authorized FIRMAN Service Dealer. 4. Flip the battery switch on "OFF"(O) position. 3.DO NOT operate engine until oil level is corrected. -
Page 25: Do Not Overload Generator
Do Not Overload Generator Overloading a generator in excess of its rated wattage capacity can result in damage to the generator and to connected electrical devices. To prolong the life of your generator and attached devices, follow these steps to add electrical load: 1. -
Page 26: Maintenance And Storage
MAINTENANCE AND STORAGE MAINTENANCE SCHEDULE Every Daily(Before Initial Every 100 hours ITEM NOTES operation) 25 hours 50 hours (or annual) Check condition. Adjust gap √ Spark Plug and clean. Replace if necessary. √ Check oil level. Engine Oil √ √ Replace. -
Page 27: Engine Maintenance
• Use fresh and high quality lubricating oil to the ENGINE MAINTENANCE specified quantity. If contaminated or deteriorated oil is used or To prevent accidental starting, remove and the quantity of the engine oil is not sufficient, ground spark plug wire before performing any the engine damage will result and its life will be service. -
Page 28: Spark Plug Maintenance
Spark Plug Maintenance Cleaning Fuel Strainer Changing the spark plug will help your engine Dirt and water in the fuel are removed by the fuel to start easier and run better. strainer. (a) Remove the spark plug cap. (b) Remove spark plug using provided wrench. (a) Remove the strainer cup and throw away water and dirt. -
Page 29: Generator Maintenance
• DO NOT touch hot parts and AVOID hot exhaust CAUTION gases. Failure to clean the spark arrester will result in • Allow equipment to cool before touching. degraded engine performance. • Keep at least 5 feet (1.5 m) of clearance on all GENERATOR MAINTENANCE sides of generator including overhead. -
Page 30: Service And Storage
WARNING Long Term Storage It is important to prevent gum deposits from forming in essential fuel system parts such as the carburetor, fuel hoses or tank during storage. Also, experience indicates that alcohol-blended fuels (called gasohol, ethanol or methanol) can attract moisture, which leads To avoid electric shock: to separation and formation of acids during storage. - Page 31 8-Keep the engine switch and fuel valve on “OFF” position. 9-Cover the unit and store in a clean, dry place out of direct sunlight. NEVER USE WATER TO CLEAN GENERATOR. NOTE: • We recommend always using a fuel stabilizer. A FUEL STABLIZER will minimize the formula- tion of fuel gum deposits during storage, the fuel stabilizer can be added to the gasoline in the fuel tank, or into the gasoline in a storage...
-
Page 32: Trouble Shooting
TROUBLE SHOOTING Problem Cause Correction 1. Circuit breaker is open. 1. Reset circuit breaker. 2. Fault in generator. 2. Contact authorized service facility. Engine is running, but no 3. Poor connection or defective cord 3. Check and repair. AC output is available. set. -
Page 33: Parts Diagram And Parts List
PARTS DIAGRAM AND PART LIST P03612 PARTS DIAGRAM Page 30... -
Page 34: Engine Parts Diagram
208cc ENGINE PARTS DIAGRAM Page 31... - Page 35 P03612 PARTS LIST Qty. Qty. NO. Part Number Description NO. Part Number Description FIRMAN 208cc Engine Support Leg 336713603 336713560 Rubber Cap 2 Flange Bolt M6×25 336713501 336713561 Rubber Cap1 Boot Red 336713502 357713570 Stator Assy Boot Black 336713605 357713571...
- Page 36 FIRMAN 208cc Engine Parts List NO. Part Number Description Qty. NO. Part Number Description Qty. 336723500 Crankcase Subassembly. 336723559 Mounting Bolt, Air Cleaner 336723501 Locating Pins 336723560 Element, Air Cleaner 336723502 Sensor, Engine Oil 336723561 Cover, Air Cleaner 336723503 Flg. Bolt M6×12...