Advertisement
Quick Links
Advertisement

Related Manuals for MSI Mega Player P310 512MB


Summary of Contents for MSI Mega Player P310 512MB
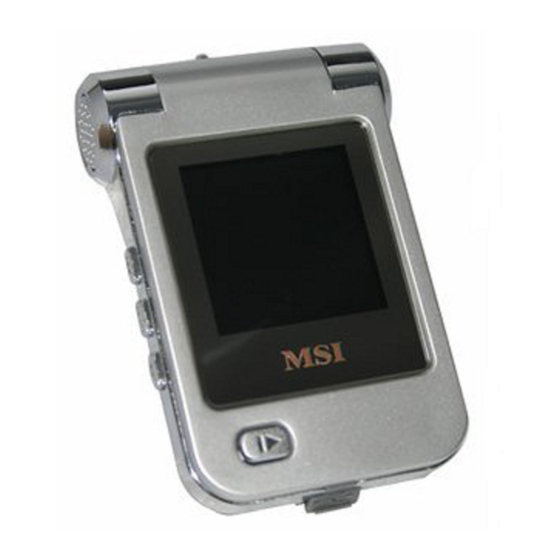
- Page 1 MSI P310 MP3 DIGITAL PLAYER OPERATION MANUAL...
- Page 2 Thank you for using the MP3 digital player of our company Please read and retain all the operating instructions before operating the unit. For better services, the content of this operation manual may be changed. Specifications are subject to change and improvement without notice If the actual setup and usage of the unit are different from this operation manual, please view the website of our company to inquire about the latest product information.
- Page 3 AMV movie function JPEG picture viewing function Support various of audio format Such as MP1, MP2, MP3, WMA, WMV, ASF, WAV etc. Firmware upgradeable You can download the latest upgrade software from the website of our company to improve the function of the unit. FM stereo radio FM tuner with 40 station memories (20 station each system) FM recording...
- Page 4 Features Digital recording/ A-B repeat function To record by the microphone, and then save the recorded contents as audio files in WAV or ACT format. Fragment repeat or contrast repeat function. 7 equalizers Natural, Rock, Pop, Classical, Soft, Jazz, DBB Seven recycling mode Normal, Repeat One, Folder, Repeat Folder, Repeat All, Random, Intro Timing power off...
-
Page 5: Introduction Of Lcd
INTRODUCTION OF LCD Charging instruction (enclosed presswork picture) Display Capacity of battery The unit introduces 9 grades monitoring. The indicator is full when the capacity of the battery is 4.2V. The indicator decreases as the using time increases. The indicator appears blank when the battery is nearly exhausted. Please charge in time then. - Page 6 BASIC FUNCTION Operation on buttons Functions of the buttons button: Power on/power off/play//stop pause MENU button: select/enter button: adjust volume button: next/FF button: previous/REW RESET button: initialize USB : USB jack earphone jack : earphone standard jack. Measures of pressing buttons There are four measures to press buttons: press momentarily, press &...
- Page 7 Single hold: press and hold the button, it takes effect until you release the button. Hold: during pressing and holding the button, it takes effects for several times by a certain frequency, such as "FF" and "REW". Basic function Enter the menu Enter the menus by pressing the MENU button.
- Page 8 BASIC FUNCTION Music mode AMV playback Record mode Voice playback FM tuner JPEG browse System Setup E-book...
- Page 9 BASIC FUNCTION Music mode Record mode Voice playback Recording time FM mode Pictures browsing System setup...
- Page 10 BASIC FUNCTION Enter the USB mode by connecting with the PC (as the following picture): Adjust volume : Increase volume; : Decrease the volume Power on/off Press hold " " button to power on under the off status. Press hold " "...
- Page 11 Music playback Simple operation 1.Plug the earphone into the earphone jack. 2. Press & hold " " button to power on and enter s the "music mode". Press " " button momentarily to start to play the music. 3.Select music: " "...
- Page 12 BASIC FUNCTION 5. There are 7 equalizers: Natural, Rock, Pop, Classic, Soft, Jazz and DBB. 6. Press " " button to select and press MENU to confirm. Lyrics synchronization The player supports "*.LRC" lyric files, to achieve the synchronous play of lyric and sound.
- Page 13 Click "Next" as per the prompt. Click "close" when it prompts install finished to finish the installation. After the tool is installed, a program group "MP3 Player Utilities" is built in the "Start" "Program" menu. "AMV Convert Tool" is the convert tool, while "AMV...
- Page 14 BASIC FUNCTION This tool is used to convert the media files into the AMV format files that the MP3 player can playback. There are 6 media file formats which supports conversion: 1.AVI format files with the extension avi. 2. Windows Media format files with the extension asf or wmv 3.
- Page 15 Usage of AMV convert tool: mp3player Utilities3.57 1.This tool is used to convert the media files into the AMV format files that the MP3 player can playback. There are 6 media file formats which supports conversion: 1). AVI format files with the extension avi.
- Page 16 2.2.2 Click "Next" as per the prompt. Click "close" when it prompts install finished to finish the installation. After the tool is installed, a program group "MP3 Player Utilities" is built in the "Start" "Program" menu. "AMV Convert Tool" is the convert tool, while "AMV Player"...
- Page 17 BASIC FUNCTION Click [start] button [program] menu to run the software. Select "MP3 Player Utilities" "AMV Convert Tool" to open the tool interface. In the below picture, the names of the buttons are marked in blue: While using this tool, keep the mouse on the button for 1-2 seconds when it is available, the name of the button is displayed.
- Page 18 BASIC FUNCTION The media file path is popped up. Click " " button on the right side of "file type" to select proper file type. After correctly selecting file or files, click "open" button, the interface displays as the following picture (the selected file types in the following picture are only for reference):...
- Page 19 BASIC FUNCTION After adding files, the path of media file is displayed in the bar "input file" of the convert tool; the related information of the added file is displayed in the status bar, such as check box, file name and path, status, length of time, etc.
- Page 20 BASIC FUNCTION when the media file is playing, the schedule of playback is display in the schedule bar; the status of the media file in the status bar changed from "unsettled" to " OK"; the time of the file changed from "0:00" to the actual length of time "0:51"; the "stop"...
- Page 21 BASIC FUNCTION 4. Convert files 4.1 Select pending convert files In the status bar, on the left side of every media file name, there is a check box and a serial number. New added media file is defaulted tick off the check box. Check boxes are used to select several media files and convert continually.
- Page 22 BASIC FUNCTION picture shows: 1.1.1 Deletion of media files As to the added media files, if you want to delete some of them, click the right button of the mouse on the selected file or files and select "delete", the file(s) would be deleted in the list.
- Page 23 BASIC FUNCTION 4.2 Save path of AMV files The defaulted save path of AMV files of the convert tool is C:\. Before converting, click AMV save path button " " on the right side of "output file" to specify the position of saving the AMV file.
- Page 24 BASIC FUNCTION After finishing the above steps, the "output file" bar of the convert tool inter face appears the whole save path of the AMV path: 4.3 Attribute setup The convert tool has the function of setting parameter of AMV files, such as set the intercepted video fragment of AMV file, video size, playback frame etc.
- Page 25 BASIC FUNCTION file turn to blue.The details of setup will be list in the following texts. The below picture is the defaulted setup of AMV files: 4.3.1 Intercept source video fragment Intercept video fragment is to intercept a fragment from a media file to convert it. Then the start position and ending position have to be set.
- Page 26 BASIC FUNCTION As the above picture shows: the current media file is interceptted from 1 minute 10 second to 3 minute 20 second. Note: if the check box which on the left side of "intercept video fragment" is not ticked off, the whole media file will be converted. 4.3.1.2 Set on the media file playback interface While playing the media file, the output information bar of the tool interface displays the related information of the AMV file, such as start time, ending time,...
- Page 27 BASIC FUNCTION Click the "start position" button, the selected start time displays in the start time bar, as the following picture shows:...
- Page 28 BASIC FUNCTION Also, click the "ending position" button, the selected ending time displays in the ending time bar, as the following picture shows: After the two time are selected, click the "select" button in the tool interface to confirm the length of the intercept file, and shows it in the running time bar. It only convert the intercept fragment while converting, as the right picture shows:...
- Page 29 BASIC FUNCTION As the above picture shows: the current media file is interceptted from 2 minute 12 second to 2 minute 40 second, totally 28 seconds. If you want to cancel the intercept fragment, you can click "cancel" button. Thus the time in the running time bar returns to the total time of the file, and the interface returns to the interface before clicking "select".
- Page 30 BASIC FUNCTION is middle. If the video effect is not good after converting, you can try to change the setup. The interface is as the following picture shows: 4.3.4 Images shortage, insert image It is defaulted to tick off this option. For better video effect, please use the default setup.
- Page 31 BASIC FUNCTION In the above picture, click " " icon to select the path new audio files, then click "open" after selecting the proper audio file. As the following picture shows: After selecting new audio files correctly, the path of the file is displayed in the "Replace the old audio data by new audio files"...
- Page 32 BASIC FUNCTION After adding new audio files, the attribute setup interface is as the following picture:...
- Page 33 BASIC FUNCTION 4.3.6 Voice shortage, insert voice It is defaulted to tick off this option. For better voice effect, please use the default setup. 4.3.7 Other settings 4.3.7.1 "Overlay file" is to replace the same name AMV files at the specified saving position automatically by the creating AMV files.
- Page 34 BASIC FUNCTION selected still keep the defaulted settings while converting. It dose not mean to select the check box of the media files by "select" here, but to keep the mouse on the name of the files to make the background of the files turn to blue. Then click the "setting"...
- Page 35 BASIC FUNCTION 4.4.3 except for the above converting measures, you can also click the right button of the media files which save in the hard disk to select "start video converting". The program runs automatically and starts to convert files directly. 5.
- Page 36 BASIC FUNCTION Voice recoding Make sure there is enough battery capacity while recoding. The unit supports 99 record files' storage under every directory. Record in record mode: 1. Enter the main menu: 2. Press " " momentarily to select "record mode" 3.
- Page 37 Recorded voice is save in the set current directory in "record stop sub- menu/main disk directory". If the LCD displays "Disk Full", it means that there is no enough space in the disk, please delete some files to release the space. If the LCD displays "Directory Full", it means that there are already 99 files in the directory.
- Page 38 BASIC FUNCTION Play recorded files 1. Enter the main menu 2. Press " " button momentarily to select "voice mode". 3. Press MENU button momentarily to enter the playback mode interface. 4. Press " " button to start to playback. 5.
- Page 39 BASIC FUNCTION 2. Select the ACT file you want to convert. 3. Click "convert" button to start conversion. Except for the function of converting ACT to WAV, the tool can also play the WAV and MP3 format files. Using FM Radio The player enters play mode every time, and needs to resume the current pre-save station and playback.
- Page 40 BASIC FUNCTION : the current frequency position, changes the position at the frequency dial with the changes of the current frequency. :frequency dial : the corresponding pre-save station number of the current station. 20 pre- save stations at most. : the current frequency value. Listen to the radio 1.Enter the main menu.
- Page 41 BASIC FUNCTION 7. Listen to a saved station If there is one or more saved stations, press " " button momentarily to listen. The sequence is backward. 8.Record function While listening to the radio, you can record your favorite program. Press MENU button momentarily to enter the FM submenu and select SP record or LP record.
- Page 42 BASIC FUNCTION JPEG interface- file selection- select file 05.jpg It is a blank directory if there is no file in it. Press " " button to enter the picture playback status. Press button to select previous/next file. Press MENU button to enter the stop submenu: 1. local folder, 2. play set, 3. delete, 4.exit.
- Page 43 System setup How to enter? Set the system parameters here, the options change as the upgrades of the firmware. 1. Enter the main menu. 2. Press " " button momentarily to select "Setup". 3. Press MENU button to enter "Setup". Introduction of parameters: Clock Set the date and time while saving recorded files.
- Page 44 BASIC FUNCTION Instructions: set of "clock" 1. System setup interface 2. Press MENU button momentarily to enter the clock interface: 3. Press + momentarily to set begin with year (- button to set from the end of the interface), the "year" twinkles. 4.
- Page 45 BASIC FUNCTION "Brightness" means the setup of the brightness of the LCD. 7 is the brightest and 0 is the darkest. Press momentarily to move the cursor; and press MENU button to return to the previous menu. Set of "black" please refer to set of "brightness".
- Page 46 BASIC FUNCTION at the manually set position. "Auto mode" means it pauses automatically during A-B repeat. "Online mode" The operation measures please refer to the set of "Equalizer". Some operation systems (versions before Windows 2K SP4) do not support two diver letter in one disk, so, after using "special space"...
- Page 47 E-book Enter the main menu, jog " to enter the sub menu. Directory selection: select the root directory of the movable disk. Press MENU button momentarily to enter the "local folder" directory. Select the directory you want by " to confirm and return to the previous menu. Note: there is no need to select directory if the text you want to read is save in the root directory of the movable disk.
- Page 48 BASIC FUNCTION Using USB disk The player is a standard USB Disk, supports these systems including Windows98 (it needs to install the driver), over Windows2K (it's unnecessary to install the driver), Mac OS X 10.3 and above, Linux 2.4.2 and above. The player supports USB power supply.
- Page 49 Select different Directory (Stop submenu) You can put different files in different directories (the directories should be set in the PC first) to classify and manage them. The unit distinguishes 9 top submenus. 1. On the stop interface (the example isunder music mode. Recording and voice mode can also select directories).
- Page 50 BASIC FUNCTION 3. Press MENU button again to enter the directory selection mode.y Music Local folder ROOT Nick Cave 5.Press MENU button to confirm the selected directory. Note: the music mode, recording mode and voice mode can set their corresponding independent directories. That is to say, three modes do not corresponding one directory.
- Page 51 Music Local folder Delete Repeat Exit 3. Press " " or " " momentarily to 4. Press MENU button momentarily to select "delete files" in the menu. enter the delete interface. "Delete all" deletes all of the related files in the current mode (such as "delete all" in the music mode deletes all of the music files, recording files will not be deleted.) The delete interface of FM is even simpler.
- Page 52 BASIC FUNCTION Repeat Normal: After the music in the current directory have been played fully, the player will play the music in the next directory till all files are played and then it will stop. Repeat One: Repeat playing a single piece of music. Folder: Play all the music in the folder.
- Page 53 BASIC FUNCTION rate (faster or slower), the voice will not change. 1. While the music is playing 2. Press MENU button momentarily to enter the play submenu. 3. Press " " momentarily to select "tempo rate". 4. Press MENU button momentarily to enter the "tempo rate". 5.
- Page 54 BASIC FUNCTION 5. Press " " button momentarily to confirm the start "A". Replay mode: the "B" icon of the replay icon "A-B" twinkles, waiting for confirming the end "B". 6. Press " " button momentarily to confirm the end "B". The replay icon "A-B"...
- Page 55 2. Press " " momentarily to enter the following mode. 3. The replay icon "A-B" changes to " starts to record the user's voice then. The length of time is same as the A-B repeat time. 4. It plays the original voice once the time is up, and the icon changes to "...
- Page 56 When the friends borrow the MP3 Player, they have to delete the personal data first, which may annoy them very much. From today, the function of "Special Space" provided by this player has solved this problem completely.
- Page 57 This is a very good function of "Special Space". 1. Connect the player with the computer. 2. Run the tool kit MP3 Player Disk Tool Of installation program enclosed with the player. 3. The user will first see the format tool. Then select the "Divide/encrypt"...
- Page 58 BASIC FUNCTION 4. After dividing, the user will see the following Indications: 5. Press "Enter", and the computer will indicating for restart the system. Confirm it so as to restart the computer system. 6. After starting, the user will see two disks (for the operation system lower than Windows 2K SP4, the user can only see one disk letter).
- Page 59 BASIC FUNCTION 7. Run the execution file "RdiskDecrypt.exe" and enter the user's name and password into the Dialogue box. If the password is correct the Copy file in the disk will be opened. 8. Each time when connecting with the computer, user must enter the user's name and password so that he can open the encrypted disk.
-
Page 60: Troubleshooting
TROUBLE SHOOTING Trouble Shooting No power supply No voice in the earphone Letters on the LCD are exceptional FM receiving effect is not good Can not download music files normally Make sure the player had been powered on. Make sure the volume is not at the status of 0, and the connection of the earphone has no problem. -
Page 61: Specifications
Specifications: Dimension 74x18x49.5mm Weight Display CSTN 1.5' screen Connect with PC USB2.0 (FS) Flash disk Memory 64MB-1GB Power supply Max playback time: 5-6 hours Sampling rate Record Record format Record time Earphone max output MP3,WMA MP3,WMA MP3 bit rate WMV, ASF WMV, ASF WMV, ASF WMA,WMV,ASF bit rate... - Page 62 SPECIFICATIONS Music format Condition to use Language Operation system Note: The design and the specification of the player are subject to change without notice. Frequency response Distortion Range of frequency Station Earphone max output MP1,MP2, MP3, WMA, WMV, ASF, WAV -5~40 Chinese, English, Japanese, French etc.
Need help?
Do you have a question about the Mega Player P310 512MB and is the answer not in the manual?
Questions and answers