M-Audio ProKeys Sono 61 User Manual
M-audio prokeys sono 61: user guide
Hide thumbs
Also See for ProKeys Sono 61:
- User manual (50 pages) ,
- Quick start manual (6 pages) ,
- Buttons layout (1 page)
Table of Contents
Advertisement
Advertisement
Table of Contents

Related Manuals for M-Audio ProKeys Sono 61


Summary of Contents for M-Audio ProKeys Sono 61
- Page 1 Sono 61 English User Guide...
-
Page 2: Table Of Contents
About . . . . . . . . . . . . . . . . . . . . . . . . . . . . . . . . . . . . . . . . . . . . . . . . . . . . . . . . . . . . . . . . . . 26 ProKeys Sono 61 User Guide ProKeys Sono 61 User Guide . - Page 3 . . . . . . . . . . . . . . . . . . . . . . . . . . . . . . . . . . . . . . . . . . . . . . . . . . . . . . . . . . . . . . . 47 ProKeys Sono 61 User Guide .
-
Page 4: Introduction
(multi-client), the ability to send large SysEx messages, as well as using your ProKeys Sono with a qualified version of the Pro Tools M-Powered recording software . On a Macintosh, installing the M-Audio drivers enables you to use your ProKeys Sono with a qualified version of the Pro Tools M-Powered recording software . -
Page 5: Prokeys Sono 61 Features
Stereo premium voices operate at a maximum polyphony of 20 notes. What’s in the Box? M-Audio ProKeys Sono 61 keyboard Printed Quick Start Guide M-Audio ProKeys Sono Drivers and Documentation CD-ROM Software Bundle CD-ROM USB cable ... -
Page 6: Minimum Requirements
Windows Media Center Edition is not currently supported. M-Audio suggests you also check the minimum system requirements for any software applications you plan on using with your new M-Audio hardware, as they may be greater than the above. ➜ IMPORTANT: Connect your headphones or powered speakers to ProKeys Sono. -
Page 7: Controls And Connectors
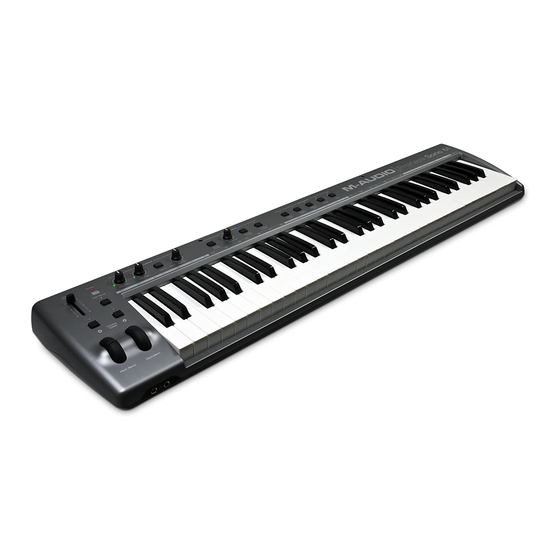
Edit mode . Press this button again to exit Edit mode . Master Volume Fader (Master Volume): The Master Volume fader controls the level of the main outputs (17) as well as the headphone outputs (2) . ProKeys Sono 61 User Guide 11 12 13 14... - Page 8 15 . Voice Select Buttons: These buttons let you select which of the five high-quality sounds is played by the ProKeys Sono keyboard . 16 . Keyboard: ProKeys Sono features 61 full-size, semi-weighted, velocity-sensitive keys . ProKeys Sono 61 User Guide...
-
Page 9: Rear Panel Descriptions
26 . Kensington Security Slot ( ® security cables to protect your device from theft . ProKeys Sono 61 User Guide ): This slot is compatible with Kensington TIP: The ProKeys Sono Auxiliary inputs do not have an input gain knob. -
Page 10: Hardware Connections
“ProKeys MIDI Output Settings” chapter to find out more about this setting . Other Connections A sustain pedal can be connected to the 1/4” Sustain pedal jack on the back of the keyboard . ProKeys Sono 61 User Guide... -
Page 11: Example Operating Scenarios
Example Setup #1 Example Setup #1 shows M-Audio ProKeys Sono with a microphone connected to the Microphone input, and an electric guitar plugged into the Instrument input . A CD player is connected to the auxiliary inputs . The main outputs of ProKeys Sono are connected to a monitoring system (powered speakers, in this case) while a computer powers the keyboard through the USB connection . -
Page 12: About The Audio Inputs
Key” portion of the “Advanced ProKeys Sono Functions in Edit Mode” chapter of this User Guide . Similarly, while ProKeys Sono features two sets of headphone outputs and 1/4” main outputs, all of these outputs play the same stereo signal . ProKeys Sono 61 User Guide Example Setup #2... -
Page 13: Prokeys Sono As A Standalone Instrument
Press the black key above C2 (C#2), representing “Data = Octave . ” (ProKeys Sono will automatically exit Edit mode) . For additional information on program changes, see the “Advanced ProKeys Sono Functions in Edit Mode” chapter of this User Guide. ProKeys Sono 61 User Guide... -
Page 14: Prokeys Sono As A Standalone Microphone Preamplifier And Mixer
Demo playback can be stopped by pressing the Edit Mode button . While the demo is playing, the LED of the selected voice will flash . At the completion of the demo, the demo song will repeat . ProKeys Sono 61 User Guide Tip: Connect the MIDI Out jack of ProKeys Sono to an external MIDI synthesizer or sound module. -
Page 15: Basic Prokeys Sono Setup In Windows
M-Audio DFU (device firmware upgrade tool) and display a Found New Hardware Wizard. The M-Audio DFU is a component of ProKeys Sono 61 that is enabled when the M-Audio drivers are installed, but is not necessary for class-compliant operation. You have the following options: A. -
Page 16: Prokeys Sono Setup In Mac Os X
We recommend that you download the most recent drivers by going to the Support > Drivers page at www .m-audio .com . This ensures that you have the newest drivers available . If you do not have Internet access, insert the M-Audio ProKeys Sono Drivers and Documentation CD-ROM into your computer to install the drivers that came with the keyboard . -
Page 17: Using Prokeys Sono With A Computer
ProKeys Sono also features a Direct Monitor knob (10) that allows you to listen to input signals directly on the main outputs, without passing the signals through your audio software. This feature is covered in the “Using Direct Monitoring” section of the “ProKeys Sono Audio Setup and Controls” chapter. ProKeys Sono 61 User Guide... - Page 18 . To learn more about this, see the section titled “The Mono Button” within the “ProKeys Sono Audio Setup and Controls” section of this User Guide . ProKeys Sono 61 User Guide Powered Monitors...
- Page 19 . To learn more about this, see the section titled “The Mono Button” within the “ProKeys Sono Audio Setup and Controls” section of this User Guide . ProKeys Sono 61 User Guide 12:02:101 Powered...
- Page 20 . To learn more about this, see the section titled “The Mono Button” within the “ProKeys Sono Audio Setup and Controls” section of this User Guide . ProKeys Sono 61 User Guide 12:02:101...
-
Page 21: Midi Tracks
“ProKeys Sono Voices” or, when using the device class-compliant in Windows XP, as “USB Audio Device” and “USB Audio Device [2]”. See the section titled “Routing MIDI Signals from your Software” for more information. ProKeys Sono 61 User Guide 12:02:101... - Page 22 The order and naming of the MIDI ports may vary slightly depending on your operating system and sequencing application. If ProKeys Sono is used as a class-compliant device under Windows XP, its output ports will appear as “USB Audio Device” and “USB Audio Device [2]. ” ProKeys Sono 61 User Guide 12:02:101 “ProKeys Sono Voices”...
- Page 23 MIDI output jack on the back of ProKeys Sono. Please see the section entitled “MIDI Out Mode Key” in the “ProKeys MIDI Output Settings” chapter to find out more about this setting. ProKeys Sono 61 User Guide 12:02:101 “ProKeys...
-
Page 24: Prokeys Sono Audio Setup And Controls
ProKeys Sono Microphone input . Setting Input Gain The M-Audio ProKeys Sono Mic input (channel one) and Instrument input (channel two) each provide up to 35dB of gain . Microphones, electric guitars, and basses typically emit low “instrument” level signals and require preamplifiers (such as the ones in ProKeys Sono) to boost the signals before being recorded . -
Page 25: Using The Aux Inputs
“latency . ” Latency is not a problem when playing back music, but it can be distracting while recording your performances . To compensate for this delay, M-Audio ProKeys Sono has a feature called Direct Monitor . -
Page 26: The Mono Button
ProKeys Sono audio inputs. However, the ProKeys Sono outputs must be selected within your recording software in order to hear sounds created by virtual (computer software-based) MIDI instruments. Be sure “ProKeys Sono 61” or “USB Audio Device” is selected as the audio output device within your recording software, and that you have headphones connected to the headphone outputs on the front of ProKeys Sono or amplified speakers connected to the 1/4”... -
Page 27: The Prokeys Sono Audio Control Panel (Windows Only)
. About This tab displays the ProKeys Sono Control Panel, firmware, and driver version, and allows you to connect to the M-Audio website for updates . ProKeys Sono 61 User Guide... -
Page 28: Routing Midi Data To And From Your Computer
ProKeys Sono, you will quickly discover that using a computer-based sequencer with virtual instrument software gives you access to a large array of high-quality sounds, a large graphic user interface, and the ability to edit and change performances even after they’ve been recorded . ProKeys Sono 61 User Guide... -
Page 29: Routing Midi Signals To Your Software
“ProKeys Sono 61” if the optional drivers have been installed. In Windows Vista, ProKeys Sono will appear as “ProKeys Sono 61” regardless of whether or not the optional drivers have been installed. Once ProKeys Sono is selected as the MIDI input device, most applications will automatically route MIDI data from ProKeys Sono to the record-enabled track (unless you explicitly specify a different routing). -
Page 30: Advanced Prokeys Sono Functions In Edit Mode
ProKeys Sono is capable of sending. Please consult your software’s documentation for information on what messages it can accept. NOTE: The M-Audio ProKeys Sono Drivers and Documentation CD-ROM contains a document showing a larger image of the keys and their advanced features in Edit mode called “KeyMap61.pdf. ”... -
Page 31: Button, Knob, Wheel And Pedal Jack Assignments
Record setting back to its default state . Button, Knob, Wheel and Pedal Jack Assignments Data (Octave) button Assignment Overview The Data “<“ and “>” buttons can be assigned to control one of seven possible MIDI functions: Octave (ProKeys Sono 61 Default) Transpose ... - Page 32 1. Octave Shift (Default Data button assignment) By default, the Data “<” and “>” buttons control octave shift of the ProKeys Sono 61 keyboard . Pressing the Data > button (right) will shift the notes played on the keyboard up by one octave . Pressing the Data < button (left) will shift the notes played on the keyboard down by one octave .
- Page 33 ProKeys Sono 61 User Guide 4. Program Change Program change MIDI messages can be used to select any of the 128 built-in MIDI instrument sounds on ProKeys Sono, or to select sounds on external MIDI synthesizers or sound modules connected to the MIDI output jack .
- Page 34 4 proprietary M-Audio controller numbers for a total of 132 assignable parameters (counting from and including zero to 131) . Numbers beyond 127 are a proprietary method M-Audio uses to simplify the transmission of certain, otherwise more complicated multi-part MIDI messages . A full list of controller values is given at the end of this manual in Appendix C .
- Page 35 Pedal jack are not stored when the keyboard is turned off. These parameters will reset to their default values each time the keyboard is powered on. ProKeys Sono 61 User Guide TIP: Using the Modulation wheel or Voice Volume knob to set the reverb...
-
Page 36: Prokeys Midi Output Settings
3 . Press the black key above D5 (D#5), representing “Transpose +, ” to shift the keyboard up by one semitone . 4 . Press C6 representing “ENTER, ” or press the Edit Mode button to exit Edit mode . ProKeys Sono 61 User Guide... - Page 37 Local On . Switching the keyboard off and on will also restore this setting back to its default . Local Off mode is often used to control a software synthesizer running on a connected computer, without layering the built-in ProKeys Sono sounds on top of the software synthesizer’s tone . ProKeys Sono 61 User Guide port are sent...
-
Page 38: Sending A Bank Change Or Program Change Message
Bank change messages by themselves do not activate a sound, but only locate and access a predefined location of a set (bank) of 128 sounds. ProKeys Sono 61 User Guide TIP: As an example, let’s use a program change MIDI message to activate the internal cello sound on ProKeys Sono. -
Page 39: Midi Messages In-Depth
ProKeys Sono 61 User Guide MIDI Messages In-Depth Program & Bank Changes When the MIDI standard was first established, it enabled the user to access only 128 different sounds using program change messages (0-127) . As MIDI devices grew to be more sophisticated and contain more sounds, bank change messages were included in an updated MIDI specification to allow for more than 128 sounds to be accessed . -
Page 40: Nrpn/Rpns
ProKeys Sono 61 User Guide You will find many MIDI devices respond to program change commands and many are organized according to the GM listing . In General MIDI devices, different sounds are organized in the same way from device to device . Piano sounds are in their particular place, string sounds are in their place, drum sounds are in their place, and so on . -
Page 41: Troubleshooting
ProKeys Sono back on and try again to see if the problem resolves . Problem: I have connected a sustain pedal to my M-Audio keyboard, but its operation is reversed (i .e ., the notes sustain when the pedal isn’t pressed, but the notes stop sustaining once the pedal is pressed) . - Page 42 Solution: In Ableton Live Lite, click View and make sure that the In/Out option is checked . On an audio track, select “Ext In” and “1” from the audio input drop down menus . Further information on this can be found in the Ableton Live Lite Help menu . ProKeys Sono 61 User Guide...
-
Page 43: Appendices - Useful Midi Data
61 Brass Section 30 Distorted Guitar 62 Synth Brass 1 31 Guitar Harmonics 63 Synth Brass 2 These sounds are ProKeys Sono premium-quality voices. ProKeys Sono 61 User Guide Reed 64 Soprano Sax 65 Alto Sax 66 Tenor Sax 67 Baritone Sax... -
Page 44: Appendix B - Channel 10 Drum Map
High Tom Ride Cymbal 1 Chinese Cymbal Ride Bell Tambourine Splash Cymbal Cowbell Crash Cymbal 2 Vibraslap ProKeys Sono 61 User Guide Key# Drum Sound Ride Cymbal 2 Hi Bongo Low Bongo Mute Hi Conga Open Hi Conga Low Conga... -
Page 45: Appendix C - Standard Midi Controller Numbers (Midi Ccs)
44 Controller 44 45 Controller 45 46 Controller 46 47 Controller 47 48 Gen Purpose 1 LSB ProKeys Sono 61 User Guide 49 Gen Purpose 2 LSB 50 Gen Purpose 3 LSB 51 Gen Purpose 4 LSB 52 Controller 52... -
Page 46: Appendix D - Additional Rpn Messages
. This is because messages 128 – 131 are a different type of MIDI message, defined in the MIDI Specification as RPN messages . M-Audio has created four messages that are sent like MIDI CCs, but actually transmit a series of RPN messages . -
Page 47: Technical Specifications
Frequency Response Headphone Outputs Maximum Output Working Range Frequency Response ProKeys Sono 61 User Guide 4 .4k Ohms -2 .2 dBu (0 .6 Vrms), balanced -96 dB, A-weighted 96 dB, A-weighted 0 .004 % (-88 dB) @ -1 dBFS, 1 kHz 20 Hz to 20 kHz, +/- 0 .5 dB... -
Page 48: Technical Info
M-Audio warrants products to be free from defects in materials and workmanship, under normal use and provided that the product is owned by the original, registered user . Visit www .m-audio .com/warranty for terms and limitations applying to your specific product . - Page 49 ....0 810 001 105 email ....info@m-audio.fr Assistance Technique PC .
Need help?
Do you have a question about the ProKeys Sono 61 and is the answer not in the manual?
Questions and answers