Table of Contents
Advertisement
Advertisement
Table of Contents

Subscribe to Our Youtube Channel
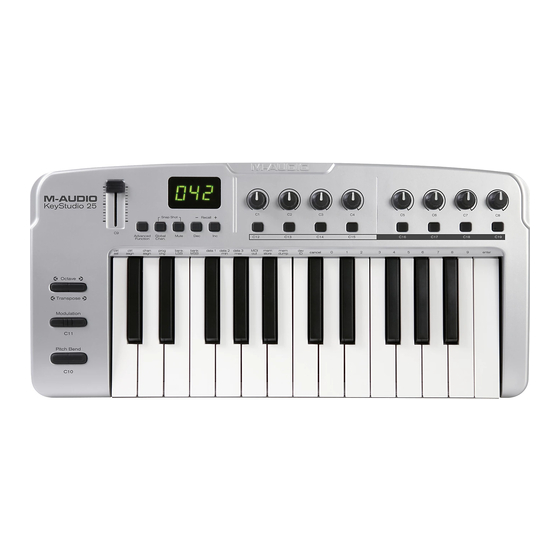
Related Manuals for M-Audio KeyStudio 25


Summary of Contents for M-Audio KeyStudio 25
-
Page 1: User Guide
The Compact Make-Music-Now Keyboard Studio English User Guide... -
Page 2: Table Of Contents
Assigning KeyStudio 25’s Buttons, Knobs, or the Slider to Control Your Software: . . . . . . . . . . . . . . - Page 3 Program & Bank Changes Troubleshooting Appendices - Useful MIDI Data Appendix A: MIDI Implementation Chart Appendix B: Assignable MIDI CC’s on KeyStudio 25 Appendix C: Hexadecimal Conversion Chart Appendix D: General MIDI Preset Specification Appendix E: MIDI Note Numbers Appendix F: Standard MIDI Controller Numbers (MIDI CC’s)
-
Page 4: Introduction
This User Guide covers setup and features of the KeyStudio 25 USB keyboard and installation of the Session music creation software. Even if you are experienced with computer-based music production, we still recommend reading this User Guide to help you get the most out of this package. -
Page 5: Minimum System Requirements
RAM, then overall system RAM requirements may increase by the amount of system RAM shared with the video card. ☨ Session software will operate with any audio interface; for best performance, M-Audio recommends using an ASIO-compatible audio interface. -
Page 6: Installation And Setup
5. Once the installer has completed, click “Finish. ” 6. Attach KeyStudio 25 to an available USB port using the cable provided. Make sure the power switch on the back of the keyboard is in the “on” position. If you are using Windows Vista, your KeyStudio 25 installation is now complete. If you are using Windows XP, proceed to steps 7-9. -
Page 7: Install The Session Music Creation Software
2. Install the Session Music Creation Software. 1. Insert the M-Audio Session DVD-ROM into your computer’s DVD-ROM drive. 2. The computer will automatically display the install screen. If your computer fails to launch the installer, manually start it by clicking on Start > My Computer* and then double-clicking Session. -
Page 8: Getting Started Making Music With Session
1. Connect the KeyStudio 25 keyboard to your computer using the supplied USB cable and make sure the keyboard is switched on. 2. Launch Session by clicking Start > All Programs > M-Audio > Session > Session. Alternatively, if you chose to create a desktop shortcut icon during installation, you can double-click the shortcut. - Page 9 Session KeyStudio 25 User Guide 5. Click the Add a Track button in the upper left corner of the Session Main Screen. The “What would you like to do?” dialog box will now appear. For this example, select Play and Record with your Keyboard,...
- Page 10 OK. A new track will now appear in the main Session window. You may click the specific instrument you would like to play from the instrument list appearing on the left side of the screen. Session KeyStudio 25 User Guide...
-
Page 11: More Information On Configuring Session
Try playing notes on your KeyStudio 25 keyboard. If you can hear instrument sounds,you may skip steps 10-12. If your computer does not yet generate sounds when KeyStudio 25 is played, proceed to step 10 for additional configuration instructions. 10. Go to Options > Audio Hardware and make sure the sound card you wish you use (i.e., your computer’s built-in sound card or an installed ASIO compatible audio interface) is selected in the Output Device and Input Device pull-down menus. -
Page 12: Use Low Latency Streaming Checkbox
Latency is loosely defined as the amount of time it takes for a sound made in Session to reach your speakers. For example, with a high latency (Buffer Size) setting, there will be a noticeable delay between the press of a key on KeyStudio 25, and the resultant sound. -
Page 13: About Midi And Software Synthesis
If you are new to MIDI (Musical Instrument Digital Interface), you may initially find it challenging to understand how KeyStudio interacts with the computer. However, as you use KeyStudio 25 along with Session, you’ll discover the benefits of using a software-based sound source and recording system such as: access to an extremely large array of high quality sounds, a large graphic user interface, the ability to change an instrument sound after the recording has been made, and the freedom to work with many music creation applications. - Page 14 In some cases, it may be useful to increase or decrease the transmitted pitch of KeyStudio 25 by a small number of semitones, rather than a whole octave. For example, you may be playing a song with a singer and the singer is having trouble hitting the high or low notes.
-
Page 15: Rear Panel
KeyStudio 25 is sent out through this MIDI output as well as through the USB connection (if available). However, if KeyStudio 25 is connected to your computer via USB, it is possible to reconfigure this port so that it appears as a completely separate MIDI output port to your music software. -
Page 16: Using The Keystudio 25 Keyboard
If your software does not have this functionality, it may still be possible to manually assign the program’s features to be controlled by the specific MIDI CC data generated by the slider, knobs, or buttons found on KeyStudio 25. Refer to your software’s user guide to see if this is possible. -
Page 17: Sending Bank Changes
If your software or MIDI device supports “program change” messages, you can recall different presets (sounds) straight from the KeyStudio 25 keyboard without having to reach for the MIDI device (or computer). To send a program change message: 1. Press the ADVANCED FUNCTION button. -
Page 18: Setting The Global Midi Channel
MIDI signals, and this parameter can be left in its default setting. However, if you are using KeyStudio 25 without a computer to control a MIDI device (such as a sound module), you will need to make sure that both your M-Audio KeyStudio 25 keyboard and the MIDI device are set to the same MIDI channel. -
Page 19: Keystudio 25 Advanced Features
Duplicating and Organizing Presets You may want to duplicate or reorganize the order of the presets on your KeyStudio 25 controller. For example, let’s say you wanted to copy preset #2 (“Reason Native”) to location #4. This can be done through the following procedure: 1. -
Page 20: Enigma Software
Enigma Software Enigma is a powerful program that allows you to change the settings of any assignable slider, knob, or button on the KeyStudio 25 through an easy-to-use graphical user interface. The program also allows you to store a virtually unlimited amount of presets on your computer’s hard drive—a handy tool for users who have created custom presets for each of their MIDI devices. -
Page 21: Assigning Midi Ccs
4. Press the ENTER key to confirm the entry and exit Program mode. Note: If a button, knob, or slider is assigned to channel 0, it will transmit on the Global Channel of KeyStudio 25. Reassigning MIDI CC for the Modulation Control To edit a MIDI CC mapping for the Modulation control: 1. -
Page 22: Reassigning Midi Cc For The Pitch Control
3. Enter “10” using the numerical data entry keys or the DEC/INC buttons. This number corresponds to the Modulation control (each slider, button, or knob’s control number is printed next to it on the KeyStudio 25 keyboard). 4. Press the ENTER key to confirm the selection and exit Program mode. -
Page 23: Setting Toggle Values For The Buttons
5. Press the ADVANCED FUNCTION button again, followed by the DATA 3 (MAX) key. 6. Enter the new “high” value using the numerical data entry keys or the DEC/INC buttons. 7. Press the ENTER key to confirm. Session KeyStudio 25 User Guide... -
Page 24: Assigning Midi Machine Control (Mmc) Commands To A Button
8. Press the ADVANCED FUNCTION button, then the DATA 2 key. 9. Enter a number from the chart on the right to assign the corresponding MMC message to your selected button. Session KeyStudio 25 User Guide Number MMC Command STOP... -
Page 25: Assigning A Note To A Button
2. Press the CTRL ASGN key and enter “132” for RPN Coarse, “133” for RPN Fine, “134” for NRPN Coarse, or “135” for NRPN Fine using the numerical data entry keys or DEC/INC buttons. 3. Press ENTER key to confirm your selection. 4. Press the ADVANCED FUNCTION button, then the DATA 3 key. Session KeyStudio 25 User Guide... -
Page 26: About Sysex Messages And Device Id
Assigning the Device ID Press the ADVANCED FUNCTION button, then the DEV ID key to assign a Device ID to the M-Audio KeyStudio 25. When the DEV ID key is pressed, the LED display indicates the assigned Device ID. It is possible to enter a new device ID using the numerical data entry keys, or the +/- buttons. -
Page 27: Midi Messages In-Depth
Session KeyStudio 25 User Guide MIDI Messages In-Depth Program & Bank Changes When the MIDI standard was first established, it enabled the user to access only 128 different sounds using program change messages (0-127). As MIDI devices grew to be more sophisticated... - Page 28 Many VST instruments such as Native Instruments’ FM7 or the synth modules in Propellerhead Reason are non-GM devices. You can send program change, bank LSB and bank MSB messages directly from the KeyStudio keyboard. Please consult the “Advanced KeyStudio 25 Features in Edit Mode“ section of this User Guide for further details.
-
Page 29: Troubleshooting
Problem 6: I have modified my KeyStudio 25 settings but would like to go back to its “factory default” settings. To reset KeyStudio 25 to its “factory default” settings, first switch the keyboard off. Next (while the controller is still off ), press and hold both Preset +/- buttons and turn the unit on. - Page 30 In general, it is good practice to turn your speakers off while recording, and listen with headphones. Session KeyStudio 25 User Guide M-Audio builds a variety of low latency ASIO-...
- Page 31 Master Volume control. Problem 15: The Session software operates very slowly, and is very system-resource intensive. This problem may be solved by downloading and installing a more current driver from your specific graphics card manufacturer’s website. Session KeyStudio 25 User Guide...
-
Page 32: Appendices - Useful Midi Data
System Common Song Select System Clock Commands Exclusive Local ON/ Messages All Notes OFF Active Sense Reset Notes Session KeyStudio 25 User Guide Transmitted 1-16 1-16 --------- ********* 0-127 ********* 0-127 ********* GM, GM2, MMC Memory Dump 0 = YES... -
Page 33: Appendix B: Assignable Midi Cc's On Keystudio 25
Appendix B: Assignable MIDI CC’s on KeyStudio 25 Table B1: Knobs and fader assignments MIDI CC Description 0-119 Standard MIDI CC’s 120-127 Channel Mode Messages Pitch Bend Sensitivity Channel Fine Tune Channel Coarse Tune Channel Pressure RPN Coarse RPN Fine... - Page 34 Table B3: MMC Command Numbers Number MMC Command STOP PLAY DEFERRED PLAY FAST FORWARD REWIND RECORD STROBE RECORD EXIT Session KeyStudio 25 User Guide Program Data LSB Toggle value 2 Toggle value 2 Sensitivity value Tuning amount Tuning amount Pressure amount Value...
-
Page 35: Appendix C: Hexadecimal Conversion Chart
Appendix C: Hexadecimal Conversion Chart Hexadecimal Value Decimal Value Session KeyStudio 25 User Guide Hexadecimal Value Decimal Value Hexadecimal Value Decimal Value... -
Page 36: Appendix D: General Midi Preset Specification
28 Muted Electric 29 Overdrive 30 Distorted 31 Harmonics Appendix E: MIDI Note Numbers Octave (n) Note Numbers Session KeyStudio 25 User Guide Bass Reed 32 Acoustic Bass 64 Soprano Sax 33 Fingered Bass 65 Alto Sax 34 Electric Picked Bass... -
Page 37: Appendix F: Standard Midi Controller Numbers (Midi Cc's)
Controller 26 Controller 27 Controller 28 Controller 29 Controller 30 Controller 31 Bank Select LSB Modulation LSB Session KeyStudio 25 User Guide Breath Control LSB Legato Pedal Controller 35 Hold 2 Foot Control LSB Sound Variation Porta Time LSB Resonance... -
Page 38: Appendix G: Roland Gs And Yamaha Xg Nrpn Support
* added by Yamaha XG; % changed from Delay to Variation by Yamaha XG Appendix H: General MIDI Reverb and Chorus Types Reverb Types Small Room Medium Room Large Room Medium Hall Large Hall Plate Session KeyStudio 25 User Guide Chorus Types Chorus 1 Chorus 2 Chorus 3 Chorus 4 FB Chorus Flanger... -
Page 39: Technical Info
Note: Your M-Audio product has been tested to comply with FCC Standards FOR HOME OR OFFICE USE. Modifications not authorized by the manufacturer may void users authority to operate this device. - Page 40 ......052-218-0875 Web ......www.m-audio.jp 080211_SsnKyStu25_UG_EN01 愛知県名古屋市...
Need help?
Do you have a question about the KeyStudio 25 and is the answer not in the manual?
Questions and answers