Table of Contents
Advertisement
Quick Links
RFRP-HW-OT
Cylinder Thermostat
Contents
1.
Factory default settings
3.
Mounting
4.
Installation
5.
Frost protection
6.
7.
8.
9.
22. Installer Menu (without OpenTherm® connected)
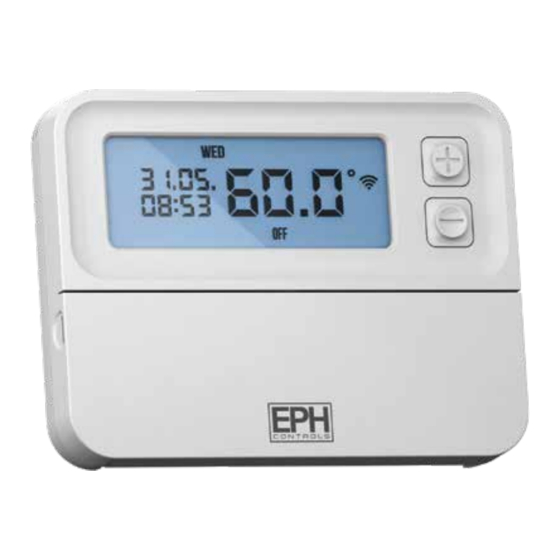
How your cylinder thermostat works
When the thermostat is in the AUTO mode, it will operate according to the
program.
During this time the thermostat will remain on until the temperature setpoint
is reached.
There is only one temperature setpoint which is applied to all programs. The
default temperature setpoint is 60°C.
1. Factory default settings
Temperature indicator:
In built frost protection:
Clock:
Operating mode:
Default temperature setpoint:
Power supply:
Power consumption:
Battery replacement:
Temp. control range:
Ambient temperature:
Dimensions:
Temperature sensor:
Temperature indication:
Frost protection:
Pollution degree:
Wireless
°C
5°C - Not adjustable
24 hours
5/2 day
60˚C
2 x AA Alkaline Battery
2 mW
Once a year
6 ... 90°C
0 ... 45°C
130 x 99 x 25mm
NTC 100K Ohm @ 25°C
˚C
Only operational in OFF mode
Pollution degree 2
EPH Controls Ireland
technical@ephcontrols.com www.ephcontrols.com
Page 1 of 4
Operating Instructions
The thermostat must not be left unsupervised
when open. (Prevent non specialists and especially
children from gaining access to it.)
the manufacturer, its safety may be impaired.
Prior to setting the thermostat, it is neccessary to
complete all required settings described in this section.
3a Mounting of temperature sensor
ON CYLINDER: To ensure accurate control of your cylinder, the
temperature sensor should be mounted on the bottom 1/3 of the cylinder.
It is essential that the sensing element is in direct contact with the
cylinder and that there is no insulation between it and the cylinder. 60°C is
the temperature level required in order to prevent the build up of
using the provided foil tape.
ON PIPEWORK: To ensure accurate control, the temperature sensor should
be mounted on the pipework as tightly as possible. It is essential that the
sensing element is in direct contact with the pipework and that there is no
insulation between it and the pipework. The temperature sensor can be
3b Mounting of thermostat
The thermostat should be mounted in a position that will make reading
the display conventient.
4. Installation
There is a battery compartment located below the buttons.
Apply downward pressure to remove the cover.
Insert the 2 x AA batteries and the thermostat will turn on.
Close the battery compartment.
5. Frost protection
Frost protection is built into this thermostat.
It will only be activated when the thermostat is in the OFF mode and the
room temperature falls below 5°C.
EPH Controls UK
technical@ephcontrols.com www.ephcontrols.co.uk
CAUTION!
Important: Keep this document
5°C
20221005_RFRP-HW-OT_OpIns_PK
Advertisement
Table of Contents

Related Manuals for EPH Controls RFRP-HW-OT


Summary of Contents for EPH Controls RFRP-HW-OT
- Page 1 14. Permanent override 15. Boost function 16. Holiday function 17. To connect the RFRP-HW-OT thermostat to an RF1A-OT receiver Prior to setting the thermostat, it is neccessary to 18. To disconnect the RFRP-HW-OT thermostat from an RF1A-OT receiver complete all required settings described in this section.
- Page 2 Press the ‘AUTO’ button or wait 5 seconds and the thermostat will return to Press the button to skip a day. normal operation. You can copy to multiple days using the button. Press the ‘OK’ button when copying has been completed. EPH Controls Ireland EPH Controls UK technical@ephcontrols.com www.ephcontrols.com technical@ephcontrols.com www.ephcontrols.co.uk 20221005_RFRP-HW-OT_OpIns_PK...
- Page 3 RF1A-OT receiver temperature setpoint. Please note, If you are installing a CP4-HW-OT, the RFRP-HW-OT thermostat and the RF1A-OT receiver will have a pre-established RF connection so it is Press Ok or after 5 seconds the thermostat will operate to this not necessary to carry out the RF connection process below.
- Page 4 P0 4: Calibration This menu allows the installer to re-calibrate the thermostat. The current temperature will be displayed on the screen and can be adjusted by pressing the up and down buttons. EPH Controls Ireland EPH Controls UK technical@ephcontrols.com www.ephcontrols.com technical@ephcontrols.com www.ephcontrols.co.uk...
Need help?
Do you have a question about the RFRP-HW-OT and is the answer not in the manual?
Questions and answers