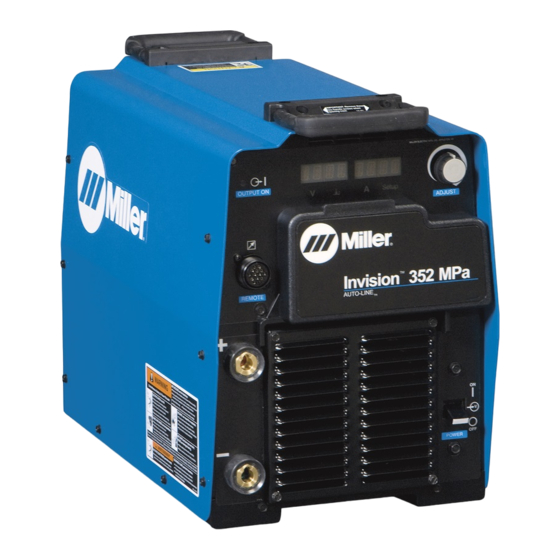
Miller Auto-Line Invision 352 MPa Technical Manual
Hide thumbs
Also See for Auto-Line Invision 352 MPa:
- Owner's manual (48 pages) ,
- Owner's manual (44 pages) ,
- Owner's manual (44 pages)
Table of Contents
Advertisement
Quick Links
For product information, Own-
er's Manual translations, and
more, visit
www.MillerWelds.com
Invision 352 MPa
Auto-Line
Proprietary Information - Do not distribute or allow to be used by unqualified persons.
TM-246193K
Eff w/Serial No. MA021803A
Processes
MIG (GMAW) and Pulsed MIG
(GMAW-P) Welding
Air Carbon Arc (CAC-A) Cutting
and Gouging
Description
Arc Welding Power Source
™
File: MULTIPROCESS
2021−11
™
Advertisement
Table of Contents
Troubleshooting

Related Manuals for Miller Auto-Line Invision 352 MPa


Summary of Contents for Miller Auto-Line Invision 352 MPa
- Page 1 TM-246193K 2021−11 Eff w/Serial No. MA021803A Processes MIG (GMAW) and Pulsed MIG (GMAW-P) Welding Air Carbon Arc (CAC-A) Cutting and Gouging Description Arc Welding Power Source Invision 352 MPa ™ Auto-Line ™ For product information, Own- File: MULTIPROCESS er’s Manual translations, and more, visit www.MillerWelds.com Proprietary Information - Do not distribute or allow to be used by unqualified persons.
- Page 2 Effective with ME100269U, IGBT Module Kit No. 217 625 was discontinued. See Parts List and Service Memo 1233 for additional informa- tion. Effective with ME224001U, 115 volts AC is no longer available at remote 14 receptacle RC50. See the Miller Extranet for service memos that may aid in the repair of this product.
-
Page 3: Table Of Contents
TABLE OF CONTENTS SECTION 1 − SAFETY PRECAUTIONS FOR SERVICING ........1-1. - Page 4 TABLE OF CONTENTS SECTION 8 − TROUBLESHOOTING ............8-1.
-
Page 5: Section 1 − Safety Precautions For Servicing
SECTION 1 − SAFETY PRECAUTIONS FOR SERVICING Protect yourself and others from injury — read, follow, and save these important safety precautions and operating instructions. 1-1. Symbol Usage OM-246193-U, safety_stm 2020-02 DANGER! − Indicates a hazardous situation which, if Indicates special instructions. not avoided, will result in death or serious injury. -
Page 6: California Proposition 65 Warnings
EXPLODING PARTS can injure. ELECTRIC AND MAGNETIC FIELDS (EMF) can affect Implanted Medical Devices. D Failed parts can explode or cause other parts to D Wearers of Pacemakers and other Implanted explode when power is applied to inverters. Medical Devices should keep away from serv- D Always wear a face shield and long sleeves icing areas until consulting their doctor and the when servicing inverters. -
Page 7: Section 2 − Definitions
SECTION 2 − DEFINITIONS 2-1. Manufacturer Safety Symbols And Definitions Some symbols are found only on CE products. Warning! Watch Out! There are possible hazards as shown by the symbols. Safe1 2012−05 When power is applied failed parts can explode or cause other parts to explode. Safe26 2012−05 Wear dry insulating gloves. - Page 8 Welding sparks can cause fires. Have a fire extinguisher nearby, and have a watchperson ready to use it. Safe14 2012−05 Do not weld on drums or any closed containers. Safe16 2017−04 Do not remove or paint over (cover) the label. Safe20 2017−04 Flying pieces of parts can cause injury.
-
Page 9: Miscellaneous Symbols And Definitions
2-2. Miscellaneous Symbols And Definitions Some symbols are found only on CE products. Three Phase Read Instructions Increase Remote Press Positive Amperes Percent Single Phase Output Input Power Or Input Voltage Arc Control Negative Volts Notes Invision 352 MPa TM-246193 Page 5... -
Page 10: Section 3 − Specifications
3-5. Information About Default Weld Parameters And Settings NOTICE − Each welding application is unique. Although certain Miller Electric products are designed to determine and default to certain typical welding parameters and settings based upon specific and relatively limited application variables input by the end user, such default settings are for reference purposes only;... -
Page 11: Dimensions And Weight
3-7. Dimensions And Weight Hole Layout Dimensions 24 in. (610 11-3/4 in. (298 mm) 17 in. 1-11/16 in. (42 mm) (432 mm) 15-3/4 in. (400 mm) 19-3/32 in. (485 mm) 12-1/2 in. 8-11/16 in. (221 mm) (318 mm) 1-17/32 in. (39 mm) 804801-A 1/4-20 UNC -2B thread Weight... -
Page 12: Duty Cycle And Overheating
3-9. Duty Cycle And Overheating Duty Cycle is percentage of 10 min- utes that unit can weld at rated load without overheating. If unit overheats, output stops, a Help message is displayed and cooling fan runs. Wait fifteen minutes for unit to cool. -
Page 13: Section 4 − Installation
SECTION 4 − INSTALLATION 4-1. Selecting A Location Movement Do not move or operate unit where it could tip. Location And Airflow Special installation may be required where gasoline or volatile liquids are present − see NEC Article 511 or CEC Section 20. -
Page 14: Selecting Cable Sizes
4-2. Selecting Cable Sizes* NOTICE − The Total Cable Length in Weld Circuit (see table below) is the combined length of both weld cables. For example, if the power source is 100 ft (30 m) from the workpiece, the total cable length in the weld circuit is 200 ft (2 cables x 100 ft). Use the 200 ft (60 m) column to determine cable size. -
Page 15: Remote 14 Receptacle Information
4-4. Remote 14 Receptacle Information Socket* Socket Information 24 volts AC. Protected by supplementary protect- 24 VOLTS AC or CB2. Contact closure to A completes 24 volts AC contactor control circuit. C L N Output to remote control; 0 to +10 volts DC, +10 volts DC in MIG mode. -
Page 16: Electrical Service Guide
4-6. Electrical Service Guide Elec Serv 2020−02 NOTICE − INCORRECT INPUT POWER can damage this welding power source. Phase to ground voltage shall not exceed +10% of rated input voltage. NOTICE − Actual input voltage should not be 10% less than minimum and/or 10% more than maximum input voltages listed in table. If actual input voltage is outside this range, output may not be be available. - Page 17 Notes Invision 352 MPa TM-246193 Page 13...
-
Page 18: Connecting 1-Phase Input Power
4-7. Connecting 1-Phase Input Power =GND/PE Earth Ground Tools Needed: input1 2012−05 − Ref. 803766-C / 803691-E TM-246193 Page 14 Invision 352 MPa... - Page 19 4-7. Connecting 1-Phase Input Power (Continued) nected to any input power between 208 and Disconnect Device (switch shown in the Installation must meet all National and 575 VAC without removing cover to relink the OFF position) Local Codes − have only qualified per- power source.
-
Page 20: Connecting 3-Phase Input Power
4-8. Connecting 3-Phase Input Power = GND/PE Earth Ground Tools Needed: input2 2012−05 − Ref. 803766-C / 803691-E TM-246193 Page 16 Invision 352 MPa... - Page 21 4-8. Connecting 3-Phase Input Power (Continued) voltage available at site. This unit can be con- Input Conductors (L1, L2 And L3) Installation must meet all National and nected to any input power between 208 and Local Codes − have only qualified per- Disconnect Device Line Terminals 575 VAC without removing cover to relink the sons make this installation.
-
Page 22: Section 5 − General Operation
SECTION 5 − GENERAL OPERATION 5-1. Front Panel Ref. 804772-B / 235550-A Right Display 10 Process Indicator Weld process operation sections de- scribe functionality of the identified items. 11 Arc Control Indicator The meters display the actual weld output values after arc initiation and remains dis- Remote 14 Receptacle 12 Setup Button played for approximately three seconds... -
Page 23: Configuration Option Menu
5-2. Configuration Option Menu Ref. 235550-A Left Display means to customize some machine features Configuration options are displayed in the Left for desired operation. Display. Settings are displayed in the Right Right Display Display. Settings can be changed by turning Adjustment Control To enter the Configuration Option Menu, hold the Adjust Control. -
Page 24: Factory Reset Procedure
Configuration Option Menu (Continued) Pulsed MIG Adjustment ARC.L PULS This option allows adjusting the Pulsed MIG process in units of Arc Length (PULS ARC.L) or preset voltage (PULS VOLT). Wire Feed Speed And Wire Diameter Units WFS IPM: WFS is displayed in inches per minute Diameter is displayed in inches WFS MPM: WFS is displayed in meters per minute... -
Page 25: Section 6 − Gmaw/Gmaw-P/Fcaw Operation
SECTION 6 − GMAW/GMAW-P/FCAW OPERATION 6-1. Typical Connection For Remote Control Feeder GMAW/GMAW-P/FCAW Process 805058-B Workpiece Use of shielding gas is dependant on Wire Turn off power before making Type. connections. Remote 14-Receptacle The connection diagram illustrates Synergic Wire Feeder DCEP (reverse polarity) suitable for all Positive (+) Weld Output Terminal wires except self-shielded FCAW. -
Page 26: Mig Welding Mode - Gmaw/Fcaw Process
6-2. MIG Welding Mode - GMAW/FCAW Process Ref. 235550-A Press the Setup Button again. Wire/Gas In- Pressing the Setup Button allows adjust- Weld terminals energized dicator is lit. The active gas type will appear ment of Arc Control, Wire Type, Gas Type through the remote control in MIG in the Left and Right Display. -
Page 27: Mig - Wire And Gas Selection Table
6-3. MIG - Wire and Gas Selection Table WIRE TYPES** GAS TYPES DEFAULT INDUCTANCE .035 (0.9) STL ARGN CO2 (75 ARGON / 25 CARBON DIOXIDE) .045 (1.2) STL ARGN OXY (98 ARGON / 2 OXYGEN) .052 (1.4) STL Steel .035 (0.9) STL CO2 (CARBON DIOXIDE) .045 (1.2) STL .035 (0.9) FCAW... -
Page 28: Pulsed Mig Welding Mode - Gmaw-P Process
6-4. Pulsed MIG Welding Mode - GMAW-P Process Ref. 235550-A Pulsed MIG − Wire and Gas Selection additional wire. The arc length setting ap- Weld terminals energized Table for available wires and gases pears in the Left Display when the Arc through the remote control in (see Section 6-5). -
Page 29: Pulsed Mig - Wire And Gas Selection Table
6-5. Pulsed MIG - Wire and Gas Selection Table WIRE TYPES** GAS TYPES ARGN CO2 (ARGON / CARBON DIOXIDE) .035 (0.9) STL Steel 80 ARGN CO2 (ARGON / CARBON DIOXIDE) .045 (1.2) STL ARGN OXY (ARGON / OXYGEN) .035 (0.9) STL Steel 100S 100S C5 (95 ARGON / 5 CARBON DIOXIDE) .045 (1.2) STL... -
Page 30: Remote Process Select
6-6. Remote Process Select This power source can be used with wire feeders that support Remote Process Se- lect. This feature allows the operator to switch the active welding process between MIG and Pulsed MIG at the wire feeder. To determine if the welding system is Remote Process Select capable, connect the wire feeder to the power source and review the... - Page 31 Notes Invision 352 MPa TM-246193 Page 27...
-
Page 32: Section 7 − Theory Of Operation
SECTION 7 − THEORY OF OPERATION Boost Boost Inverter Input Snubber Module Inductor Inductor Mod2 Input Snubber Pre-Regulator Resistor Module Module Capacitors Mod1 C12, C13 1 Phase Power Switch 3 Phase Power Interconnect Board Input Current Power Transformer Bus Voltage Input Rectifier Voltage Input Boost Inductor Current Feedback... - Page 33 Negative (−) Output Weld Stabilizer Output Receptacle Work Positive (+) Series Main Output Weld Capacitor Transformer Diodes Output Output D1 & D2 Receptacle Current Sensor Output Current Feedback Main Transformer Current Feedback Electrode Inverter Gating Signals Motor Inverter Control Control Boost Power Control...
- Page 34 Theory Of Operation Components Primary Input Power 12 Main Transformer T1 23 Optional Auxiliary Power 115 VAC Receptacle Single or Three-Phase AC primary Switching action of IGBTs in MOD2 Provides connection for auxiliary power supply. creates the AC voltage source for T1 equipment to welding power source.
-
Page 35: Section 8 − Troubleshooting
Make sure engine speed is set to correct RPM. For important service memos and software updates. Check Extranet It is possible the issue has already been identified and addressed by Miller. Check open-circuit voltage for each process and polarity. Check OCV Check auxiliary power output if available. -
Page 36: Checking Unit Before Applying Power
See Section 8-18 for test points and values. Use Miller Testing Booklet (Part No. 150853) when servicing this unit. See the Miller Extranet for service memos that may aid in the repair of this product. Follow the pre-power checklist if any of the following conditions exist:... -
Page 37: Measuring/Discharging Input Capacitor Voltage Before Working On Unit
PRE-POWER CHECKS 8-3. Measuring/Discharging Input Capacitor Voltage Before Working On Unit Turn Off welding power source, and disconnect input power. Significant voltage remain on capacitors after unit is Off. Always check the voltage as shown to be sure the input capac- itors have discharged before working on unit. -
Page 38: Input Pre-Regulator Module (Mod1)
PRE-POWER CHECKS 8-4. Input Pre-Regulator Module (MOD1) Test Equipment Needed: Read and follow safety information in Section 8-2 before proceeding. Wear an earth grounded wrist strap when perform- ing pre-power and power off checks. Remove wrist strap before performing any checks or procedures with power applied to the machine. -
Page 39: Inverter Module (Mod2)
PRE-POWER CHECKS 8-6. Inverter Module (MOD2) Read and follow safety information in Section 8-2 before proceeding. Wear an earth grounded Test Equipment Needed: wrist strap when performing pre-power and power off checks. Remove wrist strap before performing checks or procedures with power applied to the ma- chine. -
Page 40: Power Interconnect Board Pc2
PRE-POWER CHECKS 8-8. Power Interconnect Board PC2 Test Equipment Needed: Ref. 907161 / 258043-C checks or procedures with power m) All other connecting screws Read and follow safety information applied to the machine. torque to (20 in. lbs (2.3 N in Section 8-2 before proceeding. -
Page 41: Control Board Pc1
PRE-POWER CHECKS 8-10. Control Board PC1 Test Equipment Needed: Pin sequence of IC chips. Ref. 276639-A / 907161 checks or procedures with power Check all measurements for PC1. Read and follow safety information applied to the machine. (see Section 8-11). in Section 8-2 before proceeding. -
Page 42: Power Switch (S1)
PRE-POWER CHECKS 8-12. Power Switch (S1) Read and follow safety information in Section 8-2 before proceeding. Wear an earth grounded wrist strap when performing pre-power checks. Remove wrist strap before perform- ing any checks or proce- dures with power applied to the machine. -
Page 43: Output Diodes
PRE-POWER CHECKS 8-13. Output Diodes D1, D2 Read and follow safety information in Section 8-2 before proceeding. Wear an earth grounded wrist strap when performing pre-power checks. Remove wrist strap before perform- ing any checks or proce- dures with power applied to the machine. -
Page 44: Troubleshooting Table
Inspection and Testing. See Section 8-18 for test points and values. Use MILLER Testing Booklet (Part No. 150853) when servicing this unit. See the Miller Extranet for service memos that may aid in the repair of this product. Trouble Remedy No weld output;... - Page 45 Always check unit before applying power (see Sections 8-2 thru 8-11). Trouble Remedy Limited output and low open circuit Check for proper input and output connections voltage (OCV). If a remote accessory is connected to remote 14 receptacle RC50: Check accessory contact closure (continuity), and replace accessory if necessary. Check accessory amperage control potentiometer resistance and connections, and replace accessory if necessary.
-
Page 46: Help Displays
Always check unit before applying power (see Sections 8-2 thru 8-11). 8-16. Help Displays All directions are in reference to the front of the unit. All circuitry referred to is lo- cated inside the unit. Help 1 Display HELP Indicates a malfunction in the primary power circuit. -
Page 47: Factory Reset Procedure
Always check unit before applying power (see Sections 8-2 thru 8-11). 8-17. Factory Reset Procedure Start procedure with welding power source off. Press and hold Setup button while turning power On. When SETUP is displayed, release the Setup button. Press and release Setup button until INFO NO is displayed. Press and hold Setup button;... -
Page 48: Troubleshooting Circuit Diagram
Always check unit before applying power (see Sections 8-2 thru 8-11). 8-18. Troubleshooting Circuit Diagram Voltage Readings ± a) Tolerance − 10% unless specified b) Reference − single arrow: reference to circuit common (lead 42); double arrow: reference to points indicated c) Wiring Diagram −... - Page 49 Always check unit before applying power (see Sections 8-2 thru 8-11). See Section 8-23 for PC2 information Approx. 35K ohms at 705 F (215 C) See Section 8-19 for PC1 information 271737-B Invision 352 MPa TM-246193 Page 45...
-
Page 50: Control Board Pc1 Testing Information (Use With Section 8-20)
Always check unit before applying power (see Sections 8-2 thru 8-11). 8-19. Control Board PC1 Testing Information (Use with Section 8-20) Measure voltage of input ca- pacitors according to Section 8-3, and be sure voltage is near zero before touching any parts. -
Page 51: Control Board Pc1 Test Point Values
Always check unit before applying power (see Sections 8-2 thru 8-11). 8-20. Control Board PC1 Test Point Values ± a) Tolerance − 10% unless specified PC1 Voltage Readings b) Reference − to circuit common (lead 42) unless noted Receptacle Type Value Do not measure −... - Page 52 Always check unit before applying power (see Sections 8-2 thru 8-11). Section 8-20. Control Board PC1 Test Point Values (Continued) Receptacle Type Value Input Output reference; 1 volt DC per 42.5 amperes of weld output when machine is under load; when machine at idle, process set to MIG with .035 STL wire and ARGN CO2 gas selected;...
- Page 53 Always check unit before applying power (see Sections 8-2 thru 8-11). Section 8-20. Control Board PC1 Test Point Values (Continued) Output Do not measure − Test point, used to test board only Output Do not measure − Test point, used to test board only Input Do not measure −...
-
Page 54: Control Board Pc1 - Power Off Checks
Always check unit before applying power (see Sections 8-2 thru 8-11). 8-21. Control Board PC1 - Power Off Checks Board layouts are slightly different in older units. Test Equipment Needed: Pin sequence of IC chips. Ref. 276639-A / 907161 performing any checks or proce- Control Board PC1 Read and follow safety information dures with power applied to the... -
Page 55: Control Board Pc1 − Power Off Checks
Always check unit before applying power (see Sections 8-2 thru 8-11). 8-22. Control Board PC1 − Power Off Checks Pre-Regulator Control DMM Positive Lead DMM Negative Lead DMM Diode DMM Ohms Buck IGBT Gate Drive IC U6 U6 Pin 6 U6 Pin 7 0.10 - 0.30 Inverter Control... -
Page 56: Power Interconnect Board Pc2 Testing Information (Use With Section 8-24)
Always check unit before applying power (see Sections 8-2 thru 8-11). 8-23. Power Interconnect Board PC2 Testing Information (Use with Section 8-24) Measure voltage of input capacitors according to Section 8-3, and be sure voltage is near zero before touching any parts. Be sure plugs are secure before applying power. -
Page 57: Power Interconnect Board Pc2 Test Point Values
Always check unit before applying power (see Sections 8-2 thru 8-11). 8-24. Power Interconnect Board PC2 Test Point Values ± a) Tolerance − 10% unless specified PC2 Voltage Readings b) Reference − to circuit common (lead 42) unless noted Receptacle Type Value Do not measure −... - Page 58 Always check unit before applying power (see Sections 8-2 thru 8-11). Section 8-24. Power Interconnect Board PC2 Test Point Values (Continued) High voltage present. The following terminals are used to interconnect the main power circuit with the primary supply, and with power circuit components not soldered in the pcb. Voltages on this receptacle can exceed 900 volts DC from chassis (GND).
- Page 59 Always check unit before applying power (see Sections 8-2 thru 8-11). Notes Start Your Professional Over 80,000 trained 400 Trade Square East, Troy, Ohio 45373 Welding Career Now! since 1930! 1-800-332-9448 www.welding.org Invision 352 MPa TM-246193 Page 55...
-
Page 60: Power Interconnect Board (Pc2) - Power Off Checks (Prior To Mb510232A)
Always check unit before applying power (see Sections 8-2 thru 8-11). 8-25. Power Interconnect Board (PC2) - Power Off Checks (Prior To MB510232A) Test Equipment Needed: Center +BUS D11 D10 −BUS Ref. 907161 / 232403-B dures with power applied to the Visually inspect PC2 for damage. -
Page 61: Power Interconnect Board (Pc2) - Power Off Checks (Prior To Mb510232A)
Always check unit before applying power (see Sections 8-2 thru 8-11). 8-26. Power Interconnect Board (PC2) - Power Off Checks (Prior To MB510232A) Power Interconnect Board PC2 DMM Positive Lead DMM Negative Lead DMM Diode DMM Ohms Pre-Charge Resistor R14 R14 Bottom R14 Top SCR Gate Resistor R10... -
Page 62: Power Interconnect Board (Pc2) - Power Off Checks
Always check unit before applying power (see Sections 8-2 thru 8-11). 8-27. Power Interconnect Board (PC2) - Power Off Checks (Effective With MB510232A Thru MH474076U) Test Equipment Needed: Ref. 907161 / 224662-B Visually inspect PC2 for damage. dures with power applied to the Read and follow safety information machine. -
Page 63: Power Interconnect Board (Pc2) - Power Off Checks (Effective With Mb510232A Thru Mh474076U)
Always check unit before applying power (see Sections 8-2 thru 8-11). 8-28. Power Interconnect Board (PC2) - Power Off Checks (Effective With MB510232A Thru MH474076U) Power Interconnect Board PC2 DMM Positive Lead DMM Negative Lead DMM Diode DMM Ohms Pre-Charge Resistor R14 R14 Bottom R14 Top SCR Gate Resistor R10... -
Page 64: Power Interconnect Board (Pc2) - Power Off Checks (Effective With Mh474077U)
Always check unit before applying power (see Sections 8-2 thru 8-11). 8-29. Power Interconnect Board (PC2) - Power Off Checks (Effective With MH474077U) Test Equipment Needed: PTC1 Ref. 907161 / 258043-C dures with power applied to the Visually inspect PC2 for damage. Read and follow safety information machine. -
Page 65: Power Interconnect Board (Pc2) - Power Off Checks (Effective With Mh474077U)
Always check unit before applying power (see Sections 8-2 thru 8-11). 8-30. Power Interconnect Board (PC2) - Power Off Checks (Effective With MH474077U) Power Interconnect Board PC2 DMM Positive Lead DMM Negative Lead DMM Diode DMM Ohms Pre-Charge Resistor R14 R14 Bottom R14 Top SCR Gate Resistor R10... -
Page 66: Front Panel/Display Board Pc3 Testing Information (Use With Section 8-32)
Always check unit before applying power (see Sections 8-2 thru 8-11). 8-31. Front Panel/Display Board PC3 Testing Information (Use with Section 8-32) Measure voltage of input capacitors according to Section 8-3, and be sure voltage is near zero before touching any parts. Be sure plugs are secure before ap- plying power. -
Page 67: Front Panel/Display Board Pc3 Test Point Values
Always check unit before applying power (see Sections 8-2 thru 8-11). 8-32. Front Panel/Display Board PC3 Test Point Values ± a) Tolerance − 10% unless specified PC3 Voltage Readings b) Reference − to circuit common (lead 42) unless noted Receptacle Type Value Output... -
Page 68: Checking Unit Output After Servicing
Always check unit before applying power (see Sections 8-2 thru 8-11). Section 8-32. Front Panel/Display Board PC3 Test Point Values (Continued) Receptacle Type Value RC50 Output 23 volts AC RMS at 10 amps; 14−pin remote accessory power Input Remote output enable; 0 volts AC = weld output off, 23 volts AC RMS = weld output on Output Output signal to remote command reference;... -
Page 69: Section 9 − Maintenance
SECTION 9 − MAINTENANCE 9-1. Routine Maintenance Disconnect power Maintain more often during before maintaining. severe conditions. n = Check Z = Change ~ = Clean l = Replace Replace Damaged Replace Cracked Torch Body Unreadable n Z l Labels Repair Or Replace Cracked... -
Page 70: Removing Fan Motor
9-3. Removing Fan Motor Significant DC voltage can remain on capacitors after unit is Off. Always check capacitors according Section 8-3 to be sure they have discharged before working on unit. Drawing is representative and may not reflect actual unit. Mounting Unit Foot Base Fan Motor... -
Page 71: Section 10 − Electrical Diagrams
SECTION 10 − ELECTRICAL DIAGRAMS The circuits in this manual can be used for troubleshooting, but there might be minor circuit differences from your machine. Use circuit inside machine case or contact distributor for more information. The following is a list of all diagrams for models covered by this manual. Model Serial Or Style Number Circuit Diagram... - Page 72 Figure 10-1. Circuit for Invision 352 MPa (208−575 Volt) Eff. w/Serial No. MA021803A thru MB380100A TM-246193 Page 68 Invision 352 MPa...
- Page 73 246192-A Invision 352 MPa TM-246193 Page 69...
- Page 74 Figure 10-2. Circuit for Invision 352 MPa (208−575 Volt) Eff. w/Serial No. MB380101A thru MB520505A TM-246193 Page 70 Invision 352 MPa...
- Page 75 254105-A Invision 352 MPa TM-246193 Page 71...
- Page 76 Figure 10-3. Circuit for Invision 352 MPa (208−575 Volt) Eff. w/Serial No. MB520506A Thru ME224000U TM-246193 Page 72 Invision 352 MPa...
- Page 77 256236-A Invision 352 MPa TM-246193 Page 73...
- Page 78 Figure 10-4. Circuit for Invision 352 MPa (208−575 Volt) Eff. w/Serial No. ME224001U Thru MF254022U TM-246193 Page 74 Invision 352 MPa...
- Page 79 265903-A Invision 352 MPa TM-246193 Page 75...
- Page 80 Figure 10-5. Circuit for Invision 352 MPa (208−575 Volt) Eff. w/Serial No. MF254023U Thru MF344114U TM-246193 Page 76 Invision 352 MPa...
- Page 81 271737-A Invision 352 MPa TM-246193 Page 77...
- Page 82 Figure 10-6. Circuit for Invision 352 MPa (208−575 Volt) Eff. w/Serial No. MF344115U And Following TM-246193 Page 78 Invision 352 MPa...
- Page 83 271737-B Invision 352 MPa TM-246193 Page 79...
- Page 84 Figure 10-7. Wiring Diagram for Invision 352 MPa Eff. w/Serial No. MA021803A And Following (1 of 2) TM-246193 Page 80 Invision 352 MPa...
- Page 85 235706-A Invision 352 MPa TM-246193 Page 81...
- Page 86 Figure 10-8. Wiring Diagram for Invision 352 MPa Eff. w/Serial No. MA021803A And Following (2 of 2) TM-246193 Page 82 Invision 352 MPa...
- Page 87 235706-A Invision 352 MPa TM-246193 Page 83...
- Page 88 Figure 10-9. Wiring Diagram for Invision 352 MPa w/Serial No. MB380101A Thru MB520505A (1 of 2) TM-246193 Page 84 Invision 352 MPa...
- Page 89 254106-A Invision 352 MPa TM-246193 Page 85...
- Page 90 Figure 10-10. Wiring Diagram for Invision 352 MPa Eff. w/Serial No. MB380101A Thru MB520505A (2 of 2) TM-246193 Page 86 Invision 352 MPa...
- Page 91 254106-A Invision 352 MPa TM-246193 Page 87...
- Page 92 Figure 10-11. Wiring Diagram for Invision 352 MPa Eff. w/Serial No. MB520506A Thru ME224000U (1 of 2) TM-246193 Page 88 Invision 352 MPa...
- Page 93 256243-A Invision 352 MPa TM-246193 Page 89...
- Page 94 Figure 10-12. Wiring Diagram for Invision 352 MPa Eff. w/Serial No. MB520506A Thru ME224000U (2 of 2) TM-246193 Page 90 Invision 352 MPa...
- Page 95 256243-A Invision 352 MPa TM-246193 Page 91...
- Page 96 Figure 10-13. Wiring Diagram for Invision 352 MPa Eff. w/Serial No. ME224001U Thru MF254022U (1 of 2) TM-246193 Page 92 Invision 352 MPa...
- Page 97 268764-A Invision 352 MPa TM-246193 Page 93...
- Page 98 Figure 10-14. Wiring Diagram for Invision 352 MPa Eff. w/Serial No. ME224001U Thru MF254022U (2 of 2) TM-246193 Page 94 Invision 352 MPa...
- Page 99 268764-A Invision 352 MPa TM-246193 Page 95...
- Page 100 Figure 10-15. Wiring Diagram for Invision 352 MPa Eff. w/Serial No. MF254023U And Following (1 of 2) TM-246193 Page 96 Invision 352 MPa...
- Page 101 271738-A Invision 352 MPa TM-246193 Page 97...
- Page 102 Figure 10-16. Wiring Diagram for Invision 352 MPa Eff. w/Serial No. MF254023U And Following (2 of 2) TM-246193 Page 98 Invision 352 MPa...
- Page 103 271738-A Invision 352 MPa TM-246193 Page 99...
- Page 104 USA & Canada FAX: 920-735-4134 International FAX: 920-735-4125 For International Locations Visit www.MillerWelds.com Proprietary Information - Do not distribute or allow to be used by unqualified persons. © ORIGINAL INSTRUCTIONS − PRINTED IN USA 2020 Miller Electric Mfg. LLC 2020−01...
Need help?
Do you have a question about the Auto-Line Invision 352 MPa and is the answer not in the manual?
Questions and answers