
Subscribe to Our Youtube Channel
Related Manuals for Tektronix Keithley 2002


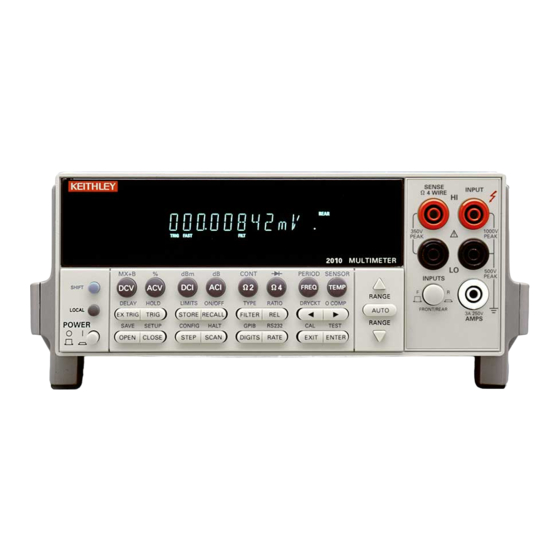
Summary of Contents for Tektronix Keithley 2002
- Page 1 tek.com/keithley Model 2002 8.5 Digit Multimeter Calibration Manual 2002-905-01 Rev. E September 2022 *P2002B-905-01E* 2002-905-01E...
- Page 2 Model 2002 Multimeter Calibration Manual © 2022, Keithley Instruments, LLC Cleveland, Ohio, U.S.A. All rights reserved. Any unauthorized reproduction, photocopy, or use of the information herein, in whole or in part, without the prior written approval of Keithley Instruments, LLC, is strictly prohibited. These are the original instructions in English.
- Page 3 Safety precautions The following safety precautions should be observed before using this product and any associated instrumentation. Although some instruments and accessories would normally be used with nonhazardous voltages, there are situations where hazardous conditions may be present. This product is intended for use by personnel who recognize shock hazards and are familiar with the safety precautions required to avoid possible injury.
- Page 4 For safety, instruments and accessories must be used in accordance with the operating instructions. If the instruments or accessories are used in a manner not specified in the operating instructions, the protection provided by the equipment may be impaired. Do not exceed the maximum signal levels of the instruments and accessories. Maximum signal levels are defined in the specifications and operating information and shown on the instrument panels, test fixture panels, and switching cards.
- Page 5 Table of Contents Performance Verification Introduction ................................. Environmental conditions ........................... Warm-up period ..............................Line power ................................Recommended test equipment ..........................Verification limits ............................... 1.6.1 Reading limit calculation example......................1.6.2 Additional derating factors.......................... Restoring default conditions ..........................Verification procedures............................1.8.1 DC volts verification ........................... 1.8.2 AC volts verification ...........................
- Page 6 2.10 Low-level calibration............................2-13 2.10.1 Recommended equipment for low-level calibration ................. 2-13 2.10.2 Low-level calibration summary......................... 2-13 2.10.3 Front panel low-level calibration procedure....................2-16 2.10.4 IEEE-488 bus low-level calibration procedure ..................2-20 2.11 Single-point calibration ............................. 2-24 2.11.1 Front panel single-point calibration......................2-24 2.11.2 IEEE-488 bus single-point calibration ......................
-
Page 7: Table Of Contents
List of Illustrations Performance Verification Figure 1-1 Connections for DC volts verification ......................Figure 1-2 Connections for AC volts verification (all except 2MHz) ................Figure 1-3 Connections for 2MHz AC volts verification ..................... Figure 1-4 Connections for DC current verification....................1-11 Figure 1-5 Connections for AC current verification.................... - Page 8 List of Tables Performance Verification Table 1-1 Recommended Test Equipment for Performance Verification..............Table 1-2 Limits for DCV verification........................Table 1-3 Limits for normal mode AC voltage verification..................Table 1-4 Limits for low-frequency mode AC voltage verification................Table 1-5 Limits for AC peak voltage verification ....................1-10 Table 1-6 Limits for DC current verification ......................
- Page 9 Performance Verification Introduction Restoring factory default conditions: Gives step-by- step procedures for restoring default conditions before The procedures in this section are intended to verify that each test procedure. Model 2002 accuracy is within the limits stated in the instru- Verification procedures: Details procedures to verify ment one-year accuracy specifications.
-
Page 10: Performance Verification
Performance Verification Line power The calculated limits are: Reading limits = 19V ± [(19V × (10ppm + 2.6ppm)) + (20V The Model 2002 should be tested while operating from a line × 0.15ppm) + 19V × 5.4ppm] voltage in the range of 90–134V or 180–250V at a frequency of 50, 60, or 400Hz. - Page 11 Performance Verification Table 1-1 Recommended Test Equipment for Performance Verification Mfg. Model Description Specifications* Fluke 5700A Calibrator ±5ppm basic uncertainty. DC Voltage: 190mV: ±11ppm 1.9V: ±7ppm 19V: ±5ppm 190V: ±7ppm 1000V: ±9ppm AC Voltage, 10Hz-1MHz (40Hz-20kHz specifications): 190mV: ±150ppm 1.9V: ±78ppm 19V: ±78ppm 190V: ±85ppm 750V: ±85ppm (50Hz-1kHz)
- Page 12 Performance Verification Verification procedures 1.8.1 DC volts verification DC voltage accuracy is verified by applying accurate DC The following paragraphs contain procedures for verifying voltages from a calibrator to the Model 2002 input and veri- instrument accuracy specifications for the following measur- fying that the displayed readings fall within specified ranges.
-
Page 13: Figure
Performance Verification Table 1-2 6. Set the calibrator output to 0.00000mVDC, and allow Limits for DCV verification the reading to settle. 7. Enable the Model 2002 REL mode. Leave REL enabled 2002 for the remainder of the DC volts verification test. Applied DC Reading Limits 8. - Page 14 Performance Verification 1.8.2 AC volts verification 4. Select the ACV function and the 200mV range on the Model 2002, and make sure that REL is disabled. AC voltage accuracy is checked by applying accurate AC voltages at specific frequencies from an AC calibration NOTE source and then verifying that each Model 2002 AC voltage Do not use REL to null offsets when per-...
-
Page 15: Figure
Performance Verification 5725 Amplifier (Connect to calibrator) Input HI Model 2002 Output HI 1.90000 VAC RMS 2001 MULTIMETER Input Output 5700A Calibrator (Output AC Voltage) CA-18-1 Low- capacitance cable Figure 1-2 Connections for AC volts verification (all except 2MHz) 5725 Amplifier (Connect to calibrator) BNC to dual banana 50Ω... - Page 16 Performance Verification Table 1-3 Limits for normal mode AC voltage verification...
- Page 17 Performance Verification Low-frequency mode 5. Select the low-frequency mode as follows: A. Press CONFIG ACV, select AC-TYPE, then press 1. Turn on the Model 2002, calibrator, and amplifier, and ENTER. allow a one-hour warm-up period before making B. Select LOW-FREQ-RMS, then press ENTER. measurements.
- Page 18 Performance Verification AC peak mode B. Select PEAK, then press ENTER. C. Select FILTER, then press ENTER. 1. Turn on the Model 2002, calibrator, and amplifier, and D. Select AVERAGING, then press ENTER. allow a one-hour warm-up period before making E.
-
Page 19: Figure
Performance Verification 1.8.3 DC current verification E. Press EXIT as necessary to return to normal display. 5. Select the DC current function (DCI) and the 200µA DC current accuracy is checked by applying accurate DC range on the Model 2002. (If the FILT annunciator is off, currents from a calibrator to the instrument AMPS input and press the FILTER key to enable the filter.) then verifying that the current readings fall within appropri-... -
Page 20: Figure
Performance Verification 1.8.4 AC current verification 2. Turn on the Model 2002 and the calibrator, and allow a one-hour warm-up period before making measure- AC current verification is performed by applying accurate ments. Be sure the calibrator is set for normal current AC currents at specific frequencies and then verifying that output. - Page 21 Performance Verification Table 1-7 Limits for AC current verification Reading limits (1 year, 18°C to 28°C) 2002 ACI Applied AC range current 40Hz 100Hz 1kHz 10kHz 200µA 190.000µA 188.260mV 189.562mV 189.210mV 189.020mV 191.740mV 190.439mV 190.790mV 190.980mV 1.90000mA 1.88355V 1.89657V 1.89742V 1.89742V 1.91645V 1.90344V...
-
Page 22: Figure
Performance Verification A. From normal display, press CONFIG then Ω2. 8. Set the calibrator output to 190Ω, and allow the reading to settle. B. Select SPEED, then press ENTER. C. Select HIACCURACY, then press ENTER. 9. Verify that the reading is within the limits stated in Table D. -
Page 23: Figure
Performance Verification 2. Characterize the 1GΩ resistor to within ±1,000ppm or Table 1-8 Limits for resistance verification (20 Ω -200M Ω ranges) better using an accurate megohm bridge or similar equipment. Record the characterized value where indi- Nominal cated in Table 1-9. Also compute the limits based on the 2002 Ω... -
Page 24: Figure
Performance Verification 3. Set the synthesizer operating modes as follows: 8. Set the synthesizer to each of the frequencies listed in Table 1-10, and verify that the Model 2002 frequency FREQ: 1Hz reading is within the required limits. AMPTD: 5V p-p OFFSET: 0V MODE: CONT Table 1-10... -
Page 25: Table 1-11 Thermocouple Temperature Reading Checks
Performance Verification 1.8.7 Temperature reading checks CONFIG-TEMP menu to set the default reference junction temperature to 0°C. When using thermocouples, the Model 2002 displays tem- perature by measuring the DC thermocouple voltage, and then calculating the corresponding temperature. Similarly, the instrument computes RTD temperature readings by mea- Table 1-11 suring the resistance of the RTD probe and calculating tem- Thermocouple temperature reading checks... -
Page 26: Table 1-12 Rtd Probe Temperature Reading Checks
Performance Verification RTD temperature reading checks Table 1-12 RTD probe temperature reading checks Use a precision decade resistance box (see Table 1-1) to sim- ulate probe resistances at various temperatures (Table 1-12). Reading limits Be sure to use 4-wire connections between the decade resis- RTD probe Applied (°C) 1 year,... -
Page 27: Calibration
Calibration Introduction Warm-up period: Discusses the length of time the Model 2002 should be allowed to warm up before This section gives detailed procedures for calibrating the calibration. Model 2002. Basically, there are three types of calibration Line power: States the power line voltage limits when procedures: calibrating the unit. - Page 28 Calibration Environmental conditions If you attempt comprehensive or low-level calibration with- out performing the unlocking procedure, the following mes- Calibration procedures should be performed at an ambient sage will be displayed: temperature of 23° ± 5°C, and at a relative humidity of less CALIBRATION LOCKED than 80% unless otherwise noted.
-
Page 29: Table 2-1 Ieee-488 Bus Calibration Command Summary
Calibration Table 2-1 IEEE-488 bus calibration command summary Command Description Calibration root command. :CALibration All commands in this subsystem are protected by the CAL switch (except queries). :PROTected Initiate calibration. :INITiate Lock out calibration (opposite of enabling cal with CAL switch). :LOCK Request comprehensive CAL switch state. -
Page 30: Table 2-2 Recommended Equipment For Comprehensive Calibration
Calibration Calibration errors 2.8.1 Recommended equipment for comprehensive calibration The Model 2002 checks for errors after each calibration step, minimizing the possibility that improper calibration may Table 2-2 lists all test equipment recommended for compre- occur due to operator error. The following paragraphs dis- hensive calibration. -
Page 31: Figure
Calibration 2. Connect the Model 8610 low-thermal short to the instru- Table 2-3 ment INPUT and SENSE terminals, as shown in Figure Front panel comprehensive calibration summary 2-1. Wait at least three minutes before proceeding to Equipment/ allow for thermal equilibrium. Step Description connections... -
Page 32: Figure
Calibration Performing 2 VDC Calibration 3. Set the calibrator output to +2.000000V, and turn exter- nal sense off. Wait at least three minutes for thermal 6. After completing 2VDC calibration, the instrument will equilibrium. display the following: 4. Press ENTER, and note that the Model 2002 displays the presently selected calibration voltage: CONNECT 20 VDC INPUT = 2.00000000 V... - Page 33 Calibration Step 5: Ohms calibration 10. Press ENTER to complete the 200kΩ calibration step. 11. Repeat steps 7 through 10 for the 20kΩ, 2kΩ, 200Ω, and 1. After completing 20VDC calibration, the instrument 20Ω ranges in that order. Be sure to set the calibrator to will display the following: the correct resistance value, and adjust the Model 2002 display to agree with the calibrator value.
-
Page 34: Figure
Calibration 5700A Calibrator Model 2002 Input Output HI 2002 MULTIMETER Amps Output Note: Be sure calibrator is set for normal current output. Figure 2-3 Connections for amps comprehensive calibration Step 9: Enter calibration dates Step 7: Open-circuit calibration 1. Press ENTER, and note that the instrument prompts you to enter the present calibration date: 1. -
Page 35: Calibration
Calibration 2.8.3 IEEE-488 bus comprehensive calibration NOTE Valid calibration constants will be saved, Follow the procedure outlined below to perform comprehen- and comprehensive calibration will be au- sive calibration over the IEEE-488 bus. Table 2-4 summa- tomatically locked out after the calibration rizes the calibration procedure and bus commands. - Page 36 Calibration Procedure 3. Wait until the Model 2002 finishes this calibration step before proceeding. (You can use the *OPC or *OPC? Step 1: Prepare the Model 2002 for calibration commands to determine when calibration steps end, as discussed in paragraph 3.6 in Section 3.) 1.
-
Page 37: Table
Calibration (Send the actual calibration value in the range of 9.5V to 5. Repeat steps 2 and 3 for each of the remaining ohms cal- 20.5V if you are using a different voltage.) ibration points as shown in Table 2-5. 7. -
Page 38: Table
Calibration Table 2-6 Amps calibration summary Calibrator point current Allowable range Calibration command 200.000µA 95µA to 205µA 200µA :CAL:PROT:DC:A200U 200E-6 2.00000mA 0.95mA to 2.05mA :CAL:PROT:DC:A2M 2E-3 20mA 20.0000mA 9.5mA to 20.5mA :CAL:PROT:DC:A20M 20E-3 200mA 200.000mA 95mA to 205mA :CAL:PROT:DC:A200M 200E-3 1.00000A 0.95A to 2.05A :CAL:PROT:DC:A2 1... -
Page 39: Recommended Equipment For Low-Level Calibration
Calibration AC CALIBRATION PHASE NOTE Disconnect inputs; press ENTER Low-level calibration is required in the field only if the Model 2002 has been 6. Press ENTER to begin AC calibration, which will take repaired, or if the other calibration proce- about six minutes to complete. -
Page 40: Table
Calibration Table 2-7 Recommended equipment for low-level calibration Mfg. Model Description Specifications* Fluke 5700A Calibrator ±5ppm basic uncertainty. DC Voltage: ±2V: ±7ppm +20V: ±5ppm +100V: ±7ppm Resistance: 19Ω: ±26ppm 190Ω: ±17ppm 1.9kΩ: ±11ppm 19kΩ: ±11ppm 100kΩ: ±13ppm 1MΩ: ±18ppm DC Current: 200µA: ±100ppm 2mA: ±55ppm 20mA: ±55ppm... - Page 41 Calibration Table 2-8 Low-level calibration summary Calibration signal Calibration command* Comments None Initiate calibration. :CAL:PROT:INIT Low-thermal short Comprehensive cal zero. :CAL:PROT:DC:ZERO 2V DC Comprehensive cal 2V. :CAL:PROT:DC:V2 20V DC Comprehensive cal 20V. :CAL:PROT:DC:V20 1MΩ Comprehensive cal 1MΩ. :CAL:PROT:DC:OHM1M 1E6 100kΩ Comprehensive cal 200kΩ.
- Page 42 Calibration 2.10.3 Front panel low-level calibration procedure Step 3: DC volts calibration 1. When the DC zero calibration step is completed, the fol- Procedure lowing message will be displayed: Step 1: Prepare the Model 2002 for calibration CONNECT 2 VDC 1.
- Page 43 Calibration INPUT = 20.0000000 V 9. Using the cursor and range keys, set the resistance value displayed by the Model 2002 to the exact resistance val- ue displayed by the calibrator. (The allowable range for (At this point, you can use the cursor and range keys to set this parameter is from 95kΩ...
- Page 44 Calibration 2. Disconnect all test leads from the INPUT and AMPS 2. Connect the calibrator to the INPUT terminals, as jacks, then press ENTER. During this calibration phase, shown in Figure 2-4. the instrument will display the following: 3. Press ENTER. The instrument will display the following: Performing Open Ckt Calibration Connect 20V @ 1kHz...
- Page 45 Calibration 10. Set the calibrator output to 200V AC at 30kHz, then 21. After this step has been completed, the unit will display press ENTER. The Model 2002 will display the the following: following: Connect -20 VDC Low-Level Cal - Step 4 of 13 NOTE 11.
- Page 46 Calibration Model 3930A or 3940 Synthesizer BNC-to-Dual Banana Plug 3930A MULTIFUNCTION SYNTHESIZER Adapter Model 2002 Function Output 2002 MULTIMETER 50Ω BNC Coaxial Cable Figure 2-5 Synthesizer connections 3. Press EXIT as necessary to return to normal display. 30. Press the Model 2002 ENTER key. The instrument will display the following while calibrating: NOTE Low-Level Cal - Step 13 of 13...
- Page 47 Calibration Step 2: DC zero calibration NOTE For best results, use the calibration values 1. Connect the Model 8610 low-thermal short to the instru- given in this procedure whenever possible. ment INPUT and SENSE terminals, as shown in Figure 2-1. Wait at least three minutes before proceeding to allow for thermal equilibrium.
-
Page 48: Table
Calibration Table 2-9 Ohms calibration summary Nominal Cal point resistance Allowable range Command* 2MΩ 1MΩ 475kΩ to 1.025MΩ :CAL:PROT:DC:OHM1M 1E6 200kΩ 100kΩ 95kΩ to 205kΩ :CAL:PROT:DC:OHM200K 100E3 20kΩ 19kΩ 9.5kΩ to 20.5kΩ :CAL:PROT:DC:OHM20K 19E3 2kΩ 1.9kΩ 0.95kΩ to 2.05kΩ :CAL:PROT:DC:OHM2K 1.9E3 200Ω... - Page 49 Calibration Step 8: Perform low-level calibration steps NOTE The accuracy of the 100V calibration NOTE source is especially critical. It may be nec- The following steps perform the low-level essary to adjust the calibrator output part of the calibration procedure. Use only slightly to achieve exactly 100V.
- Page 50 Calibration Step 10: Save calibration constants 1. Turn on the Model 2002, and allow the instrument to warm up for at least four hours before performing Calibration is now complete, so you can store the calibration calibration. constants in EEROM by sending the following command: 2.
- Page 51 Calibration prehensive commands, or Table 2-8 for low-level com- 5. Send the following calibration command over the bus: mands.) Remember that you must unlock calibration first. :CAL:PROT:DC:OHM2K 2E3 Before sending any calibration commands, you must send Be sure to substitute the exact calibration resistance value for the ":CAL:PROT:INIT"...
- Page 52 Calibration 2-26...
- Page 53 Calibration Command Reference Introduction CALibration:UNPRotected Subsystem: Discusses the :ACC command, which is used to perform AC user This section contains detailed information on the various calibration over the bus. Model 2002 IEEE-488 bus calibration commands. Section 2 Bus error reporting: Summarizes bus calibration of this manual covers detailed calibration procedures, and errors, and discusses how to obtain error information.
-
Page 54: Table 3-1 Ieee-488 Bus Calibration Command Summary
Calibration Command Reference Table 3-1 IEEE-488 bus calibration command summary Command Description Paragraph Calibration root command. :CALibration All commands in this subsystem are protected by the CAL switch :PROTected (except queries). Initiate calibration. 3.3.1 :INITiate 3.3.2 Lock out calibration (opposite of enabling cal with CAL switch). :LOCK Request comprehensive CAL switch state. - Page 55 Calibration Command Reference :CALibration:PROTected Subsystem The calibration protected subsystem commands perform all Model 2002 calibration except for AC-only calibration. All commands in this subsystem are protected by the calibration lock (CAL switch). The following paragraphs discuss these commands in detail. 3.3.1 :INIT (:CALibration:PROTected:INITiate) Purpose...
- Page 56 Calibration Command Reference 3.3.3 :SWITch? (:CALibration:PROTected:SWITch?) Purpose To read comprehensive calibration lock status. Format :cal:prot:swit? Response Comprehensive calibration locked Comprehensive calibration unlocked. Description The :SWITch? query requests status from the Model 2002 on calibration locked/unlocked state. Calibration must be unlocked by pressing in on the CAL switch while power is turned on before calibration can be performed.
- Page 57 Calibration Command Reference 3.3.6 :DATE (:CALibration:PROTected:DATE) Purpose To send the calibration date to the instrument. Format :cal:prot:date <yr>,<mon>,<day> Parameters <yr> = year (yyyy, 1993 to 2092) <mon> = month (mm, 1 to 12) <day> = day of month (dd, 1 to 31) Query Format :cal:prot:date? Response...
- Page 58 Calibration Command Reference 3.3.8 :DC (:CALibration:PROtected:DC) The :DC commands perform comprehensive (user) calibration. Table 3-2 summarizes these comprehensive calibration commands along with parameter limits. Table 3-2 Comprehensive calibration commands Command Description Parameter limits :CALibration :PROTected User calibration subsystem. Short-circuit calibration :ZERO +2V DC calibration step 0.95 to 2.05...
- Page 59 Calibration Command Reference (:CALibration:PROTected:DC:V2) Purpose To program the +2V comprehensive calibration step. Format :cal:prot:dc:v2 <Cal_voltage> Parameter <Cal_voltage> = 0.95 to 2.05 [V] Description :V2 programs the +2V DC comprehensive calibration step. The allowable range of the calibra- tion voltage parameter is from 0.95 to 2.05V, but 2V is recommended for best results. Example :CAL:PROT:DC:V2 2 Program 2V step.
- Page 60 Calibration Command Reference :OHM200K (CALibration:PROTected:DC:OHM200K) Purpose To program the 200kΩ comprehensive calibration step. Format :cal:prot:dc:ohm200k <Cal_resistance> Parameter <Cal_resistance> = 95E3 to 205E3 [Ω] Description :OHM200K programs the 200kΩ comprehensive calibration step. The allowable range of the calibration resistance parameter is from 95kΩ to 205kΩ. Use a 100kΩ value whenever possible, or the closest possible value.
- Page 61 Calibration Command Reference :OHM200 (CALibration:PROTected:DC:OHM200) Purpose To program the 200Ω comprehensive calibration step. Format :cal:prot:dc:ohm200 <Cal_resistance> Parameter <Cal_resistance> = 95 to 205 [Ω] Description :OHM200 programs the 200Ω comprehensive calibration step. The allowable range of the calibration resistance parameteris from 95Ω to 205Ω. Use the 200Ω value whenever possible, or the closest possible value (for example, 190Ω, which is the closet value available on many calibrators).
- Page 62 Calibration Command Reference :A2M (CALibration:PROTected:DC:A2M) Purpose To program the 2mA comprehensive calibration step. Format :cal:prot:dc:a2m <Cal_current> Parameter <Cal_current> = 0.95E-3 to 2.05E-3 [A] Description :A2M programs the 2mA comprehensive calibration step. The allowable range of the calibration current parameter is from 0.95mA to 2.05µA. Use the 2mA value whenever possible for best results.
- Page 63 Calibration Command Reference (CALibration:PROTected:DC:A2) Purpose To program the 2A comprehensive calibration step. Format :cal:prot:dc:a2 <Cal_current> Parameter <Cal_current> = 0.95 to 2.05 [A] Description A2 programs the 2A comprehensive calibration step. The allowable range of the calibration cur- rent parameter is from 0.95A to 2.05A. Use the 1A value whenever possible for best results. Example :CAL:PROT:DC:A2 1 Program 2A step.
- Page 64 Calibration Command Reference :SWITch? (CALibration:PROTected:LLEVel:SWITch?) Purpose To request the state of the low-level calibration lock. Format :cal:prot:llev:swit? Response Low-level calibration locked Low-level calibration unlocked Description :SWITch? query requests the status of the low-level calibration lock from the instrument. This :SWITch? query should not be confused with the :SWITch? query that requests the status of the comprehensive calibration lock (see paragraph 3.3.2.) Programming Note To unlock low-level calibration, hold in the CAL switch while turning on instrument power.
- Page 65 Calibration Command Reference :CALibration:UNPRotected Subsystem 3.4.1 :ACCompensation (:CALibration:UNPRotected:ACCompensation) Purpose To perform user AC calibration Format :cal:unpr:acc Parameter None Description The :ACC command performs user AC calibration, which requires no calibration equipment. All test leads must be disconnected from the input jacks when performing user AC calibration. Programming Note Calibration constants generated by using the :ACC command are not stored in EEROM.
- Page 66 Calibration Command Reference Detecting calibration step completion When sending calibration commands over the IEEE-488 bus, you must wait until the instrument completes the current operation before sending a command. You can use either *OPC? or *OPC to help determine when each calibration step is completed. (The example programs in Appendix B use the *OPC command to detect when each calibration step is completed.) 3.6.1 Using the *OPC? Query With the *OPC? (operation complete) query, the instrument will place an ASCII 1 in the output...
- Page 67 Specifications Specifications For the latest specifications, refer to tek.com/keithley.
- Page 68 Calibration Programs Introduction • MS-DOS version 5.0 or later (version 3.3 or later may be used if not using QBasic). This appendix includes programs written in BASIC and Tur- • HP-style Universal Language Driver, CECHP.EXE bo C to aid you in calibrating the Model 2002. Refer to Sec- (supplied with Keithley and CEC interface cards listed tion 2 for more details on calibration procedures.
- Page 69 Calibration Programs Table B-1 Table B-2 Recommended equipment for comprehensive calibration Recommended equipment for low-level calibration Mfg. Model Description Specifications* Mfg. Model Description Specifications* Fluke 5700A Calibrator ±5ppm basic uncer- Fluke 5700A Calibrator ±5ppm basic uncertainty. tainty. DC Voltage: DC Voltage: ±2V: ±7ppm 2V: ±7ppm +20V: ±5ppm...
- Page 70 Calibration Programs General program instructions Comprehensive calibration 1. With the power off, connect the Model 2002 and the Programs B-1 and B-2 will perform comprehensive calibra- calibrator to the IEEE-488 interface of the computer. Be tion almost fully automatically using the Fluke 5700A Cali- sure to use shielded IEEE-488 cables for bus brator.
- Page 71 Calibration Programs 5700A Calibrator Sense HI Sense HI Model 2002 Input HI Output HI 2002 MULTIMETER Input Output Sense LO Sense LO Note : Use shielded cables to minimize noise. Enable or disable calibrator external sense as indicated in procedure. Figure B-2 Connections for comprehensive calibration 5700A Calibrator...
-
Page 72: Figure 2-5 Synthesizer Connections
Calibration Programs Model 3930A or 3940 Synthesizer BNC-to-Dual Banana Plug 3930A MULTIFUNCTION SYNTHESIZER Adapter Model 2002 Function Output 2002 MULTIMETER 50Ω BNC Coaxial Cable Figure B-5 Synthesizer connections Program B-1 Comprehensive calibration program for use with Fluke 5700A Calibrator (BASIC Version) ' Model 2002 comprehensive calibration program for use with the ' Fluke 5700A calibrator. - Page 73 Calibration Programs PRINT #1, "ENTER 4" INPUT #2, R, R$, S Cmd$ = Cmd$ + " " + STR$(R) CASE 10 PRINT #1, "OUTPUT 4;STBY" PRINT "Connect calibrator to AMPS and INPUT LO jacks." GOSUB KeyCheck PRINT #1, "OUTPUT 4;"; Msg$ PRINT #1, "OUTPUT 4;OPER"...
- Page 74 Calibration Programs Settle: ' Calibrator settling routine. DO: PRINT #1, "OUTPUT 4;ISR?" ' Query status register. PRINT #1, "ENTER 4" INPUT #2, S LOOP UNTIL (S AND &H1000) ' Test settle bit. RETURN EndProg: ' Close files, end program. BEEP: PRINT "Calibration aborted." PRINT #1, "OUTPUT 4;STBY"...
- Page 75 Calibration Programs Program B-2 Comprehensive Calibration Program for Use with Fluke 5700A Calibrator (C Version) /* Model 2002 comprehensive calibration program for use with the Fluke 5700A calibrator. Rev. 1.2. 4/7/94 */ #include <stdio.h> #include <stdlib.h> #include <conio.h> FILE *ieeein,*ieeeout; main() static char *msg[] = { "Connect low-thermal short, wait 3 minutes",...
- Page 76 Calibration Programs fprintf(ieeeout,"output 4;%s\n",msg[i]); fprintf(ieeeout,"output 4;oper\n"); break; case 2: fprintf (ieeeout,"output 4;%s\n",msg[i]); break; case 3: case 4: case 5: case 6: case 7: case 8: fprintf(ieeeout,"output 4;%s\n",msg[i]); fprintf(ieeeout,"output 4;extsense on\n"); fprintf(ieeeout,"output 4;oper\n"); fprintf(ieeeout,"output 4;out?\n"); fprintf(ieeeout,"enter 4\n"); fgets(buf,100,ieeein); j=0; while (buf[j++] !=’,’); buf[--j]=’\0’;...
- Page 77 Calibration Programs int calend(n) /* Check for cal end. */ int n; int stat; printf("Performing cal step #%d.\n",n+1); do { fprintf(ieeeout,"srq?\n"); fscanf(ieeein,"%d",&stat); while (stat==0); fprintf(ieeeout,"output 16;*esr?\n"); fprintf(ieeeout,"enter 16\n"); fscanf(ieeein,"%d",&stat); fprintf(ieeeout,"spoll 16\n"); fscanf(ieeein,"%d",&stat); void errcheck() /* Check for error. */ char errbuf[100]; fprintf(ieeeout,"output 16;:syst:err?\n");...
- Page 78 Calibration Programs Program B-3 Low-level Calibration Program for Use with Fluke 5700A Calibrator (BASIC Version) ' Model 2002 low-level calibration program for use only with the ' Fluke 5700A calibrator. ' Rev. 1.2, 4/7/94 OPEN "IEEE" FOR OUTPUT AS #1 ' Open IEEE-488 output path.
- Page 79 Calibration Programs IF I <> 1 AND I <> 15 AND I <> 16 AND I <> 27 AND I <> 29 THEN GOSUB Settle PRINT #1, "OUTPUT 16;"; C$; Cmd$; ";*OPC" ' Send cal command to 2002. GOSUB CalEnd ' Wait until cal step ends.
- Page 80 Calibration Programs CmdList: DATA "Connect low-thermal short to inputs, wait 3 minutes.","DC:ZERO" DATA "OUT 2 V","DC:V2 2" DATA "OUT 20 V","DC:V20 20" DATA "OUT 1 MOHM","DC:OHM1M" DATA "OUT 100 KOHM","DC:OHM200K" DATA "OUT 19 KOHM","DC:OHM20K" DATA "OUT 1.9 KOHM","DC:OHM2K" DATA "OUT 190 OHM","DC:OHM200" DATA "OUT 19 OHM","DC:OHM20"...
- Page 81 Calibration Programs Program B-4 Low-level Calibration Program for Use with Fluke 5700A Calibrator (C Version) /* Model 2002 low-level calibration program for use with the Fluke 5700A calibrator. Rev. 1.2, 4/7/94 */ #include <stdio.h> #include <stdlib.h> #include <conio.h> FILE *ieeein,*ieeeout; main() static char *msg[] = { "Connect low-thermal short, wait 3 minutes",...
- Page 82 Calibration Programs clrscr(); /* Clear CRT. */ printf(“Model 2002 Calibration Program.\n"); printf(“This program controls the 5700A Calibrator.\n"); chkswit(); /* Check cal switch. */ fprintf(ieeeout,"output 16;;cal:prot:init\n"); for(i=0;i<=28;i++) { /* Loop for cal points. */ switch(i) { case 0: case 14: case 28:fprintf(ieeeout,"output 4;stby\n"); printf("%s\n",msg[i]);...
- Page 83 Calibration Programs keypress(); break; if (i!=0 && i!=14 && i!=15 && i!=26 && i!=28) settle(); if (i>2 && i<9) fprintf(ieeeout,"output 16;%s%s;*opc\n",cmd[i],buf); else fprintf(ieeeout,"output 16;%s;*opc\n",cmd[i]); calend(i); errcheck(); printf("Enter calibration date (yyyy,mm,dd): "); gets(date); fprintf(ieeeout,"output 16;:cal:prot:date %s\n",date); errcheck(); printf("Enter calibration due date (yyyy,mm,dd): "); gets(date);...
- Page 84 Calibration Programs void settle() /* Calibrator settle. */ int stat; do { fprintf(ieeeout,"output 4;isr?\n"); fprintf(ieeeout,"enter 4\n"); fscanf(ieeein,"%d",&stat); while (!(stat & 0x1000)); void endpgm() /* End program. */ fprintf(ieeeout,"output 4;stby\n"); printf("Calibration aborted.\n"); fprintf(ieeeout,"local 4 16\n"); exit(1); B-17...
- Page 85 Calibration Programs B-18...
- Page 86 Calibration Messages Introduction will turn on, and the "Excessive temp drift during cal" mes- sage will be placed in the error queue. This appendix lists calibration errors that may occur during calibration as well as the :CAL:PROT:DATA? query Note that this error condition does not prevent calibration response.
- Page 87 Calibration Messages Table C-1 (cont.) Table C-1 Calibration error messages Calibration error messages Error number Message Error number Message +390 “2k ohm fs oc out of spec” +350 “200µa zero out of spec” +391 “200 ohm fs out of spec” +351 “2ma zero out of spec”...
-
Page 88: Calibration Error Messages
Calibration Messages Table C-1 (cont.) Calibration error messages Error number Message +440 “ampsac out of spec” +441 “ampsacdc out of spec” +442 “lfac out of spec” +443 “lfacdc out of spec” +444 “Cal step generated invalid data” +445 “Preamp 1k gain out of spec” +446 “Preamp 10k gain out of spec”... -
Page 89: Table
Calibration Messages Table C-2 Calibration constants returned by :CAL:PROT:DATA? query Cal constant Description RMS gain for 2V, 200V, and 750V ranges RMS offset for 2V, 200V, and 750V AC ranges RMS gain for 200mV and 20V AC ranges of10 RMS offset for 200mV and 20V AC ranges gfwr1 Average gain for 2V, 200V, and 750V AC ranges offwr1... - Page 90 Calibration Messages Table C-2 (cont.) Calibration constants returned by :CAL:PROT:DATA? query Cal constant Description c200rzon 200Ω 2-wire zero OC on c200rzoff 200Ω 2-wire zero OC off c20r4wz 20Ω 4-wire zero c20r4wzon 20Ω 4-wire zero OC on c20r4wzoff 20Ω 4-wire zero OC off c20rz 20Ω...
- Page 91 Calibration Messages Table C-2 (cont.) Calibration constants returned by :CAL:PROT:DATA? query Cal constant Description tmpdiv100 /100 divider cal value divval2 Divider cal value 2 divval3 Divider cal value 3 tmpdiv200 /200 divider cal value tmpdiv500 /500 divider cal value acvallow AC-coupled cal value for low ranges dcvallow DC-coupled cal value for low ranges...
-
Page 92: Table
Calibration Command Summary Table D-1 Calibration commands Command Description Calibration root command. :CALibration All commands in this subsystem are protected by the CAL switch (except queries). :PROTected Initiate calibration. :INITiate Lock out calibration (opposite of enabling cal with CAL switch). :LOCK Request comprehensive CAL switch state. - Page 93 Calibration Command Summary Table D-1 Calibration commands Command Description Low-level calibration subsystem. :LLEVel Request low-level CAL switch state. (0 = locked; 1 = unlocked) :SWITch? :STEP <Step #> 20V AC at 1kHz step. 20V AC at 30kHz step. 200V AC at 1kHz step. 200V AC at 30kHz 1.5V AC at 1kHz step.
- Page 94 Index Symbols Calibration error summary 3-13 Calibration errors Calibration lock :ACCompensation 3-13 IEEE-488 bus AC self-calibration 2-13 Calibration messages :CALibration:PROTected subsystem IEEE-488 bus calibration commands Calibration programs :CALibration:UNPRotected IEEE-488 bus calibration lock status Command summary subsystem 3-13 IEEE-488 bus comprehensive calibration Commands :DATA? IEEE-488 bus error reporting...
- Page 95 Selecting the temperature sensor 1-17 Unlocking calibration Warm-up period 1-1, 2-2 Single-point calibration 2-24 Using the *OPC command 3-14 Specifications Using the *OPC query 3-14 Status byte EAV (Error Available) Bit 3-13 Verification limits Temperature drift error Verification procedures Temperature reading checks 1-17 Thermocouple temperature reading checks...
- Page 96 Specifications are subject to change without notice. All Keithley trademarks and trade names are the property of Keithley Instruments. All other trademarks and trade names are the property of their respective companies. Keithley Instruments • 28775 Aurora Road • Cleveland, Ohio 44139 • 1-800-833-9200 • tek.com/keithley 04/2022...
Need help?
Do you have a question about the Keithley 2002 and is the answer not in the manual?
Questions and answers