Table of Contents
Advertisement
Quick Links
Advertisement
Table of Contents

Subscribe to Our Youtube Channel
Related Manuals for Spectrum Technologies 2305G


Summary of Contents for Spectrum Technologies 2305G
- Page 1 Cardy Nitrate – Meter PRODUCT MANUAL Item 2305G...
-
Page 2: Table Of Contents
Contents Introduction …………………………….. 3 Meter Components and Functions …….. 4 Handling Precautions ……….……………. 6 Calibrating Solutions …………………….. 8 Calibration ……………………………….. 9 Measurement Procedure …... …………….. 12 Special Setting Modes …..…………….. 14 Replacing the Sensor ....…………. 18 Installing and Replacing Batteries ….…….. 19 Preparing Soil Samples ....…….. -
Page 3: Introduction
Introduction Congratulations on the purchase of your Cardy Nitrate ) meter. This manual describes how to use your Cardy meter and how to keep it working accurately for many years. Read it thoroughly in order to make effective use of your meter. Nitrogen is one of the most important elements required for plant growth. -
Page 4: Meter Components And Functions
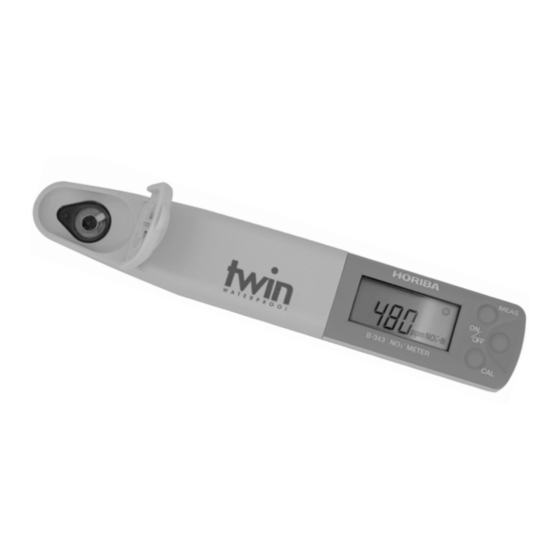
Meter Components And Functions Name Description Flat sensor Consists of a liquid junction (electrode A) and response membrane (electrode B). Both electrodes must be covered by sam- ple to enable accurate measurement. Light shield Cover used to shield sensor from light. cover Because the sensor is affected by light, attach the light shield cover before start-... - Page 5 Name Description MEAS Used during measurement. Press button the button for ½ second to evaluate the stability of the measured value. The screen will lock onto a stable value. If this button is pressed for 5 seconds, the meter will go into the special setting mode (p.
-
Page 6: Handling Precautions
Handling Precautions • Neither the meter nor sensor is waterproof by itself. The sensor must be securely mounted on the meter before use. • Never drop the meter or apply exces- sive force to it. • The sensor is made of PVC and may get scratched if not handled with care. - Page 7 • Measurement of organic solvents, oils, adhesives, ce- ment, alcohols or concentrated acids (pH less than 2) will shorten the sensor’s life. • Some sample types (such as oily plant sap) may not yield stable values. • To ensure a waterproof seal, check that the water- proofing gasket is not scratched or dirty and is prop- erly seated in the groove.
-
Page 8: Calibrating Solutions
Calibrating Solutions (nitrate) versus NO -N (nitrate-nitrogen) The sensor of the Cardy meter measures NO nitrate ion ac- tivity similar to the way a pH sensor measures H ion activ- ity. Decide whether you desire the meter LCD display to express the sample concentration as NO nitrate or NO nitrate-nitrogen. -
Page 9: Calibration
Calibration Selecting the Calibration Mode. The meter is shipped with the meter in 2-point calibration mode. The calibration mode can be changed as follows (see also “Special Settings Modes” , p. 14) 1. With the meter on, press and hold the MEAS button for at least 5 sec- onds to enter the special setting mode. - Page 10 One-Point Calibration (ppm NO - N mode) 1. Press and hold the ON/OFF button for, at least, two seconds to power the unit on. 2. Open the light shield cover and add enough of the 450 ppm NO - N refer- ence solution to cover the space be- tween electrodes A and B.
- Page 11 Two-Point Calibration (ppm NO - N mode) 1. Press and hold the ON/OFF button for, at least, two seconds to power the unit on. 2. Add enough of the 34 ppm NO reference solution to cover the space between electrodes A and B. Close the light shield cover and press the CAL button until the CAL icon flashes (a minimum of 2 seconds).
-
Page 12: Measurement Procedure
Measurement procedure Measurement on a flat surface Important: Do not make measurements with the meter (sensor) in direct sunlight. 1. Open the light shield cover and add enough of the sample to cover the space between electrodes A and 2. Close the light shield cover 3. - Page 13 Submerged Measurement 1. Open the light shield cover’s sliding cap. Submerge the senor in the sample and shake it gently 2 or 3 times 2. When the stability icon appears, proceed as with flat surface measurements (p. 12). Scoop Measurement 1.
-
Page 14: Special Setting Modes
Setting Special Modes The Cardy nitrate meter has 6 special modes that can be modified at the user’s discretion. The modes are: 1. Set measurement units 2. Temperature measurement 3. Set number of calibrations 4. Set slope coefficient 5. Set offset coefficient 6. - Page 15 Mode 1 (Set measurement units) MEAS button From mode selection screen 1, press the MEAS button for half a second. From here, you can configure which units will be displayed. Press the CAL button for half a second to cycle to the desired option. The choices are: ppm NO - N, ppm NO , mg/L NO...
- Page 16 Mode 3 (Set number of calibrations) MEAS button From mode selection screen 3, press the MEAS button for half a second. From here, you can configure the number of solutions that will be used to calibrate the meter. The options are 1- and 2-point calibration. Press the CAL but- ton for half a second to cycle to the desired option.
- Page 17 Mode 5 (Set offset coefficient) MEAS button From mode selection screen 5, press the MEAS button for half a second. From here, you can set an additive constant (-1000 to 1000) that will be added to the reading. This, along with the slope setting (mode 4), can be used to mod- ify the output value to suit a specific application such as dilute or concentrated solutions.
-
Page 18: Replacing The Sensor
Replacing the Sensor Removal Lift hole a off tab A and slide the sensor away from the chassis. Replacement Slide the sensor onto the body so that tab A fits into hole a. Take care not to twist the waterproof gasket Precautions •... -
Page 19: Installing And Replacing Batteries
Installing and Replacing Batteries Installation Slide both batteries into the bat- tery clips as shown such that the positive sides are facing up- ward. Replacement Use a small flat-head screwdriver or other instrument to pry the bat- teries from the clips as shown. Always replace both batteries at once. -
Page 20: Preparing Soil Samples
Preparing Soil Samples Sample Collection Collect at least 15 to 20 core samples from an area not ex- ceeding ten acres by using a Z pattern. Areas having dif- ferent soil types or management histories should be sam- pled separately. Sample the top 12 inches of soil. Some universities recommend sampling the top 24 inches in 12 inch increments. - Page 21 Sample Preparation 1. Measure 2 level measuring spoons (30 ml) full of dry soil into the soil sample cup. 2. Add 2 (30 ml) measuring spoons of the soil extractant to the soil. 3. Mix the soil and the solution by stirring with the spoon for at least 2 minutes, making sure the soil sample is thoroughly mixed.
- Page 22 Correction for moist soil In order to make accurate soil nitrate measurements, the soil must be dry. Nitrate is extracted by mixing a precise amount of dry soil with a measured amount of extracting solution. If the soil is moist, the dilution varies and the result is an understated nitrate test concentration.
-
Page 23: Collecting Tissue Sap
Collecting Tissue Sap When conducting a test on plant materials, the biggest source of error is due to sampling. This error results when a sample is not representative of the source. Follow these steps to gather and care for your sample: 1.) Do not sample plants which show obvious signs of nutrient deficiency or damage from disease, insects, or chemicals unless these plants are the subject of a study. -
Page 24: Preparing Soil-Less Media
Preparing Soil-less media Sample collection 1. Collect sample just before plants are irrigated. 2. Avoid the top layer of media with no roots. 3. Collect root media from the bottom ⅔ of the pot. 4. Take samples from 10 or more plants distributed in the sample population. - Page 25 After 15 minutes, add more water if needed. Extract the solution from the media using a pipette, Buchner funnel, side arm, flask and vacuum pump, fil- ter bag or sieve. Make any additional measurements (such as EC) using the extracted solution. Table 2 gives a general idea of the nitrate levels to look for in the ex- tracted solution.
-
Page 26: Specifications
Specifications Principle Ion electrode method Readout 4-digit LCD digital display Reproducibility ±10% of indication value Measurement Range 14 to 1400 ppm NO Operating Temperature º 5 to 40 Operating Humidity maximum 85% RH Calibration 1-pt (450 ppm NO -N) or 2-pt (34 and 450 ppm NO Weight 52g (approx. -
Page 27: Soil Test Kit Accessories
Soil Test Kit Accessories #2330 Description Replenishment Kit Std. Solution 450ppm -N (30ml) Extractant 34ppm -N (1 Liter) Cups - 8oz. Measuring Spoon (29.5 cc) Pipet Filter Papers * Calibration solutions in soil test kits include AlSO Hydraulic Plant Sap Press Handheld Plant Sap Press (item #2720) (item #2725) -
Page 28: Sufficiency Levels
Petiole NO -N Sufficiency Levels For Drip-Irrigated vegetables (Source: UC-Davis) Petiole NO -N concentration Crop Growth Stage Dry Tissue Fresh Sap Broccoli Mid growth 10,000 - 20,000 1000 - 1600 Button formation 8000 - 15,000 800 - 1200 Preharvest 5000 - 8000 600 - 1000 Cabbage Cupping... - Page 29 Petiole NO -N Sufficiency Levels (Source: University of Florida) -N (ppm) Crop Growth Stage Fresh Sap Cucumber First blossom 800 - 1000 Fruits 3-inches long 600 - 800 First harvest 400 - 600 Broccoli & Six-leaf stage 800 - 1000 Collards Just prior to harvest 500 - 800...
- Page 30 Petiole NO -N Sufficiency Levels (Cont.) (Source: University of Florida) -N (ppm) Crop Growth Stage Fresh Sap Annual Hill November 800 - 900 Strawberries December 600 - 800 (October January 600 - 800 planting) February 300 - 500 March 200 - 500 April 200 - 500 Watermelon...
- Page 31 Petiole NO -N Sufficiency Levels For Potatoes (Source: Univ. Wiisconsin-Madison) Optimum range of nitrate-nitrogen concentrations (dry weight and sap basis) in potato petiole at various stages of growth Growth Stage Norkotah, Shepody, Onaway (days after Norland, R. Burbank, Superior emergence) Atlantic, Snowden Kennebec...
- Page 32 Petiole NO -N Sufficiency Levels (Source: Michigan State University) The following guidelines are based on one year’s research results and will be revised as necessary based on future research findings. Readings taken on youngest fully extended petiole. Carrots Adequate petiole sap nitrate concentration Carrot shoulder diameter (in.) Nitrate-N (ppm) Nitrate (ppm)
- Page 33 Pre-Sidedress Nitrate (PSNT) Soil Test Interpretation University of Tennessee <17 ppm NO -N Low 17 - 25 ppm NO -N Low >25 ppm NO -N Low Rutgers Cooperative Extension PSNT Soil Test Level Sidedress N (ppm NO Recommendation 1 - 15 16 - 20 21 - 25 26 - 30...
-
Page 34: Warranty
Warranty This product is warranted to be free from defects in material or workmanship for one year from the date of purchase. During the warranty period Spectrum will, at its option, either repair or replace products that prove to be defective. This warranty does not cover damage due to improper installation or use, lightning, negligence, accident, or unauthorized modifications, or to inci- dental or consequential damages beyond the Spectrum prod-... - Page 36 This equipment has been manufactured for Spectrum Technologies, Inc. 12360 S. Industrial Dr. East Plainfield, IL 60585 USA The Manufacturer’s DECLARATION OF CONFORMITY is on file at the above address, and certifies conformity to the following: Model Number: 2305G Description:...
Need help?
Do you have a question about the 2305G and is the answer not in the manual?
Questions and answers