Hans Grohe ShowerSelect 15744 1 Series Installation And User Instructions Manual
Hide thumbs
Also See for ShowerSelect 15744 1 Series:
- Installation/user instructions/warranty (32 pages) ,
- Installation/user instructions/warranty (32 pages)

Related Manuals for Hans Grohe ShowerSelect 15744 1 Series


Summary of Contents for Hans Grohe ShowerSelect 15744 1 Series
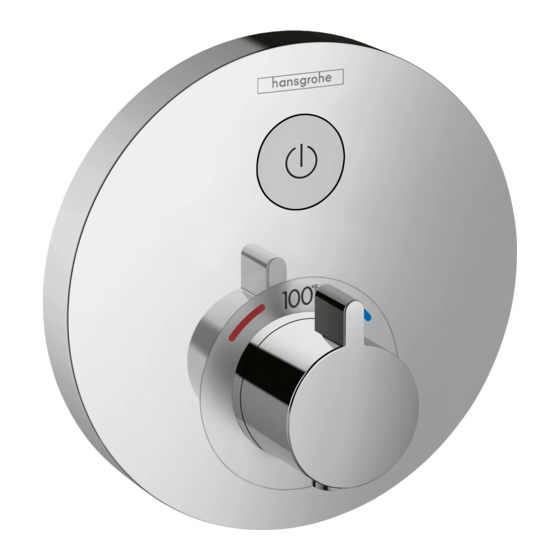
- Page 1 EN Installation / User Instructions / Warranty FR Instructions de montage / Mode d'emploi / Garantie ES Instrucciones de montaje / Manejo / Garantía 0 ° ShowerSelect 15744xx1 ShowerSelect 15762xx1...
-
Page 2: Technical Information
English Français Technical Information Données techniques Water pressure Pression d’eau Recommended 15 - 75 PSI (0.1 - 0.5 MPa) recommandée 15 - 75 PSI (0.1 - 0.5 MPa) Maximum 145 PSI (1 MPa) maximum 145 PSI (1 MPa) Hot water temp. Température d'eau chaude Recommended 120°-140°... -
Page 3: Consideraciones Para La Instalación
Español Datos tecnicos Tools Required / Outils Requis / Herramientas Útiles Presión en servicio recomendada 15 - 75 PSI (0.1 - 0.5 MPa) max. 145 PSI (1 MPa) Temperatura del agua caliente recomendada 120°-140° F (48° - 60° C)* max. 158°F (70°... - Page 4 ShowerSelect ShowerSelect 15762XX1 15744XX1 ¾" (20 mm) 6⅛" (155 mm) ¾" (20 mm) 1¾" 2⅛"- 3¼" 2⅛"- 3¼" (44 mm) (54-82 mm) (54-82 mm) Service Stops / Butées d’arrêt d’isolation / Cierres de servicio cold froid frío closed ferme cerrado open 4 mm ouvert...
-
Page 5: Installation / Installation / Instalación
Installation / Installation / Instalación To reduce the risk of scald injury and property damage, turn the water off at the main. Remove the cover. Close the stops. closed ferme 90° Pour réduire les risques de blessures cerrado par brûlure et de dommages matéri- els, fermez l’eau à... - Page 6 Remove the flush insert and the flush insert seals. Dry the inside of the valve using a soft cloth. Retirez le module encastré et les joints d'étanchéité du module encastré. Sécher l'intérieur de la valve à l'aide d'un chiffon doux. Retire el inserto de lavado y los sellos del inserto de 5 mm lavado.
- Page 7 Lower the spacer. Abaissez l'entretoise. 4 mm Baje el separador. Remove the backing from the adhesive pads on the fitting aid. Retirez la pellicule protectrice des plaquettes adhé- sives sur l'aide au montage. Retire la parte posterior de las almohadillas adhesi- vas de la ayuda de montaje.
- Page 8 Position the fitting aid over the shutoff stem. Positionnez l'aide au montage sur le tige d'arrêt. Posicione la ayuda de montaje sobre el vástago de cierre. Cut the shutoff stem so that it is even with the front of the fitting aid. Coupez le tige d'arrêt afin qu'elles soient de niveau avec le devant de l'aide au montage.
- Page 9 File the shutoff stem so that it is straight and even. Limez le tige d'arrêt afin qu'elles soient droites et égales. Lime el vástago de cierre de modo que estén rectos y parejos. Raise the spacer so that it is even with the back of the fitting aid.
- Page 10 Remove the fitting aid. Seal the wall around the plaster shield using water- proof sealant. Failure to seal the wall may lead to water damage. Retirez l'aide au montage. Scellez le mur autour de la coque de protection à l'aide d'un produit de scellement. Si le mur n’est pas scellé, l’eau pour- rait causer des dommages.
- Page 11 Install the nut on the shutoff valve stem so that it is even with the front of the stem. Installez les écrous sur le tige des vannes d'arrêt afin qu'ils soient de niveau avec l'avant des tiges. Instale la tuerca en el vástago de la válvula de cierre de modo que queden parejos con el frente de el vástago.
- Page 12 Add ⁷⁄₁₆" (11 mm) to X. Cut the retainer plate screws so that they are X + ⁷⁄₁₆" (X + 11 mm) long. ⁷ ⁄ ₁ ₆ " ⁷ ⁄ ₁ ₆ " ⁷ ⁄ ₁ ₆ " Ajoutez ⁷⁄₁₆ po (11 mm) à X. Coupez les vis de la plaque d'arrêt afin que leur longueur soit de X + ⁷⁄₁₆...
- Page 13 Make sure that the stops are open. open Install the retainer plate. ouvert abierto Assurez-vous que les vannes d'arrêt soient ouvertes. Installez la plaque d'arrêt. Asegúrese de que las llaves de paso estén abiertas. 0.74 ft-lb Instale la placa de sujeción. 1 Nm IMPORTANT: Remove the safety guard from the shutoff valve.
- Page 14 Turn the water on at the main. Press the shutoff stem to test the shower function. Ouvrez l'eau au niveau de la conduite principale. Appuyez sur le tige d'arrêt pour ouvrir l'eau afin de tester le fonction. Abra el paso del agua en la entrada del suministro. Presione el vástago de cierre para encender el agua y probar la funciÓn.
- Page 15 In the "off" position, the front of the shutoff button should be flush with the front of the escutcheon. If it is, go to step 22. If it is not, go to step A. En position fermée, le devant du bouton d’arrêt doit 0 mm <...
- Page 16 Rotate the nut on the shutoff stem slightly counter- clockwise, to bring it out farther. Tournez légèrement l'écrou sur le tige d’arrêt dans le sens antihoraire, pour les positionner plus loin. Gire la tuerca del vástago de cierre levemente en sentido antihorario para sacarla un poco más.
- Page 17 Turn the thermostatic mixer stem until the output water is 104°F (40°C). Tournez la tige du mitigeur thermostatique jusqu’à ce que l’eau de sortie soit à une température de 104°F (40°C). Gire el vástago del mezclador termostático hasta que el agua de salida esté en 104ºF (40°C). Install the handle so that the lever is next to the index- ing mark on the sleeve and the 100°...
- Page 18 Make sure that the escutcheon is level. Assurez-vous que l'écusson est de niveau. °F 1 0 0 Asegúrese de que el escudo quede nivelado. If it is not, turn to page 19. Si ce n'est pas le cas, référez-vous à la page 19. max.
- Page 19 If the escutcheon is tilted 5° or less, follow these steps. Turn the water off at the main or at the stops. Remove the function block. Si l'écusson est incliné de 5° ou moins, suivez ces étapes. Coupez l’eau au niveau de la conduite principale ou des vannes d'arrêt.
- Page 20 Install the function block in the rough. Rotate the function block so that it is straight. Install the screws. 0 ° Installez le bloc fonction dans la boîte d'encastrement. Faites tourner le bloc fonction afin qu'il soit droit. Installez les vis. Instale el bloque de función en la pieza interior.
- Page 21 Set the high temperature limit stop / Réglage de la butée limite d’eau chaude / Ajuste el tope de límite de alta temperatura Follow all applicable local plumbing codes when setting the high temperature limit stop. To prevent scald injury, the maximum output temperature of the shower valve must be no higher than 120°F (49°C).
- Page 22 Set the high temperature limit stop / Réglage de la butée limite d’eau chaude / Ajuste el tope de límite de alta temperatura...
- Page 23 Replacement Parts / Pièces détachées / Repuestos ShowerSelect 15762XX1 92594000 97980000 96525000 98133000 (M5x20) (16x2) 98368000 4 mm (M28x1.5) SW 19 mm 92540000 95758000 92219000 94073000 96454000 (M5x55) 98197000 98282000 (20x1.5) 98471000 92218XX0 98146000 (44x4) 98913000 (25x1.5) (M34x1.5) 92146000 SW 27 mm (25x2.5) 98793000 (5¾"...
- Page 24 ShowerSelect 15744XX1 92594000 97980000 96525000 98133000 (M5x20) (16x2) 98368000 4 mm (M28x1.5) SW 19 mm 92540000 95758000 92219000 94073000 96454000 (M5x55) 98197000 98282000 (20x1.5) 98471000 92218XX0 98146000 (44x4) 98913000 (25x1.5) (M34x1.5) 92146000 SW 27 mm (25x2.5) 98793000 (5¾" /145 mm) 92218XX0 92216XX0 98133000...
- Page 25 User Instructions / Instructions de service / Manejo ouvert fermé abierto cerrado cold chaud froid caliente frío >100° F...
-
Page 26: Maintenance / Entretien / Mantenimiento
Maintenance / Entretien / Mantenimiento 2 mm 4 mm 27 mm... - Page 27 27 mm 5.9 ft-lb/8 Nm 4 mm 3.7 ft-lb/5 Nm 2 mm...
-
Page 28: Maintenance
Maintenance • Should the volume of water decrease over time, water off using the stops on the iBox first inspect and clean the showerhead(s). If the Universal Plus or at the main shutoff. problem persists, inspect the cartridge. • When reassembling after maintenance, set the •... -
Page 29: Entretien
Entretien pièce intérieure iBox Universal Plus ou à • Si le débit d’eau devait décroître avec le temps, la vanne d’arrêt principale. commencez par inspecter et nettoyer la ou les pomme(s) de douche. Si le problème persiste, inspectez la cartouche. •... -
Page 30: Mantenimiento
Mantenimiento • Si el volumen del agua disminuye con el tiempo, la pieza interior iBox Universal Plus o la primero inspeccione y limpie el cabezal de válvula de paso principal. ducha. Si el problema persiste, inspeccione el cartucho. • Al rearmar después de realizar el mantenimiento, configure el tope de límite de alta temperatura •... - Page 31 Cleaning Recommendation for Hansgrohe Products Modern bathroom faucets, kitchen faucets and shower products are made from different materials to comply with the needs of the market with regard to design and functionality. To avoid damage to the product, it is necessary to take proper care of it.
- Page 32 Important • Les residus de produits pour le corps comme les savons liquides, shampooings, gels de douche, teintures pour cheveux, parfums, apres-rasage et vernis a ongles peuvent causer des deteriorations. Rincez le produit avec de l’eau propre après chaque utilisation. •...
- Page 35 Hansgrohe, Inc. Limited Warranty Offering our customers the highest quality at all times is a funda- • abuse, neglect or improper or incorrectly performed mental part of the Hansgrohe, Inc. company philosophy. We of- installation, maintenance or repair, including the use of fer consumers a limited warranty on our hansgrohe and AXOR abrasive or caustic cleaning agents or “no-rinse”...
- Page 36 PRODUCT I NSTRUC TIONS A ND QUE STIONS TEAR, OUTDOOR USE, MISUSE (INCLUDING USE OF THE PRODUCT FOR AN UNINTENDED APPLICATION), FREEZING WATER, EXCESSIVE WATER PRESSURE, PIPE CORROSION IN Upon purchase or prior to installation, please carefully inspect THE HOME IN WHICH THE PRODUCT IS INSTALLED, ABUSE, your product for any damage or visible defect.
Need help?
Do you have a question about the ShowerSelect 15744 1 Series and is the answer not in the manual?
Questions and answers