Table of Contents
Advertisement
Advertisement
Table of Contents

Subscribe to Our Youtube Channel
Related Manuals for BTECH DMR-6X2 PRO


Summary of Contents for BTECH DMR-6X2 PRO
- Page 1 baofengtech.com...
- Page 2 DMR-6X2 PRO Digital DMR and Analog UHF/VHF Two Way Radio Operating Manual DIGITAL MOBILE RADIO ASSOCIATION...
- Page 4 It offers great stability, and reliability, together with long distance communication as well as fashionable design and compact exterior lines. DMR-6X2 PRO has Text Messaging, Recording, Voice Message, Digital Encryption, Emergency Alarm, Man Down Alarm, Work Alone GPS, APRS Location Reporting, Roaming, Vibration, Analog DTMF, 2TONE, 5TONE, CTCSS/DCS encode/decode functions.
-
Page 5: Table Of Contents
CONTENTS 1.UNPACKING AND CHECKING THE EQUIPMENT ......1 1.1 Supplied Accessories ..............1 1.2 Standard Accessories ..............2 1.3 Optional Accessories ..............2 2.BATTERY INFORMATION .............. 3 2.1 Charging the Battery Pack ............3 2.2 Charger Supplied ............... 3 2.3 Use Caution with the Li-ion Battery ..........3 2.4 How to Charge ................ - Page 6 5.10 Making a Call ................. 16 5.11 Monitor ................... 16 5.12 Man Down Alarm ..............17 5.13 Battery Voltage Test ............... 17 6. ADVANCED FEATURES ............. 18 6.1 Access Advanced Features for Private Call ......18 6.2 Set up Advanced Features for Private Call ......18 7.MAIN MENU FUNCTIONS ............
-
Page 7: Unpacking And Checking The Equipment
1. UNPACKING AND CHECKING THE EQUIPMENT Unpack the radio carefully. We recommend that you identify the items listed in the following table before discarding the packing materials. If any items are missing or have been damaged during shipment, please contact the carrier or the dealers immediately. -
Page 8: Standard Accessories
1. UNPACKING AND CHECKING THE EQUIPMENT 1.2 Standard Accessories Li-ion Battery Pack Antenna Charger (3100mAh) AC Adaptor Belt Clip Instruction Manual (2 pcs included in 2 battery kit) Earphone USB Programming cable 1.3 Optional Accessories Programming Software Car Charger Li-ion Battery Pack Software is available (2100mAh) online for Download:... -
Page 9: Battery Information
2. BATTERY INFORMATION 2.1 Charging the Battery Pack The Li-ion battery pack is not charged at the factory; please charge it before use. Charging the battery pack for the first time after purchase or extended storage (more than 2 months) may not bring the battery pack to its normal maximum operating capacity. -
Page 10: How To Charge
2. BATTERY INFORMATION when carrying and using the battery. Remember to put the battery or radio into an insulated container for storage when not in use. Do not put it into a metal container. 2.3 How to Charge Plug the AC adaptor into the AC outlet, and then plug the cable of the AC adaptor into the DC jack located on the back of the charger. -
Page 11: Normal Charging Tips
2. BATTERY INFORMATION e. LED Indicator: STATUS Standby(No Battery) None Precharge Red light Flashing Charging Red Light Fully Charged Green Light » Trouble means battery is too warm, battery short-circuited or charger short-circuited. 2.4 Normal Charging Tips Self-Test: When powering on the charger, the red light turns on and then turns off and stays off, which means the charger has passed the self test and it is ready to charge the battery. -
Page 12: How To Store The Battery
2. BATTERY INFORMATION 2.5 How to Store the Battery If the battery needs to be stored, keep the level at approximately 80% of full charge. It should be kept in low temperature and dry environment. Keep it away from hot places and direct sunlight. »... -
Page 13: Preparation
3. PREPARATION 3.1 Installing / Removing the Battery Match the two bottom grooves of the battery pack with the corresponding guides on the back of the radio and then push it until you hear a click. To remove the battery pack, slide the release latch at the top away from the battery and remove the pack away from the transceiver. -
Page 14: Installing / Removing The Belt Clip
3. PREPARATION 3.3 Installing / Removing the Belt Clip Installing the Belt Clip: Place the belt clip above the corresponding holes on the back of the radio, and screw it into place clockwise with the two supplied screws. Removing the Belt Clip: Unscrew counter-clockwise to remove the belt clip. -
Page 15: Radio Overview
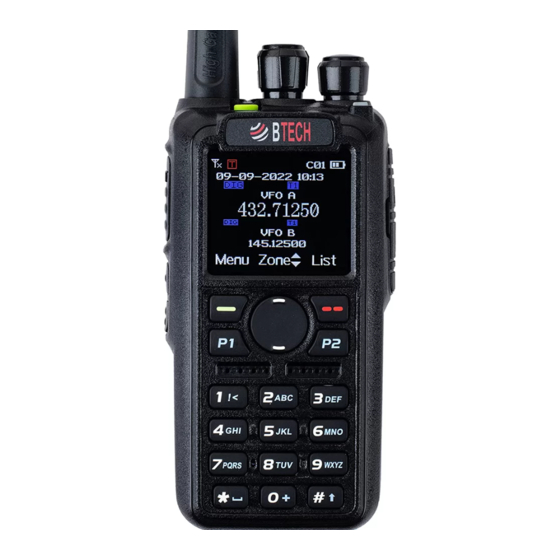
4. RADIO OVERVIEW Channel Switch Antenna POWER/VOL LED Status Indicator Menu key Exit Key P1 key/ P2 key Speaker MIC Input PTT Button Speaker/Mic Jacks [PF1] top Key [PF2] bottom Key Digital DMR and Analog UHF/VHF Two Way Radio... -
Page 16: Status Indications
4. RADIO OVERVIEW 4.1 Status Indications The top LED will help you to identify the current radio status. LED Indication Status Flashes Red Low battery voltage Constant Red Transmitting Constant Green Analog Receiving Constant Cyan Digital Receiving Flashes Green Scan 4.2 Programmed Key It is possible to set different functions for [PF1], [PF2], [PF3], keys. - Page 17 4. RADIO OVERVIEW Start/stop recording. When stop recording, the radio will remind repeat Record or send the record. Messages In digital mode, press to enter into SMS messages Dial Start the manually dial GPS Info Check the GPS position information Monitor Monitor the weak signal or the signal with unmatched ID.
- Page 18 4. RADIO OVERVIEW In standby, press the key programmed as "Max Volume", will enable Max VOL Set users to set the maximum RX volume. Slot Set Choose Slot for current channel, this function is only valid in repeater mode. Ana SQ Set Set the squelch level in analog mode.
-
Page 19: Hot Key Setting For Pf1, Pf2, Pf3, P1, P2
4. RADIO OVERVIEW The Switch operations listed are factory default functions. They can be modified in CPS or by the front panel menus for other functions. If you do not get the operations shown, check to see if function has been changed in CPS by reading the radio and reviewing options. -
Page 20: Basic Operations
5. BASIC OPERATIONS 5.1 Power on the Radio Turn on the radio by turning the [Power/Volume] switch clockwise till a click is heard, and the LCD displays will show a start-up message, and you will hear a beep after 7 seconds. 5.2 Adjust Volume Rotate the [Power/Volume] knob to adjust the volume. -
Page 21: Adding A New Channel
5. BASIC OPERATIONS There are four possible settings that can be selected in the CPS channel: Always Allow: The user can transmit all the time. Channel Free: The radio can transmit only if the channel is free. Different Color Code: The radio can transmit if the channel is free, but the color code is mismatch. -
Page 22: Receiving And Responding To A Radio Call
5. BASIC OPERATIONS 5.9 Receiving and Responding to a Radio Call When the radio is in the digital mode, it can receive and respond to a call with the same frequency/color code/ slot. When receiving a call: If the radio is programed with callers DMR ID number in the digital contact list, when receiving a call, the radio will ring or vibrate briefly. -
Page 23: Man Down Alarm
5. BASIC OPERATIONS » When in analog mode, if no signal is heard, it will emit noise when you press the Monitor Key. ** The Rx icon is seen when monitor is activated. 5.12 Man Down Alarm Press (Menu) to enter main Menu, press key to Settings. -
Page 24: Advanced Features
6. ADVANCED FEATURES 6.1 Access Advanced Features for Private Call Method 1: To Access a Private Call from Contact list Press the (Exit) key to enter the Contact List, press the key to a private call ID name. Press Select to View Contact, press Select to see the contact information. - Page 25 6. ADVANCED FEATURES Kill Select Kill, and it will send out a kill signaling to the target radio which will be killed (No display, no operation) when receiving the signaling and it will send back a kill successful message to the transmit radio. Wake Select Wake, and it will send out a wake signaling to the killed radio and the target radio will return to standby when it receives this signaling and...
-
Page 26: Main Menu Functions
ID as a new contact. 7.4 Zone 7.4.1 Select a Zone A Zone is a group of channels grouped together. DMR-6X2 PRO DMR radio has 250 Zones. A Zone can have the maximum of 160 analog and/or digital channels. -
Page 27: Scan
7. MAIN MENU FUNCTIONS Select "Zone". Select a zone from the zone list, radio will change to selected zone. 7.4.2 Add A Zone Press (Menu) to enter main Menu. Select "Zone". Select "Add Zone". 1. Select "Edit name" Input zone name by keypad, press key to delete. -
Page 28: Roaming
7. MAIN MENU FUNCTIONS 7.6 Roaming The roaming function enables users to search the roaming channel list by locking on the repeater with strongest signal. Roaming On/Off Allows you to turn on the roaming manually. After the roaming is finished, it will return to the off state. - Page 29 7. MAIN MENU FUNCTIONS Ana Idle Set on if you want a tone when the analog channel is free. Startup Sound Set On if you want a tone when powering on. Talk Permit Select if you want a tone confirming Digital and/or Analog repeater connection at the start of a call.
- Page 30 7. MAIN MENU FUNCTIONS The duration of the “Mute Time” may be set by the CPS->Optional Setting- >Other->Mute Timing. 2.Display Func Back Light LCD backlight intensity is adjustable in 5 steps Light Time Always: The backlight is always on. 5 sec. to 5 min. adjustable. Note: This function is valid when power save is turned off.
- Page 31 7. MAIN MENU FUNCTIONS Orange: In standby, the channel and other information will display color in orange. Red: In standby, the channel and other information will display color in red. Yellow: In standby, the channel and other information will display color in yellow. Green: In standby, the channel and other information will display color in green.
- Page 32 7. MAIN MENU FUNCTIONS Key PF1, PF2, PF3, P1, P2 (2-11) You can program these keys for different functions.(Refer to page 10 & 11) 4.Other Func Auto Power Off Allow to set automatic power off when not used for a period of 10 minutes, 30minutes, 1 hour or 2 hours of inoperation.
- Page 33 7. MAIN MENU FUNCTIONS instead of pressing the [PTT] key. A total of 3 levels are provided. VOX Delay (10) When the VOX is enabled, set up the VOX delay to help to extend the transmission time to avoid stopping a transmission too early. 0.5s-3s, a total of 26 times offered.
- Page 34 7. MAIN MENU FUNCTIONS AuRepeater A or B (For VFO A or B) (17-18) Turn on the Auto Repeater function, the TX frequency in VFO mode will auto increase or reduce frequency based on the programmed offset frequency in CPS. Off: Turn off the function.
- Page 35 7. MAIN MENU FUNCTIONS GPS Check: When GPS is positioning successful, enter this menu, select GPS check to do the date & time correction automatically. 7.7.2 Chan Set Channel set menu: Main Menu- Settings - Chan Set. The channel set menu will change accordingly to the channel type.
- Page 36 7. MAIN MENU FUNCTIONS TX Freq Input the TX frequency by keypad, click the Menu key to save, press [P2] key to return. Talk Around When the TX radio and RX radio both are set up with Talk Around on, they can communicate directly without a repeater.
- Page 37 7. MAIN MENU FUNCTIONS Digi Encrypt (16) With the digital encryption, the communication will be confidential. A total of 32 digital encryptions is offered, and it can be programmed in the PC software or defined in the Menu. Not legal for USA Amateur Radio Use. Encrypt Type (17) Choose normal encryption or enhanced encryption type.
- Page 38 7. MAIN MENU FUNCTIONS with opposite TX/RX frequncies. Repeater: Enable communications via a repeater system. Double Slot: When TX/RX frequency is same, turn on this function to communicate by the slot set in simplex mode. Note: If DMR mode not choosed Doulbe Slot, the radio will work on Slot in repeat mode.
- Page 39 7. MAIN MENU FUNCTIONS Reverse (11) When this function is enabled, the RX frequency, TX frequency and CTCSS/DCS encode/decode will be reversed. Busy Lock (16) Always: Always allows transmissions Different CDT: Will not allow transmit when receiving matched carrier but unmatched CTCSS/DCS.
-
Page 40: Record
7. MAIN MENU FUNCTIONS APRS Receive(optional with installed BT+APRS board) (27) Turn on this function to enable the radio to receive analog APRS information the analog APRS information in current channel. Make sure your channel setting Frequency, CTCSS/DCS match to the transmit radio's setting. -
Page 41: Gps Positioning Function(Optional With Installed Gps)
7. MAIN MENU FUNCTIONS Record Play, it will play one record at a time, you can press to switch the recording without return to previous menu. Loop Playback, it will play all records in a loop. 7.8.3 Send the Record Press (Menu) to enter main Menu, press key to Record. -
Page 42: Aprs Location Reporting(Supported By Gps)
7. MAIN MENU FUNCTIONS 7.9.2 GPS Info Method 1: Check GPS info from Menu Press (Menu) key to enter Main Menu, select "GPS", then select "GPS Info". Method 2: Check GPS info from programmed key In the PC software, Public – Optional Setting – Key function, program a key as "GPS Info", then press the programmed key to check the GPS info. - Page 43 7. MAIN MENU FUNCTIONS Upload Power: Set the transmit power. Upload frequency: Set the transmit frequency. Upload text: Set the text to be shown on aprs.fi Ana APRS Info The received analog APRS information will be saved in radio for review. Click on "Ana APRS Info"...
-
Page 44: Digital Monitor
7. MAIN MENU FUNCTIONS Digital Monitor 7.11 Press (Menu) key to enter main menu, press key to choose Digi Moni function. Press Select to enter Digi Moni menu, press key to choose a sub menu. DigiMoni Switch off: Turn off Digital Monitor Single Slot: Monitor the current TS Double Slot: Monitor TS1 and TS2 DigiMoni Cc... -
Page 45: Reset
8. RESET Power off the radio first. Then power it on while holding the [PTT] and the [PF1] button below the PTT at the same time. The radio will start up with a note on the display – “Are you sure you want to initialize radio?”... -
Page 46: Trouble Shooting Guide
9. TROUBLE SHOOTING GUIDE Problems Solutions A. Battery pack may not be installed properly. Remove the battery pack The radio cannot be switched and install it again. on or no display after being B. Battery power may be insufficient. switched on. Recharge or replace the battery pack. -
Page 47: Programming Guide
Multiple Radio ID’s The DMR-6X2 PRO radio will allow multiple DMR Radio ID numbers to be used with the radio. This feature will allow one radio to be used for example as a Commercial Radio with its own DMR ID, and at the same time also be used as an Amateur radio with another DMR ID. - Page 48 10. PROGRAMMING GUIDE Worldwide Amateur Contact Database The DMR-6X2 PRO DMR radios contain a separate database memory for importing and displaying Amateur DMR individual IDs, call sign and user name in comma-delimited format (.csv) Please reference in the programming guide for import and export database operations detailed.
-
Page 49: On-Line Service And Support
11. ON-LINE SERVICE AND SUPPORT website provides additional information about obtaining service or support for the line of two-way radios and accessories. Visit: baofengtech.com Warning Notes Every effort has been made to ensure that the information in this document is complete, accurate, and up to-date. Radio assumes no responsibility for the results of errors beyond its control. -
Page 50: Safety
SAFETY DMR-6X2 PRO DMR handheld transceiver has been carefully designed to provide you with years of safe, reliable operation. As with all electrical equipment, however, there are a few basic precautions you should take to avoid hurting yourself or damaging the radio: •... - Page 51 SAFETY • Handle the battery properly. Never place the LI-ion battery in your pocket or purse with loose coins, keys, or metal objects. This could result in short circuiting the battery. • Be certain that your power source matches the rating listed for the supplied battery charger (AC adapter).
-
Page 52: Technical Specifications
12. TECHNICAL SPECIFICATIONS General Europe: 144-146MHz(V),430-440MHz(U) United States: 136-174MHz(V),400-480MHz(U) Frequency Range Australia: 144-148MHz(V), 420-450MHz(U) India: 144-146MHz(V), 436-438MHz(U) Channel Capacity 4000 channels Channel Spacing 25KHz (Wide Band) ,12.5KHz (Narrow Band) Phase-locked Step 5KHz, 6.25KHz Operating Voltage 7.4V DC ±20% /(2100mAh/3100mAh) Frequency Stability ±2.5ppm Operating Temperature -20℃~ +55℃...
Need help?
Do you have a question about the DMR-6X2 PRO and is the answer not in the manual?
Questions and answers