Table of Contents
Advertisement
Advertisement
Table of Contents

Related Manuals for BTECH MURS-V1


Summary of Contents for BTECH MURS-V1
- Page 2 Contributions taken from: Miklor.com Resource Site, and Jim Unroe, KC9HI. Used by permission. All rights reserved. THANK YOU FOR YOUR PURCHASE OF THE MURS-V1. THIS MURS RADIO (WITH UHF/VHF SCANNER CHANNELS) WILL DELIVER YOU SECURE INSTANT RELIABLE COMMUNICATION.
-
Page 3: Table Of Contents
Table of Contents Part I. Getting started Chapter 1. - Initial setup Safety Information Features and Functions What's in the box Available Accessories: www.baofengtech.com/store Assembly Antenna Belt clip Battery Charging and battery maintenance Charging Battery Maintenance Chapter 2. - Getting to know your radio The main display Battery Level Indicator... - Page 4 Status LED Side key 1 / [F] Side key 2 / [M] Dual Push-To-Talk Numeric keypad Pound # Key Star * Key Zero 0 Key Menu and function keys Accessory jack Chapter 3. - Basic Use Power and volume Turning the unit on Turning the unit off Adjusting the volume Making a call Channel selection Channel (MR) mode MURS-V1...
- Page 5 iii Chapter 4. - MURS Information and FCC Declaration FCC NOTICE AND DECLARATION NO LICENSE REQUIRED FOR MURS OPERATION MURS Frequency Chart, Channel Guide Part II. Advanced topics Chapter 5. - Working the menu system Basic use Using Short-cuts Chapter 6. - Scanning Scanning modes Time operation Carrier operation Search operation SKIP Scanning Channels Tone Scanning Scanning for CTCSS and DCS Tones/Codes Chapter 7. - Dual Watch...
- Page 6 Chapter 8. - DTMF Chapter 9. - Selective calling CTCSS DCS Tone-burst Chapter 10. - Customization Display Single or Dual PTT Display Sync Power-on message Computer programming Appendix A. - Troubleshooting Appendix B. - Menu definitions Appendix C. - Technical specifications General MURS-V1...
-
Page 7: Part I. Getting Started
Transmitter Receiver DCS table CTCSS table Part I. Getting started... - Page 8 VISIT BAOFENGTECH.COM AND MIKLOR.COM FOR DOWNLOADS AND HELP Part one covers the basic setup and use of your hand-held two-way transceiver. HAPTER NITIAL SETUP HAPTER ETTING TO KNOW YOUR RADIO HAPTER ASIC MURS HAPTER NFORMATION AND ECLARATION MURS-V1...
-
Page 9: Chapter 1. - Initial Setup
VISIT BAOFENGTECH.COM AND MIKLOR.COM FOR DOWNLOADS AND HELP Chapter 1. - Initial setup Safety Information The following safety precautions should always be observed during operation, service and repair of this equipment. • Qualified technicians shall service this equipment only. • Do not modify the radio for any reason. • Use only BTECH supplied or approved batteries and chargers. • Do not use any portable radio that has a damaged antenna. If a damaged antenna comes into contact with your skin, a minor burn can result. • Turn off your radio prior to entering any area with explosive and flammable materials. • Do not charge your battery in a location with explosive and flammable materials. • To avoid electromagnetic interference and/or compatibility conflicts, turn off your radio in any area where posted notices instruct you to do so. • Turn off your radio before boarding an aircraft; any use of a radio must be in accordance with airline regulations or crew instructions. • Turn off your radio before entering a blasting area. • For vehicles with an air bag, do not place a radio in the area over an air bag or in the air bag deployment area. - Page 10 25mm is 0.091W/Kg for 12.5 KHz and 0.069W/Kg for 25 KHz This product is compliance to FCC RF Exposure requirements and refers to FCC website https://apps.fcc.gov/oetcf/eas/reports/GenericSearch.cfm search for FCC ID:2AGND-MURS-V1...
-
Page 11: Features And Functions
VISIT BAOFENGTECH.COM AND MIKLOR.COM FOR DOWNLOADS AND HELP Features and Functions • • MURS Transceiver DTMF encoder. • • High Capacity Lithium-Ion battery Broadcast FM receiver 65-108 MHz • • 50 CTCSS tones and 346 (Normal and PC programmable (customizable Inverted) DCS codes. names) • • Alarm function. Up to 15 named memory channels. • • High low power, selectable. Tri Color Display • • Function beep on the keyboard. Dual watch / Dual reception. • • VOX (voice activated transmit). Transmission time-out timer. • • Battery saving function Busy channel lock out • • Scan mode LED flashlight. •... -
Page 12: What's In The Box
VISIT BAOFENGTECH.COM AND MIKLOR.COM FOR DOWNLOADS AND HELP What's in the box This transceiver comes shipped with the following items in the box: • MURS-V1 Radio Body • 1800mAh Lithium-Ion battery pack • Antenna • Desk charger (With power adapter) • Belt clip • Wrist-strap • Dual PTT Earpiece MURS-V1... -
Page 13: Available Accessories: Www.baofengtech.com/Store
VISIT BAOFENGTECH.COM AND MIKLOR.COM FOR DOWNLOADS AND HELP Available Accessories: BL-8 12V Battery BL-8 AAA Battery Pack QHM-22 IP54 BTECH USB Charger Transformer Eliminator Speaker Mic ... -
Page 14: Assembly
VISIT BAOFENGTECH.COM AND MIKLOR.COM FOR DOWNLOADS AND HELP Assembly Before the radio is ready for use we need to attach the antenna and battery pack, as well as charge the battery. Antenna This transceiver is fitted with a Male SMA connector. To mount your antenna (Female SMA connector), align the two connectors and turn clockwise until it stops. • Do not over-tighten your antenna to avoid damage to the connectors. • When installing the antenna, don't grip it by the top. Grip by the base and turn. • If you use an external antenna, make sure the SWR is about 1.5:1 or lower to avoid damage to the transceiver. • Do not hold the antenna with your hand while transmitting. • Never transmit without an antenna. • The antenna gain that should not be exceeded while using a different antenna MURS-V1... -
Page 15: Belt Clip
VISIT BAOFENGTECH.COM AND MIKLOR.COM FOR DOWNLOADS AND HELP Belt clip At the back of the radio there are two parallel screws mounted above the battery, remove these and thread them through the holes on the belt clip as you screw them back into the radio body. SAR has been performed for a held to face configuration and a body configuration with the belt clip. Do not use any form of glue to fix the screws on the battery clip. The solvents in the glue may cause damage to the battery casing. Battery Before attaching or removing the battery make sure your radio is turned off by turning the power/volume knob all the way counter-clockwise. Installation Make sure the battery is aligned in parallel with the radio body with the lower edge of the battery about 1-2cm below the edge of the radio. Once aligned with the guide-rails, slide the battery upward until you hear a click as the battery locks in place. - Page 16 VISIT BAOFENGTECH.COM AND MIKLOR.COM FOR DOWNLOADS AND HELP Removal To remove the battery: press the battery releases on the sides of the battery pack as you slide the battery downward. MURS-V1...
-
Page 17: Charging And Battery Maintenance
VISIT BAOFENGTECH.COM AND MIKLOR.COM FOR DOWNLOADS AND HELP Charging and battery maintenance Charging Battery should be fully charged before initial use. Optimum battery efficiency will be achieved after the three full battery charge and discharge cycles. Follow these steps to hook up and use the charger: 1. Plug the DC connector of the power adaptor into the charger base. 2. Plug the AC connector of the power adaptor into a main AC wall outlet. 3. Place the radio in the charging slot on the charger. 4. Make sure the radio is making contact with the charger. When the red LED comes on steady, your radio is charging. 5. The radio is fully charged once the charger's green status LED glows steady. Please remove the radio at that time to avoid over-charging your battery. - Page 18 VISIT BAOFENGTECH.COM AND MIKLOR.COM FOR DOWNLOADS AND HELP Table 1.1. Charger LED codes Red LED Green LED Status Standby (charger empty) or Flashing Flashing charge complete Steady Off Charging Off Steady Charge complete. MURS-V1...
-
Page 19: Battery Maintenance
VISIT BAOFENGTECH.COM AND MIKLOR.COM FOR DOWNLOADS AND HELP The charger and battery are fitted with matching notches so that you can charge your battery on its own! Practical if you have two batteries. That way you can charge one battery while still using your radio. Radio should be turned OFF during charge cycle Battery Maintenance The battery for your radio comes uncharged from the factory; please let it charge for at least four to five hours before you start using your radio. • Use only batteries approved by the original manufacturer. • Never attempt to disassemble your battery pack. • Do not expose your batteries to fire or intense heat • Dispose of batteries in accordance with local recycling regulations. Batteries do not belong in your trashcan! Prolonging the life of your battery • Only charge batteries in normal room temperatures. • When charging a battery attached to the radio, turn the radio off for a faster charge. • Do not unplug the power to the charger or remove the battery and/or radio before it's finished charging. - Page 20 VISIT BAOFENGTECH.COM AND MIKLOR.COM FOR DOWNLOADS AND HELP • Never charge a wet battery. • Batteries wear out over time. If you notice a considerably shorter operating time with your radio, please consider purchasing a new battery. • Battery performance will be reduced in temperatures below freezing. When working in cold environments, keep a spare battery on you. Preferably inside your jacket or in a similar location in order to keep the battery warm. • Dust can interfere with the contacts on the battery. If necessary wipe the contacts with a clean cloth to ensure proper contact with radio and charger. If your battery has become wet, remove it from the radio, wipe it dry with a towel and put it in a plastic bag with a handful of dry rice. Tie the bag up and let it sit over night. The rice will absorb any remaining moisture in the battery. This method is only effective against minor splashes (light rain for instance). A soaked radio may very well be beyond repair. Storage Partially charge your battery before long-term storage in order to prevent damage from over- discharge. While lead acid must always be kept at full charge during storage, this radio uses a lithium-based battery and should be stored at around a 40 percent charge. This level minimizes age-related capacity loss while keeping the battery in operating condition and allowing self- MURS-V1...
- Page 21 VISIT BAOFENGTECH.COM AND MIKLOR.COM FOR DOWNLOADS AND HELP discharge. To avoid severe capacity degradation of your battery while in long-term storage, please cycle the battery at least every six (6) months. Store your batteries in a cool and dry place, never above normal room temperatures.
-
Page 22: Chapter 2. - Getting To Know Your Radio
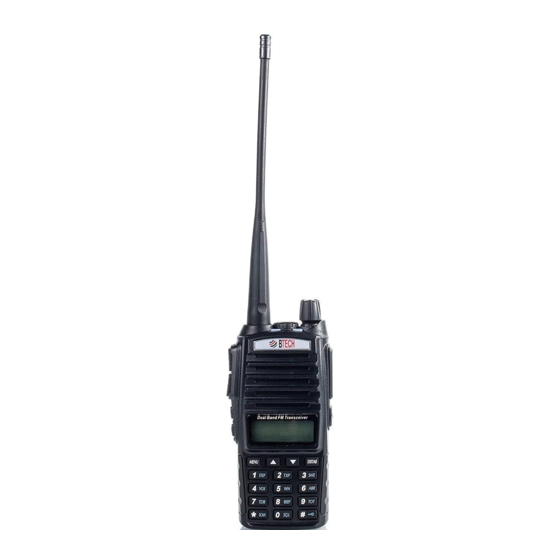
VISIT BAOFENGTECH.COM AND MIKLOR.COM FOR DOWNLOADS AND HELP Chapter 2. - Getting to know your radio Figure 2.1. BTECH MURS-V1, overview MURS-V1... - Page 23 VISIT BAOFENGTECH.COM AND MIKLOR.COM FOR DOWNLOADS AND HELP 1. Antenna, see the section called “Assembly” for details. 2. Two-line LCD 3. Keypad 4. Power / Volume knob, usage discussed in the section called “Power and volume”. 5. LED flashlight - See the section called “Side key 2 - MONI (Monitor and Flashlight)” for more information. 6. Speaker 7. Microphone 8. Battery release latch 9. PTT A key, usage discussed in the section called “Dual Push-to-Talk”. 10. PTT B key, usage discussed in the section called “Dual Push-to-Talk”. 11. Side Key 1 / [F] 12. Side Key 2 / [M] 13. Strap Buckle 14. Accessory jack 15. Status LEDs...
-
Page 24: The Main Display
VISIT BAOFENGTECH.COM AND MIKLOR.COM FOR DOWNLOADS AND HELP The main display Figure 2.2. BTECH MURS-V1, display The transceiver is fitted with a seven character by two line dot matrix alphanumeric LCD, with auxiliary icons for miscellaneous features. Table 2.1. LCD icon summary Icon Description Icon Description 188 Memory channel 25, 75 Least significant modifiers. Narrowband enabled CTCSS enabled Battery level indicator DCS DCS enabled Keypad lock enabled Low Power Enabled Dual watch enabled When not displayed, high power is active VOX VOX enabled Indicates active band or channel Squelch Open/ Close Indicator MURS-V1... -
Page 25: Battery Level Indicator
VISIT BAOFENGTECH.COM AND MIKLOR.COM FOR DOWNLOADS AND HELP Battery Level Indicator When the battery level indicator reads the battery is depleted. At this point the radio will start beeping periodically as well as flash the backlight of the display and when voice prompts are enabled, a "Low Voltage" announcement will be heard, indicating that you need to change your battery or put your radio in the charger. To get an Accurate Voltage reading you Press and Hold button (for about 2 seconds), the display will show the current voltage level of the battery Status LED The status LED has a very simple and traditional design. When you receive a signal it turns green, when you transmit it turns red, and it's off in standby. Side key 1 / [F] Press [F] momentarily to start the broadcast FM receiver. Another momentary press turns the broadcast FM receiver off. If a signal is received on the active frequency or channel while you are listening to the broadcast FM, the receiver will open squelch to that frequency (as if scanning) and remain there until the signal goes away; it will then switch back to broadcast FM. Press and hold [F] to activate the alarm function. Press [F] (a short press) again to turn it off. To send out a tone (more details in the section called “Tone-burst”.) Press the [F] key while... -
Page 26: Side Key 2 / [M]
VISIT BAOFENGTECH.COM AND MIKLOR.COM FOR DOWNLOADS AND HELP holding down the PTT. Side key 2 / [M] Press [M] momentarily to turn on the LED flashlight. Another momentary press will flash the LED. Another momentary press turns the flashlight off. Press and hold [M] to monitor the signal. This will open up the squelch so you can listen to the unfiltered signal. Dual Push-To-Talk The MURS-V1 includes a Dual PTT Key/ Rocker Switch. You can communicate with other parties effortlessly by pressing the PTT rocker key upwards to transmit on Channel A (the upper display), or by pressing the PTT rocker key downwards to transmit on Channel B (the lower display). The MURS-V1 allows syncing the rocker switch as a single push-to-talk button (refer to Menu Option 33 for more details). MURS-V1... -
Page 27: Numeric Keypad
VISIT BAOFENGTECH.COM AND MIKLOR.COM FOR DOWNLOADS AND HELP Numeric keypad The BTECH MURS-V1 hand-held transceiver comes standard with a full numeric keypad. Figure 2.3. BTECH MURS-V1, keypad The numeric keys have their secondary function printed on them (in reality it's rather menu short-cuts, more on that in Chapter 4, Working the menu system). The , a n d keys also serve as scan, keypad lock, and Voltage display respectively. Pound # Key In channel mode, also acts as a transmit power shift key. While in channel mode, momentarily press to change between High and Low transmit power. Do note that this is does not alter the transmit power stored to memory for that channel; it only affects the current session. Switching to another channel or another operating mode (including broadcast FM) will reset transmit power to what's stored in channel memory. -
Page 28: Star * Key
VISIT BAOFENGTECH.COM AND MIKLOR.COM FOR DOWNLOADS AND HELP Keypad Lock The BTECH MURS-V1 features a keypad lock that locks out all keys except for the three side keys. To enable or disable the keypad lock, press and hold the key for about two seconds. Star * Key A short momentary press of the key enables the reverse function. When listening to broadcast FM a momentary press will start the scanning. Scanning in broadcast FM will stop as soon as an active station is found, regardless of scanner resume method. To enable the scanner, press and hold the key for about two seconds. See Chapter 6, Scanning for details. Zero 0 Key The BTECH MURS-V1 features a battery voltage meter that the current voltage of the battery on the display MURS-V1... -
Page 29: Menu And Function Keys
VISIT BAOFENGTECH.COM AND MIKLOR.COM FOR DOWNLOADS AND HELP To see the voltage displayed, press and hold the key for about two seconds. Menu and function keys The key, used to enter the menu and confirm menu options. The and keys are used to navigate through the menu as well as select channels and step up or down in frequency (depending on operating mode). The key is used to exit menus and cancel menu options. The key a l s o switches between A (upper) and B (lower) displays. The frequency or channel on the selected display becomes the active listening and transmit frequency or channel. When listening to broadcast FM, the key switches between 65-75 MHz and 76-108 MHz bands. For a more in-depth explanation on how to work the menu see Chapter 5, Working the menu system. -
Page 30: Accessory Jack
VISIT BAOFENGTECH.COM AND MIKLOR.COM FOR DOWNLOADS AND HELP Accessory jack The accessory jack on the BTECH MURS-V1 is a Kenwood compatible two (2)-pin design. Figure 2.4. Typical 2 pin Kenwood headset configuration. • To attach accessories such as headsets, speaker-mics or programming cables, align the connectors and push in fully. • The fit isn't always perfect on cheap or clone cables and connectors and may require a bit of force to wiggle them in completely. • Make sure the radio is off before attaching any accessories. MURS-V1... -
Page 31: Chapter 3. - Basic Use
VISIT BAOFENGTECH.COM AND MIKLOR.COM FOR DOWNLOADS AND HELP Chapter 3. - Basic Use Power and volume Before we turn the power on, make sure you have attached the battery and antenna as described in Chapter 1, Initial setup. Turning the unit on To turn the unit on, simply rotate the volume/power knob clockwise until you hear a "click". If your radio powers on correctly there should be an audible double beep after about one second and the display will show a message or flash the LCD depending on settings for about one second (see “38 PONMSG - Power On Message” in Appendix B, Menu definitions). Then it will display a frequency or channel. If the Voice prompt is enabled, the voice will announce "frequency mode" or "channel mode". -
Page 32: Turning The Unit Off
VISIT BAOFENGTECH.COM AND MIKLOR.COM FOR DOWNLOADS AND HELP Figure 3.1. First power-on, display You can get additional information about your radio by holding down miscellaneous keys as you turn it on. Turning the unit off Turn the volume/power knob counter-clockwise until you hear a "click". The unit is now off. Adjusting the volume To turn up the volume, turn the volume/power knob clockwise. To turn the volume down, turn the volume/power knob counter-clockwise. Be careful not to turn it too far, as you may inadvertently turn your radio off. By using the monitor function, enabled from the Side key [M]; you can more easily adjust your volume by adjusting it to the un-squelched static. MURS-V1... -
Page 33: Making A Call
VISIT BAOFENGTECH.COM AND MIKLOR.COM FOR DOWNLOADS AND HELP Making a call Press and hold the PTT button on the side of the radio body to transmit (upwards for CHANNEL A; downwards for CHANNEL B). While transmitting, speak approximately 3-5cm from the microphone. When you release the PTT your transceiver will go back to receive mode. Channel selection There is one modes of operation: Channel / Memory (MR) mode. Channel (MR) mode The use of Channel (MR) mode is the main mode of the MURS-V1. Here you will have access to the preprogrammed MURS channels, as well as modifying the privacy tones (CTCSS and DCS) and power levels of the channels and bandwidth (channels 4/5, 9/10, 14/15 only). If you have channels programmed with Transmit power set to Low, you can use the key to temporarily switch over to high power if you're having trouble getting through. -
Page 34: Chapter 4. - Murs Information And Fcc Declaration
VISIT BAOFENGTECH.COM AND MIKLOR.COM FOR DOWNLOADS AND HELP Chapter 4. - MURS Information and FCC Declaration THE BTECH MURS-V1 IS FCC PART 95J CERTIFIED FOR MURS USAGE FCC NOTICE AND DECLARATION This device complies with part 15 of the FCC Rules. Operation is subject to the following two conditions: 1. This device may not cause harmful interference, and 2. This device must accept any interference received, including interference that may cause undesired operation The scanning receiver in this equipment is incapable of tuning, or readily altered, by the user to operate within the frequency bands allocated to the Domestic public Cellular Telecommunications Service in Part 22 NO LICENSE REQUIRED FOR MURS OPERATION MURS-V1... - Page 35 VISIT BAOFENGTECH.COM AND MIKLOR.COM FOR DOWNLOADS AND HELP The MURS-V1 operates on MURS (Multi Use Radio Service) frequencies, which do not require an FCC (Federal Communications Commission) license. The highest point of any MURS antenna must not be more than 60 feet above the ground or 20 feet above the highest point of the structure on which it is mounted. MURS can be used: • Within or over any area of the world where radio service are regulated by the FCC • Any other area of the world, except within the territorial limits of areas where radio services are regulated by either an agency of the United States other than the FCC or any foreign government (Subject to either parties rules) • Aboard any vessel of the United States, with the permission of the captain, while the vessel is traveling either domestically or in international waters • Within or over any area of the world where radio service are regulated by the FCC • MURS operation is not authorized aboard aircraft in flight. • MURS stations may transmit voice or data signal as permitted in FCC regulation Section 95.631.
-
Page 36: Murs Frequency Chart, Channel Guide
VISIT BAOFENGTECH.COM AND MIKLOR.COM FOR DOWNLOADS AND HELP MURS Frequency Chart, Channel Guide MURS-V1 FREQUENCY CHART CH: Name Ch. Freq CH: Name Ch. Freq CH: Name Ch. Freq 01: MURS1-1 151.820 06: MURS2-1 151.820 11: MURS3-1 151.820 02: MURS1-2 151.880 07: MURS2-2 151.880 12: MURS3-2 151.880 03: MURS1-3 151.940 08: MURS2-3 151.940 13: MURS3-3 151.940 04: MURS1-4 154.570 09: MURS2-4 154.570 14: MURS3-4 154.570 05: MURS1-5 154.600 10: MURS2-5 154.600 15: MURS3-5 154.600 MURS-V1... -
Page 37: Part Ii. Advanced Topics
VISIT BAOFENGTECH.COM AND MIKLOR.COM FOR DOWNLOADS AND HELP Part II. Advanced topics Part two covers the more advanced topics, such as customization and programming via computer link. HAPTER ORKING THE MENU SYSTEM HAPTER CANNING HAPTER UAL ATCH DTMF HAPTER HAPTER ELECTIVE CALLING HAPTER USTOMIZATION HAPTER ROGRAMMING CANNING HANNELS... -
Page 38: Chapter 5. - Working The Menu System
VISIT BAOFENGTECH.COM AND MIKLOR.COM FOR DOWNLOADS AND HELP Chapter 5. - Working the menu system For a complete reference on available menu items and parameters, see Appendix B, Menu definitions You can modify the follow information on the MURS channels on the fly to suit your current needs: TXP (Power), CTCSS, DCS, Scan Add, and *Bandwidth *(Channels 4,5,9,10,14,15) Basic use Procedure 5.1. Using the menu with arrow keys 1. Press the key to enter the menu. 2. Use the and keys to navigate between menu items. 3. Once you find the desired menu item, press again to select that menu item. 4. Use the and keys to select the desired parameter. 5. When you've selected the parameter you want to set for a given menu item; a. To confirm your selection, press and it will save your setting and bring you back to the main menu. MURS-V1... -
Page 39: Using Short-Cuts
VISIT BAOFENGTECH.COM AND MIKLOR.COM FOR DOWNLOADS AND HELP Using Short-cuts As shown in Appendix B, Menu Definitions, each menu item has an associated numerical value. These can be used for direct access to a menu item. The menu is also organized in such a way that the ten most common functions are on top, and as can be seen in Figure 2.3, “BTECH MURS-V1, keypad”, these are also printed on the keypad so you don't have to remember them all. The parameters also have a number associated with them, see Appendix B, Menu definitions for details. Procedure 5.2. Using the menu with short-cuts 1. Press the key to enter the menu. 2. Use the numerical keypad to enter the number of the menu item. 3. To enter the menu item, press the key. 4. For entering the desired parameter you have two options: a. Use the arrow keys as we did in the previous section; or b. Use the numerical keypad to enter the numerical short-cut code. 5. And just as in the previous section; a. To confirm your selection, press and it will save your setting and bring you back to the main menu. 6. All further examples and procedures in this manual will use the numerical menu short- cuts. -
Page 40: Chapter 6. - Scanning
VISIT BAOFENGTECH.COM AND MIKLOR.COM FOR DOWNLOADS AND HELP Chapter 6. - Scanning The BTECH MURS-V1 features a built in scanner for scanning Channels or for matching calling tones. To enable the scanner, press and hold the key for about two seconds. Press any key to exit scanning mode. Scanning modes The scanner is configurable to one of three ways of operation: Time, carrier or search, each of which is explained in further details in their respective section below. Procedure 6.1. Setting scanner mode 1. Press the key to enter the menu. 2. Enter on your numeric keypad to come to scanner mode. 3. Press the key to select. 4. Use the and keys to select scanning mode. 5. Press the key to confirm and save. 6. Press the key to exit the menu. MURS-V1... -
Page 41: Time Operation
VISIT BAOFENGTECH.COM AND MIKLOR.COM FOR DOWNLOADS AND HELP Time operation In Time Operation (TO) mode, the scanner stops when it detects a signal, and after a factory pre- set time out, it resumes scanning. Carrier operation In Carrier Operation (CO) mode, the scanner stops when it detects a signal, and after a factory preset time with no signal it resumes scanning. Search operation In Search Operation (SE) mode, the scanner stops when it detects a signal. To resume scanning you must press and hold the key again. SKIP Scanning Channels You can configure channels to be added or removed from the scanning list on the fly. Procedure 6.2. Setting scanner channels 1. Press the key to enter the menu. 2. Enter on your numeric keypad to come to scanning add mode. 3. Press the key to select. 4. Use the and keys to select if the channel will be added or removed from the scanning list. The change will apply to the current channel selected... -
Page 42: Tone Scanning
VISIT BAOFENGTECH.COM AND MIKLOR.COM FOR DOWNLOADS AND HELP 5. Press the key to confirm and save. 6. Press the key to exit the menu. Channels that are in the scanning be indicated on the LCD display. Under the Memory Channel number a small icon box will appear if it is in the scanning list. No icon under the memory channel will be present if the channel is skipped during scanning. Tone Scanning Scanning for CTCSS and DCS Tones/Codes CTCSS tone and DCS code scanning mode can be accessed with or without a signal being present. The scanning process itself only occurs while a signal is being received. Scanning for CTCSS Tone 1. Press the key to enter the menu. 2. Enter on your numeric keypad to come to Menu 11: R-CTCS 3. Press the key to select. Insure you have a tone activated (and it is not off) 4. Press the to begin CTCSS scanning A flashing "CT" will be in the left status display to indicate the radio is in CTCSS scanning mode. In this mode, whenever the radio is receiving an RF signal on the selected MR channel, the lower MURS-V1... - Page 43 VISIT BAOFENGTECH.COM AND MIKLOR.COM FOR DOWNLOADS AND HELP display will cycle through the CTCSS tones as they are being tested. Once the frequency of the received CTCSS tone is determined, the "CT" indicator will stop flashing. Press the key to save the scanned tone into memory then press the key to exit the menu. Don't forget to set menu 11 back to OFF when the CTCSS tone is no longer required. Scanning for a DCS tone 1. Press the key to enter the menu. 2. Enter on your numeric keypad to come to Menu 10: R-DCS 3. Press the key to select. Insure you have a tone activated (and it is not off) 4. Press the to begin DCS scanning A flashing "DCS" will be in the left status display to indicate the radio is in DCS scanning mode. In this mode, whenever the radio is receiving an RF signal on the selected MR channel, the lower display will cycle through the DCS codes as they are being tested. Once the bits of the received DCS code are determined, the "DCS" indicator will stop flashing. Press the key to save the scanned tone into memory then press the key to exit the menu.
- Page 44 VISIT BAOFENGTECH.COM AND MIKLOR.COM FOR DOWNLOADS AND HELP Don't forget to set menu 10 back to OFF when the DCS tone is no longer required. MURS-V1...
-
Page 45: Chapter 7. - Dual Watch
VISIT BAOFENGTECH.COM AND MIKLOR.COM FOR DOWNLOADS AND HELP Chapter 7. - Dual Watch In certain situations, the ability to monitor two channels at once can be a valuable asset. The BTECH MURS-V1 features Dual Watch functionality (single receiver) with the ability to lock the transmit frequency to one of the two channels it monitors. Procedure 7.1. With Dual Push-to-Talk Enabled (Default) 1. The Dual Push-to-Talk Switch is a Rocker Switch with upper and lower buttons. You can use Menu “42” (See Appendix B) to adjust audible alerts for Received Transmissions. 2. To Transmit on the Upper Frequency (Display A) – Press upwards on the Dual PTT Button 3. To Transmit on the Lower Frequency (Display B) – Press downwards on the Dual PTT Button Procedure 7.2. With Single Push-to-Talk Enabled 1. Select the option to synchronize the push-to-talk button, than upload the new settings to the radio via software (or see Menu 33 - See Chapter 9 “Single or Dual PTT”) 2. Press the key to select between the upper (Display A) or lower (Display B) frequency. - Page 46 VISIT BAOFENGTECH.COM AND MIKLOR.COM FOR DOWNLOADS AND HELP 3. An arrow will display ( ) next to the frequency that you have selected as your default transmitting channel. 4. Press the Push-to-Talk (either direction) to transmit on the selected frequency MURS-V1...
-
Page 47: Chapter 8. - Dtmf
VISIT BAOFENGTECH.COM AND MIKLOR.COM FOR DOWNLOADS AND HELP Chapter 8. - DTMF DTMF is an in-band signaling method using dual sinusoidal signals for any given code. Originally developed for telephony systems, it has proved a very versatile tool in many other areas. In two-way radio systems, DTMF is most commonly used for automation systems and remote control. A common example would be in amateur radio repeaters where some repeaters are activated by sending out a DTMF sequence (usually a simple single-digit sequence). Table 8.1. DTMF frequencies and corresponding codes 1209 Hz 1336 Hz 1477 Hz 1633 Hz 697 Hz A - 770 Hz B - 852 Hz C - 941 Hz D - The BTECH MURS-V1 has a full implementation of DTMF, including the A, B, C and D codes. The numerical keys, as well as the , and , keys correspond to the matching DTMF codes as you would expect. The A, B, C and D codes are located in the and keys... - Page 48 VISIT BAOFENGTECH.COM AND MIKLOR.COM FOR DOWNLOADS AND HELP respectively (†). To send DTMF codes, press the key(s) corresponding to the message you want to send while holding down the PTT key. If you have the keypad lock enabled on your radio, you can still send DTMF tones the regular way without having to unlock your radio. MURS-V1...
-
Page 49: Chapter 9. - Selective Calling
VISIT BAOFENGTECH.COM AND MIKLOR.COM FOR DOWNLOADS AND HELP Chapter 9. - Selective calling Some times when you're working with larger groups of people using the same channel, things can get very crowded, very fast. To minimize this problem, several methods of blocking out unwanted transmissions on your frequency have developed. In general, there are two forms of selective calling in two-way radio systems: Group calling, and individual calling. Group calling, as the name suggest, is a one-to-many form of communication. Every radio in your working group is configured the same way and any radio will make contact with every other radio in the group. Individual calling, some times also known as paging, is a one-to-one form of communication. Every radio is programmed with a unique ID code. And only by sending out a matching code can you get that radio to open up to your transmissions. The BTECH MURS-V1 features three different ways of group calling: • CTCSS • DCS • Tone-burst... -
Page 50: Ctcss
VISIT BAOFENGTECH.COM AND MIKLOR.COM FOR DOWNLOADS AND HELP The BTECH MURS-V1 does not feature any form of individual calling. Using these features does NOT mean that others won't be able to listen in on your transmissions. They only provide a method to filter out unwanted incoming transmissions. Any communications made while using these features will still be heard by anyone not employing filtering options of their own. You can change the CTCSS or DCS settings while in memory (MR) mode. CTCSS and Tone-burst are also popular to open up repeaters. CTCSS CTCSS is set with menus 11 R-CTCS and 13 T-CTCS. For a complete list of available CTCSS codes and corresponding sub-tone frequencies, see Table C.2, “CTCSS Frequencies” in Appendix C, Technical specifications. Procedure 9.1. CTCSS setup how-to MURS-V1... - Page 51 VISIT BAOFENGTECH.COM AND MIKLOR.COM FOR DOWNLOADS AND HELP 1. Press the key to enter the menu. 2. Enter on the numeric keypad to get to receiver CTCSS. 3. Press to select. 4. Enter desired CTCSS sub-tone frequency in hertz on the numeric keypad. 5. Press to confirm and save. 6. Enter on the numeric keypad to go to transmitter CTCSS. 7. Press to select. 8. Enter desired CTCSS sub-tone frequency in hertz on the numeric keypad. Make sure it's the same frequency as that you entered for receiver CTCSS. 9. Press to confirm and save. 10. Press to exit the menu system. To turn CTCSS off, follow the same procedure but set it to off with the key instead of selecting a CTCSS sub-tone frequency. For more information see the section called “11 R-CTCS - Receiver CTCSS” and the section called “13 T-CTCS - Transmitter CTCSS” in Appendix B, Menu definitions.
- Page 52 DCS is set with menus 10 R-DCS and 12 T-DCS. For a complete list of available DCS codes, see Table C.1, “DCS Codes” in Appendix C, Technical specifications. Procedure 9.2. DCS setup how-to 1. Press the key to enter the menu. 2. Enter on the numeric keypad to get to receiver DCS. 3. Press to select. 4. Enter desired DCS code on the numeric keypad. 5. Press to confirm and save. 6. Enter on the numeric keypad to go to transmitter DCS. Press to select. 8. Enter desired DCS code on the numeric keypad. Make sure it's the same code as that you entered for receiver DCS. 9. Press to confirm and save. 10. Press to exit the menu system. To turn DCS off, follow the same procedure but set it to off with the key instead of MURS-V1...
-
Page 53: Tone-Burst
VISIT BAOFENGTECH.COM AND MIKLOR.COM FOR DOWNLOADS AND HELP selecting a DCS code. For more information see the section called “10 R-DCS - Receiver DCS” and the section called “12 T-DCS - Transmitter DCS” in Appendix B, Menu definitions. Tone-burst To send out a tone-burst (selectable by MENU 40); press the [F] key while holding down the PTT. No further configuration required using this feature. You can select from 1000, 1450, 1750, or 2100Hz Tone Burst Options. These options are found on the Menu 40. Procedure 9.3. Tone Burst setup how-to 1. Press the key to enter the menu. 2. Enter on the numeric keypad to get to receiver DCS. 3. Press to select. 4. Enter desired Tone Burst Option on the numeric keypad. a. 1000 HZ[0] | 1450 HZ[1] | 1750 HZ[2] | 2100 HZ[3] 5. Press to confirm and save. 6. Press to exit the menu system. - Page 54 VISIT BAOFENGTECH.COM AND MIKLOR.COM FOR DOWNLOADS AND HELP If you have the keypad lock enabled on your radio, you can still send a tone burst the regular way without having to unlock your radio. MURS-V1...
-
Page 55: Chapter 10. - Customization
VISIT BAOFENGTECH.COM AND MIKLOR.COM FOR DOWNLOADS AND HELP Chapter 10. - Customization The BTECH MURS-V1 allows for customization of both the power-on message (via computer link only), and the backlight color during the three states of the transceiver (Transmit, Receive and Standby). Display The LCD on the BTECH MURS-V1 is backlit by multi-color LEDs, the color of which can be pre-set from the menu system into a variety of colors. To change the colors, follow these steps: Procedure 10.1. Changing backlight color 1. Press the key to enter the menu. 2. Enter one of the following on your numeric keypad: to change the standby color. to change the receive color. to change the transmit color. 3. Press key to select. 4. Use the and keys to pick the desired color. 5. Press to confirm and save. -
Page 56: Single Or Dual Ptt
VISIT BAOFENGTECH.COM AND MIKLOR.COM FOR DOWNLOADS AND HELP 6. Press to exit the menu. To change the time the backlight stays on for your LCD, follow these steps: Procedure 10.2. Setting backlight time-out 1. Press the key to enter the menu. 2. Enter on your numeric keypad to come to backlight time out. 3. Press key to select. 4. Use the and keys to pick the desired time-out for the display. 5. Press to confirm and save. 6. Press to exit the menu. For details see the section called “29 WT-LED - Display backlight color, Standby” and onward in Appendix B, Menu definitions. Single or Dual PTT Dual PTT Synchronization The MURS-V1 comes with the Dual PTT key enabled, but the MURS-V1 Menu has a Menu option that allows locking the Dual PTT Button to simulate a Single PTT and override the Dual PTT feature. By Pressing the EXIT/AB button, you can still switch the selected upper/lower display. MURS-V1... -
Page 57: Display Sync
2. Enter on your numeric keypad to come to the PTT configuration option. 3. Press key to select. 4. Use the and keys to pick the PTT configuration 5. Press to confirm and save. 6. Press to exit the menu. Display Sync Display Synchronization The MURS-V1 allows the upper and lower display to be synched so that you can see two simultaneous items on one channel (Frequency Value and Name) by scrolling through the channels the displays will remain synched together when this is activated. Procedure 10.4. Setting the Display Synchronization Preference 1. Press the key to enter the menu. 2. Enter on your numeric keypad to come to the Sync configuration option. 3. Press key to select. 4. Use the and keys to enable or disable the display sync 5. Press to confirm and save. -
Page 58: Power-On Message
VISIT BAOFENGTECH.COM AND MIKLOR.COM FOR DOWNLOADS AND HELP 7. Use Menu and to configure Display A and Display B (See Appendix B) Power-on message The power-on message can only be set via computer link, see the section called “Computer programming” for details on how to set up a link with your computer. The following instructions assume that you've already established a link using the BTECH software from a computer running Windows, and that the BTECH software is already installed and running. Procedure 10.5. Setting the power-on-message 1. Click other in the menu bar; a dialogue box titled "Other" should have popped up. 2. In the box titled "Power On Message", there are two text fields representing the two lines on your LCD. Enter the desired text in the fields. 3. Click Write to write your changes to the radio. Make sure that menu item 38 is set to MSG, otherwise your message won’t be displayed. See Chapter 5 Working the menu system for details on how to navigate the menu. Some times it takes the BTECH software more than one try to connect to your radio. If you see a dialogue box popping up stating that you have a connection failure, close the dialogue box and click read or write again. MURS-V1... -
Page 59: Computer Programming
VISIT BAOFENGTECH.COM AND MIKLOR.COM FOR DOWNLOADS AND HELP Computer programming Computer Programming uses CHIRP (available at no charge: www.baofengtech.com/download ) Computer Programming Allows the customization of Channels (included Custom channel names) Saving and Uploading the same presets to other radios. Customization of the Start Up Message... -
Page 60: Appendix A. - Troubleshooting
Symptom Possible Cause Solution The radio doesn't start. The battery is too low. Change or recharge the battery. The battery isn't correctly installed. Remove the battery and reinstall it. The battery dies quickly The battery is dead. Purchase a new battery. The battery isn't fully charged. Recharge the battery. The LED indicates reception, but the speaker is Volume is too low. Turn up the volume. silent. CTCSS or DCS enabled Change your CTCSS or DCS to match those you're trying to communicate with. Turn CTCSS or DCS off. Others can't hear my transmission. Their CTCSS or DCS settings don’t match yours. Change your CTCSS or You're too far apart. DCS settings to match your peers. Move in closer. The radio transmits without touching the PTT. The VOX is enabled. Turn VOX off. VOX sensitivity is too high. Turn down VOX sensitivity. I can’t hear others on the same channel Your CTCSS or DCS don’t match theirs Change your CTCSS or DCS settings to match theirs Verify by pressing [M] while they are transmitting MURS-V1... -
Page 61: Appendix B. - Menu Definitions
VISIT BAOFENGTECH.COM AND MIKLOR.COM FOR DOWNLOADS AND HELP Appendix B. - Menu definitions See Chapter 5, Working the menu system for more info about using the menu-system. - Page 62 VISIT BAOFENGTECH.COM AND MIKLOR.COM FOR DOWNLOADS AND HELP Name Menu Settings [Keypad Shortcut] Description - Full Name [0 - 9] Mutes the speaker of the transceiver in the absence of SQL - Squelch Setting the squelch to 0 will open up a strong signal. Squelch is either OFF or one of 9 levels. Level the squelch entirely. The higher the level, the stronger the signal must be to un-mute the speaker. STEP - 2.5K[0] | 5.0K[1] | 6.25K[2] | UNUSED SETTING in MURS-V1 Frequency 10.0K[3] | 12.5K[4] | 20.0K[5] | Step 25.0K[6] | 50.0K[7] TXP - Selects between HIGH and LOW transmitter power. Use Transmit HIGH [0] | | LOW [1] the minimum transmitter power necessary to carry out Power the desired communications. Selects the ratio of sleep cycles to awake cycles (1:1, 2:1, 3:1, 4:1). The higher the number the longer the SAVE - OFF [0] | 1 | 2 | 3 | 4 battery lasts. When enabled, a word or two might be Battery Save missed when the frequency being monitored becomes active. When enabled it is not necessary to push the [PTT] VOX - Voice OFF [0] | 1 | 2 | 3 | 4 | 5 | 6 | 7 | 8 | button on the transceiver. Adjust the gain level to an...
- Page 63 VISIT BAOFENGTECH.COM AND MIKLOR.COM FOR DOWNLOADS AND HELP ABR - Display OFF [0] | 1 | 2 | 3 | 4 | 5 | 6 | 7 | 8 | Illumination Time-out for the LCD backlight. (In seconds) 9 | 10 Time Monitor [A] and [B] at the same time. The display with the most recent activity ([A] or [B]) becomes the selected display. TDR - Dual When TDR is set to ON, an 'S' is indicated in the status Watch, Dual OFF [0] | ON [1] display --- TDR should be set to OFF when manually Reception programming --- TDR is inhibited while scanning is in operation BEEP - OFF [0] | ON [1] Allows audible confirmation of a key press Keypad Beep This feature provides a safety switch, which limits in 15 second steps transmission time to a programmed value. This will TOT - 15, 30, 45, … 600 promote battery conservation by not allowing you to make excessively long transmissions, and in the event Transmission Time-out- The red TX LED begins to flash 10 of a stuck PTT switch (perhaps if the radio or a Speaker/Mic is wedged between car seats) it can Timer seconds before the timeout limit is reached prevent interference to other users as well as battery depletion. Mutes the speaker of the transceiver in the absence of R-DCS - OFF [0] | see DCS Table in Appendix a specific low level digital signal. If the station you are...
- Page 64 VISIT BAOFENGTECH.COM AND MIKLOR.COM FOR DOWNLOADS AND HELP Mutes the speaker of the transceiver in the absence of R-CTCS - a specific and continuous sub- audible signal. If the OFF [0] | see CTCSS Table in Receiver station you are listening to does not transmit this Appendix C CTCSS specific and continuous signal, you will not hear anything. T-DCS - OFF [0] | see DCS Table in Appendix Transmits a specific low-level digital signal to unlock Transmitter the squelch of a distant receiver (usually a repeater). DCS T-CTCS - Transmits a specific and continuous sub-audible signal OFF [0] | see CTCSS Table in Transmitter to unlock the squelch of a distant receiver (usually a Appendix C CTCSS repeater). VOICE - Voice OFF [0] | ENG [1] | CHI [2] Allows audible voice confirmation of a key press Prompt ANI-ID - Displays the ANI code that has been set by software. Automatic This menu cannot be used to change it. The ANI-ID is Number ID sent when the alarm is activated and menu 32 = CODE MURS-V1...
- Page 65 VISIT BAOFENGTECH.COM AND MIKLOR.COM FOR DOWNLOADS AND HELP OFF [0]: No DTMF Side Tones are heard DT-ST [1]: Side Tones are heard DTMFST – only from manually keyed DTMF DTMF-Side codes Determines when DTMF Side Tones can be heard from Tone of ANI-ST [2]: Side Tones are heard the transceiver speaker. transmit only from automatically keyed code DTMF codes DT+ANI [3]: All DTMF Side Tones are heard 1[0] | 2[1] | 3[2] | 4[3] | 5[4] | 6[5] S-CODE - Selects 1 of 15 DTMF codes. The DTMF codes are | 7[6] | 8[9] | 9[8] | 10[9] | 11[10] | Signal Code programmed with software and are up to 5 digits each. 12[11] | 13[12] | 14[13] | 15[14] TO [0]: Time Operation - scanning will resume after a fixed time has SC-REV - passed Scanner CO [1]: Carrier Operation - scanning Scanning Resume Method Resume will resume after the signal Method disappears SE [2]: Search Operation - scanning will not resume...
- Page 66 VISIT BAOFENGTECH.COM AND MIKLOR.COM FOR DOWNLOADS AND HELP OFF [0]: No ID is sent BOT [1]: The selected S-CODE is PTT-ID - When to Send PTT-ID sent at the beginning When to EOT [2]: The selected S-CODE is send the PTT- Codes are sent during either the beginning or ending of sent at the ending a transmission. BOTH [3]: The selected S-CODE is sent at the beginning and ending PTT-LT - Signal code 0 - 50ms PTT-ID Delay (milliseconds) sending delay CH [0]: Displays the channel MDF-A - number [A] MR/Channel Mode Display Format Channel NAME [1]: Displays the channel Mode A name. Note: Names must be entered using software. Display FREQ [2]: Displays programmed Frequency MURS-V1...
- Page 67 MDF-B - number [B] MR/Channel Mode Display Format Channel NAME [1]: Displays the channel Mode B name. Note: Names must be entered using software. Display FREQ [2]: Displays programmed Frequency Disables the [PTT] button on a channel that is already in BCL - Busy use. The transceiver will sound a beep tone and will not Channel OFF [0] | ON [1] transmit if the [PTT] button is pressed when a channel Lock-out is already in use. Display A and B are synced. This allows the upper SYNC – OFF [0] | ON [1] display to show channel Name while the lower shows Display Sync the Frequency. (Use with MENU 21 and 22) OFF [0]: TX = RX (simplex) SFT-D - + [1]: TX will be shifted higher in Frequency UNUSED SETTING in MURS-V1 frequency than RX Shift - [2]: TX will be shifted lower in Direction frequency than RX OFFSET - UNUSED SETTING in MURS-V1 Frequency 00.000 - 999.990 in 1 kHz steps shift amount...
- Page 68 This menu is used to either create new or modify Store a 023 - 127 existing channels (023 through 127) so that they can be Memory accessed from MR/Channel Mode. Channel DEL-CH - This menu is used to delete the programmed Delete a information from the specified channel (023 through 023 - 127 memory 127) so that it can either be programmed again or be channel left empty. WT-LED - Display OFF [0] | BLUE [1] | ORANGE [2] | backlight Default: PURPLE PURPLE [3] color, Standby RX-LED - Display OFF [0] | BLUE [1] | ORANGE [2] | Default: BLUE backlight PURPLE [3] color-Receive TX-LED - Display OFF [0] | BLUE [1] | ORANGE [2] | backlight Default: ORANGE PURPLE [3] color- Transmit MURS-V1...
- Page 69 SITE: Sounds alarm through your radio speaker only TONE: Transmits a cycling tone TONE: Transmits a cycling tone over-the-air AL-MOD - over-the-air CODE: Transmits '119' (911 in reverse?) followed by Alarm Mode CODE: Transmits 119 followed by the ANI code over-the-air the ANI code over-the-air OFF: Disabled OFF: Alarm is Disabled DB-PTT – ON: Upper PTT selects upper display Double Push- OFF [0] | ON [1] Lower PTT selects lower display to-Talk OFF: PTT emulates a single PTT TDR-AB - Transmit UNUSED SETTING in MURS-V1 selection OFF [0] | A [1] | B [2] while in Dual Watch mode This function is used eliminate squelch tail noise STE - Squelch between BTECH handhelds that are communicating Tail OFF [0] | ON [1] directly (no repeater). Reception of a 55 Hz or 134.4 Hz Elimination mutes the audio long enough to prevent hearing any squelch tail noise. RP-STE - Squelch Tail OFF [0] | 1 - 10 UNUSED SETTING in MURS-V1 Elimination...
- Page 70 VISIT BAOFENGTECH.COM AND MIKLOR.COM FOR DOWNLOADS AND HELP RPT-RL - Delay the OFF [0] | 1 - 10 UNUSED SETTING in MURS-V1 squelch tail of repeater FULL [0]: Performs an LCD screen PONMSG - test at power-on Controls the behavior of the display when the Power On MSG [1]: Displays a 2-line power-on transceiver is turned on. Message message Sends an end-of-transmission tone to indicate to other ROGER - OFF [0] | ON [1] stations that the transmission has ended. Roger Beep The R-TONE frequency is transmitted by pressing the [F] side key while the [PTT] button is also pressed. R-TONE – 1000 HZ [0] | 1450 HZ [1] | Burtst Tone 1750 HZ [2] |2100 HZ [3] A common tone burst frequency used by many amateur radio systems in Europe is 1,750 Hz SC-ADD – - ON Adds the current channel to the scan list OFF [0] | ON [1] Scan Add - OFF Removes the current channel from the scan list Tone at End of Reception - Receiver tone prior to A/B-BP OFF [0] / A / B squelch closing. - An audible indication of which display was in use. MURS-V1...
- Page 71 VISIT BAOFENGTECH.COM AND MIKLOR.COM FOR DOWNLOADS AND HELP RESET - Restore VFO [0] | ALL [1] Resets the radio to factory defaults defaults...
-
Page 72: Appendix C. - Technical Specifications
VISIT BAOFENGTECH.COM AND MIKLOR.COM FOR DOWNLOADS AND HELP Appendix C. - Technical specifications General General specifications Specification Value Frequency Range (MHz) 65-108 (Rx) FCC Part 95J MURS Channels (Rx/Tx) (Channels 001-015) Memory channels Frequency stability 2.5ppm Frequency step (kHz) 2.5K/5.0K/6.25K/10.0K/12.5K/20.0K/25.0K/50.0K Antenna impedance 50 Ohm Operating temperature -20°C to +60°C Supply voltage 7.4 Consumption ≤ 75mA (standby) 380mA (reception) ≤ 1.4A (transmission) Mode of operation Simplex or semi-duplex Duty cycle 03 / 03 / 54 min. (Rx / Tx / Standby) Dimensions (mm) 58 x 110 x 32 MURS-V1... - Page 73 VISIT BAOFENGTECH.COM AND MIKLOR.COM FOR DOWNLOADS AND HELP Weight (g) 214 Transmitter Transmitter specifications Specification Value RF power L/H 500mW/2W Type of modulation Emission class 15K#F3E (wideband) 10K#F3E (narrowband) Maximum deviation (kHz) ≤± 5.0 (wideband) ≤ ± 2.5 (narrowband) Spurious emissions (dB) <-60dB...
- Page 74 D071N 014 D072N 015 D073N 016 D074N 017 D114N 018 D115N 019 D116N 020 D122N 021 D125N 022 D131N 023 D132N 024 D134N 025 D143N 026 D145N 027 D152N 028 D155N 029 D156N 030 D162N 031 D165N 032 D172N MURS-V1...
- Page 75 VISIT BAOFENGTECH.COM AND MIKLOR.COM FOR DOWNLOADS AND HELP Code Code Number Code Number Code Number Number D174N D205N 035 D212N 036 D223N 033 034 037 D225N 038 D226N 039 D243N 040 D244N 041 D245N 042 D246N 043 D251N 044 D252N 045 D255N 046 D261N 047 D263N 048 D265N 049 D266N...
- Page 76 D413I D423I D431I D432I D445I D446I D452I D454I D455I D462I D464I D465I D466I D503I D506I D516I D523I D526I D532I D546I D565I D606I D612I D624I D627I D631I D632I D645I D654I D662I D664I D703I D712I D723I D731I D732I D734I D743I D754I MURS-V1...
- Page 77 VISIT BAOFENGTECH.COM AND MIKLOR.COM FOR DOWNLOADS AND HELP CTCSS table Table C.2. CTCSS Frequencies Number Frequency Number Frequency Number Frequency Number Frequency 69.3 71.9 74.4 67.0 79.7 82.5 85.4 77.0 91.5 94.8 97.4 88.5 100.0 103.5 107.2 110.9 118.8 123 127.3 114.8 131.8 136.5 141.3 146.2 156.7 159.8 162.2 151.4 165.5 167.9 171.3 173.8...
- Page 78 VISIT BAOFENGTECH.COM AND MIKLOR.COM FOR DOWNLOADS AND HELP MURS-V1...
Need help?
Do you have a question about the MURS-V1 and is the answer not in the manual?
Questions and answers