Sign In
Upload
Download
Table of Contents
Contents
Add to my manuals
Delete from my manuals
Share
URL of this page:
HTML Link:
Bookmark this page
Add
Manual will be automatically added to "My Manuals"
Print this page
×
Bookmark added
×
Added to my manuals
Manuals
Brands
BTECH Manuals
Two-Way Radio
UV-25X2
User manual
BTECH UV-25X2 User Manual
Multi-band radio
Hide thumbs
1
2
Table Of Contents
3
4
5
6
7
8
9
10
11
12
13
14
15
16
17
18
19
20
21
22
23
24
25
26
27
28
29
30
31
32
33
34
35
36
37
38
39
40
41
42
43
44
45
46
47
48
49
50
51
52
53
54
55
56
57
58
59
60
61
62
63
64
65
66
67
68
69
70
71
72
73
74
75
76
77
78
79
80
81
82
83
page
of
83
Go
/
83
Contents
Table of Contents
Bookmarks
Table of Contents
Table of Contents
Part I. Getting Started
Chapter 1. - Getting Started
Unpacking and Inspecting
UV-25X2: Overview of the Front Panel
UV-25X4: Overview of the Front Panel
UV-50X2: Overview of the Front Panel
UV-25X2 & UV-25X4: Overview of the Rear Ports
UV-50X2: Overview of the Rear Ports
Hand Held MIC Keys and Description
Color Display and Icon Descriptions
Antenna Basics
Grounding Plane
Antenna Requirements
Chapter 2. - Basic Shortcuts and Use
Pound # Key
Star * Key
Turning the Unit on
Turning the Unit off
Adjusting the Volume
Making a Call
Channel Selection
Frequency (VFO) Mode
Channel (MR) Mode
Monitor both VFO & MR Modes
Chapter 3. - Menu Quick Review
Chapter 3. - Menu Quick Review Quick Menu Settings
Chapter 4. - Programming
Frequency Mode Vs. Channel Mode
Ex: Programming a Channel Repeater Offset with CTCSS Tone
Ex. Programming a Simplex Channel with CTCSS Tone
Chapter 5. - Other Settings
Toggle from High to Low Power
Storing an FM Radio Station and Scanning
Keypad Lock-Out
PTT ID Setting
DTMF RX Settings
DTMF TX Settings
Remote Stun
Remote Kill
Remote Revive
Read more about Remote Commands
DTMF Receive Settings, Transmit Setting (Call Key)
2TONE Receive Settings, Transmit Setting (Call Key)
5Tone Receive Settings, Transmit Setting (Call Key)
Scanning Modes
Time Operation
Carrier Operation
Search Operation
SKIP Scanning Channels
Scanning a Frequency Range (VFO Mode)
Tone Scanning
Scanning for CTCSS and DCS Tones/Codes
Dual, Tri, and Quad Watch (TMR)
Chapter 6. - Selective Calling
Ctcss
Dcs
1000Hz, 1450Hz, 1750Hz, 2100Hz Tone-Burst
Part III. How-To and Setup Guides
Chapter 7. - Repeaters
Chapter 8. - Application Specific Setup
Commercial Radio Setup
Amateur Radio Setup
Frs, Gmrs, Murs, Pmr446
Chapter 9. - Customization Display
Display
Sync Display Channels
Appendix A. - Menu Definitions
Appendix B. - Technical Specifications
General
Receiver
Transmit
Advertisement
Quick Links
1
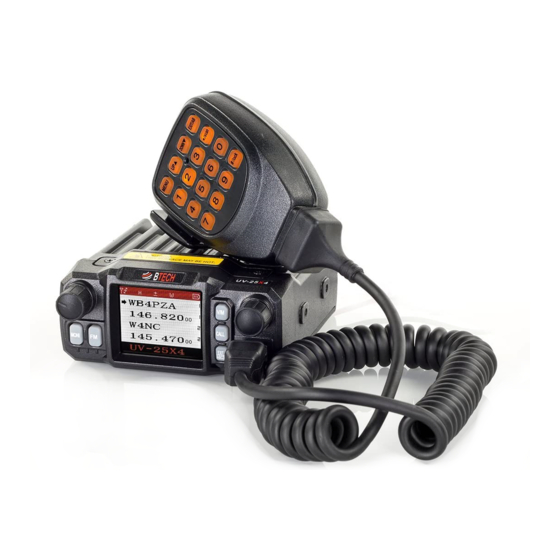
Uv-25X2: Overview of the Front Panel
Download this manual
Table of
Contents
Previous
Page
Next
Page
1
2
3
4
5
Advertisement
Table of Contents
Need help?
Do you have a question about the UV-25X2 and is the answer not in the manual?
Ask a question
Questions and answers
Related Manuals for BTECH UV-25X2
Two-Way Radio Btech UV-2501 User Manual
(47 pages)
Two-Way Radio Btech UV-5001 User Manual
(47 pages)
Two-Way Radio BTECH UV-25X4 User Manual
Multi-band radio (83 pages)
Two-Way Radio BTECH UV-50X2 User Manual
Multi-band radio (83 pages)
Two-Way Radio BTECH UV-PRO Instruction Manual
(40 pages)
Two-Way Radio BTECH BF-F8HP-PRO Instruction Manual
(70 pages)
Two-Way Radio BTECH DMR-6X2 PRO Operating Manual
Digital dmr and analog uhf/vhf two way radio (53 pages)
Two-Way Radio BTECH GMRS-V1 Manual
(83 pages)
Two-Way Radio BTECH GMRS-50V2 Manual
(78 pages)
Two-Way Radio BTECH GMRS-PRO Manual
(71 pages)
Two-Way Radio BTECH MURS-V1 Manual
(78 pages)
Two-Way Radio BTECH GMRS V2 User Manual
(6 pages)
This manual is also suitable for:
Uv-25x4
Uv-50x2
Table of Contents
Save PDF
Print
Rename the bookmark
Delete bookmark?
Delete from my manuals?
Login
Sign In
OR
Sign in with Facebook
Sign in with Google
Upload manual
Upload from disk
Upload from URL


Need help?
Do you have a question about the UV-25X2 and is the answer not in the manual?
Questions and answers