Advertisement
LightwaveRF
connect
3-Way Control Relay
Operation Manual
Model No: JSJS LW825
It is important to install this product in accordance
with the tting instructions below. Failure to do so
may render your guarantee void.
IMPORTANT: PLEASE RETAIN THESE INSTRUCTIONS
FOR FUTURE REFERENCE AND FOR GUIDANCE ON
THE ASSOCIATION OF REMOTE HANDSETS. FOR
HELP AND SETUP GUIDANCE PLEASE VISIT
www.lightwaverf.com
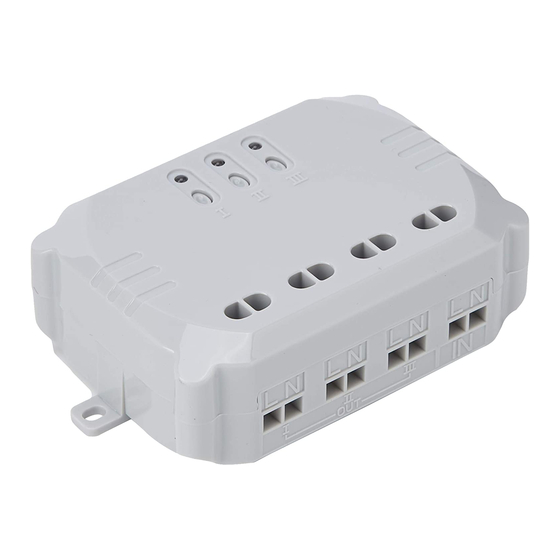
OVERVIEW:
Indicator Lights
Manual Buttons
Outputs 1/2/3
230v Input
Advertisement
Table of Contents

Related Manuals for LightwaveRF JSJS LW825


Summary of Contents for LightwaveRF JSJS LW825
- Page 1 LightwaveRF connect 3-Way Control Relay Operation Manual Model No: JSJS LW825 It is important to install this product in accordance with the tting instructions below. Failure to do so may render your guarantee void. IMPORTANT: PLEASE RETAIN THESE INSTRUCTIONS FOR FUTURE REFERENCE AND FOR GUIDANCE ON THE ASSOCIATION OF REMOTE HANDSETS.
- Page 2 3 channels added together)/. It is mains powered. Each channel can be operated independently. The relay can be operated using any LightwaveRF Connect Remote or other transmitter. FITTING AND WIRING INSTRUCTIONS: Important Things to Consider Before you Begin 1).
- Page 3 INSTALLATION:...
- Page 4 IMPORTANT: The 3-Way Control relay is not designed to be left exposed once it is installed, as live mains wiring is connected to the terminals. Ensure that the device is mounted securely in a suitable housing (e.g. LightwaveRF IP56 housing).
- Page 5 Pairing a channel with a LightwaveRF transmitter 1) Press and hold one of the manual buttons (1 to 3) on the Relay until the corresponding LED starts to ash.
- Page 6 Manually. NOTE: If the RF range between the transmitter and receiver is too great to achieve reliable operation, the LightwaveRF SIGNAL BOOSTER may be used in conjunction with this product to increase the signal strength over greater distances.
- Page 8 SPECIFICATION: Radio frequency: 433.92 MHz Input: 230V~ / 50Hz Output: max. 3000 watts for resistive load Operating distance: 30 meter closed eld. Standby power consumption: ≦ 1w. Birmingham Science Park Aston Faraday Wharf Holt Street Birmingham B7 4BB Tel: 01902 500 562 Email: support@jsjsdesigns.com...
Need help?
Do you have a question about the JSJS LW825 and is the answer not in the manual?
Questions and answers