Advertisement
Quick Links
Advertisement

Related Manuals for Tucano Urbano Termoscud PRO R187PRO


Summary of Contents for Tucano Urbano Termoscud PRO R187PRO
- Page 1 ISTRUZIONI DI MONTAGGIO Instruction manual Kymco AK550 > 2017 R187 PRO...
- Page 2 Le foto e i disegni sono puramente indicativi. Tucano Urbano si riserva il diritto di modificare o migliorare il prodotto in qualsiasi momento, senza preavviso e senza obblighi di dover applicare tali modifiche su prodotti già venduti. Photos and drawings are purely indicative. Tucano Urbano reserves the right to modify or improve the product at any time, without prior notification and with no obligation to apply such modifications to products already sold.
-
Page 3: Summary View
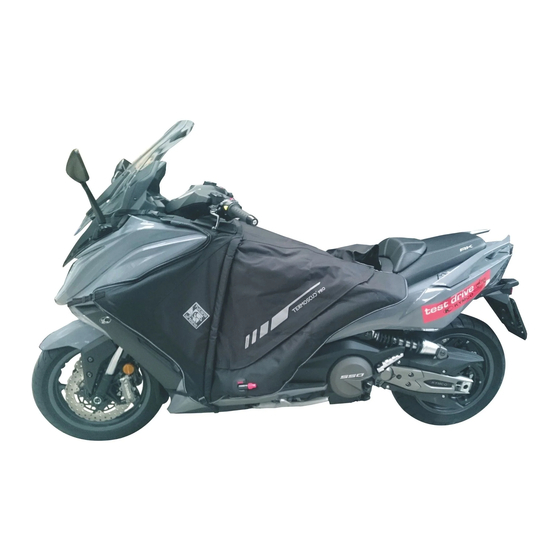
VISTA RIEPILOGATIVA Summary view KIT DI MONTAGGIO Assembly kit STEP C STEP D STEP A STEP E STEP G STEP B 2bis STEP F STEP H R187 PRO... - Page 4 Stendere Termoscud® sulla sella con i nastri 1 e 2 in avanti. Unfold Termoscud® on the scooter’s seat with straps 1 and 2 forward. 2bis 2bis Rimuovere le viti dello scooter nei punti 4. Montare su questi fori il profilo rigido usando le viti (A) fornite in dotazione.
- Page 5 Infilare la prolunga F fino in fondo tra il cupolino ed il parabrezza trasparente. Quindi, agganciare gli attacchi fastex del nastro F al Termoscud® nei punti 1F. Thread extension strap F as far as it will go between the fairing and the Perspex screen.
- Page 6 Fissare Termoscud® da entrambi i lati, utilizzando i fastners forniti in dotazione (all’interno del vano ruota), facendoli passare attraverso i fori sul nastro 3. Fasten Termoscud® on both sides, using the supplied fastners (behind the front wheel), threading them through the holes at the end of straps 3.
- Page 7 Collegare i due lembi del nastro X utilizzando l’aggancio a baionetta, facendo passare il nastro sul retro dello scudo. Close the buckles of straps X under the leg cover. Behind the bodywork. Agganciare i moschettoni dei nastri 2 al bordo inferiore della carrozzeria, sotto la pedana.
- Page 8 Tucano Urbano S.r.l. Via Dell’Annunciata, 21 20121 Milano - Italy...
-
Page 9: Instructions De Montage
INSTRUCTIONS DE MONTAGE Manual de istrucciones Kymco AK550 > 2017 R187 PRO... - Page 10 à tout moment, sans préavis et sans obligation d’apporter telles modifications aux produits déjà vendus. Las fotos y los dibujos se muestran únicamente a modo de ejemplo. Tucano Urbano se reserva el derecho de modificar o mejorar el producto en cualquier momento, sin previo aviso y sin la...
- Page 11 VUE SOMMAIRE Vista resumen KIT DE MONTAGE Kit de montaje STEP C STEP D STEP A STEP E STEP G STEP B 2bis STEP F STEP H R187 PRO...
- Page 12 Dérouler Termoscud® sur la selle en mettant les rubans 1 et 2 en avant. Extienda el Termoscud® sobre el asiento del scooter, de manera que las cintas 1 y 2 queden hacia delante. 2bis 2bis Enlever la vis du point 4. Monter le profil rigide sur ce trou en utilisant la vis (A) en dotation.
- Page 13 Enfiler le sangle F jusqu’au fond entre le para-brise et le cuvel age du phare. Ensuite accrocher les attaches fastex de sangle F au Termoscud® aux points Tire de la alargadera F lo má posible entre el carenado y la pantalla Perspex.
- Page 14 Fixer Termoscud® sur les deux côtés, à l’aide des rivets plastique (*), à l’intérieur du logement de la roue en les faire passer dans les trous pratiqués sur les rubans 3. Fijar el Termoscud® a ambos lados, utilizando los tornillos (*) (en la zona interior del hueco para la rueda delantera), haciéndolos pasar por los agujeros de la cinta...
- Page 15 Joindre les deux bouts du ruban X à l’aide de l’attache rapide, en faisant passer le ruban à l’arrière du bouclier de protection. Cierre la hebilla de la cinta X, por debajo Termoscud®, a la altura de las rodillas. Accrocher les mousquetons des rubans 2 au bord inférieur de la carrosserie sous le repose-pied.
- Page 16 Tucano Urbano S.r.l. Via Dell’Annunciata, 21 20121 Milano - Italy...
Need help?
Do you have a question about the Termoscud PRO R187PRO and is the answer not in the manual?
Questions and answers