
Related Manuals for UREVO STROL LITE UR9TM0011


Summary of Contents for UREVO STROL LITE UR9TM0011
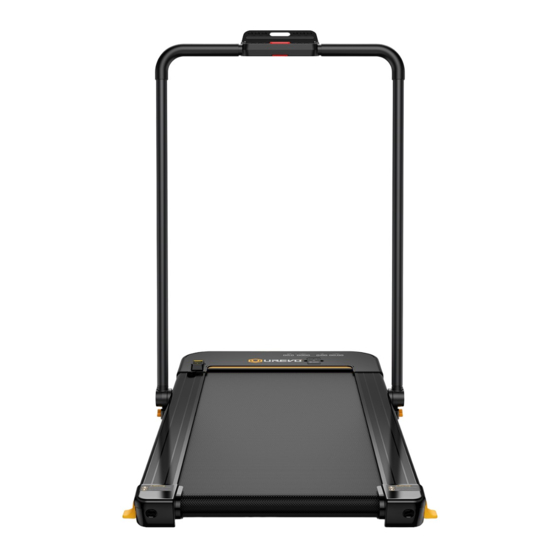
- Page 1 UREVO STROL LITE 2-IN-1 UNDER DESK TREADMILL M A K I N G F I T N E S S F U N UR9TM0011 USER MANUAL...
-
Page 2: Table Of Contents
CONTENT SERVICE IMPORTANT SAFETY GUIDELINES PACKING LIST TECHNICAL PARAMETERS PRODUCT STRUCTURE ASSEMBLY CONSOLE REMOTE CONTROL GUIDELINES BATTERY REPLACEMENT ADJUSTMENT OF RUNNING BELT LUBRICATING TROUBLESHOOTING WARRANTY... -
Page 3: Service
SERVICE IMPORTANT: FOR UREVO ONLY For damaged or defective products, questions, replacement parts or any other service support, please contact our customer service department as follows: Services@urevosports.com Response Time: 24-48 hours Order ID Emailing us with the will be the best method to receive a response during peak business hours. -
Page 4: Important Safety Guidelines
IMPORTANT SAFETY GUIDELINES Please carefully read this manual before use to ensure your safety and avoid accidents. • This product is home fitness equipment. Do not modify it for other purposes or outdoor use. The walking machine should be placed on clean and flat ground rather than thick carpet or near water with a 3 -6 ft safe area free from any obstacles behind it. -
Page 5: Packing List
PACKING LIST Walking machine × 1 Remote control × 1 Manual & Warranty card × 1 Allen wrench × 1 Lubricating oil × 1 Power Cord × 1 TECHNICAL PARAMETERS Product configuration Technical parameter Input voltage 100 ~ 120VAC Packaging size 57.1 x 28.9 x 5.9 inch Folding size 54.7 x 26.4 x 5.1 inch... -
Page 6: Product Structure
PRODUCT STRUCTURE PRODUCT STRUCTURE Emergency stop button Instrument & Buttons Safety lock switch Column tube Motor upper cover Display panel Running belt Motor lower cover Foot edge strip Lubricating port Locking switch Rear shield (right) Rear shield (left) Power Switch... -
Page 7: Assembly
ASSEMBLY ASSEMBLY STEPS 1. Open the packaging box and take out the related accessories and the machine from the box. Place the machine on the flat ground. 2. Lift and push the column tube upwards until it stops moving. 3. Hold the column tube with one hand and turn the locking switch to the OFF position with the other hand (same operation on both sides). - Page 8 ASSEMBLY Plug in the power cord and turn on the Power. Power Switch FOLDING STEPS 1. Hold the column tube with one hand and turn the locking switch to the ON position with the other hand (same operation on both sides). 2.
-
Page 9: Console
CONSOLE CONSOLE SCREEN Speed Calories Time Distance Lubricating LED Rreceiver OPERATION INSTRUCTIONS Start/Stop and Increase/Decrease keys on the remote control or keyboard. Emergency stop switch (STOP). Pause in operation. Speed: 0.6-7.6 mph; Calories: 0001-9999KCAL; Time: 01-99 minutes; Distance: 00.00-99.99miles. 5. Sleep time in standby: 5 minutes. The screen turns off after sleep. 6. -
Page 10: Remote Control Guidelines
REMOTE CONTROL GUIDELINES REMOTE CONTROL PANEL Speed increase Speed decrease Long press under standby state Start/stop to remove lubricating prompt OPERATION OF REMOTE CONTROL key: In standby mode, press key and the machine runs at the speed of 0.6 mph. Press key again and the machine stops. - Page 11 REMOTE CONTROL GUIDELINES SPEED CONTROL Each time when you press the “+” key on the remote control (or the instrument) during operation, the speed per hour will be increased by 0.2 miles; long press the “+” key to continuously increase the speed by 0.2 miles.
- Page 12 REMOTE CONTROL GUIDELINES OPERATION OF INSTRUMENT Function description of keys Mobile phone placement slot Reduce key 3 mph Start/Pause Emergency stop key (STOP) START Stop STOP S TO P 6 mph Add key Safety lock switch Note: You can start the machine only after turning on the safety lock switch; when the safety lock switch is not on, the STOP word keeps flashing.
-
Page 13: Battery Replacement
BATTERY REPLACEMENT BATTERY REPLACEMENT 1. Removing insulating paper from the remote control before use: Prepare to remove the insulating paper. Pull out the insulating paper. Available status. 2. Replacement of button battery of the remote control: If the remote control would present less sensitivity or cannot be operated due to low battery after having been used for a long time, the battery of the remote control needs to be replaced. -
Page 14: Adjustment Of Running Belt
ADJUSTMENT OF RUNNING BELT Moving to the left Adjustment: Turn off the power. Clockwise rotate the bolt of the left rear roller by 1/4 turn with the 5mm Allen wrench to tighten the running belt. Then power on the machine and test whether the running belt is centered. - Page 15 ADJUSTMENT OF RUNNING BELT BATTERY REPLACEMENT ADJUSTMENT OF RUNNING BELT Adjustment: Turn off the power. Clockwise rotate the bolts of the left and right rear rollers by 1/4 turn simultaneously with the 5mm Allen wrench to tighten the running belt. Then power on the machine and test the tightness of the running belt.
-
Page 16: Lubricating
LUBRICATING The walking machine has been lubricated before shipment. However, the rubbing between the running belt and the running board greatly affects the service life and performance of the product, so you must add lubricating oil according to the instructions of the machine. When the walking machine has run a distance of 100 miles, a red indicator will appear on the display for lubricating. -
Page 17: Troubleshooting
TROUBLESHOOTING BATTERY REPLACEMENT TROUBLESHOOTING ADJUSTMENT OF RUNNING BELT Code Causes Resolutions 1. Check whether the electric display is properly connected to the controller. 2. Reinsert the main IC of the controller as it is Communication error in poor contact. 3. Replace the controller as its power supply is abnormal. -
Page 18: Warranty
All Other Components 90 days For Home Use Only Exclusions from Warranty Coverage: UREVO does not warrant against and is not responsible for, and no implied warranty shall be deemed to cover, any product failure, product malfunction, or damages attributable to: 1. - Page 20 IMPORTANT: Read all instructions carefully before using this product. Retain this owner’s manual for future reference. The specifications of this product may vary from this photo, subject to change without notice. Manufacturer:Shanghai Runmi Technology Co., Ltd. Address:15th Floor, Building 21B, No.1158, Zhongxin Rd, Songjiang district, Shanghai, P.R.China MADE IN CHINA Vesion: 5.0...
Need help?
Do you have a question about the STROL LITE UR9TM0011 and is the answer not in the manual?
Questions and answers
Stop button flashing