Table of Contents
Advertisement
Quick Links
Advertisement
Chapters
Table of Contents

Related Manuals for Rinnai Dry-Soft 9


Summary of Contents for Rinnai Dry-Soft 9
- Page 1 Model: Dry-Soft 9 RDT-90-AU Gas Clothes Dryer Operation & Installation Manual...
- Page 2 Congratulations on the purchase of your new Rinnai Dry-Soft gas clothes dryer. We trust you will have many years of comfort and enjoyment from your appliance. BEFORE USING THIS APPLIANCE. Before proceeding with the operation or installation read this manual thoroughly and gain a full IMPORTANT understanding of the appliance, to ensure safe and correct use.
-
Page 3: Table Of Contents
Cleaning the Appliance Body ............................18 Cleaning the Lint Filter ..............................18 Cleaning the Air Inlet Filter ............................... 19 Trouble Shooting Check List ................................... 20 General Dryer Characteristics ............................20 Service ....................................20 Error Codes ..................................21 Installation Table of Contents Contacts Rinnai GD OIM... -
Page 4: Warnings & Important Information
For safety and warranty purposes, appliances that may be damaged or incorrect must not be installed or operated under any circumstances. Installation of damaged or incorrect appliances may contravene local government regulations. Rinnai disclaims any liability or responsibility whatsoever in relation to the installation or operation of damaged or incorrect appliances. - Page 5 The items become warm, causing an oxidation reaction in the oil. Oxidation creates heat. If the heat cannot escape, the items can become hot enough to catch fire. Piling, stacking or storing oil-affected items can prevent heat from escaping and so create a fire hazard. Rinnai GD OIM...
-
Page 6: Safety Devices
FEATURES & BENEFITS Quick Drying The range of Rinnai gas clothes dryers utilise gas as the drying medium rather than electricity. This results in a considerable reduction in drying time when compared to most electric clothes dryers. Economical The range of Rinnai gas clothes dryers are highly efficient. -
Page 7: Operation
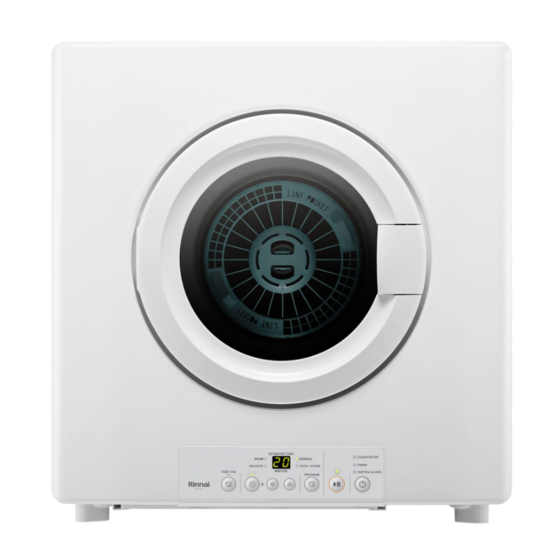
OPERATION APPLIANCE OVERVIEW Rinnai GD OIM... -
Page 8: Control Panel
14. CLEAN FILTER INDICATOR Used to increase or decrease the drying time (Timer Illuminates red when the filter requires cleaning. operation only). A short beep will sound when pressing buttons to confirm that the action has been registered. NOTE Rinnai GD OIM... -
Page 9: Automatic Programs
Operating time and gas consumption may vary depending on the usage and environmental conditions. On days when clothes are difficult to dry, such as cold days or rainy days, the ventilation operation stops and immediately switches to warm operation. Rinnai GD OIM... -
Page 10: Drying Time
Blankets made of 100% wool Acrylic blankets • • Items marked with "Do not tumble dry Tufted blankets • Woven blankets • The blanket will be damaged if it is dried using a cycle other than the SHEET/BLANKET mode. Rinnai GD OIM... -
Page 11: Operational Time
Pressing the power button will place the dryer into SOFTEN & COOL operation and the error code 00 will also be flashing in the digital display. To clear an error condition caused by disruption to power, follow the procedure used to cancel the SOFTEN & COOL function in the previous section. IMPORTANT Rinnai GD OIM... -
Page 12: Audible Signals
1. Close the door. 2. Press the ON/OFF button. 3. Press the PROGRAM and TIMER buttons at the same time. 4. Press the UP button, the digital display shows 01. 5. Press the ON/OFF button. Rinnai GD OIM... -
Page 13: Loading Considerations
Read the fabric care label attached to most clothes to confirm if they are suitable for tumble drying and, if so, select the drying cycle recommended by the manufacturer. In the absence of manufacturer recommendations Rinnai suggests the following: •... -
Page 14: How To Use Automatic Programs
OFF OFF! once the SOFTEN & COOL function is completed. 3 ~ 76 min 1 min Refer to the section "Soften & Cool Function" on page 11 for instruction on how to cancel operation. NOTE Rinnai GD OIM... -
Page 15: How To Use A Timer Program
OFF OFF! once the SOFTEN & COOL function is completed. 3 ~ 76 min 1 min Refer to the section "Soften & Cool Function" on page 11 for instruction on how to cancel operation. NOTE Rinnai GD OIM... -
Page 16: Cancelling A Set Timer Program
SOFTEN & COOL function will begin, OFF! in place the SOFTEN & COOL indicator will now be illuminated steady. Refer to the section "Soften & Cool Function" on page 11 for instruction on how to cancel operation. NOTE Rinnai GD OIM... -
Page 17: How To Use The Self-Clean Program
The SOFTEN & COOL indicator will now be flashing steadily and the dryer will automatically turn OFF once the SOFTEN & COOL function is completed. Refer to the section "Soften & Cool Function" on page 11 for instruction on how to cancel operation. NOTE Rinnai GD OIM... -
Page 18: Care & Maintenance
The components of the lint pocket / filter assembly are NOT dishwasher safe. 4. Reassemble the lint pocket / filter assembly, ensuring that both halves are locked together. 5. Place the pocket / filter assembly into the dryer drum, the assembly will CLICK into place when correctly fitted. Rinnai GD OIM... -
Page 19: Cleaning The Air Inlet Filter
4. Insert the air inlet filter along the rails on the base of the main unit and push in as far as possible. Make sure to insert the front and back of the filter in correctly. Rinnai GD OIM... -
Page 20: Trouble Shooting
This appliance does not contain user serviceable parts and MUST ONLY be serviced and repaired by an authorised person. Rinnai has a Service and Spare Parts network with personnel who are fully trained and equipped to give the best service on your Rinnai appliance. If your appliance requires service, please call our National Help Line (contact numbers for which are on the back cover of this manual). -
Page 21: Error Codes
ERROR CODES Your Rinnai Gas Dryer has a self diagnostic capability. If a fault occurs, an error code will flash on the digital monitor. This assists with diagnosing the fault, and may enable you to overcome a problem without a service call. - Page 22 NOTES Rinnai GD OIM...
-
Page 23: Installation Table Of Contents
Gas Pressure Setting ................................ 34 Wiring Diagram .................................. 34 Installation Record ................................34 Specifications Appliance Details and Dimensions ..........................35 Warranty Warranty Terms .................................. 36 Definitions ..................................36 Warranty Conditions ................................. 36 Warranty Exclusions ................................. 37 Contacts Rinnai GD OIM... -
Page 24: General Installation Information
The gas meter and regulator must be specified for the total gas rate. Suitable sizing chart such as the one in AS/NZS 5601 should be used. Refer to "Commissioning" / "Testing" on page 34 before finalising the gas connections and operating the appliance. Rinnai GD OIM... -
Page 25: Electrical Supply
GENERAL INSTALLATION INFORMATION ELECTRICAL SUPPLY This appliance is supplied with a 1.5 metre long power cord with a three pin plug. Rinnai recommends that the dryer be plugged into a dedicated 230V,10A earthed power point. Alternatively the appliance can be direct wired if the power supply is to be concealed. - Page 26 Position the appliance in accordance with the requirements listed under "Appliance Location" on page 24. If the dryer is to be wall mounted, the following must be considered: Only the Rinnai wall mounting bracket must be used DS9BKT. Alternative brackets or wall mounting options are unsuitable.
-
Page 27: Wall Mounting Bracket Assembly
Secure the dryer to the frame through the rear most holes of the tabbed mounting plates using the four mounting screws and washers provided with the wall mounting bracket. Rinnai GD OIM... -
Page 28: Changing Door Opening Direction
Hinge Mounting Tabs While holding onto the door to prevent it from dropping, remove the two hinge mounting screws. Lift the door upwards off the locating tabs, and place both the door and screws safely to one side. Rinnai GD OIM... - Page 29 Remount door hinge onto the tabs on the right side of the tub following the reverse order to that in steps 2 & 3. Clicks in place Clip the plastic hinge cover plate back over the hinge and check that the door is working correctly. Rinnai GD OIM...
-
Page 30: Ventilation, Exhaust & Clearances
Accessory EXHAUST DUCT SYSTEM Rinnai gas dryers must be installed with Rinnai gas dryer exhaust duct components. Two exhaust duct kits are available, DFVKIT - vertical exhaust kit and DSHKIT horizontal exhaust duct kit. Each kit consists of rigid aluminium pipes (can be cut to length as required) and vertical or horizontal terminals, stand-off brackets, rigid bends and an internal wall plate. -
Page 31: Exhaust Duct Installation Options And Clearances
Min clearance 20mm to combustible materials. maintained and that a min penetration of 50mm Decktite or other non lead based flashing, to be remains to join other exhaust duct components. provided by installer. Rinnai GD OIM... -
Page 32: Horizontal Terminal Clearances
For minimum clearances not addressed above acceptance should be obtained from the Technical Regulator. Minimum clearances d and e also apply to any combustion air intake openings of appliances. FIGURE 6.2 (in-part) LOCATION OF FLUE TERMINALS OF BALANCED FLUE, ROOM-SEALED, FAN-ASSISTED OR OUTDOOR APPLIANCES Rinnai GD OIM... -
Page 33: Internal Clearances
2° Fall to terminal ATTACHING VERTICAL ROOF TERMINAL The DSVCOWL (C) is fitted directly to either a DSFPIPE1000 (B) or DSFBEND (D). Ensure that the female socket fully engages the male end by 50mm. Rinnai GD OIM... -
Page 34: Commissioning
After testing is completed, explain to the householder the functions and operation of the dryer. Ensure the "Installation Record" on page 34 is filled in and that this booklet is handed to the customer. Reminding the customer to complete the Warranty Card and forward to Rinnai. GAS PRESSURE SETTING The regulator is electronically controlled and factory pre-set. -
Page 35: Specifications
SPECIFICATIONS APPLIANCE DETAILS AND DIMENSIONS All dimensions in mm unless otherwise stated. Appliance Details Model Dry-Soft 9 - RDT-90-AU Weight (appliance body only) 33kg Standard drying capacity (dry weight) Standard drying time 90 Minutes Power supply AC 230 V (50 Hz) Power cord length 1.5m... -
Page 36: Warranty
Rinnai will repair or provide parts for repair or replacement, in the event of defects arising from faulty materials and/or workmanship, in accordance with the Warranty Terms in Table 1, Definitions, Warranty Conditions and Exclusions stated in this document. -
Page 37: Warranty Exclusions
No warranties except those express and or implied by law and cannot be excluded are given by Rinnai in respect of Goods supplied. Where it is lawful to do so, the liability of Rinnai for a breach of condition or warranty is limited to the repair or replacement of the Goods, the supply of equivalent Goods, the payment of the cost of repairing or replacing the Goods or acquiring equivalent Goods as determined by Rinnai. - Page 38 NOTES Rinnai GD OIM...
- Page 39 NOTES Rinnai GD OIM...
-
Page 40: Contacts
*Cost of a local call higher from mobile or public phones. For further information visit www.rinnai.com.au or email enquiry@rinnai.com.au Rinnai has a Service and Spare Parts network with personnel who are fully trained and equipped to give the best service on your Rinnai appliance. If your...
Need help?
Do you have a question about the Dry-Soft 9 and is the answer not in the manual?
Questions and answers