
Subscribe to Our Youtube Channel
Related Manuals for Linksys USBVPN1


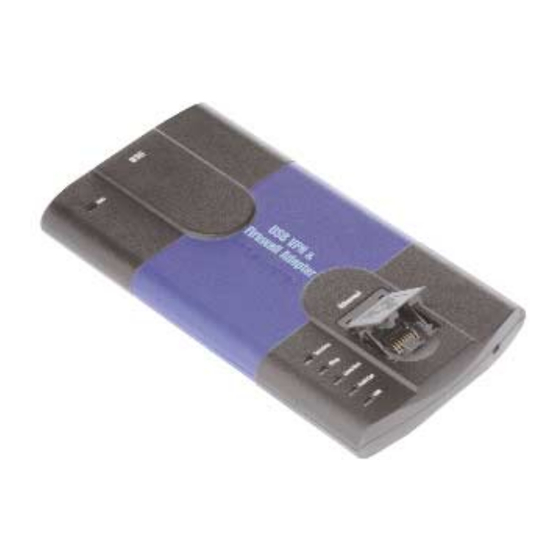
Summary of Contents for Linksys USBVPN1
- Page 1 Instant EtherFast ® Series USB VPN & Firewall Adapter Use this guide to install: USBVPN1 User Guide...
-
Page 2: Table Of Contents
Linksys reserves the right to revise or update its prod- ucts, software, or documentation without obligation to notify any individual or entity. -
Page 3: Chapter 1: Introduction
The Linksys USB VPN & Firewall Adapter The Linksys EtherFast Let the Linksys USB VPN and Firewall Adapter protect your PC and your com- munications wherever you go. This easy-to-pack, lightweight, network inter- face with advanced safety and security features connects you to the Internet... -
Page 4: Chapter 2: Getting To Know The Etherfast
USB & VPN Firewall Adapter The Adapter’s Front Panel The Adapter’s ports and LEDs are shown in Figure 2-1. For details on the Reset Button and Ethernet port, see Figure 2-2. For details on the USB port, see Figure 2-3. For details on the LEDs, see Figure 2-4 and Figure 2-5. -
Page 5: The Adapter's Leds
If this LED does not light up, then your connection speed is 10 Mbps. Figure 2-5 Green. The USB LED lights up when the Adapter is connected to a PC and powered on. (See Figure 2-4.) Proceed to “Chapter 3: Connect the Adapter.”... -
Page 6: Chapter 3: Connect The Usb Vpn & Firewall Adapter
1. Before you begin, make sure that all of your hardware is powered off, 2. Connect one end of the USB cable to the USB port on the Adapter (see 3. Connect one end of an Ethernet cable to the Ethernet port on the Adapter, •... -
Page 7: Chapter 4: Install The Driver For The Adapter
3. Windows may inform you that it is searching for the driver. 4. Then, it will notify you that the driver has not passed Windows Logo test- ing. This is normal, and it has been verified that the Adapter does work with Windows XP. Click the Continue Anyway button. -
Page 8: Driver Installation For Windows 2000
Driver Installation for Windows 2000 1. If you haven’t already, start your computer. 2. Windows 2000 will automatically detect the Adapter connected to your PC. When the Welcome to the Found New Hardware Wizard screen appears, insert the Setup CD into your CD-ROM drive, and click the Next button. - Page 9 USB VPN & Firewall Adapter 6. You may be informed that a digital signature has not been found (see Figure 4-10). This is normal, and it has been verified that the Adapter does work with Windows 2000. Click the Yes button to continue.
-
Page 10: Driver Installation For Windows Me
Driver Installation for Windows Me 1. If you haven’t already, start your computer. 2. Windows Me will automatically detect the Adapter connected to your PC and display the New Hardware Found screen. 3. When the Add New Hardware Wizard screen appears, insert the Setup CD into your CD-ROM drive, and select Automatic search for a better driv- er (Recommended). -
Page 11: Driver Installation For Windows 98Se
Driver Installation for Windows 98SE 1. If you haven’t already, start your computer. 2. Windows 98 will automatically detect the Adapter connected to your PC. When the first Add New Hardware Wizard screen appears, insert the Setup CD into your CD-ROM drive, and click the Next button. - Page 12 Instant Broadband ® Series USB VPN & Firewall Adapter 8. When asked if you want to restart your computer, remove the Driver CD from the CD-ROM drive, and click the Yes button. If Windows does not ask you to restart your PC, restart your PC anyway.
-
Page 13: Chapter 5: Configure Tcp/Ip
The next few pages tell you, step by step, how to configure your network set- tings based on the type of Windows operating system you are using. Make sure that an adapter has been successfully installed in each PC you will configure. Once you’ve configured your computers, continue to “Chapter 6: Configure the Adapter.”... -
Page 14: Configuring Windows 2000 Pcs
Control Panel. From there, double-click the Network and Dial-up Connections icon. 2. Select the Local Area Connection icon for the applicable Ethernet adapter (usually it is the first Local Area Connection listed). Double-click the Local Area Connection. (See Figure 5-4.) Click the Properties button. -
Page 15: Configuring Windows 98 And Me Pcs
Control Panel. From there, double-click the Network icon. 2. On the Configuration tab, shown in Figure 5-7, select the TCP/IP line for the USB VPN & Firewall Adapter. Do not choose a TCP/IP entry whose name mentions DUN, PPPoE, VPN, or AOL. If the word TCP/IP appears by itself, select that line. -
Page 16: Chapter 6: Configure The Adapter
USB VPN & Firewall Adapter Chapter 6: Configure the Adapter This chapter will show you how to configure the Adapter to function in your net- work and gain access to the Internet through your Internet Service Provider (ISP). Detailed description of the Adapter’s Web-based Utility can be found in “Chapter 7: The USB VPN &... - Page 17 Host Name and Domain Name: These fields allow you to provide a host name and domain name for the Adapter. These fields are usually left blank. If requested by your ISP (usually cable ISPs), complete these two fields.
- Page 18 If you need advanced setting information, please refer to “Chapter 7: The USB VPN & Firewall Adapter’s Web-based Utility”. Congratulations! You’ve successfully configured the Adapter. Test the setup by opening your web browser and entering www.linksys.com/registration, as shown in Figure 6-8. Figure 6-8 If you are unable to reach our website, you may want to review what you did in this section or refer to “Appendix A: Troubleshooting.”...
-
Page 19: Chapter 7: The Usb Vpn & Firewall Adapter's Web-Based Utility
Microsoft Internet Explorer or Netscape Navigator through use of the computer connected with a USB cable to the Adapter. For a basic Adapter setup, most users only have to use the following screens of the utility: • Setup Enter the settings provided by your ISP. - Page 20 Internet. Figure 7-4 Obtain an IP Address Automatically By default, the Adapter’s WAN Connection Type is set to obtain an IP address automatically, shown in Figure 7-4, and it should be used only if your ISP sup- ports DHCP.
- Page 21 Enter the User Name and Password provided by your ISP. Connect on Demand and Max Idle Time You can configure the Adapter to cut your connection with your ISP after a specified period of time (Max Idle Time). If you have been disconnected due to inactivity, Connect on Demand enables the Adapter to automatically re-establish your connection as soon as you attempt to access the Internet again.
-
Page 22: Firewall
Web Filter You can either enable or disable these four filtering methods by selecting Allow or Deny. • Proxy Use of WAN proxy servers may compromise the Adapter’s secu- • Java Java is a programming language for websites. If you deny Java, you •... -
Page 23: Vpn
Instant Broadband ® Series USB VPN & Firewall Adapter Virtual Private Networking (VPN) is a security measure that basically creates a secure connection between two remote locations. This connection is very specific as far as its settings are concerned; this is what creates the security. - Page 24 Establishing a Tunnel The Firewall Adapter creates a tunnel or channel between two endpoints, so that the data or information between these endpoints is secure. This Tunnel is where you enable or disable the tunnel. Click the radio button next to Enable to enable the tunnel.
- Page 25 • Any - If you select Any for the Remote Security Group, as shown in Figure 7-15, the local Firewall Adapter will accept a request from any IP address. This setting should be chosen when the other endpoint is using DHCP or PPPoE on the WAN side.
- Page 26 Address of the VPN device at the other end of the tunnel. The remote VPN device can be another Firewall Adapter, a VPN Server, or a computer with VPN client software that supports IPSec. The IP Address may either be static (permanent) or dynamic (changing), depending on the settings of the remote VPN device.
- Page 27 Instant Broadband ® Series USB VPN & Firewall Adapter The Inbound SPI and Outbound SPI fields are different, however. Inbound SPI value set here must match the Outbound SPI value at the other end of the tunnel. The Outbound SPI here must match the Inbound SPI value at the other end of the tunnel.
- Page 28 Instant Broadband ® Series USB VPN & Firewall Adapter To get more details concerning your tunnel connection, click the View Logs button. The screen in Figure 7-22 will appear: Select the log you wish to view: All (to view all logs), System Log, Access Log, Firewall Log, or VPN Log.
- Page 29 VPN Adapter will accept both Main and Aggressive requests from the remote VPN device. Encryption Figure 7-23 Select the length of the key used to encrypt/decrypt ESP packets. There are two choices: DES and 3DES. 3DES is recommended because it is more secure.
-
Page 30: Password
Adapter Password It is strongly recommended that you set a password for the Adapter. The default password is admin. If you don’t change the password, all users on your network will be able to access the Adapter using the default pass- word admin. -
Page 31: Dhcp
LAN These fields display the current IP Address and Subnet Mask of the Adapter, as seen by users on your local area network. The DHCP Server field shows the status of the Adapter’s DHCP server function, which is either enabled or disabled. -
Page 32: Log
Logs on the VPN tab. For a permanent record of these logs, Logviewer software must be used. This software is downloadable from the Linksys website, www.linksys.com. The Logviewer saves all incoming and outgoing activity as a permanent file on your PC’s hard drive. -
Page 33: Help
Clicking on any of the topics in the bar on the left will give you help informa- tion about that topic. Clicking the Linksys Website link will take you to Linksys’s website, www.linksys.com, provided you are connected to the Internet. -
Page 34: Appendix A: Troubleshooting
Adapter. If your situation is described here, the problem should be solved by applying the corresponding solution. If you can’t find an answer here, check the Linksys website at www.linksys.com. 1. I want to test my Internet connection. - Page 35 In order to upgrade the firmware with the latest features, you need to go to the Linksys website and download the latest firmware at www.linksys.com. Follow these steps: A. Go to the Linksys website at http://www.linksys.com and download the latest firmware. B. To upgrade the firmware, follow the steps in the Help section found in...
- Page 36 Subnet Mask, Default Gateway, and DNS). Restart the computer that is having a problem. • If the PC is configured correctly, but still not working, check the Adapter. Ensure that it is connected and ON and that the driver is installed cor- rectly.
-
Page 37: Frequently Asked Questions
LAN side of the Adapter. Does the Adapter support any operating system other than Windows 98, Windows 2000, or Windows XP? Yes, but Linksys does not, at this time, provide techni- cal support for setup, configuration or troubleshooting of any non-Windows operating systems. -
Page 38: Appendix B: Installing The Tcp/Ip Protocol
T C P/ I P Protocol Follow these instructions to install the TCP/IP protocol on your PC only after a the USB VPN & Firewall Adapter has been successfully installed on the PC. These instructions are for Windows 98 and Windows Me. For TCP/IP setup under 2000 and XP, see your Windows documentation or the Help feature. -
Page 39: Appendix C: Finding The Mac Address And Ip
Address and IP Address for Your Adapter This section describes how to find the MAC address for your Adapter to do MAC Address Cloning for the Adapter and ISP. You can also find the IP address of your Adapter. Follow the steps in this appendix to find the MAC address or IP address for your Adapter in Windows 98, Me, 2000, and XP. - Page 40 Figure C-5 3. Write down the Physical Address as shown on your computer screen; it is the MAC address for your Ethernet adapter. This will appear as a series of letters and numbers. The MAC address/Physical Address is what you will use for MAC Address Cloning.
-
Page 41: Appendix D: Glossary
Appendix D: Glossary 3DES - 3DES is a variation on DES that uses a 168-bit key. Adapter - Printed circuit board that plugs into a PC to add to capabilities or connectivity to a PC. AppleTalk - An Apple Computer networking system that supports Apple's pro- prietary local talk. - Page 42 Instant Broadband ® Series USB VPN & Firewall Adapter Dynamic Routing - The ability for a router to forward data via a different route based on the current conditions of the communications circuits. For example, it can adjust for overloaded traffic or failing lines and is much more flexible than static routing, which uses a fixed forwarding path.
- Page 43 For example, the PING program uses ICMP. Instant Broadband ® Series USB VPN & Firewall Adapter ICQ - A conferencing program for the Internet that provides interactive chat, e-mail and file transfer and can alert you when someone on your predefined list has also come online.
- Page 44 MAC (Media Access Control) Address - A unique number assigned by the manufacturer to any Ethernet networking device, such as a network adapter, that allows the network to identify it at the hardware level. Mbps (Megabits per second) - One million bits per second; unit of measure- ment for data transmission.
- Page 45 Instant Broadband ® Series USB VPN & Firewall Adapter RJ-45 (Registered Jack-45) - A connector similar to a telephone connector that holds up to eight wires, used for connecting Ethernet devices. Router - Protocol-dependent device that connects subnetworks together.
- Page 46 Instant Broadband ® Series USB VPN & Firewall Adapter UDP (User Datagram Protocol) - A method (protocol) used along with the IP (Internet Protocol) to send data in the form of message units (datagram) between network devices over a LAN or WAN. While IP takes care of handling...
-
Page 47: Appendix E: Specifications
FROM THE PRODUCT'S PACKAGING ON HAND WHEN CALLING. RETURN REQUESTS CANNOT BE PROCESSED WITHOUT PROOF OF PURCHASE. IN NO EVENT SHALL LINKSYS’S LIABILITY EXCEED THE PRICE PAID FOR THE PRODUCT FROM DIRECT, INDIRECT, SPECIAL, INCI- DENTAL, OR CONSEQUENTIAL DAMAGES RESULTING FROM THE USE OF THE PRODUCT, ITS ACCOMPANYING SOFTWARE, OR ITS DOCUMENTATION. -
Page 48: Appendix G: Contact Information
Appendix G: Contact Information For help with the installation or operation of the USB VPN & Firewall Adapter, contact Linksys Technical Support at one of the phone numbers or Internet addresses below. Sales Information 800-546-5797 (LINKSYS) Technical Support 800-326-7114 RMA (Return Merchandise Authorization) Issues www.linksys.com (or call 949-271-5461)
Need help?
Do you have a question about the USBVPN1 and is the answer not in the manual?
Questions and answers