Linksys SPA2102 User Manual
Phone adapter with router
Hide thumbs
Also See for SPA2102:
- User manual (96 pages) ,
- Product data (4 pages) ,
- Setup manual (3 pages)
Table of Contents
Advertisement
Quick Links
Advertisement
Table of Contents

Related Manuals for Linksys SPA2102


Summary of Contents for Linksys SPA2102
- Page 1 Phone Adapter with Router User Guide Voice SPA2102 Model No.
-
Page 3: Copyright And Trademarks
Copyright and Trademarks Specifications are subject to change without notice. Linksys is a registered trademark or trademark of Cisco Systems, Inc. and/or its affiliates in the U.S. and certain other countries. Copyright © 2006 Cisco Systems, Inc. All rights reserved. Other brands and product names are trademarks or registered trademarks of their respective holders. - Page 4 Phone Adapter with Router...
-
Page 5: Table Of Contents
Table of Contents Chapter 1: Introduction Welcome What’s in this Guide? Chapter 2: Networking Basics An Introduction to Local Area Networks The Use of IP Addresses Chapter 3: Getting to Know the Phone Adapter The Back Panel The Front Panel Chapter 4: Getting Started Before You Begin Connecting the Phone Adapter... - Page 6 Windows 98 or Me Instructions Windows 2000 or XP Instructions For the Phone Adapter’s Web-based Utility Appendix C: Windows Help Appendix D: Glossary Appendix E: Specifications Appendix F: Warranty Information Appendix G: Regulatory Information Appendix H: Contact Information Internet Telephony Service Provider (ITSP) Linksys...
-
Page 7: List Of Figures
List of Figures Figure 3-1: Back Panel Figure 3-2: Front Panel Figure 4-1: Connect a Telephone Figure 4-2: Connect a PC Figure 4-3: Connect to the Modem Figure 4-4: Connect Power Figure 4-5: Login Screen Figure 4-6: Router - WAN Setup Screen Figure 4-7: MAC Clone Settings Figure 4-8: Static IP Settings Figure 4-9: PPPoE Settings... - Page 8 Phone Adapter with Router Figure 6-11: Voice - User 1 Screen Figure 6-12: Speed Dial and Supplementary Service Settings Figure 6-13: Distinctive Ring and Ring Settings Figure B-1: IP Configuration Screen Figure B-2: MAC/Adapter Address Figure B-3: MAC/Physical Address Figure B-4: MAC Address Cloning...
-
Page 9: Chapter 1: Introduction
Chapter 1: Introduction Welcome Thank you for choosing the Phone Adapter with Router. This Phone Adapter will allow your computers to share a high-speed Internet connection as well as resources, including files and printers. And after you have set up your Internet phone service, also known as Voice over Internet Protocol (VoIP), you will be able to make phone or fax calls using the Internet. -
Page 10: What's In This Guide
Phone Adapter with Router To create your network, install and set up the Phone Adapter. To guide you through the process, use the instructions in the Quick Installation or this User Guide to help you. These instructions should be all you need to get the most out of the Phone Adapter with Router. - Page 11 This appendix supplies the regulatory information regarding the Phone Adapter. • Appendix H: Contact Information This appendix provides contact information for a variety of Linksys resources, including Technical Support. Chapter 1: Introduction What’s in this Guide? Phone Adapter with Router...
- Page 12 Phone Adapter with Router Chapter 1: Introduction What’s in this Guide?
-
Page 13: Chapter 2: Networking Basics
Chapter 2: Networking Basics An Introduction to Local Area Networks Simply put, a router is a network device that connects two networks together. The Phone Adapter connects your local area network (LAN), or the group of PCs in your home or office, to the Internet. - Page 14 Phone Adapter with Router If you use the Phone Adapter to share your cable or DSL Internet connection, contact your ISP to find out if they have assigned a static IP address to your account. If so, you will need that static IP address when configuring the Phone Adapter.
-
Page 15: Chapter 3: Getting To Know The Phone Adapter
Chapter 3: Getting to Know the Phone Adapter The Back Panel The Phone Adapter’s ports are located on the back panel. Figure 3-1: Back Panel PHONE 1/2 Use this port to connect an analog phone (or fax machine) with an RJ-11 telephone cable. ETHERNET The ETHERNET port connects to a network device, such as a PC or a switch, with an Ethernet network cable. -
Page 16: The Front Panel
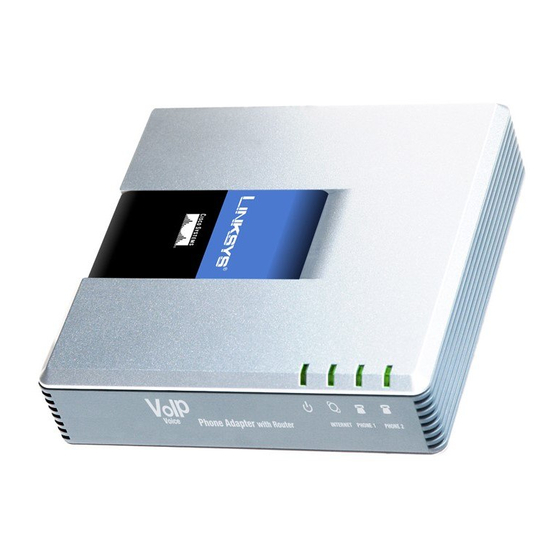
Phone Adapter with Router The Front Panel The Phone Adapter’s LEDs, which inform you about network activities, are located on the front panel. Figure 3-2: Front Panel Power Green. The Power LED lights up when the Phone Adapter is powered on and connected to the Internet. -
Page 17: Chapter 4: Getting Started
Chapter 4: Getting Started Before You Begin Make sure you have the following: • An active Internet connection • An active Internet phone service account and its settings • cable/DSL modem • One computer for configuration of the Phone Adapter •... -
Page 18: Figure 4-2: Connect A Pc
Phone Adapter with Router 4. Connect one end of an Ethernet network cable (included) to the ETHERNET port of the Phone Adapter. Connect the other end to the Ethernet port of your PC. 5. Connect one end of a different Ethernet network cable to the INTERNET port of the Phone Adapter. Connect the other end to your cable/DSL modem. -
Page 19: Configuring The Phone Adapter
Configuring the Phone Adapter 1. Launch the web browser on the PC. 2. Enter 192.168.0.1/advanced in the Address field (192.168.0.1 is the default local IP address of the Phone Adapter). Then press the Enter key. 3. If your Internet Telephony Service Provider (ITSP) did not supply a password, you will not see a login screen. Proceed to step 4. -
Page 20: Figure 4-8: Static Ip Settings
Phone Adapter with Router Static IP a. Select Static IP from the Connection Type drop-down menu. b. In the Static IP Settings section, enter the IP address in the Static IP field, the subnet mask in the NetMask field, and the default gateway IP address in the Gateway field. c. -
Page 21: Placing The Phone Adapter
Placing the Phone Adapter There are two ways to place the Phone Adapter. The first way is to place the Phone Adapter horizontally on a surface. The second way is to mount the Phone Adapter on a wall. The wall-mount option is explained in further detail below. - Page 22 Phone Adapter with Router Chapter 4: Getting Started Placing the Phone Adapter...
-
Page 23: Chapter 5: Using The Interactive Voice Response Menu
Voice Response Menu through an analog telephone, not any of the Internet phones.) 2. Press **** (in other words, press the star key four times). 3. Wait until you hear “Linksys configuration menu. Please enter the option followed by the # (pound) key or hang up to exit.”... -
Page 24: Using The Interactive Voice Response Menu
Phone Adapter with Router Using the Interactive Voice Response Menu While entering a value, such as an IP address, you may exit without entering any changes. Press the * (star) key twice within half a second. Otherwise, the * will be treated as a decimal point or dot. After entering a value, such as an IP address, press the # (pound) key to indicate you have finished your selection. - Page 25 Using the Interactive Voice Response Menu Description Use this command to enter the Interactive Voice Response Menu. Do not press any other keys until you hear, “Linksys configuration menu. Please enter the option followed by the # (pound) key or hang up to exit.”...
- Page 26 Phone Adapter with Router Interactive Voice Response Menu Action Command Choices (press these keys on the telephone) Check Firmware Version Check Primary DNS Server IP Address Check Internet Web Server Port Check Local IP Address Set Internet Press 0 to use DHCP. Connection Type Press 1 to use a static IP address.
- Page 27 Interactive Voice Response Menu Action Command Choices (press these keys on the telephone) Set Network (or Enter the network or Subnet) Mask subnet mask using numbers on the telephone keypad. Use the * (star) key when entering a decimal point. Set Gateway IP Enter the IP address using Address...
- Page 28 Phone Adapter with Router Interactive Voice Response Menu Action Command Choices (press these keys on the telephone) Set the Mode Press 0 to select the router/NAT mode. Press 1 to select the bridge/switch mode. Enable/Disable WAN 7932 Press 1 to enable. Access to the Press 0 to disable.
-
Page 29: Entering A Password
Interactive Voice Response Menu Action Command Choices (press these keys on the telephone) User Factory Reset 877778 Press 1 to confirm. Press * (star) to cancel. Entering a Password You may be prompted to enter a password when you want to reset the Phone Adapter to its factory default settings. -
Page 30: Configuring The Settings For Your Internet Phone Service
Phone Adapter with Router • To enter P, Q, R, S, o, q, r, or s — press 7. • To enter T, U, V, t, u, or v — press 8. • To enter W, X, Y, Z, w, x, y, or z — press 9. •... -
Page 31: Chapter 6: Using The Web-Based Utility
Chapter 6: Using the Web-based Utility Overview NOTE: If your ITSP sent you the Phone Adapter, then it may be pre-configured for you, and you do not need to change any settings. Refer to the instructions supplied by your service provider for more information. -
Page 32: How To Access The Web-Based Utility
Phone Adapter with Router Voice • Info. This screen displays voice-related status information about the Phone Adapter. • System. Use this screen to configure the user password. • User 1. Use this screen to configure call forward, speed dial, supplementary service, and ring settings for the primary Internet phone line. -
Page 33: The Router Tab
The Router Tab The Router - Status Screen This screen displays product and system information. Product Information Product Name. Shown here is the model number of the Phone Adapter. Serial Number. Shown here is the serial number of the Phone Adapter. Software Version. - Page 34 Phone Adapter with Router Current IP. Displayed here is the Internet IP address of the Phone Adapter. Host Name. Displayed here is the host name of the Phone Adapter. Domain. Displayed here is the domain name of the Phone Adapter. Current Netmask.
-
Page 35: Internet Connection Settings
The Router - WAN Setup Screen This screen lets you configure the Internet connection, MAC clone, remote management, QoS, VLAN, and optional settings. Information about your Internet connection type should be provided by your Internet Service Provider (ISP). If you do not have this information, contact your service provider. Internet Connection Settings Connection Type. -
Page 36: Optional Settings
Phone Adapter with Router PPPoE Service Name (optional). Enter the service name provided by your ISP. Optional Settings HostName. Enter the host name, if provided by your ISP. Domain. Enter the domain name, if provided by your ISP. Primary DNS. Enter the IP address of the primary DNS server. Secondary DNS (optional). - Page 37 Maximum Uplink Speed. Enter the maximum upload speed of your Internet connection. The default is 128Kbps. VLAN (Virtual Local Area Network) Settings Enable VLAN. VLAN (802.1Q) settings let you use the Phone Adapter in a virtual LAN environment. Select yes or no from the drop-down menu.
-
Page 38: Lan Network Settings
Phone Adapter with Router The Router - LAN Setup Screen This screen lets you configure the local network, dynamic DHCP, and static DHCP lease settings. Networking Service. Select the service you want to use, NAT or Bridge. The default is NAT. LAN Network Settings LAN IP Address. - Page 39 Host MAC Address. Enter the MAC address of the device whose IP address you want to specify. Host IP Address. Enter the IP address you want to assign to the device, 192.168.0.x (x being a different number for each device you specify). When you have finished making changes, click the Submit All Changes button to save the changes, or click the Undo All Changes button to undo your changes.
-
Page 40: Port Forwarding Settings
Phone Adapter with Router The Router - Application Screen This screen lets you configure port forwarding, DMZ, and reserved ports range settings. Port Forwarding Settings Enable. Select yes or no for each port forwarding entry, which defines a port range to be forwarded to a server. -
Page 41: Miscellaneous Settings
Miscellaneous Settings Multicast Passthru. Multicasting allows for multiple transmissions to specific recipients at the same time. If multicasting is permitted, then the Phone Adapter will allow IP multicast packets to be forwarded to the appropriate computers. Select the types of multicast transmissions to allow: Disabled (none), Inbound Only, Outbound Only, or Inbound and Outbound. -
Page 42: The Voice Tab
Phone Adapter with Router The Voice Tab The Voice - Info Screen This screen shows voice-related settings for the Phone Adapter. Product Information Product Name. Shown here is the model number of the Phone Adapter. Serial Number. Shown here is the serial number of the Phone Adapter. Software Version. -
Page 43: Figure 6-9: Line 1 Status
RTP Bytes Sent. Displayed here is the number of RTP bytes sent by the Phone Adapter. RTP Packets Recv. Displayed here is the number of RTP packets received by the Phone Adapter. RTP Bytes Recv. Displayed here is the number of RTP bytes received by the Phone Adapter. SIP Messages Sent. - Page 44 Phone Adapter with Router Call Back Active. This indicates whether a call back request is in progress. Last Called Number. Displayed here is the last number called. Last Caller Number. Displayed here is the number of the last caller. Mapped SIP Port. Shown here is the port number of the NAT mapped SIP port. Calls 1 and 2 have the same status information available.
- Page 45 Call 1/2 Packets Sent. Displayed here is the number of packets sent. Call 1/2 Packets Recv. Displayed here is the number of packets received. Call 1/2 Bytes Sent. Displayed here is the number of bytes sent. Call 1/2 Bytes Recv. Displayed here is the number of bytes received. Call 1/2 Decode Latency.
-
Page 46: Figure 6-10: Voice - System Screen
Phone Adapter with Router The Voice - System Screen This screen lets you change the password for user access to the Web-based Utility. NOTE: If your ITSP supplied this password, you may not be able to change it. Figure 6-10: Voice - System Screen System Configuration User Password. -
Page 47: Selective Call Forward Settings
The Voice - User 1/2 Screen Use the appropriate screen to configure settings for each Internet phone line. Call Forward Settings Enter the call forwarding numbers you want to use. Cfwd All Dest. Enter the number for the Call Forward All Service feature (when you want to forward all calls). Cfwd Busy Dest. - Page 48 Phone Adapter with Router Cfwd Sel3 Dest. Enter the forward number for the Call Forward Selective 3 feature. Cfwd Sel4 Caller. Enter the caller number pattern to trigger the Call Forward Selective 4 feature. Cfwd Sel4 Dest. Enter the forward number for the Call Forward Selective 4 feature. Cfwd Sel5 Caller.
-
Page 49: Speed Dial Settings
Speed Dial Settings Speed Dial 2. Enter the target phone number (or URL) to assign to speed dial 2. Speed Dial 3. Enter the target phone number (or URL) to assign to speed dial 3. Speed Dial 4. Enter the target phone number (or URL) to assign to speed dial 4. Speed Dial 5. -
Page 50: Distinctive Ring Settings
Phone Adapter with Router CWCID Setting. Select whether you want to enable caller ID for call waiting, yes or no. The default is yes. Dist Ring Setting. Select whether you want to use the distinctive ring feature, yes or no. The default is yes. Message Waiting. - Page 51 Hold Reminder Ring. Select the ring pattern that will remind you of a call on hold when the phone is on-hook. Call Back Ring. Select the ring pattern for call back notification. Cfwd Ring Splash Len. Enter the duration of the ring splash when a call is forwarded. The range is 0 to 10.0 seconds.
- Page 52 Phone Adapter with Router Chapter 6: Using the Web-based Utility The Voice Tab...
-
Page 53: Appendix A: Troubleshooting
This appendix provides solutions to problems that may occur during the installation and operation of the Phone Adapter. Read the description below to solve your problems. If you can't find an answer here, check the website of your Internet Telephony Service Provider (ITSP) or the Linksys website at www.linksys.com. Common Problems and Solutions 1. - Page 54 Phone Adapter with Router C. Click Tools. Click Internet Options. Click the Security tab. Click the Default level button. Make sure the security level is Medium or lower. Then click the OK button. 3. I need to set a static IP address on a PC. The Phone Adapter, by default, assigns an IP address range of 192.168.0.100 to 192.168.0.150 using the DHCP server on the Phone Adapter.
-
Page 55: For Windows 2000
For Windows 2000: A. Click Start, Settings, and Control Panel. Double-click Network and Dial-Up Connections. B. Right-click the Local Area Connection that is associated with the Ethernet adapter you are using, and select the Properties option. C. In the Components checked are used by this connection box, highlight Internet Protocol (TCP/IP), and click the Properties button. - Page 56 Phone Adapter with Router D. In the This connection uses the following items box, highlight Internet Protocol (TCP/IP). Click the Properties button. E. Enter a unique IP address that is not used by any other computer on the network connected to the Phone Adapter.
- Page 57 4. Click the OK button in the Internet Protocol (TCP/IP) Properties window, and click the OK button in the Local Area Connection Properties window. 5. Restart the computer if asked. 6. Click the OK button in the Internet Protocol (TCP/IP) Properties window, and click the OK button in the Local Area Connection Properties window.
- Page 58 If you do NOT get a reply, try the ping command from a different computer to verify that your original computer is not the cause of the problem. E. In the command prompt, type ping www.linksys.com and press the Enter key. •...
- Page 59 E. Make sure the cable connecting from your cable or DSL modem is connected to the Phone Adapter’s Internet port. Verify that the Router - Status page of the Phone Adapter’s Web-based Utility shows a valid IP address from your ISP. F.
- Page 60 Phone Adapter with Router D. Enter the port range of the service you are using. For example, if you have a web server, you would enter the range 80 (in the Starting Port field) to 80 (in the Ending Port field). E.
- Page 61 information on what port services to use is to go to the website of the online game or application you want to use. Follow these steps to set up online game hosting or use a certain Internet application: A. Access the Phone Adapter’s Web-based Utility by going to http://192.168.0.1 or the IP address of the Phone Adapter.
- Page 62 Phone Adapter with Router 9. I can’t get the Internet game, server, or application to work. If you are having difficulties getting any Internet game, server, or application to function properly, consider exposing one PC to the Internet using DeMilitarized Zone (DMZ) hosting. This option is available when an application requires too many ports or when you are not sure which port services to use.
- Page 63 For Microsoft Internet Explorer 5.0 or higher: A. Click Start, Settings, and Control Panel. Double-click Internet Options. B. Click the Connections tab. C. Click the LAN settings button and remove anything that is checked. D. Click the OK button to go back to the previous screen. E.
-
Page 64: Frequently Asked Questions
Phone Adapter with Router Frequently Asked Questions Can I make Internet phone calls if my Internet connection is down? No. When you make Internet phone calls, your high-speed Internet connection must be active. Can I make calls while I’m browsing the Internet? Yes. - Page 65 Does the Phone Adapter support any operating system other than Windows 98, Millennium, 2000, or XP? Yes, but Linksys does not, at this time, provide technical support for setup, configuration or troubleshooting of any non-Windows operating systems. Does the Phone Adapter support ICQ send file? Yes, with the following fix: click ICQ menu =>...
- Page 66 Ethernet adapter as a temporary measure. (Please look at the Network Control Panel in your Ethernet adapter’s Advanced Properties tab.) Make sure that your proxy setting is disabled in the browser. Check our website at www.linksys.com for more information. Will the Phone Adapter function in a Macintosh environment? Yes, but the Phone Adapter’s setup pages are accessible only through Internet Explorer 5.0 or Netscape...
- Page 67 What is DMZ Hosting? Demilitarized Zone (DMZ) allows one IP address (computer) to be exposed to the Internet. Some applications require multiple TCP/IP ports to be open. It is recommended that you set your computer with a static IP if you want to use DMZ Hosting.
- Page 68 Phone Adapter with Router Appendix A: Troubleshooting Frequently Asked Questions...
-
Page 69: Appendix B: Finding The Mac Address And Ip Address For Your Ethernet Adapter
Appendix B: Finding the MAC Address and IP Address for Your Ethernet Adapter This section describes how to find the MAC address for your computer’s Ethernet adapter so you can use the MAC address cloning feature of the Phone Adapter. You can also find the IP address of your computer’s Ethernet adapter. -
Page 70: Windows 2000 Or Xp Instructions
Phone Adapter with Router Windows 2000 or XP Instructions 1. Click Start and Run. In the Open field, enter cmd. Press the Enter key or click the OK button. 2. At the command prompt, enter ipconfig /all. Then press the Enter key. 3. -
Page 71: Appendix C: Windows Help
Phone Adapter with Router Appendix C: Windows Help Almost all Linksys products require Microsoft Windows. Windows is the most used operating system in the world and comes with many features that help make networking easier. These features can be accessed through Windows Help and are described in this appendix. - Page 72 Phone Adapter with Router Appendix C: Windows Help...
-
Page 73: Appendix D: Glossary
Appendix D: Glossary This glossary contains some basic networking terms you may come across when using this product. For more advanced terms, see the complete Linksys glossary at http://www.linksys.com/glossary. Bandwidth - The transmission capacity of a given device or network. - Page 74 Phone Adapter with Router DNS (Domain Name Server) - The IP address of your ISP's server, which translates the names of websites into IP addresses. Domain - A specific name for a network of computers. Download - To receive a file transmitted over a network. DSL (Digital Subscriber Line) - An always-on broadband connection over traditional phone lines.
- Page 75 Phone Adapter with Router IPCONFIG - A Windows 2000 and XP utility that displays the IP address for a particular networking device. ISP (Internet Service Provider) - A company that provides access to the Internet. LAN - The computers and networking products that make up your local network. MAC (Media Access Control) Address - The unique address that a manufacturer assigns to each networking device.
- Page 76 Phone Adapter with Router Server - Any computer whose function in a network is to provide user access to files, printing, communications, and other services. SMTP (Simple Mail Transfer Protocol) - The standard e-mail protocol on the Internet. SNMP (Simple Network Management Protocol) - A widely used network monitoring and control protocol. Static IP Address - A fixed address assigned to a computer or device that is connected to a network.
-
Page 77: Appendix E: Specifications
Appendix E: Specifications Model SPA2102 Data Networking MAC Address (IEEE 802.3) IPv4 - Internet Protocol v4 (RFC 791) upgradeable to v6 (RFC 1883) ARP - Address Resolution Protocol DNS - A Record (RFC 1706), SRV Record (RFC 2782) DHCP Client - Dynamic Host Configuration Protocol (RFC 2131) - Page 78 Phone Adapter with Router Voice Gateway SIPv2: Session Initiation Protocol v2 (RFC 3261, 3262, 3263, 3264) SIP Support in Network Address Translation Networks - NAT (incl. STUN) Secure (Encrypted) Calling via Pre-Standard Implementation of Secure RTP Codec Name Assignment Voice Algorithms G.711 (A-law and µ-law) G.726 (16/24/32/40 kbps) G.729 A...
- Page 79 VMWI - Visual Message Waiting Indicator via FSK Polarity Control Hook Flash Event Signaling Caller ID Generation (Name & Number) - Bellcore, DTMF, ETSI Music on Hold Client Streaming Audio Server - up to 10 sessions Security Password Protected System Reset to Factory Default Password Protected Admin and User Access Authority Provisioning/Configuration/Authentication: HTTP Digest - Encrypted Authentication via MD5 (RFC 1321)
- Page 80 Power Adapter: 100-240V - 50-60Hz (26-34VA) AC Input, 1.8 m cord Indicator Lights/LEDs Power, Ethernet (WAN), Phone 1, Phone 2 Documentation Quick Installation and User Guides are downloadable from www.linksys.com Administration Guide - Service Providers Only Provisioning Guide - Service Providers Only Dimensions 3.98"...
- Page 81 Unit Weight 5.29 oz. (0.15 kg) Operating Temp. 32 to 113º F (0 to 45º C) Storage Temp. -13 to 185º F (-25 to 85º C) Operating Humidity 10 to 90% Non-condensing, operating and non-operating Appendix E: Specifications Phone Adapter with Router...
- Page 82 Phone Adapter with Router Appendix E: Specifications...
-
Page 83: Appendix F: Warranty Information
Linksys warrants to You that, for a period of two years (the “Warranty Period”), your Linksys Product will be substantially free of defects in materials and workmanship under normal use. Your exclusive remedy and Linksys' entire liability under this warranty will be for Linksys at its option to repair or replace the Product or refund Your purchase price less any rebates. - Page 84 Agreement fails of its essential purpose. Some jurisdictions do not allow the exclusion or limitation of incidental or consequential damages, so the above limitation or exclusion may not apply to You. Please direct all inquiries to: Linksys, P.O. Box 18558, Irvine, CA 92623. Appendix F: Warranty Information...
-
Page 85: Appendix G: Regulatory Information
Appendix G: Regulatory Information FCC Statement This product has been tested and complies with the specifications for a Class B digital device, pursuant to Part 15 of the FCC Rules. These limits are designed to provide reasonable protection against harmful interference in a residential installation. This equipment generates, uses, and can radiate radio frequency energy and, if not installed and used according to the instructions, may cause harmful interference to radio communications. - Page 86 Phone Adapter with Router Industry Canada (Canada) This device complies with Industry Canada ICES-003 rule. Cet appareil est conforme à la norme NMB003 d'Industrie Canada. EC Declaration of Conformity (Europe) In compliance with the EMC Directive 89/336/EEC, Low Voltage Directive 73/23/EEC, and Amendment Directive 93/68/EEC, this product meets the requirements of the following standards: •...
- Page 87 User Information for Consumer Products Covered by EU Directive 2002/96/EC on Waste Electric and Electronic Equipment (WEEE) This document contains important information for users with regards to the proper disposal and recycling of Linksys products. Consumers are required to comply with this notice for all electronic products bearing the following symbol:...
- Page 88 Phone Adapter with Router Appendix G: Regulatory Information...
- Page 89 Phone Adapter with Router Appendix G: Regulatory Information...
- Page 90 Phone Adapter with Router Appendix G: Regulatory Information...
- Page 91 Phone Adapter with Router Appendix G: Regulatory Information...
- Page 92 Phone Adapter with Router Appendix G: Regulatory Information...
-
Page 93: Appendix H: Contact Information
Appendix H: Contact Information Internet Telephony Service Provider (ITSP) For support, contact your ITSP. Linksys Visit Linksys online for information on the latest products and updates to your existing products at: Appendix H: Contact Information Internet Telephony Service Provider (ITSP) Phone Adapter with Router http://www.linksys.com... - Page 94 Phone Adapter with Router Appendix H: Contact Information Linksys...
- Page 96 www.linksys.com...
Need help?
Do you have a question about the SPA2102 and is the answer not in the manual?
Questions and answers