Panasonic FV-0511VFL1 Installation Instructions Manual
Ventilating fan
Hide thumbs
Also See for FV-0511VFL1:
- Service manual (28 pages) ,
- Installation instructions manual (12 pages)
Advertisement
Table of Contents
- 1 Table of Contents
- 2 General Safety Information
- 3 Description
- 4 Unpacking
- 5 Supplied Accessories
- 6 Dimensions
- 7 Wiring Diagram
- 8 Features
- 9 Installation (Retrofit)
- 10 Installation (New Construction)
- 11 Maintenance (Cleaning)
- 12 Practical Guide to Installation
- 13 Specifications
- 14 Product Service
- Download this manual
READ AND SAVE THESE INSTRUCTIONS
Thank you for purchasing this Panasonic product.
Please read these instructions carefully before attempting to install, operate or service
the Panasonic product. Please carefully read the "GENERAL SAFETY INFORMATION".
Failure to comply with instructions could result in personal injury or property damage.
Please explain to users how to operate and maintain the product after installation,
and this booklet should be presented to users.
Please retain this booklet for future reference.
INSTALLATION INSTRUCTIONS
Model No.
Contents
----------------------------------------- 5~6
Ventilating Fan
FV-0511VFL1
FV-0511VFL1K
---------------------------------------- 4
------------------------------------------ 4
---------------------------- 4
----------------------------------------- 5
------------------------------------ 5
------------------------ 6~8
------------------------- 11
-------------------------
---------------------- BACK COVER
----------------- 2~3
---------- 9~11
---
BACK COVER
BACK COVER
5 1 1 F L 1 4 2 0
Advertisement
Table of Contents

Related Manuals for Panasonic FV-0511VFL1


Summary of Contents for Panasonic FV-0511VFL1
-
Page 1: Table Of Contents
Thank you for purchasing this Panasonic product. Please read these instructions carefully before attempting to install, operate or service the Panasonic product. Please carefully read the “GENERAL SAFETY INFORMATION”. Failure to comply with instructions could result in personal injury or property damage. -
Page 2: General Safety Information
GENERAL SAFETY INFORMATION To reduce the risk of injury, loss of life, electric shock, fire, malfunction, and damage to equipment or property, always observe the following safety precautions. The following symbol word panels are used to classify and describe the level of hazard, injury, and property damage caused when the denotation is disregarded and improper use is performed. - Page 3 GENERAL SAFETY INFORMATION CONTINUED This product is not to be installed in a ceiling thermally insulated to a value greater than R60. Do not disassemble the unit for reconstruction. It may cause fire or electric shock. If this product is no longer to be used, it must be removed from the ceiling to prevent it from falling.
-
Page 4: Description
Also, any changes or modifications not expressly approved by the party responsible for compliance could void the user’s authority to operate this equipment. DoC Responsible Party: Panasonic Corporation of North America Two Riverfront Plaza, Newark, NJ 07102 Customer Call Center: 1-866-292-7299 This device complies with Part 15 of the FCC Rules. -
Page 5: Dimensions
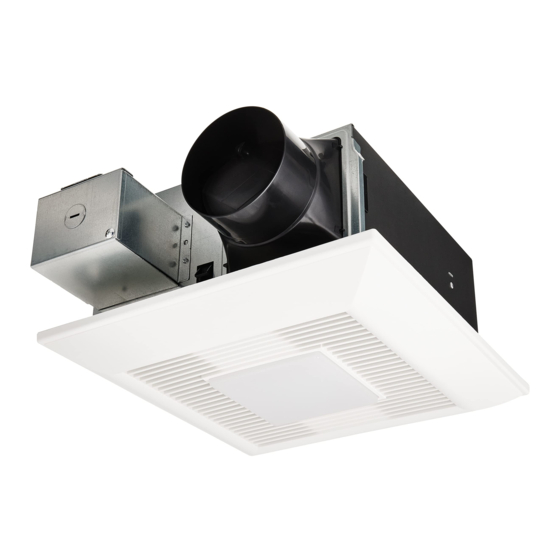
DIMENSIONS FV-0511VFL1 and FV-0511VFL1K Unit: inches (mm) 1 1/2 (37) 1 3/8 (32.6) 2 7/8 (71.4) 5 5/8 (143) 13 (330) Part name Part name Blade Fan body Damper Grille Junction box Flex-Z Fast bracket Adaptor Adjustable color temperature... -
Page 6: Installation (Retrofit)
FEATURES CONTINUED [For model : FV-0511VFL1 and FV-0511VFL1K] Pick-A-Flow Feature: This product comes with Pick-A-Flow speed options. The Pick-A-Flow switch on the face of the product allows the option to choose 50, 80 or 110 CFM. This product can run continously or intermittently, depending upon the needs of the owner. - Page 7 INSTALLATION (RETROFIT) CONTINUED Install circular exhaust duct Circular exhaust duct Conduit Flex-Z Fast™ bracket 2 Tapping Joist screws (ST4.2X20) Adaptor Junction box cover Remove screw from junction box cover and secure Joist conduit or stress relief to junction box knock-out hole. Extend bracket to the other joist.
- Page 8 INSTALLATION (RETROFIT) CONTINUED Insert fan body Insert fan body and slide into adaptor assembly using the guide parts until you hear a click from the hook. Guide parts Guide parts Secure fan body Sealing Joist Drywall Plug connector Flange Receptacle Once fan body is mounted and secure, fill gap 2 Self-drilling screws (fasten the Machine screw (M4X8)
-
Page 9: Installation (New Construction)
INSTALLATION (NEW CONSTRUCTION) WARNING Damper Adaptor Please remove the tape placed on the damper Disconnect power supply before and adaptor before installing the unit. installation. Tape Please wear gloves to protect hands during the installation. Ensure the junction box cover encloses all the wires and is completely flush before locking in place with the attached screw. - Page 10 INSTALLATION (NEW CONSTRUCTION) CONTINUED Insert fan body Assembled view detail Guide parts Hook Guide parts Insert fan body and slide into adaptor assembly using the guide parts until you hear a click from the hook. Secure fan body Joist Plug connector Flange Receptacle 2 self-drilling screws...
-
Page 11: Maintenance (Cleaning)
INSTALLATION (NEW CONSTRUCTION) CONTINUED Install grille Connect the LED lamp wire to fan body. Drywall Insert the mounting springs into the slot as shown to mount grille to fan body. Mounting spring Glove Grille Receptacle LED lamp wire MAINTENANCE (CLEANING) Disconnect power supply before working on unit. -
Page 12: Practical Guide To Installation
Loose fill or batt insulation can be placed directly Mechanically connect duct to termination and seal with mastic or approved foil over the fan housing in the attic. Panasonic fans faced tape. do not create excessive heat, which is a common 2-3 ft straight run before elbow.
Need help?
Do you have a question about the FV-0511VFL1 and is the answer not in the manual?
Questions and answers
What is the size of the self drilling screws that come with the unit. I canno find mine.
The self-drilling screws included with the Panasonic FV-0511VFL1 unit are size ST4-8.
This answer is automatically generated