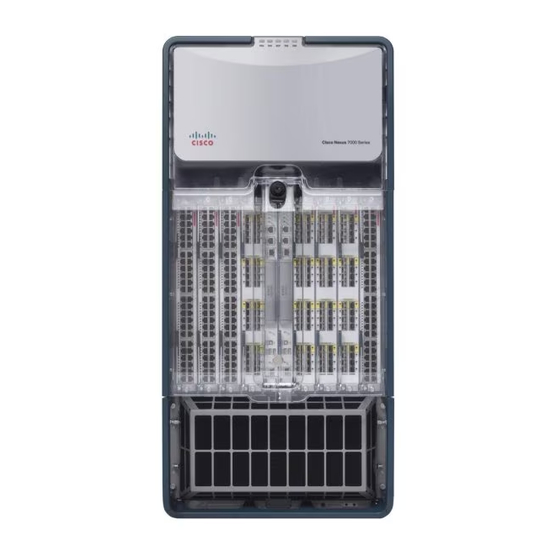
Cisco Nexus 7010 Series Installing
Hide thumbs
Also See for Nexus 7010 Series:
- Hardware installation and reference manual (508 pages) ,
- Hardware installation and reference manual (274 pages) ,
- Hardware installation and reference manual (76 pages)
Advertisement
Quick Links
Installing a Cisco Nexus 7010 Chassis
This chapter describes how to install a new or relocated Cisco Nexus 7010 chassis in a rack or cabinet. For
information about installing other Cisco Nexus 7000 Series chassis or power supplies, see the following
chapters:
This chapter includes the following sections:
•
•
•
•
•
•
•
Preparing to Install the Switch
This section includes the following topics:
Note
Required Tools
Before you install the Cisco Nexus 7010 chassis into a rack, make sure that you have the following tools and
equipment:
• Mechanical lift capable of lifting 550 pounds (250 kg)
• Number 1 Phillips screwdriver with torque capability
• 3/16-inch flat-blade screwdriver
• Crimping tool
• Wire stripping tool
Preparing to Install the Switch, on page 1
Installing the Chassis, on page 7
Grounding the Cisco Nexus 7010 Chassis, on page 11
Installing Storage Media in a Supervisor Module, on page 16
Installing the Front Doors and Frame Assembly, on page 17
Installing the Air Filter, on page 24
You must set up one four-post, 19-inch EIA rack or cabinet before you can install the Cisco Nexus 7010
chassis. Make sure that you order the rack or cabinet and have it delivered before installing the chassis.
Installing a Cisco Nexus 7010 Chassis
1
Advertisement

Related Manuals for Cisco Nexus 7010 Series


Summary of Contents for Cisco Nexus 7010 Series
-
Page 1: Table Of Contents
Installing a Cisco Nexus 7010 Chassis This chapter describes how to install a new or relocated Cisco Nexus 7010 chassis in a rack or cabinet. For information about installing other Cisco Nexus 7000 Series chassis or power supplies, see the following... - Page 2 Before you install the Cisco Nexus 7010 chassis, you must install a standard four-post, 19-inch EIA data center rack (or a cabinet that contains such a rack) that meets the requirements listed in the Cisco Nexus 7000 Series Site Preparation Guide. To maximize safety, you should do the following for the rack: •...
- Page 3 Unpacking and Inspecting a New Switch Before you install a new Cisco Nexus 7010 chassis, you need to unpack and inspect it to be sure that you have all the items that you ordered and verify that the switch was not damaged during shipment. If anything is damaged or missing, contact your customer representative immediately.
-
Page 4: Installing The Bottom-Support Rails On The Rack
Installing the Bottom-Support Rails on the Rack The bottom-support rails hold the Cisco Nexus 7010 chassis on the rack or cabinet. To maximize the stability of the rack, you must attach these rails at the lowest possible rack unit (RU). - Page 5 Position one of the two adjustable bottom-support rails at the lowest possible RU. If you are installing a chassis above another Cisco Nexus 7010 chassis, position the rail 36.75 inches (93.4 cm) (21 RU) above the bottom-support rails for the lower chassis as shown in Figure 1: Positioning the Bottom-Support Rails, on page 6.
- Page 6 Attaching the Bottom-Support Rails Figure 1: Positioning the Bottom-Support Rails For the first and heaviest Cisco Nexus 7010 chassis installed in a rack, Allow at least 36.75 inches (93.4 cm) position two bottom-support rails at the lowest RU on the rack.
-
Page 7: Installing The Chassis
Phillips screws Installing the Chassis This section describes how to install the Cisco Nexus 7010 chassis in a rack or cabinet. These installation steps include transporting the chassis, elevating the chassis to the rack using a mechanical lift, pushing the chassis onto the rack, and then securing the chassis to the rack. - Page 8 For more information, see the Unpacking and Inspecting a New Switch, on page Required Tools and Equipment You need the following tools and equipment to install the Cisco Nexus 7010 chassis: • Mechanical lift capable of lifting at least 550 pounds (250 kg) Caution You must use a mechanical lift whenever lifting a device over 120 pounds (55 kg).
- Page 9 You should also have at least four persons to push the chassis, which can weigh up to 550 pounds (250 kg), onto and off the mechanical lift and rack. Installing the Chassis To install a Cisco Nexus 7010 chassis in a four-post rack or cabinet, follow these steps: SUMMARY STEPS 1. Load the chassis onto a mechanical lift as follows: 2.
- Page 10 Push the lower half of the front side of the chassis so that the back side enters the rack first, and push until the chassis mounting brackets come in contact with the front vertical mounting rails on the rack. Figure 3: Moving a Cisco Nexus 7010 Chassis onto a Rack Push the lower half of the front side of the chassis...
-
Page 11: Grounding The Cisco Nexus 7010 Chassis
Grounding the Cisco Nexus 7010 Chassis The Cisco Nexus 7010 system is grounded through the AC power supply cables and one of two grounding connections on the chassis. The AC power supply cables provide a connection to an earth ground whenever you connect the AC power to the system. - Page 12 • Grounding lug—A two-holed standard barrel lug that supports up to 6 AWG wire. This lug is supplied with the Cisco Nexus 7010 system accessory kit. • Grounding screws—Two M4 x 8 mm (metric) pan-head screws. These screws are shipped with the Cisco Nexus 7010 accessory kit.
- Page 13 Remove the adhesive label from one of the two system grounding pads, and secure the grounding wire lug to the grounding pad with two M4 screws. Figure 6: Grounding Pad on the Front of the Cisco Nexus 7010 Chassis, on page 13 shows the location of the grounding pads on the front side of the chassis.
- Page 14 Installing a Cisco Nexus 7010 Chassis Connecting Your ESD Wrist Strap to the Chassis Figure 7: Grounding Pad on the Rear of the Cisco Nexus 7010 Chassis Grounding Step 5 Prepare the other end of the grounding wire and connect it to an appropriate grounding point in your site to ensure an adequate earth ground for the switch.
- Page 15 Installing a Cisco Nexus 7010 Chassis Connecting Your ESD Wrist Strap to the Chassis Figure 8: ESD Grounding Ports on the Front of the Cisco Nexus 7010 Chassis ESD grounding port Installing a Cisco Nexus 7010 Chassis...
-
Page 16: Installing Storage Media In A Supervisor Module
Installing Storage Media in a Supervisor Module Each supervisor module on a Cisco Nexus 7000 Series switch is shipped with a CompactFlash card installed in the LOG FLASH reader (Supervisor 1 modules) or a USB drive installed in the LOG FLASH reader (Supervisor 2 and Supervisor 2E modules). -
Page 17: Installing The Front Doors And Frame Assembly
Make sure that the card or USB drive is fully inserted inside the reader. If it is fully inserted, either format the card (see the Cisco Nexus 7000 Series NX-OS Fundamentals Configuration Guide ) or replace the storage media with another that is properly formatted for the reader. - Page 18 Installing a Cisco Nexus 7010 Chassis Installing the Front Doors and Frame Assembly 2. For each of the two front doors, match the two alignment pins on the door frame to the alignment holes on the chassis. Position each door frame immediately under the cable management area (see...
- Page 19 Installing a Cisco Nexus 7010 Chassis Installing the Front Doors and Frame Assembly Figure 11: Installing the Bottom Frame Bottom frame assembly with screw holes aligned to screw holes in chassis Four M4 x 6 mm screws Step 2 For each of the two front doors, match the two alignment pins on the door frame to the alignment holes on the chassis.
- Page 20 Installing a Cisco Nexus 7010 Chassis Installing the Front Doors and Frame Assembly Figure 12: Installing the Front Doors Front door frames. Place door frame on front edge of chassis and immediately under the cable management area. Cable management area.
- Page 21 Installing a Cisco Nexus 7010 Chassis Installing the Front Doors and Frame Assembly Figure 13: Attaching the Door Frames to the Chassis For each of two door frames, tighten three captive screws to secure the frame to the chassis. a) Remove the EMI panel by unscrewing its four captive screws until each is free of the chassis (see...
- Page 22 Installing a Cisco Nexus 7010 Chassis Installing the Front Doors and Frame Assembly Figure 14: Removing the EMI Panel Unscrew four captive screws until they are each clear of the chassis. Remove the EMI panel from the chassis. b) On each side of the EMI panel, align a side frame piece so that its two screw holes align to two screw holes on one side of the EMI panel.
- Page 23 Installing a Cisco Nexus 7010 Chassis Installing the Front Doors and Frame Assembly Figure 15: Attaching the Side Frame Assemblies to the EMI Panel Right side Use two 6-32 x 1/2-inch flat-head screws to attach the right side frame to the right side of the frame.
-
Page 24: Installing The Air Filter
Installing a Cisco Nexus 7010 Chassis Installing the Air Filter Installing the Air Filter You can install the optional air filter while the Cisco Nexus 7000 Series system is operational. Note Only the Cisco Nexus 7010 switch includes an optional air filter.
Need help?
Do you have a question about the Nexus 7010 Series and is the answer not in the manual?
Questions and answers