
Related Manuals for Daikin VRV system FXMQ200AXVMB


Summary of Contents for Daikin VRV system FXMQ200AXVMB
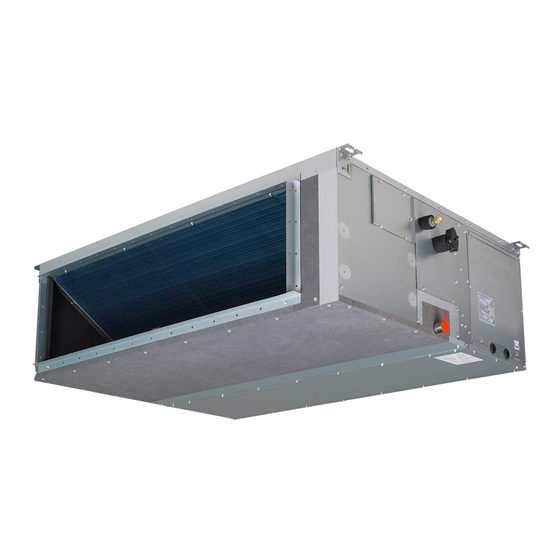
- Page 1 Installation and operation manual VRV system air conditioner Installation and operation manual FXMQ200AXVMB English VRV system air conditioner FXMQ250AXVMB...
- Page 2 4P689940-3B...
- Page 3 4P689940-4B...
-
Page 4: Table Of Contents
Mounting the indoor unit............12 Daikin website (publicly accessible). 12.2.1 Guidelines when installing the indoor unit....12 ▪ The full set of latest technical data is available on the Daikin 12.2.2 Guidelines when installing the ducting......12 Business Portal (authentication required). -
Page 5: For The User
3 User safety instructions CAUTION WARNING This equipment is NOT intended for use in residential ▪ All wiring MUST be performed by an authorised locations and will NOT guarantee to provide adequate electrician and MUST comply with the applicable protection to radio reception in such locations. legislation. -
Page 6: Instructions For Safe Operation
3 User safety instructions concerning use of the appliance in a Instructions for safe operation safe way and understand the hazards WARNING involved. ▪ Do NOT modify, disassemble, Children SHALL NOT play with the remove, reinstall or repair the unit appliance. - Page 7 3 User safety instructions CAUTION DANGER: RISK OF ELECTROCUTION Do NOT operate the system when using a room fumigation-type To clean the air conditioner or air filter, insecticide. Chemicals could collect in be sure to stop operation and turn all the unit, and endanger the health of power supplies OFF.
-
Page 8: About The System
4 About the system Troubleshooting (see "8 Troubleshooting" [ 4 10]) WARNING Stop operation and shut OFF the power if anything unusual occurs (burning smells etc.). Leaving the unit running under such circumstances may cause breakage, electrical shock or fire. Contact your dealer. -
Page 9: About Operation Modes
7 Maintenance and service About operation modes Maintenance and service INFORMATION Precautions for maintenance and Depending on the installed system, some operation modes service will not be available. ▪ The air flow rate may adjust itself depending on the room CAUTION temperature or the fan may stop immediately. -
Page 10: To Clean The Air Filter
Refer reference guide located https:// About the refrigerant www.daikin.eu for more troubleshooting tips. Use the search function to find your model. This product contains fluorinated greenhouse gases. Do NOT vent gases into the atmosphere. If after checking all above items, it is impossible to fix the problem... -
Page 11: Relocation
9 Relocation Relocation Disposal Contact your dealer to remove and reinstall the entire unit. Moving NOTICE units requires technical expertise. Do NOT try to dismantle the system yourself: dismantling of the system, treatment of the refrigerant, oil and other parts MUST comply with applicable legislation. Units MUST be treated at a specialised treatment facility for reuse, recycling and recovery. -
Page 12: Mounting The Indoor Unit
Depending on the field conditions, it might be easier to install the optional equipment first. INFORMATION For installation of the optional 8 mm pre-filter see the reference guide located on https://www.daikin.eu. Use the search function to find your model. Anchor... -
Page 13: Guidelines When Installing The Drain Piping
12 Unit installation Canvas duct (field supply) CAUTION Aluminium tape (field supply) ▪ Make sure the installation of the duct does NOT exceed ▪ Filter. Be sure to attach an air filter inside the air passage on the the setting range of the external static pressure for the air inlet side. -
Page 14: Piping Installation
13 Piping installation Refrigerant pipes 3 Push the drain hose as far as possible over the adapter for the drain hose. 5 Turn OFF the power. 4 Tighten the metal clamp until the screw head is less than 4 mm 6 Disconnect the electrical wiring. -
Page 15: Connecting The Refrigerant Piping
14 Electrical installation Pipe outer diameter Insulation inner Insulation thickness CAUTION (Ø diameter (Ø Do NOT reuse sealing (on the attached piping). Always 9.5 mm (3/8") 10~14 mm ≥13 mm use new sealing to prevent refrigerant gas leaks. 19.1 mm (3/4") 20~24 mm 3 Insulate the refrigerant piping on the indoor unit as follows: 22.2 mm (7/8") 23~27 mm Ø... -
Page 16: To Connect The Electrical Wiring To The Indoor Unit
14 Electrical installation 5 Plastic clamp for tie wrap (for transmission cable): Pass tie Component Class wraps through the plastic clamps and fasten to fix the cables. 6 Cable clamp (for power supply cable): Fix the cable with the User interface cable 0.75 to 1.25 mm (2‑core wire) cable clamp. -
Page 17: Commissioning
Make sure all field settings you want are set. See commissioning instructions in this chapter, a general setting" [ 4 17]. "16.1 Field commissioning checklist is also available on the Daikin Business Portal (authentication required). 15.2 To perform a test run The general commissioning checklist is complementary to... - Page 18 16 Configuration ▪ T1/T2 input setting — External static pressure (Pa) 13(23) Setting: External static pressure INFORMATION ▪ The fan speed of the indoor unit is preset to ensure the standard external static pressure. ▪ To set a higher or lower external static pressure, reset the initial setting with the user interface.
- Page 19 16 Configuration Setting: Thermostat sensor selection If you want to Then Example set… This setting must correspond with how/if the remote controller — thermostat sensor is used. 0°C 12 (22) cooling 24°C/heating When the remote controller thermostat Then 24°C sensor is… —...
-
Page 20: Technical Data
▪ A subset of the latest technical data is available on the regional monitor green) Daikin website (publicly accessible). HIGH VOLTAGE High voltage ▪ The full set of latest technical data is available on the Daikin Intelligent eye sensor Business Portal (authentication required). IPM* Intelligent power module... - Page 21 17 Technical data Symbol Meaning Terminal strip (block) Electronic expansion valve coil Y*R, Y*S Reversing solenoid valve coil Ferrite core ZF, Z*F Noise filter FXMQ-A Installation and operation manual VRV system air conditioner 3P701545-1 – 2022.07...
- Page 24 3P701545-1 2022.07 Verantwortung für Energie und Umwelt...
Need help?
Do you have a question about the VRV system FXMQ200AXVMB and is the answer not in the manual?
Questions and answers