ring Video Doorbell 3 Installation Manual
- Setup and installation manual (12 pages) ,
- Manual (4 pages) ,
- Manual (35 pages)
Advertisement
Charge the provided battery
Plug the battery in
First, fully charge the battery by plugging it into a power source using the provided orange cable.
The small light on top will glow green once fully charged.
 = Charging
  = Charged

If you can't wait to play with your Video Doorbell, go ahead and set it up. But, we recommend fully charging it before installation.
Insert the battery
After charging, insert the battery in the bottom of your Video Doorbell until it clicks into place.

Set up your Video Doorbell in the Ring app
Download the Ring app
The Ring app walks you through setting up and managing your Video Doorbell.
Search for "Ring" in one of the app stores below, or visit: ring.com/app 

Grab your Wi-Fi password
It's required for the in-app setup.
Set up your Video Doorbell near your Wi-Fi router
In the Ring app, select Set Up a Device.
When prompted, select Doorbells, and follow the in-app instructions.
Try it out!
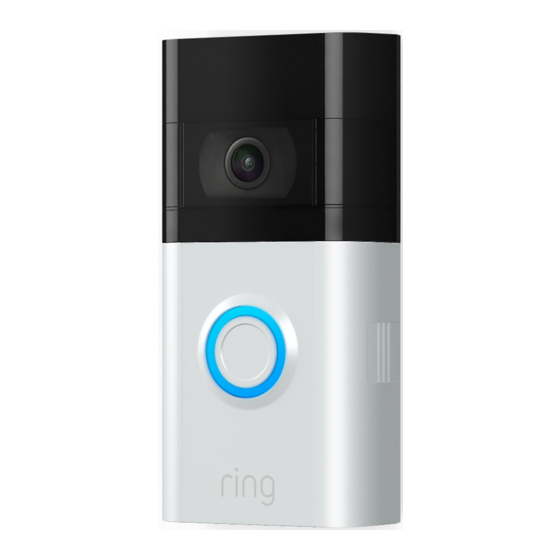
After setup, push the button on the front of your Video Doorbell to see video from the camera in the Ring app. 
Install your Video Doorbell
Select your install height
Install Video Doorbell approximately four feet above the ground for optimal performance.
If you're connecting to existing doorbell wiring that's higher than four feet, thus limiting where you can install your new Doorbell, use the provided wedge mount to angle your Doorbell down. 
Steps for wiring to an existing doorbell
Remove your existing doorbell. (optional)
If replacing an existing doorbell, shut off power at the breaker. Then remove it from the wall and disconnect the wires. Your Video Doorbell is compatible with doorbell systems supplying 8-24 volts AC at 50 or 60Hz, 40VA max. ")
 If wiring directly to a doorbell transformer, connect a 25 ohm, 50W wirewound resistor in series with one of the doorbell wires to protect your Video Doorbell.
Do not wire your Video Doorbell to a DC-powered intercom system or other DC power source.
Insert the mini-level
Insert the mini-level into your Video Doorbell to make sure it's even when you install it. 
Install the anchors. (optional)
If installing on stucco, brick, or concrete, mark 4 drill holes. Use the provided masonry drill bit to drill holes in your wall, then insert the included anchors.
If you're installing on wood, skip this step and toss the anchors in that drawer of stuff you never use. ")
Connect the wires. (optional)
Connect the wires coming out of your wall to the screws on the back of your Video Doorbell.
Either wire can connect to either screw. The order doesn't matter.
")
Attach the wire extensions. (optional)
If you have trouble connecting the wires coming out of your wall to the back of your Video Doorbell, use the provided wire extensions and wire nuts.
")
Screw it in
Feed all the wires (and the wire nuts, if you used them) into your wall and secure your Video Doorbell on the wall using four screws.

Install the faceplate
Place one of the provided faceplates on your Video Doorbell by slotting it in at the top and clicking it into place.

Secure the faceplate
Lastly, insert one of the provided security screws into the bottom, and tighten with the starshaped end of the screwdriver bit.
That's it! Your Video Doorbell is now ready to use.

 ring.com/help
 | +800 87 00 97 81 |
 | +44 1727 263045 |
 | +800 87 00 9781 |
 | +800 87 00 9781 |
 | +1 310 929 7085 |
 | +61 1 300 205 983 |
 | +64 9 887 9871 |
 | +52 55 8526 5445 |
 | +54 11 5031 9543 |
 | +57 1 381 9843 |
 | +56 22 405 3059 |
 | +507 833 6750 |
To review your warranty coverage, please visit www.ring.com/warranty.

© 2020 Ring LLC or its affiliates.
Ring and all related logos are trademarks of Ring LLC or its affiliates.
VideosHow to Install Ring Video Doorbell 3 Video
Ring Video Doorbell 3 Review Video
Documents / Resources
References
Download manual
Here you can download full pdf version of manual, it may contain additional safety instructions, warranty information, FCC rules, etc.
Advertisement


Need help?
Do you have a question about the Video Doorbell 3 and is the answer not in the manual?
Questions and answers